Adele, Author at Absolute Gardener

Adele

Lawn Care Tips for Beginners – Everything You Need to Know

A beautiful lawn is something every homeowner wants. But before you get started, you’ll want to know how to take care of your first lawn. There are several steps involved in caring for your first lawn, and they vary depending on whether you have a large or small yard.

There are several steps involved in taking care of your first lawn, and you should begin with a plan. In this guide, learn about lawn care tips for beginners, it’s got all you need on how to care for your very first lawn.

Get to Know Your Soil

The most important thing when it comes to caring for your first lawn is knowing what type of soil you have. The best way to find out is to check the color of the grass. If the grass is light green, then you probably have sandy soil. This means that your soil has plenty of nutrients, but it doesn’t hold water as well. On the other hand, if the grass is dark green, then you likely have clay soil. Clay soils don’t absorb water as easily, so you need to be careful not to overwater them. If you have both types of soil, you can use fertilizers designed specifically for either type of soil.

If you live in an area where there isn’t much rainfall, you may need to add mulch around plants to help retain moisture. Mulching keeps weeds from growing and helps prevent evaporation.

Know the Best Grasses for Your Region

You also need to know which grasses will grow best in your region. For example, Bermuda grass grows well in warm climates, while Kentucky bluegrass does better in cooler regions. In addition, some grasses do better in wetter conditions than others. Knowing this information will help you choose the right grass for your climate.

Fix Underlying Issues

When it comes to caring for a new lawn, one of the biggest mistakes homeowners make is trying to fix problems without addressing their root causes. Many times, homeowners try to solve issues like bad drainage, poor soil quality, or overgrown areas by applying fertilizer and chemicals. These products only mask the problem, and they won’t work unless you address the underlying cause. To ensure that your lawn stays healthy, you’ll need to dig up any existing turf and replace it with a healthier variety.

Once you’ve addressed the root cause of the issue, you can apply fertilizer and other products to improve the overall appearance of your lawn.

Choose a Suitable Time to Plant

Once you’ve decided on the type of grass you’d like to plant, you’ll need to decide when to plant it. Some grasses require more time to germinate than others. Also, some grasses prefer full sun while others thrive in partial shade. It’s best to consult a local expert about planting times for your specific area.

Prepare the Ground

Before you start preparing the ground for your new lawn, make sure you remove any existing grass. If you’re using sod, you’ll need to wait until all the roots have been removed. Then, dig up the top layer of soil and mix in compost or fertilizer.

Plant Seeds

After you’ve prepared the ground, you’ll need to plant seeds. Start by spreading seed evenly over the entire surface of the ground. When you spread the seeds, try to keep them at least 1/2 inch apart. Covering the seeds with dirt makes it easier for the grass to germinate.
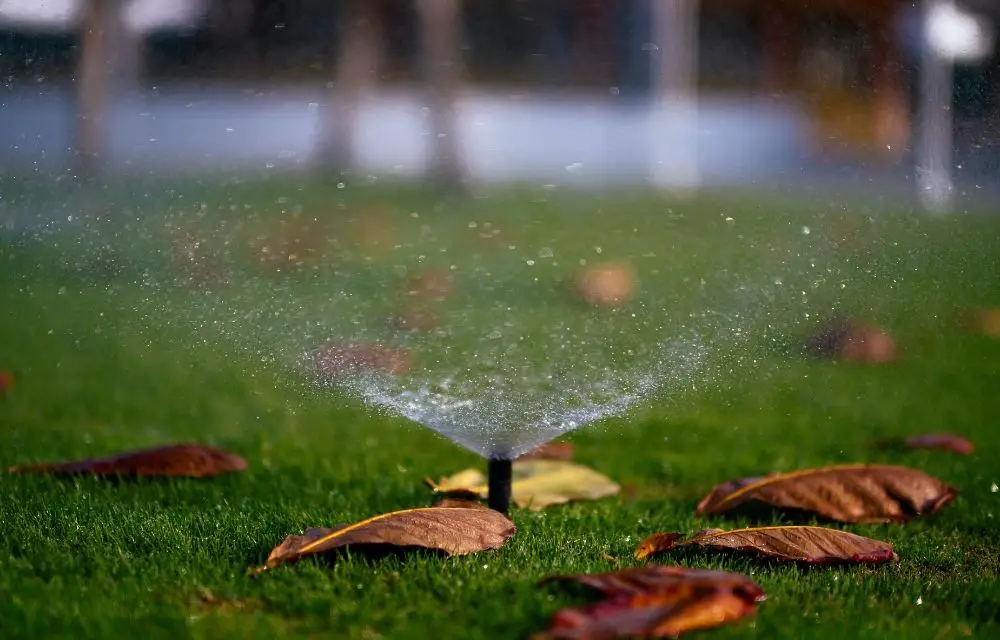
Water

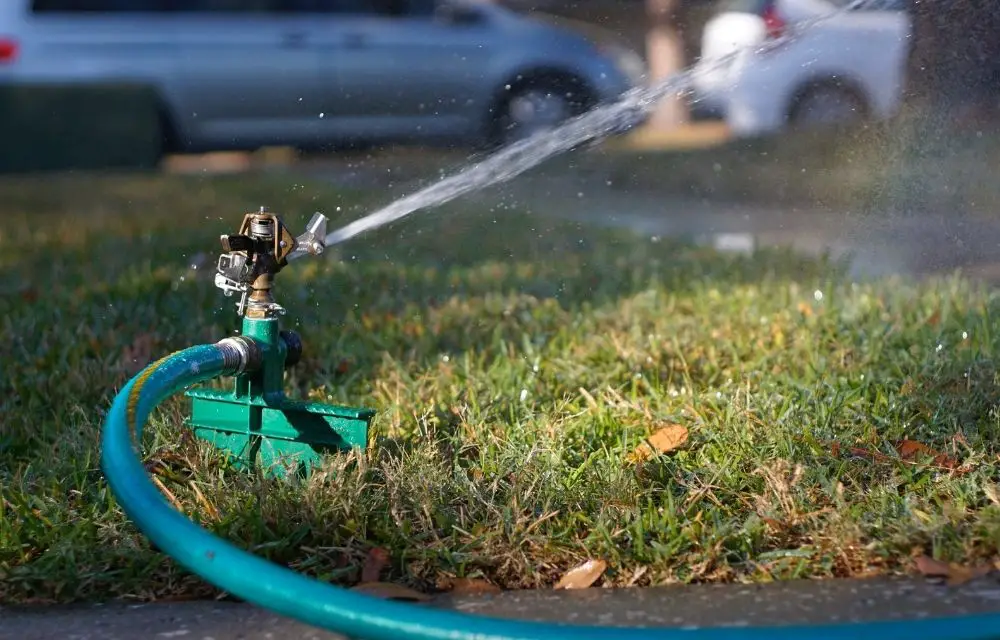
After you’ve planted your seeds, you’ll need to water them regularly. Water deeply once a week during the spring and summer months. However, avoid watering too often because frequent watering can lead to root rot.

Fertilize

Once your grass starts coming through, you’ll need to fertilize it. Groundguider.com recommend applying a balanced fertilizer twice per year. Apply the fertilizer before you water your lawn. Follow the instructions on the package to determine how much fertilizer to apply.

Mow

When your grass reaches 6 inches tall, mow it down. Mowing allows sunlight to reach the grass’ leaves, which stimulates growth. After you cut the grass, rake away clippings to allow air to circulate.

Keep Up With Maintenance

As long as you follow these basic steps, you should enjoy a healthy lawn. But, remember that your lawn needs maintenance just like any other garden. Be sure to maintain your lawn throughout the season. Check the grass for signs of disease such as yellowing or browning. If you notice any problems, contact your local nursery to get advice.

Choosing a Lawn Mower

One of the most important decisions you’ll make is choosing a lawn mower. There are several different types available, including gas-powered and electric models. Gas-powered models tend to be heavier and louder than their electric counterparts. Electric models are quieter, but they don’t offer as many features as gas-powered models. 

Lawn Care Mistakes to Avoid

If you want your yard to look great, you won’t want to make mistakes. Here are some common lawn care mistakes to avoid:

Overfertilizing

It may seem like a good idea to fertilize your lawn every few weeks. However, this practice can cause your lawn to grow too quickly. Overly lush grass isn’t attractive, so it will need regular trimming.

Not Trimming Grass

Trimming your grass helps prevent weeds from growing. If you let your grass go unkempt, weeds will take over.

Using Weed Control Products Without Reading Instructions

Weed control products aren’t always safe. Some contain chemicals that could harm pets or children who come into contact with them. Read the label carefully before using weed control products.

Not Using Weed Preventive Measures

Weed prevention measures help protect your lawn against weeds. For example, if you use mulch around plants and shrubs, it prevents weeds from taking hold in those areas.

Not Raking Away Clippings

Raking away clippings keeps your lawn looking neat. It also reduces the amount of debris that ends up in storm drains and waterways.

Not Washing Your Carpet

Washing your carpet removes dust, dirt, and pet hair. This makes your house cleaner and more comfortable.

Not Keeping Leaves Out Of The Yard

Leaves provide nutrients to your lawn. They also add texture and color to your yard. Keep leaves out of your lawn by raking them up regularly.

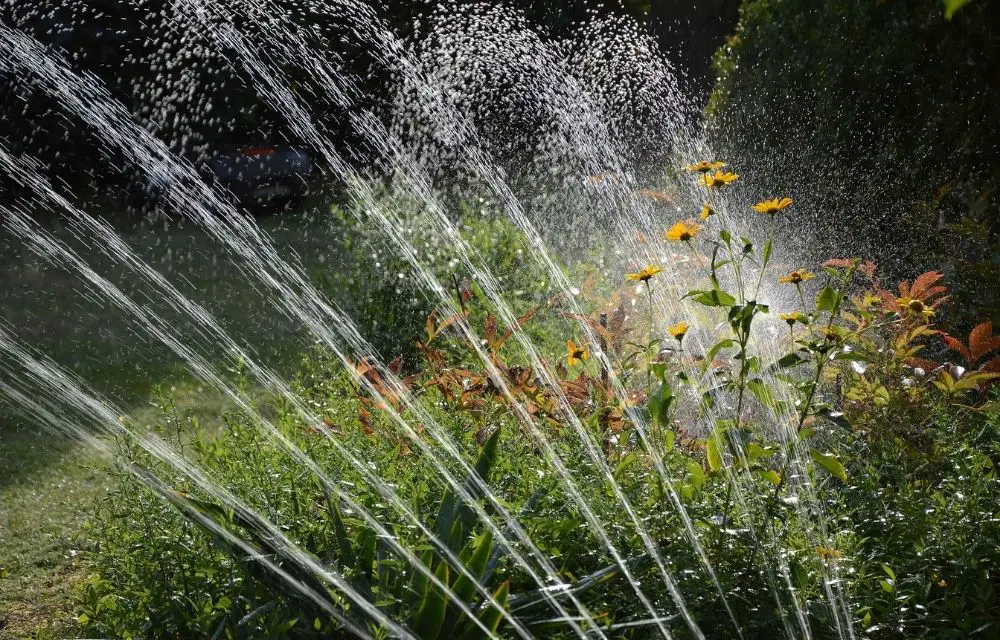
Not Watering Your Lawn Frequently

Watering your lawn frequently encourages new plant growth. It also helps keep your lawn healthy.

Not Fertilizing Often Enough

Fertilizers encourage new growth. If you fertilize your lawn once every two months, you’ll see better results.

Not Maintaining Proper Drainage

Drainage systems remove excess water from your lawn. If you don’t have proper drainage, you risk having puddles on your lawn.

Treat For Pests

  1. Spraying insecticides on the lawn doesn’t always work. Insecticide sprays don’t kill all insects, and they often leave behind pesticide residues that are harmful to people and animals.
  2. If you have ants, apply ant bait (such as an antifreeze solution) to attract them away from your home. Ants dislike cold temperatures and will move toward heat sources.
  3. If you have aphids, spray a dilute dish soap mixture onto the infested plants. Dish soaps contain natural oils that repel insects.
  4. To control spider mites, use a hose nozzle attachment to spray a fine mist of water onto the affected plants. Spider mites like hot weather and wet conditions. A light mist of water will help keep them off the leaves.
  5. To control flea beetles, spray a diluted dish detergent solution onto the infested plants once every week. Flea beetles hate strong smells.
  6. To control whiteflies, spray a diluted dish soap solution onto the infested foliage once every two days. Whiteflies prefer warm, humid environments. Spray the solution into the air above the plants.
  7. To prevent scale buildup, apply a dilute dish soap solution to the infested plants twice a month. Scale is a hard mineral deposit that forms on surfaces such as pipes, windows, and shower heads.
  8. To control slugs, apply a slug bait to the soil around the base of the plants. Slug baits contain copper sulfate, which kills slugs by making them toxic.
  9. To control leafhoppers, spray a diluted dish washing liquid onto the infested plants twice weekly. Leafhoppers dislike strong scents.
  10. To control mealybugs, spray a diluted dishwashing liquid onto the infested plant once daily. Mealybugs like damp conditions.

Fight Lawn Weeds

  1. Weed seeds germinate best in cool, moist soils. Soil with high organic matter content helps suppress weeds.
  2. Apply mulch around the base of the plant to discourage weed growth. Mulching also provides nutrients for new growth.
  3. Use a hand-held hoe to remove weeds before they get too large. Hoes come in several sizes and shapes. Choose one that fits comfortably in your hands.
  4. Keep weeding areas clear of debris and loose topsoil. This makes it easier to spot emerging weeds.
  5. When planting annual flowers, wait until after the last frost date to sow seed. Annuals need time to mature before blooming.

 Easy Tips for the Perfect Lawn

  1. Avoid fertilizers with high nitrogen content. Nitrogen is one of the most important nutrients for plants. It encourages rapid growth but also causes damage when used in excess.
  2. Use a deep mulch around the base of trees and shrubs. Mulching prevents soil erosion and promotes good drainage.
  3. Keep the area where you want to install new sod dry until you’re ready to lay the sod. Moisture will slow the process of setting the sod.
  4. Make sure you remove all debris and weeds from the area before installing the sod.
  5. Don’t plant grass seed directly into existing turf. Planting grass seed directly into existing grass slows its growth rate and makes it more difficult to establish.
  6. Water the entire area thoroughly before planting the sod. This ensures that the sod has adequate moisture during installation.
  7. Wait at least three weeks after seeding before watering again. Seeding takes time to germinate.
  8. Do not over-water newly seeded areas. Allow the ground to dry out between waterings.
  9. When using fertilizer, make sure to spread it evenly across the area. Too much fertilizer applied too close together can lead to nutrient burn.
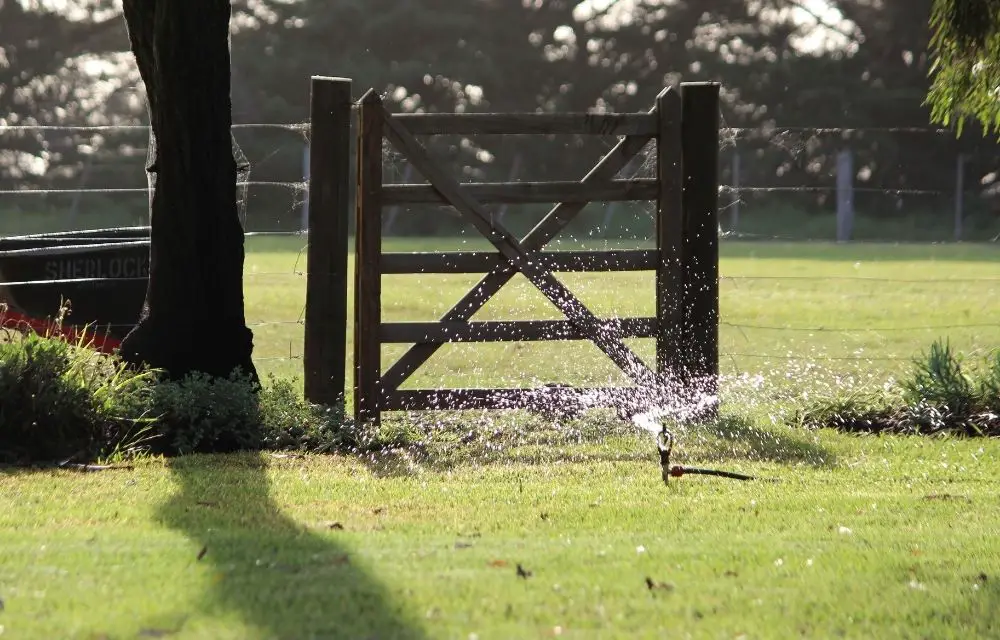
  10. Maintain a consistent irrigation schedule. Irrigation schedules vary widely among different types of grasses.
  11. After each rain, check the sprinkler system to ensure that no clogs exist.
  12. Remove dead leaves and fallen branches from the area prior to installing the sod. These materials can block sprinklers and reduce their effectiveness.
  13. Install the sod slowly. Sod tends to expand when it’s first installed. The slow installation allows the sod to settle into place without causing tearing or distortion.
  14. Be careful when removing sod. The roots of grasses tend to grow downward. Removing the sod while it’s still moist can result in root damage.

Lawn Care Tips for Beginners Frequently Asked Questions

What should I put on my lawn first?

The first thing you should put on your lawn is a layer of mulch. This will help to protect the roots of your grass and keep it healthy.

What is the quickest method of establishing a lawn?

The quickest method of establishing a lawn is to sow the seeds directly onto the soil.

How do I get good at mowing the lawn?

By following these simple tips, you can master the art of mowing your lawn like a pro!

-Start by mowing in a straight line

-Make sure to overlap each row slightly so that you don’t miss any patches of grass

-Use a sharp blade on your lawn mower to get a clean cut

-Don’t mow too low – no lower than two inches

How do you maintain lawn maintenance?

Here are some tips on how to maintain your lawn

-Water your lawn regularly

-Mow your lawn regularly

-Remove weeds and other pests from your lawn

-Fertilize your lawn

-Aerate your lawn

-Overseed your lawn

What is thatch and should I remove it?

Thatch is a layer of dead and living grass shoots, roots, and other organic matter that builds up on your lawn over time. While a small amount of thatch is beneficial as it helps to insulate the roots of your grass, too much thatch can cause problems such as waterlogging and compaction

If you have more than half an inch of thatch on your lawn, it’s time to remove it. This can be done with a rake or a power dethatcher

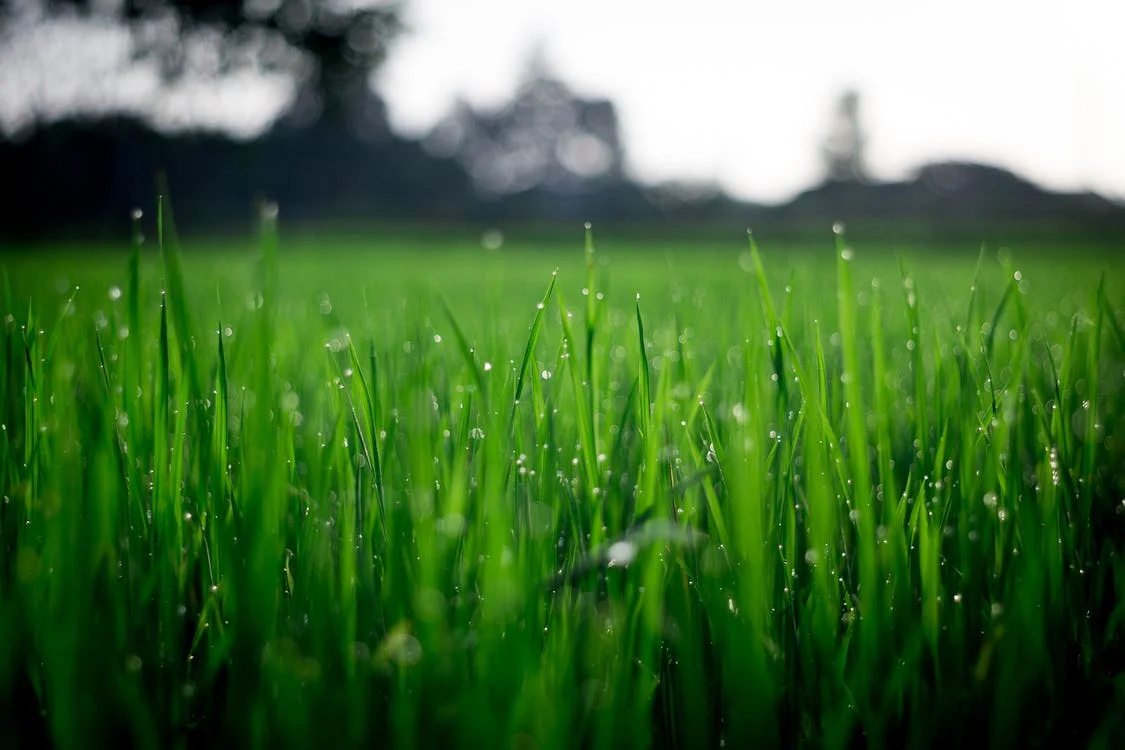
How often should I water my lawn?

You should water your lawn once a week, making sure to soak the roots of the grass thoroughly.

Final Words

When you have a lawn that needs some help, don’t give up! With a little bit of effort, you’ll be able to keep your yard looking great. We hope you enjoyed this article on lawn care tips for beginners!

If you liked this post, we have more for you to check out!

Philodendron Majesty Plant: Caring for The Royal Potted Plant

A philodendron majesty plant is a beautiful, majestic philodendron variety that has become widely popular in recent years. These plants are often grown as houseplants and can be found in many homes around the world. However, there are many philodendrons to choose from so it’s important for you to know what type of philodendron you have before caring for it properly.

The philodendron majesty plant is one of the most carefree types of philodendra and requires only minimal maintenance on your part to keep it happy and healthy!

What is a Philodendron Majesty Plant?

The philodendron majesty plant, also known as Flamingo flower, is part of the philodendron genus. The philodendron genus has over 400. It belongs to the Araceae family, which also includes other popular houseplants like Anthuriums or Calatheas.

Their stems resemble woody trees because they have aerial roots on them as well as root structures below ground called rhizomes . These plants store water inside these underground parts where new roots sprout out again when it’s time for more growth!

It has large leaves that can grow up to 18 inches long! The tree-like stalks, or petioles , are typically green but some philodendrons also have red stems. The philodendron majesty plant is perfect if you want something unique with big, decorative leaves around since this specific philodendron has large stalks and heart-shaped foliage!

Origins of Philodendron Majesty Plant

Philodendron majesty plant has its origins in the rainforests of South America. The philodendron is a larger, more mature version of philodendron selloum that produces leaves with purple edges and red veins. This gorgeous indoor houseplant was discovered by an American horticulturalist named Robert Allen Read who found it on one of his trips to Brazil.

The philodendron grows as an epiphyte on other plants or trees – either wild or cultivated – but it can also grow independently from soil if it doesn’t have any competition for light and water nearby (which is important to remember when caring for philodendrons). Even though they are part of the philodendron family, Philadendra Majesty Plant does not produce aerial roots!

Philodendron Majesty Plant Care Guide

The philodendron majesty plant can reach up to six feet in height, making it the perfect centerpiece for your home or office! However, caring for philodendrons are quite different from other plants because of their specific needs. Here are some philodendron majesty care guides.

Soil

Soil is a very important part of taking care philodendron majesty. The most common soil to use is peat moss and perlite, or you can mix them together in equal parts for the right consistency to support philodendrons growth. You should make sure that your potting media drains well so as not to promote root rot which could kill philo’s quickly if it isn’t caught early enough. Philod

Light

Philodendron majesty are big plants that like a lot of light, but not direct sunlight. If philo’s are exposed to too much sun and dry air they will start dropping leaves and philo’s can even die from over-exposure to the sun or lack thereof. When growing philodendron plants you should make sure to keep it within six feet of an open window with no curtains covering them so your philo receives enough light for photosynthesis every day.

The best time is sunrise after the dew has dried as long as there isn’t any harsh glare on its foliage which could burn it up when facing west windows in particular due to the strong afternoon rays of the summer months.

Watering

You want to water philodendron majesty plant enough so that there is always some moisture in the potting media. The key here is consistency when it comes to watering philo’s, too much or too little will kill them quickly if you aren’t checking up on their soil conditions at least once a week. When growing philodendrons you should check the philo by sticking your finger into the potting mix until it is up to knuckle deep. If there’s moisture present then you don’t need to water, if not add a little bit of warm water and let that soak in before checking again next week.

Make sure to keep philo’s moist but not soggy. Philodendron majesty don’t like to sit in water for long periods of time, and it will quickly cause root rot if they are sitting in a container that doesn’t drain well or the plant is too large for its pot so make sure you check under the leaves regularly for bugs and signs of over-watering which can lead to leaf yellowing from rotting roots.

Philodendron Majesty

Temperature

Temperature is a very important factor for philodendron majesty plant. The ideal temperature is between 76-88 degrees Fahrenheit. If philodendron majesty plant is exposed to temperatures below 55 degrees Fahrenheit, it can result in leaf burn. If philodendron majesty plant is exposed to above 90 degrees Fahrenheit, the leaves will dry out and die back.

Philodendrons are also very cold sensitive plants. When watering philodendron majesty plant do not pour cold water on it even if glass pot because when the roots are exposed to sudden changes like those caused by pouring a bucket of cold ice-cold tap water over them, severe damage may occur such as root loss resulting in eventual death.

Humidity

The philodendron is a tropical plant that will thrive in the humid environment of your home. Houseplants like this are even able to absorb some amount of moisture from the air, so maintaining humidity levels around them should be easy! Philodendrons can also get water droplets on their leaves if you mist them with room temperature filtered or bottled water once per day. Keep an eye out for any signs of rot or mold and immediately treat it with fungicide when spotted.

Fertiliser

Philodendron majesty plant needs to be fertilised once a month. Use a water-soluble or time release houseplant food at half strength for philodendrons. This will encourage new growth and healthy, dark green leaves with vibrant red veins. To fertilise philodendron majesty plant, mix the food in water and pour it into a watering can or spray bottle. Apply to both top and bottom of the philodendron leaves until they are dripping wet with liquid feed.

Toxicity

Philodendron majesty plant is toxic to pets and humans, so it’s important to keep philodendron majesty plant out of reach. If ingested or if skin comes in contact with philodendron leaves and sap, seek medical attention right away as the toxins are very potent. The toxicity of philo dondron has been known to cause liver failure for some people who have ingested philo dondroon juice orally.

Pruning

Philodendron majesty philodendrons need a little trimming every once in awhile to keep them looking fresh and healthy.

To prune philodendron, use sharp scissors or hand snips to cut away any dead leaves near the base of your plant. Make sure you are cutting at an angle where there is no bare stem showing. You can also remove any flowers that may have bloomed from your philodendron as long as they aren’t diseased or root-bound (flowers sometimes signal over-watering).

After removing old growth, take some time out of each week to inspect all areas around your philo for signs of insects such as aphids, mealybugs, spider mites and whiteflies. An easy way to check the undersides of philodendron leaves is with a flashlight and magnifying glass, but if you have trouble spotting any pests then try using an insecticide soap or neem oil as directed on package label.

When moving philodendrons around it’s best not to disturb their roots too much so avoid doing this unless necessary (for example when repotting). To prevent damage while transporting your plant, wrap its pot in paper towels before putting it inside a box – philo plants are very sensitive like that! If done correctly, no damage should be done during transport and immediately after re-potting philo majesty you will notice new growth emerging from below soil level which means they’re happy again.

Propagation and Growth

Philodendrons are easy to propagate from cuttings. The stem cutting should be a part of the plant that contains at least one leaf node, which is where roots emerge once planted. It’s important not to water philodendron majesty plant stems before planting or allow them to dry out as this will kill it and prevent rooting from occurring. Instead, begin watering after two weeks of propagation for best results.

Repotting

Step One – Preparing Your Philodendron Majesty Plant For Repotting

Before repotting your philadendron majesty it is essential to inspect its roots. If your plant has been in the same pot for more than two or three years (or longer) there’s a chance that its root system may have become so dense that air cannot circulate properly around them which will hamper the philodendron majesty from receiving sufficient water. If this is the case, you will need to prune back some of your philodendrons roots before transferring it into a larger pot.

Step Two – Transferring Your Philodendron Majesty Plant Into Its New Pot

Once you’ve successfully carried out step one (above) and trimmed off any dead or dying material, place your philadendron majesty plant in its new pot and fill with fresh soil around its roots ensuring that there are no air pockets (this could cause problems for oxygen supply). Then gently firm down the soil making sure not to compact too tightly as philodendrons like lots of loose moist root space! Once finished simply give your philodendron majesty plant a good soak (from top to bottom) and continue watering on an as required basis.

Step Three – Caring For philodendron majesty Plant After Repotting

The best thing about philodendrons is that they are pretty low maintenance plants, but if you want them to flourish then it’s crucial not to let the soil dry out completely! If this happens your philadendron will lose its leaves in response which isn’t something we would like to see happen, so try and remember ‘wet-but-not-sopping’. Also make sure that the growing conditions for philodendrons remain moist year round even during their winter rest period when no growth takes place.

Plant Disease

Philodendron Majesty
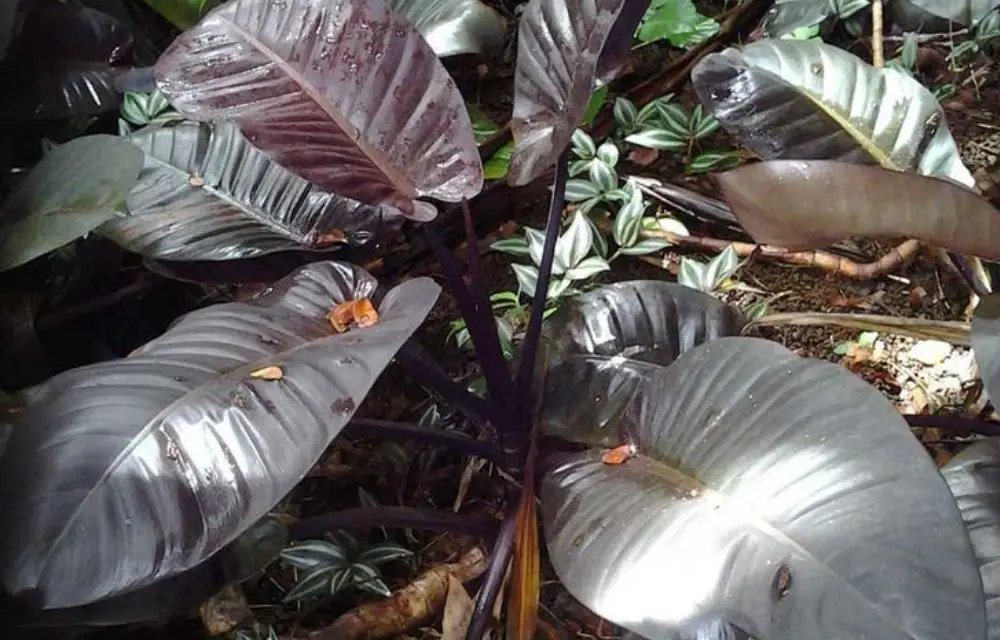
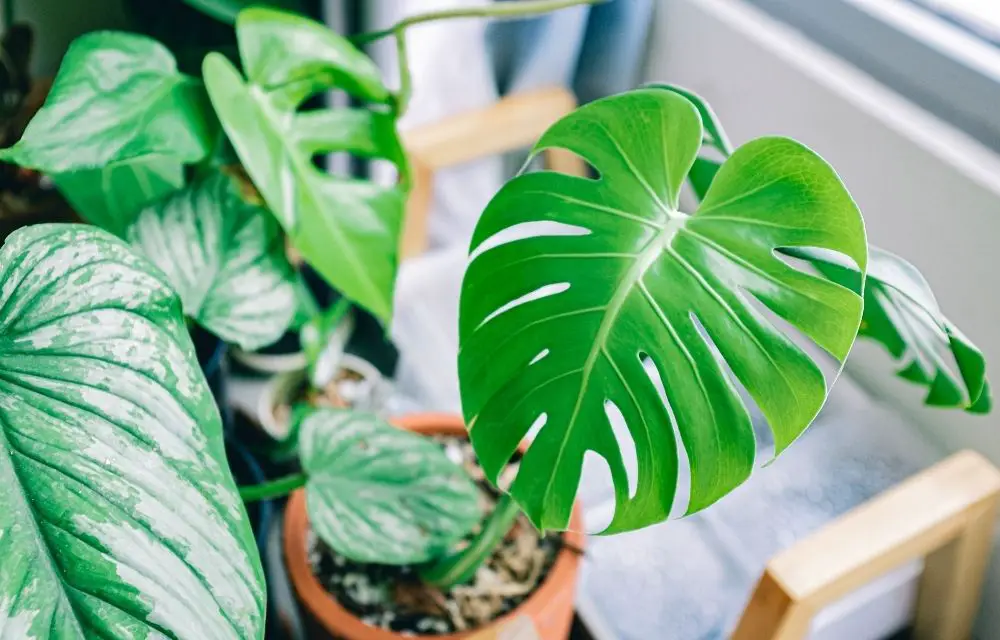
Philodendron majesty plants are affected by a number of different diseases. The most common disease affecting philodendrons is root rot, especially from over-watering due to high humidity levels or poor drainage. Symptoms include yellowing leaves with brown roots they may even appear slimy which can lead to stunted growth and death if not treated quickly enough.

Prolonged neglect often leads to leaf drop as well so once you notice these symptoms it’s best to act fast! It also helps prevent future outbreaks of any type of fungus or blight that could potentially affect your philodendron majesty plant.

The philodendron is also commonly affected by white flies, spider mites and aphids as well as symptoms such as yellowing leaves or leaf drop but these pests are much easier to treat than root rot. If you suspect your philodendron has been infected with any of the mentioned it’s best to contact a local nursery so they can prescribe further treatment for each specific case. They will be able to provide fertiliser that won’t cause more damage if used in correct amounts which should help get rid of most garden problems related to philodendrons!

Philodendron Majesty Plant Variegated

The philodendron majesty plant variegated is a philo with green leaves that have yellow edges. The philodendron has heart-shaped foliage and the root system can grow to be invasive but it’s easy to control if you’re attentive, so don’t worry too much about this point! They are very common house plants but their popularity stems from their toughness rather than aesthetics.

Philodendron Majesty vs Dark Lord

The philodendron majesty plant is often confused with the dark lord philodendron. Many people don’t realize they’re two different plants, but you’ll know it when you see it! The philodendron majesty has light green leaves and a thick base while the dark Lord philo’s leaves are purple/red on top of a thin stem that branches out into more stems. They each have unique characteristics so keep an eye out for them if you want to really impress someone who knows their philos (and show off your new smarts)!

Philodendron Majesty vs Bloody Mary

Philodendron majesty and philodendron “bloody mary” are both philodendrons, but that is where the similarities end. Here are three key differences between philodendron “majesty” vs “bloody mary”:

  • mature size (for height)
  • flower coloration/shape
  • leaf shape & width: length ratio (the plant’s leaves have notably different shapes for each species). the most popular variety of philodendron genus philodendrons

Philodendron “majesty” is a philodendron that tends to grow larger than its philodendron cousin, philodendron “bloody mary”. The majestic can easily reach heights of up to seven feet tall! In contrast, the bloody mary grows much more slowly and rarely exceeds five feet tall.

The size difference between philodendron majesty vs bloody mary has led some users (and even sellers) to think they are two different species altogether – but in reality, both bloody mary and majesty are types of phildendron pinnata. However, there’s one key difference: while bloody mary leaves tend resemble hearts or arrow heads with their pointed tips, philodendron majesty leaves are more rounded at the ends.

Philadendra “bloody mary” has flowers that closely resemble a bleeding heart flower with its pink color and shape – but philodendron majesty’s blooms look nothing like bloody marys’. Majesty philodendrons produce small, white or green-ish yellow blooms. They grow in clusters on long stems which hang down from their leaf axils (the place where each stem attaches to the main plant body). On the other hand, bloody Mary philodendron produces red trumpet-shaped flowers in large sprays that cover much of its foliage.

Lastly: philodendron “majesty” vs “bloody mary” have leaves with notably different shapes and width:length ratios. philodendron “majesty” leaves (which look similar to maple trees) are arrowhead-shaped with a long, slender tip while philodendron bloody mary’s leave resemble heart-shaped leaves that taper at both ends.

Philodendron Majesty vs Bloody Mary

Philodendron majesty and philodendron “bloody mary” are both philodendrons, but that is where the similarities end. Here are three key differences between philodendron “majesty” vs “bloody mary”:

– mature size (for height)

– flower coloration/shape

– leaf shape & width: length ratio (the plant’s leaves have notably different shapes for each species). the philodendron genus philodendrons

Philodendron Majesty vs Dark Lord

The philodendron majesty plant is often confused with the dark lord philodendron. Many people don’t realize they’re two different plants, but you’ll know it when you see it! The philodendron majesty has light green leaves and a thick base while the dark Lord philo’s leaves are purple/red on top of a thin stem that branches out into more stems. They each have unique characteristics so keep an eye out for them if you want to really impress someone who knows their philodendrons (and show off your new smarts)!

Issues with Philodendron Majesty Plant

Philodendron dark majesty plant is a delicate houseplant, with many common issues that can be easily solved. One of the most common problems people have when caring for philodendrons is overwatering them. Philodendrons are very sensitive to being over watered, so it’s best not to water philodendron plants until their soil has dried out completely and you see signs of drooping or wilting leaves. If your philo’s roots are sitting in moist soil all day long they will begin rotting quickly!

Another issue with philodenron majesty care is root rot and mold growth due to excess moisture in the potting mix, particularly having too much peat moss mixed into the growing medium. Peat moss is a very light material that can float around the philodendron roots if there’s too much air in the potting mix.

Philodendrons like to be moist but not wet, so when watering your philo try adding water until it begins draining out of the drainage holes then stop, and you should only need to do this once or twice per week (depending on how warm/humid it gets in your home).

Tips for Keeping Philodendron Majesty Happy

When caring for philodenrons, there is plenty more information online but here are some basic tips:

Watering: If you live in a cooler climate where temperatures don’t reach above 95 degrees F (35 C) then philodendrons are perfect for you. These plants like moist soil, but not excessively wet roots so it might be helpful to use a tray underneath the pot or saucer your plant sits in. If there is too much water buildup in the dish then consider putting some rocks on top of the soil to make sure excess moisture doesn’t reach philo’s roots and cause root rot.

Light: Philodendron majesty prefers bright light with indirect sunlight exposure during summer months when they’re actively growing and producing leaves. In winter time when daylight hours are shorter philo should have less light as well as lower humidity levels because these two things signal that winter has come and its time for rest! When considering where philo will go, try to put it near a window, but not in direct sunlight.

Humidity: philodendrons like humidity levels of about 50-70% with occasional misting and spraying.

Philodendron Majesty Plant Frequently Asked Questions

Is philodendron Majesty rare?

Philodendron majesty plant is not rare. In fact, philodendron plants are the third most popular indoor houseplant sold in America!

Is philodendron bloody mary the same as majesty?

The philodendron majesty plant and philodendron bloody mary are both medium-sized leafy plants. Both can grow up to three feet tall with leaves that reach a length of around six inches, so they’re pretty similar in appearance! They also share many care requirements.

However, blood mary is actually just a philodendron cordatum ‘oxycardium’ which means it has heart shaped leaves instead of the pointier shape found on most types of philo (including philodendrons). Majesty tends to have more variegation between its two main colors – dark green or red – while blood mary often only comes in shades of either green or red. The tips may be cream-colored, but that’s about the only major difference.

How do you identify a philodendron majesty?

Two things I look for when identifying philodendrons: shape of their leaf and size of their roots. If you see an exotic-looking plant with long, glossy dark green leaves (that are more oval than round) and thick, heavy roots – you’ve found the philo majesty.

What is philodendron Majestic?

Philodendron Majesty is a philodendron plant that comes in the form of an epiphyte. It has large glossy green leaves with yellow and white stripes down its veins to create beautiful patterns on the philo majesty’s foliage.

What is the darkest philodendron?

The philodendron imperial is the darkest philodendron. This plant has dark green leaves that are almost black in color. However, this philodendron does require a lot of light to grow and thrive. They also need soil with lots of nutrients as well as moist conditions constantly if you want your philodium imperial to be healthy.

How do you take care of a Black Majesty plant?

A philodendron black majesty plant requires a lot of sunlight and water. You should also be sure to fertilize it once every month or two with a good all-purpose fertilizer diluted by half. If you notice that the leaves are turning yellow, this is likely due to lack of nitrogen in the soil.

You should prune back any dead leaves as well, because these could attract pests who might then cause further problems for your black majesty philodendrons overall health.

Conclusion

Philodendron majesty plant are beautiful and regal plants that anyone would love to have in their home. It is a beautiful, low-maintenance houseplant that can add life to any corner of your home. The philodendron majesty is an intriguing plant that requires a bit of care to keep it happy. However, caring for philodendrons are quite different from other plants because of their specific needs. Follow the guides above and enjoy your majestic philo!

More articles here:

Secrets of Keeping a Hoya Linearis Happy

Hoya linearis plants are often called a jewel of the horticulture world, but they can be a challenge to grow. They’re finicky with their water and light, so it’s important that you know how to take care of hoya linearis plant if you want one in your home or office. In this article, we will give you tips on how to care for hoya plant as well as some common problems that hoya linearis plants face and what you can do about them!

What is Hoya Linearis Plant?

Hoya Linearis is a houseplant with an attractive and unique look, the hoya plant is well known for its glossy leaves that are striped in white or cream. The hoya linearis has many other common names including Wax Plant, Hoydah, Lace Flower and String of Pearls.

A hoya linearis plant is a hoyas that are grown for their beautiful foliage and not the flowers. The hoya linearis plant has an upright, branching habit with little or no aerial roots. It produces these beautiful trumpet-shaped flowers which can range from white to pink and purple.

A hoya linearis plant can grow to be from six inches high and wide, all the way up to three feet in height depending on how much light it gets. The leaves are dark green with a powdery coating that looks like white dusting or frosting once they reach maturity. The flowers of hoya plants are called hoya flowers, and their colors range from white to deep purple.

Origins of Hoya Linearis Plant

The plant originated from India where its name originates from “hoi-ya” meaning fragrant flower. It was first introduced to Europe by Sir Joseph Banks who was on a voyage to the Pacific with Captain Cook. It is also native to the rainforests of Southeast Asia, though it’s been cultivated in various parts of the world for centuries. Hoya linearis plants are also known as “string of pearls,” which comes from its long, thin leaves that resemble a string or necklace. This hoya has white flowers and typically grows up to three feet tall.

Hoya plants are known for their indoor and outdoor uses, as hoyas can be a bloomer or evergreen depending on the variety you’re growing. Hoya linearis flowers are also extremely fragrant, which is what led them to being used in perfumes and incense during various Asian dynasties.

In hoya plants, sap is used to make natural latex and rubber products as well. So hoyas are versatile plants that can not only be grown in the garden or house, but they also have a long history of being useful for many things including personal hygiene items like soap, incense, perfume oils and more!

Hoya Linearis Care Guide

Maintaining hoya plants is not difficult. However, there are a few pointers that should be taken to ensure the hoya plant will grow well and stay healthy for many years. Follow the hoya plant care guides below!

Soil

Some hoya plants grow in soil, while others do not. The hoya plant needs to be planted with a good potting mix consisting of peat and perlite or vermiculite. Some hoya plants have been known to thrive without any type of soil at all!

Hoyas prefer well-drained soils that are rich in organic matter such as manure, composts, leaf mold (be careful if using this option because it may harbor disease) and other types of natural fertilizers like bone meal, blood meal or fish products.

In addition to providing nutrients for the hoya plant, these substances also help moisture drain away from the roots rather than staying around them which can lead to root rot.

Hoyas are also averse to soils that contain salt, calcium chloride or other substances.

Light

Hoya linearis plants thrive in bright indirect light, preferably with morning or late afternoon sun. They should be placed away from direct sunlight and drafts to prevent drying out of the leaves. A hoya plant can also benefit from artificial lighting for 12 hours a day during winter months if it is not getting enough natural light.

It’s important that hoya plants receive at least six hours of strong filtered light each day–more than an hour per side as hoyas are used to receiving more intense solar radiation than most houseplants.

Plant hoyas where they will receive morning sun or late afternoon sunlight (horticultural zones 11 and 12. Do not plant hoyas in shady areas as leaves may burn from lack of sufficient ultraviolet rays.

Watering

Hoyas originated in Southeast Asia, and are often described as a tropical plant. One of the ways hoya plants survive is by collecting water from their natural environment to store it inside them. Hoyas like moist soil but do not want wet feet! The best way to water hoyas during the winter months (December through February) is with distilled or rainwater that has been allowed to sit for 24 hours.

A good rule of thumb: when watering hoyas you should barely be able to see your finger tips once submerged in dirt after watering – this helps keep dampness away from roots while retaining enough moisture so spurs can grow healthily year-round without any browning leaves or signs of wilting.

Water hoyas sparingly during the summer months (March through November) – they tend to be more tolerant of dry soil than other plants but you will want to make sure your hoya doesn’t get too thirsty as this can result in brown and wilted leaves.

It is best not to water hoyas when it has been raining or after a heavy watering because the plant’s roots are most vulnerable at these times, which may lead to root rot if soil becomes saturated with moisture. In addition, overwatering hoyas makes them susceptible to mold growth due to their high humidity requirements! If hoya does show signs of either yellowed leaves or dampness around its base, remove any excess foliage and discard it to reduce the hoya’s moisture source.

Temperature

Temperature is one of the most crucial factors when caring for linearis hoya plants because these subtropical flowers are vulnerable to frost damage if brought indoors during winter months without proper protection against extreme cold (below 40 F/40 C). Additionally, hoyas dislike high heat and dryness and will not thrive in such conditions.

The hoya curasoana plant is a tropical, frost-sensitive hoya that needs to be brought indoors during the winter months if it’s going to survive outdoors without damage. If you want your hoya with normal indoor light (with no artificial lights), place it on a north-facing window sill or any other cool spot for its first month inside then transfer the hoya back outside before temperatures reach 50 F/43 C for long periods of time. The plants can also be kept at room temperature but they prefer 60 – 75 degrees Fahrenheit (16 – 24 degree Celsius).

Hoya Linearis

Humidity

The hoya plant is a tropical flower, it requires more humidity than other plants. Humidity can be created naturally by using a humidifier and make sure to mist the hoya often with water. If you don’t have access to either of these then place your hoya in an airtight container next to wet sponges or cheesecloth soaked in water.

To measure the right amount of humidity use this equation:

(room temperature + 80) / 100 = relative humidity (%)

For example if room temperature was 74 degrees Fahrenheit (23 Celsius), add 20 degrees Fahrenheit (11 degree Celsius). The result would be 94%. Relative humidity should be at least 50% for hoyas linearis but no higher than 80% or root rot may occur.

Or, you can use a hoya linearis moisture meter to measure the relative humidity of your hoya’s environment in parts per million (PPM). The ideal range for PPM is between 50 and 80 but no higher than 100 if not using an automated humidifier.

When watering hoyas make sure you use room temperature, distilled or purified water and avoid tap water if possible because chlorine may help kill bacteria but can also damage your hoya’s leaves as well. Misting hoya plants will add much needed humidity into their environment which they need for survival.

Fertiliser

Make sure that the hoya plant is in a pot with good drainage, and water thoroughly before adding any fertiliser. If you are using an organic liquid feed, mix it at half strength to avoid burning your hoya.

Organic or chemical fertilisers can be used; however if they have high nitrogen content then only apply every six months. Nitrogen encourages foliage growth but too much will cause spindly weak stems. This often results in browning of leaves as well as black tips on new shoots because there isn’t enough chlorophyll production for photosynthesis – don’t fear! Leaf fall usually occurs after the hoya has finished flowering so this should not bother you at all unless it’s happening very early on.

Avoid using high nitrogen fertilisers for hoya plants that are in flower or have just been repotted as this could cause them to die of leaf browning and black tips on new shoots, even when the hoya is not flowering.

Toxicity

Hoya plants are toxic to humans and other animals. However, hoyas do not produce a sap like many of the common houseplants that we keep in our homes.

This means that if you were to eat any part of it, your stomach would dissolve the hoya plant before it had much time to cause ill effects on your body. In fact, hoyas have been used for centuries as medicinal treatments for various ailments because they are so nontoxic. This also makes hoya plants an excellent choice for young children or pets who may be inclined toward nibbling at things out of curiosity.

Pruning

Hoyas can be pruned to control their size and shape. The hoya’s leaf-stem junction should be cut with sharp, clean shears or scissors. Start by removing the oldest leaves in a hoya plant – they will have brown edges on them and are not as healthy looking as other hoya leaves. Cut off the stem node that is located where old leaves meet new growth (budding).

This technique encourages branching of new stems from this point forward which produces fuller hoyas than those topped with just one growing point near the center of the hoya plant. These nodes also produce more blooms for you when it comes time to bloom your hoya again next year!

The hoya’s cut stem will bleed sap. Be sure to put hoya plants in a dish or plastic bag and seal it tightly so the hoya plant doesn’t end up with its leaves covered with sticky sap from the pruning process.

Hoyas can be planted throughout landscapes, including flowerbeds, borders of sidewalks, beds under trees on both sunny and shady sites. They are not only attractive as they stand out boldly with their big shiny green leaves against any background color but also make excellent ground cover when used along walkways where grass cannot grow because there is too much foot traffic or mud around that area.

Propagation

Propagating hoya linearis is easy. There are two ways to do this; hardwood cutting and softwood cuttings.

A hardwood cutting is taken from a mature hoya plant that has been allowed to grow several years, it will produce roots in about three months if planted in soil or water. A hoya can also be propagated by taking a section of the stem with at least one leaf attached and sticking it into an earthy-looking potting mixture – this should take root within two weeks.

Soft wood cuttings may be taken from healthy looking stems between March and May using either side shoots (a new shoot on the same node as the original) or basal sections (the base). Soft wood cuttings should be cut about 20-30cm long and should have at least two or three leaves.

Cuttings are taken from hoya linearis, rinsed under water, then placed into a mixture of 50% perlite (or vermiculite) and 50% coarse sand in an airy pot that can drain well. The hoya propagating mix is lightened with twice as much perlite if the hoya to be propagated has stiff stems such as HOYA BROWNIANA variegata

They can also be propagated either by stem cuttings or seed pods. It is best to use hoya plant stems that have leaf joints on the ends, rather than just a single node. The hoya cutting should be about 12 inches long and it must contain at least one node with leaves attached; this will provide enough nutrients for the new hoya plant to form until it has its own roots developed from soil contact. A rooting hormone can also be used if desired.

Repotting

A hoya linearis is a beautiful houseplant that will need to be repotted as the plant grows. It’s easy to do and, fortunately for us, not very messy! Follow these steps:

Gently remove the hoya by pulling on it from its base or stem where you want it out of the pot. If there are roots in your hand when you pull up, just cut them away with scissors (you can discard them). Wash off any dirt left behind under running water and set aside somewhere warm until needed again.

Fill your new hoya planter three quarters full with fresh soil mix; add some slow release fertilizer if desired. Make sure all clumps are broken up and the soil is relatively level.

Gather hoya linearis roots together in a bundle; gently make sure they’re all pointing downward when you place them into the new pot (nothing should be sticking out of the top). Take care to not disturb hoya plant’s leaves or its stem – this can cause it undue stress, which will lead to unhappy hoyas!

Add an inch or two of soil on top if needed. Firmly press down with both hands so that the whole thing feels solid but don’t push too hard because squeezing hoyas kills them! Water well after planting. You might want to put some kind of saucer under your new planter, just in case any water spills out of it.

Place hoya plant in a spot where it’ll get at least six hours direct sunlight each day, and keep water levels consistent (but not too full – hoyas like to dry out between watering). Watch for signs of drooping leaves or wilting stems, which are indicators that your hoya is feeling thirsty! Give it some more water if this happens. Remember: happy hoyas need attention as much as any other living thing does but they’re easy enough take care of so long as you remember these simple tips!

Plant Disease

Hoyas are not immune to plant disease. They can become susceptible especially if they do not get enough light or have poor horticultural practices like over watering, under fertilizing and more

Common hoya diseases include leaf spot, rust fungus and root rot. Another major cause of hoya plant disease are pests such as mites, fungi and viruses. Mite infestation is most commonly seen on new growth near leaves and can lead ro airy looking foliage if left untreated

Fungal diseases are also a problem hoya plants face with fungus that can cause spots on leaves, which lead to leaf drop. If hoyas do not get enough light or fertilizer in their soil they will eventually become susceptible to disease as well

Hoya Linearis Plant Variegated

The hoya linearis variegata is a hoya plant that has hues of white mixed in with dark green leaves. This hoya variegated plant is so popular because it’s just as easy to care for as a hoya linearis, but the hoyas have a bit more color and beauty than plain old regular hoyas do.

This hoya requires little water when compared to other plants. It’s perfect for those who live in an apartment where they have limited access to watering their plants during summer months . The hoya should be watered only once every two weeks or so without letting it get too dry before doing this again.

Common Issues with Hoya Linearis Plant

The most common problem with hoya care are pests like spider mites or aphids which will leave ugly spots on the leaves of hoyas. Spider mite control includes spraying plants every week (every three days if infestation) with a simple neem oil solution – one part water and two parts neem oil.

Aphid control involves washing off plants weekly with warm soapy water then spraying once more before the lights go out each night. Another major issue for hoyas stems from over-watering. Over-watered hoyas plants will develop a soft, spongy root system and leaves that turn brown with yellow edges.

Tips for Keeping Hoya Linearis Happy

The following are hoya plant care tips:

  • Prune hoya once it’s finished blooming to keep the plant from flowering too much or at all next year. Cut back stems by one quarter of their length – this should be done during active growth season after buds start opening but before they flower on new shoots. Remove old spent flowers then spray cut ends with neem oil mixture
  • Plant hoyas near natural light sources for best results; east and west windows work well. Avoid south facing rooms which produce too much heat
  • Never expose hoya plants to drafts or cold temperatures but avoid excessively hot, dry air. Humidity around 50% is ideal for hoyas
  • Avoid over fertilizing hoya with liquids because it can produce a buildup of salts which may show up as brown spots on leaves and stems – this occurs when the plant takes in more water than the salt content can match. To combat excess watering problems, use an organic fertilizer such as fish emulsion or compost tea instead of synthetic chemicals like MiracleGro that only provide nutrients without any moisture retention capabilities. It’s also important to make sure hoya linearis has enough space outside its pot where roots can grow unimpeded; keep pots at least three inches away from walls and avoid potting hoya in containers larger than six-inches deep

Hoya Linearis Plant Frequently Asked Questions

How do you care for Hoya Linearis?

Hoya Linearis plants are attractive and easy to care for, so the hoya plant is a great houseplant. These plants require very little light or water to thrive in their conditions. Avoid putting hoyas near heating vents as they will dry out more quickly than other tropicals which need higher humidity levels to thrive. Plus, if you move your hoyas often when repotting them, try not to pot them up too tightly as this could harm roots that grow close together around the root ball of the plant.

Is Hoya Linearis rare?

It is not uncommon for hoya plants to be difficult to find in the wild, but they are certainly available when grown commercially. It’s true that hoyas come from tropical regions and require a warm environment year-round with high humidity, so it would make sense if hoyas were rare in colder climates–but there are many thousands of hoya cultivars available all over the world.

How fast does Hoya Linearis grow?

Hoya plants grow very fast. They have the ability to grow taller and wider at a rate of about two inches per month, which means hoyas can quickly become too large for their pots (or other containers) within just few months!

This is why it’s important to periodically divide hoyas you are propagating into smaller pieces so that they don’t get out-of-control too quickly. If your hoya has roots coming out of the drainage holes in its pot or if it needs more room, then it should be divided as soon as possible before it becomes overgrown. On top of not being able to stay healthy when overcrowded with leaves, hoyas will also stop flowering.

What does Hoya Linearis smell like?

Hoya linearis plants have a strong, sweet scent that many people enjoy. If hoyas are not given enough light they will start to emit an unpleasant odor. When hoyas become too dry and thirsty the flower petals may turn brown or powdery. As hoya plant care becomes more complex as time goes on, it’s important to keep these factors in mind if you want your hoya plants to stay healthy and fragrant through all seasons of the year.

How often should I water my Hoya Linearis?

Hoya plants are very easy to care for and require little attention. They prefer the soil to dry out a bit between watering, but should never be allowed to completely dry out or they will wilt. However hoyas can withstand periods of drought in low light conditions without damage as well as succulent hoyas which require less water than their more delicate cousins such as Hoya carnosa.

The only time you would need to worry about giving your hoya too much water is when it’s grown outside where there may not be enough rain during especially hot summers – these hoyas can sometimes benefit from an occasional dousing with tepid water (a few times each summer).

Do hoyas grow fast?

The hoya plant is so easy to grow but it does take some time for them to mature. The hoyas are not a quick growing plants and most of the hoyas will need more than one year before they start blooming – so don’t expect your hoya flowers in less than two years (and even then there might be no sign).

So if you want fast growth, go for succulents or cacti instead!

Conclusion

The hoya plant is one of the easiest plants to care for, and hoya linearis in particular. All it requires is a little bit of water once or twice per week (depending on how dry your air is). Other than that, hoyas are content just sitting around doing their thing. They thrive best when exposed to indirect sunlight by placing them near an east-facing window where they can get some morning light without overheating during the day.

Luckily there’s not too much you need to do other than misting your hoya every so often with filtered water; they’re happy as longs as they’ve got plenty of time between watering cycles! There isn’t much else you really have to know about hoyas, hoya linearis in particular. They are one of the easiest plants to care for and require minimal upkeep! You nay find hoya linearis for sale at your local nursery.

More articles here:

Hoya Linearis

Ways to Care for Calathea Dottie Plant

For those of you who haven’t heard, calathea plants are one of the most popular houseplants on the market. What’s not to love about them? They’re so cute and they grow in many different colors! But calathea dottie plant is a little more picky than your average houseplant. If you want it to thrive, then these tips will help you keep it happy and healthy.

What is Calathea Dottie Plant?

The calathea roseopicta dottie plant is a type of calathea that has beautiful, large leaves. The calathea’s green foliage can be decorated with purple veins and spots which makes the calathea one of the most popular house plants worldwide.

A dottie calathea can grow up to 30 inches tall with leaves that measure about 16-24 inches wide depending on how much light it receives from its surroundings. The calathea dottie plant is a slow grower and will take anywhere from two to five years before it reaches its full size.

The calathea has been granted the honor of being in NASA’s Clean Air Study because calatheas have the ability to absorb some air pollutants such as benzene, formaldehyde, and trichloroethylene.

Origins of Calathea Dottie Plant

The calathea dottie plant originates from the tropical regions of Central America, Brazil, Colombia, Ecuador and Peru. It was introduced to Europe by French missionary botanist Andre Michaux, who traveled from 1799-1804 to explore what he called “the kingdom of plants.”

This hardy green shrub makes for an interesting conversation piece because its leaves are shaped like butterflies. This calathea dottie plant has a short stem and an upright rosette growth pattern. The calathea dottie leaves are big, which is why it’s also called the “elephant foot.” It grows up to 20 inches tall with some calathea plants growing as high as 40 inches.

The calathea dottie plant is a highly popular houseplant because of its unusual and captivating design. The calathea dottie often blooms with small white, yellow or purple flowers that can be found in groups of up to 20 on top of the leaves – although they’re not always visible without looking closely.

calathea dottie

Calathea Dottie Plant Care Guide

The calathea dottie is a beautiful plant, and it’s been known to live for over 20 years! But how can you care for calathea dottie plants? Follow the calathea roseopicta dottie care guide below!

Soil

The calathea dottie plant has a soil preference. It prefers a peat-based potting mix with sand or perlite added to provide drainage. The calathea dottie can be grown in pure sphagnum moss, but the plant will not grow as well as it would when growing in other types of soil.

Light

Although calathea dottie prefers to be in a bright room, it also needs the shade for protection from too much sunlight.

The best way to provide calathea dottie with enough light is by having two- three fluorescent lights overhead on an 18 hour schedule. Calathea plants likes lots of indirect natural light so it’s best to keep calathea plants away from windows.

Watering

The calathea dottie is a tropical plant that requires frequent watering, as it does not like to dry out. Recreating the calathea dottie’s natural habitat will help keep them happy and healthy by providing plenty of water regularly.

The calathea dottie plant is best watered once or twice per week–more if the calathea has been recently repotted. The calathea needs to be treated like any other houseplant: avoid overwatering it by letting its potting soil dry out in between watering sessions.

The calathea can be watered by hand with a water bottle, or an automatic plant waterer that is hooked up to a hose and refilled regularly from the sink. Make sure not to overwater calathea dottie as it will rot if too much water gets on its leaves.

In general, calathea dottie plants need to be watered less than other types of tropical houseplants like the dracaena or peace lily because they are lower-watering plants.

Temperature

Calathea Dottie plants can do well in a wide variety of temperatures, ranging from 60° F-80° F. They tend to prefer warmer environments (to the extent where they are still comfortable). The calathea dotties will not tolerate frost or freezing conditions and should be placed indoors if there is any chance of this happening.

Temperature is important to calathea dotties because different temperatures will activate or slow down the growth of calathea Dottie plants, which can range from green stems and leaves to red ones. The environment should be monitored for temperature changes in order for calatheas Dottie plant’s coloration not to change.

Humidity

A calathea dottie needs humidity to survive. The leaves will usually curl if the humidity is too low and it might not be able to recover. Humidity can easily be increased by using a pebble tray, which should ideally contain water that does not dry out for 24 hours.

Fertiliser

Fertilisers are something calathea dottie plants need to grow successfully.

If your calathea dottie plant is looking a bit droopy or wilted, try fertilising it with fish emulsion and see if that helps. You can also mix some compost into the soil around calathea dottie plant.

It’s important to make sure calathea dottie plants are receiving the right nutrients, otherwise they won’t be able to grow healthy and strong. If you don’t fertilise calathea dotties on a regular basis, then it’s likely that either your calathea dotties will have a yellowing or brownish color to the leaves, and/or they will be very slow-growing.

If roseopicta dottie dotties are grown in cool environments with low light levels, then it’s recommended that calathea plants receive fertilizer once a month during their growing season. However if calathea dottie plants are grown in a warm environment with high light levels then it’s recommended calathea dottie plants receive fertilizer every other month.

The type of fertiliser you use is important too – calathea dotties need organic types, so avoid those that contain chemical pesticides or additives which could kill your calathea dottie plant.

If calathea dotties are grown in a pot, try to use organic fertilisers as much as possible so that the calathea dottie roots can absorb them properly and it doesn’t harm your calathea dottie plants.

Toxicity

You may wonder about calathea toxicity and potency. No calathea is poisonous, but the calathea dottie plant does have a mild irritant effect on skin because it contains saponins that can cause dermatitis with prolonged use.

If this happens to you or someone in your household, discontinue using calathea. In general calathea is considered a safe plant for pets and children, but you should always use caution with any new plant in your home!

Pruning

A calathea plant is a type of succulent that needs to be pruned periodically. Pruning calataeas plants will help keep them healthy, and also gives gardeners an opportunity to shape the way their calathea looks. The most important thing about caring for calataea houseplants is knowing when to prune calataeas.

The right time for calathea houseplant pruning is just after new growth starts in springtime. One of the best things about calathea houseplants is that pruning calataeas will not kill them or cause any harm whatsoever!

Pruning calataea house plants just means giving them a little haircut to get rid of dead leaves and old growth, which can help make your calathea plant more beautiful in appearance.

Propagation

The calathea dottie plant is a wonderful tropical houseplant. It can be propagated from leaf cuttings and will then grow as an exact replica of the parent calathea dottie plant. To propagate, lay out some moist potting soil on a flat surface with drainage holes in it like a cookie sheet or shallow pan.

The calathea dottie plant leaves should then be cut off at the base of the stem and placed on top of the moist potting soil, with a few inches between each leaf. Cover them with more wet potting soil and wait for calathea dottie plants to grow from your leaf cutting!

Repotting

If you feel like your calathea dottie plant needs repotting, take calathea dottie plant from the pot and dig it up. You need to look for signs of root rot if there is any because that means your calathea dottie needs more water than what you are giving it.

Once calathea dottie has been removed put a layer of fresh potting mix on top of the calathea dottie root ball. Fill in around calathea dottie plant roots and give it a good water to make sure the soil is wet all the way through, but don’t over saturate your roseopicta dottie with too much water or you’ll be sorry!

You may notice calathea dottie plant roots on the top of the soil. Gently cover them with a layer of potting mix and water calathea dottie plants again to help settle in new calathea dottie plant’s root ball into its newly repotted container.

Plant Disease

A common problem that calathea have is a disease called leaf spot. Leaf spots are flat, brown or black circular patches on the leaves of calathea. The lesions may look dry and cracked at first but eventually the calathea will start to wither and die. Leaf spot is diagnosed by the presence of sclerotia, which are small black bumps on the underside of leaves or near leaf spots.

One way calathea dottie plant owners can prevent this disease from occurring in their plants is by spraying water with a fungicide that contains copper or sulfur.

Another calathea dottie plant problem is root rot, which can be caused by over watering your calathea plants. If a calathea becomes too wet from the soil to the leaves it will increase its chances of developing root rot and eventually die. To prevent this disease from occurring in your calathea plant, calathea owners should water their calatheas’ plant by giving it a good soaking in the morning and at night.

A third common problem that calathea have is leaf scorch; they are leaves that become burned or blackened from too much sunlight. If you notice one of your calathe’s plants leaves turning brown, there are a few things calathea owners can do to help the plant. The first solution is to place your calatheas away from direct sunlight or put shade cloth over it, but if that doesn’t work calathea owners can also try shading their plants with leaves of other plants nearby.

Calathea Dottie Plant Variegated

The calathea dottie variegated plant is a beautiful flowering houseplant that has green leaves with white or cream edges. Calathea dottie flower are pink to purple-pink, often spotted with darker shades of the same color.

This calathea variety loves bright indirect sunlight but will be okay in shadier areas.They are very tolerant of dry air and soil, making it a good choice for apartments or homes with less than ideal living conditions. If you are looking for calathea varieties that need more water, try calathea tripartite (more commonly known as calatheas).

Common Issues with Calathea Dottie Plant

Many calathea dottie plant issues are caused by improper care. One common problem for calathea is overwatering, which can lead to root rot and leaf loss. It’s important to make sure the calathea gets an adequate amount of water but not too much, or else it will be susceptible to fungus and other diseases. When calathea dottie is overwatered, it can also produce a lot of leaf tips and not enough flowers or buds.

Another common issue with calathea dottie plant care is too much sun exposure which will cause the leaves to yellow in color and eventually drop off altogether if left untreated for many months.

Calathea Dottie vs Medallion

Dottie plant varieties that have smaller leaves and a more compact shape. In contrast, calathodes are calathea which have larger leaves with an open center or crown of foliage .

Medallion calatheas have dark green undulating leaves with white margins around the edges. They are calathea dottie plant that stand out in a room and make the perfect conversation starter.

Tips for Keeping Calathea Dottie Happy

Here are some tips from the experts:

  • Keep your calathea dotties in direct sunlight. This will help them grow faster and stay healthy.
  • Be careful not to overwater calathea dotties because they will drown easily and rot quickly.
  • Mist calathea dottie plants with water, but don’t soak them through or allow the leaves to get wet–this can cause mildews or fungus growths on the calathea plant.
  • Fertilize calathea dotties by giving them a fertilizer every now and then. You can use compost, manure or rose petals to fertilize your plant!
  • Give calathea plants some time off from watering once in a while if it looks like they are drying out too fast. It’s also a good idea to use organic material in calathea potting soil as this will help the calathea plant’s root system.
  • Keep your calathea dottie plants away from any sources of extreme heat, like fireplaces, candles or ovens. Exposing calathea plants to excessive heat can cause them to dry out or die.
  • If calathea plants get yellow leaves, it might be because they need more light–try placing them in a brighter location and see if that improves their condition.
  • Cleaning calathea potting soil doesn’t have to happen every day, but make sure you do so at least once per week. There are a lot of ways you can clean calathea potting soil–you could use water or a mixture of bleach and water, but don’t overdo it!

calathea dottie

Calathea Dottie Plant Frequently Asked Questions

Is Calathea Dottie easy?

The calathea dottie plant is a fairly easy-to-care for houseplant. It will require some work and research to keep it alive, but calathea plants are worth the effort!

Where do you put Calathea Dottie?

The calathea dottie plant is a popular indoor houseplant. But where do you put calathea dottie? The best place would be in front of a window with bright but indirect light, ideally a window with eastern or western exposure.

How big does a Calathea Dottie get?

Calathea dottie plants can grow to be up to 24 inches tall.

How often should you water Calathea Dottie?

The calathea dottie plant likes to be watered once every few days. If the calathea is not getting enough water, it will start drooping and you’ll notice that its leaves are wilting.

How do you revive a dying Calathea?

One way to revive the calathea is by removing excess water from its soil. The calathea plant will be able to absorb more oxygen through a drier medium, which may help it survive in dry conditions.

Another solution for reviving calathea plants that are close to death is adding fertilizer or any type of liquid fertilizer to its soil. Liquid fertilizers are available at gardening stores and can be mixed with water or other plant-specific solutions.

Does Calathea Dottie need sunlight?

Calathea Dottie needs a moderate amount of sunlight. It should be placed in an area that receives at least four hours of bright, indirect light per day – either from sun through a window or artificial light such as LEDs and fluorescent lamps. Too much direct sunlight will cause calathea dottie to burn its leaves.

Conclusion

The calathea dottie plant is easy to care for as long as you follow these simple steps. Ensure the calathea dottie has a wet, well drained soil and plenty of light so it can grow healthy and strong. Give your calathea dottie with organic fertilizer every two weeks during the growth season to ensure it’s getting the nutrients that are vital to its health.

If you keep your dottie plant happy, it will be a joyous addition to any home or office space! You may find calathea dottie for sale here.

More articles here:

calathea dottie

The One Plant to Have in Your House: Ficus Triangularis

Ficus triangularis is a fickle plant. They require lots of attention and care, but with the right amount of love they can thrive for many years. This fickle plant is often mislabeled as ficus benjamina or ficus microcarpa, so you may not know that it needs more water than other plants in order to stay healthy. Ficus triangularis are susceptible to spider mites because they like high humidity environments- this means your fiddle leaf fig will need extra TLC!

In this article we’ll take a look at all the things you need to know about caring for ficus triangularis trees- from how often they should be watered, when its best time to fertilize them, and the pitfalls to avoid.

What is Ficus Triangularis Plant?

The ficus triangularis is a beautiful plant and sometimes called the fiddle leaf fig, Indian fern tree or Seemandi Tree because of its leaves which resemble fiddles or seemandis in Hindi. The ficus triangularis plant can grow to be up to six feet tall. The ficus triangularis plant is known for its large leaves which are typically green, but can be variegated with brown or cream colors in the center of each leaf.

There are over 900 different species of ficus trees. Ficus Triangularis is one of the more popular ficus trees, due to its appearance in Jurassic Park and a variety of other movies.

Origins of Ficus Triangularis Plant

The ficus triangularis plant is a slow grower with an upright form. It can be used in tight spaces and it does not have to be trimmed often. If kept properly, ficus triangularis will produce many aerial roots that help keep the soil moist.

This fern-like houseplant has leaves that are fiddlehead-shaped and often dark green in color. They are long, narrow, and leathery with a triangular shape. This fern is an evergreen tree from the fig family. It grows to be around 25 feet tall but it can also grow as small as six inches tall. When ficus triangularis is grown in its native habitat, it can grow as thick and wide as a fern tree or be more like an herbaceous fern.

This fern has oval-shaped fruit that resembles figs. The fruits contain many small seeds each with their own tiny wings on them for dispersal by the wind. The ficus triangularis plant is native to India, but it can be grown indoors anywhere in the world.

Ficus Triangularis Care Guide

The ficus triangularis plant is a small houseplant that can be difficult to care for. It has shiny, dark green leaves and white flowers.

This article will discuss how to properly care for your ficus triangularis!

Soil

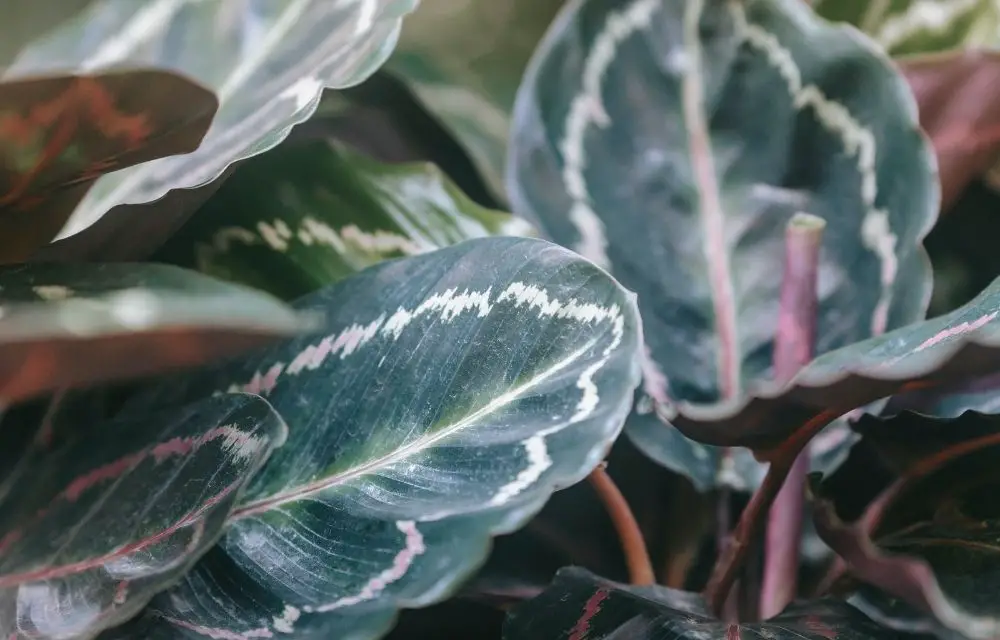
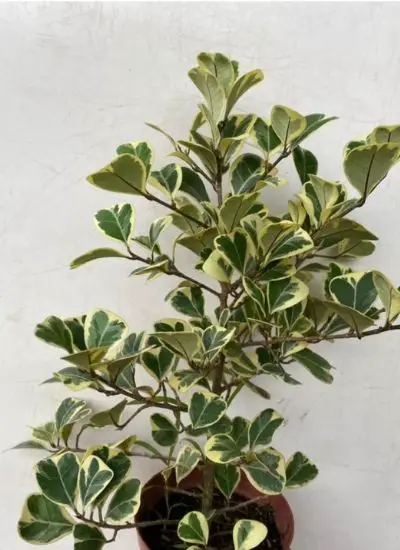
A ficus triangularis needs a pot with at least one inch of soil. If you want to make your own potting mix, then get the following:

– One part peat or coconut coir

– Two parts sphagnum moss

– A handful of perlite and vermiculite

The ficus triangularis needs at least three times the time of its pot size to dry out. If you are using a ficus tree from a nursery, then it will most likely be well-established and not need as much watering.

Light

Ficus triangularis plants need to be near a window, but not in the direct sunlight. Natural light is preferred over artificial light; ficus triangularis can also grow with some low-level of fluorescent lighting. Ficus Triangularis should always feel like they are being hugged by the sun for most of the day and as such must be within a foot of the window if possible.

Watering

The ficus triangularis should be watered every day. Watering should take place early in the morning or at night to avoid over-watering, which can cause root rot and leaf drop. When watering, water until it starts coming out of the bottom of the pot and let drain into a saucer.

Temperature

The ficus triangularis plant can survive with a wide range of temperatures. It is forgiving and hardy, but also susceptible to cold drafts or extreme heat. The ficus triangularis thrives in the middle temperature zone which ranges from 65-85 degrees Fahrenheit. If you have an area where the ficus triangularis receives direct sunlight for most of the day but also has some shade, it is best to keep your ficus triangularis in this temperature zone as well.

The ficus triangularis plant will not be happy if you place it outside during the winter months and then bring it inside when summer comes around. The ficus triangularis prefers a gradual change in temperatures instead of a drastic one-time change.

Humidity

Humidity is key to ficus triangularis plant’s life. If it gets too dry, the leaves will start curling up and eventually fall off. Too much humidity can cause root rot or fungi to grow on the roots. In general ficus triangularis likes a humid environment (60-80% relative humidity).

A good way to achieve this is by placing ficus in a humidifier or using a spray bottle. Another way that you can create humidity for ficus plants, if they are not located near the source of moisture (i.e., kitchen sink), is to place a container with water beneath them and mist once every few hours.

Fertiliser

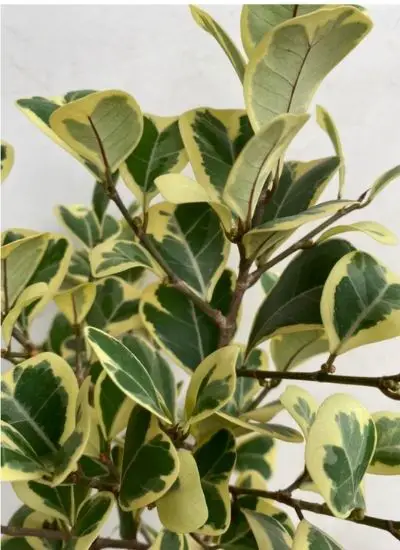
Ficus triangularis plants are fickle. They do not like to be over or underfed, preferring instead a happy medium for what they need in terms of food and water. In order to maintain the ficus’s healthy growth it is important that you fertilise your plant regularly with a good organic soil mix mixed into its soil.

If you’re in the US, this is most commonly found at your local nursery or gardening store under the name “Miracle-Gro.” For a ficus triangularis plant that has been transplanted into a pot and grown for one year (or more) it can be fertilised with Miracle-Gro three times per month. If you’re in the UK, a ficus triangularis plant can be fertilised with Miracle-Gro two times per month for a transplant that’s been grown for one year or more.

Toxicity

The ficus plant is not toxic to humans and the only reported cases of toxicity are in pets who have consumed leaves from ficus plants that contain an unknown toxin which causes vomiting, diarrhea or even death if untreated. The ficus fiddle-leaf fig is toxic to cats and dogs.

Pruning

Pruning ficus triangularis is easy. The ficus will grow fast so you should give your plant a trim every week or two, even more often if it starts to look like it’s getting too top heavy for the pot. If your ficus is in an area where high winds are common, then prune ficus triangularis in the spring before new growth starts.

Ficus Triangularis Propagation and Growth

The ficus triangularis plant is a very interesting houseplant that can be propagated in many different ways. One way you could propagate your ficus triangularis from its own root cutting would be to cut off the top of the ficus triangle and place it into some moist soil or potting mix then just wait for it to take hold and grow.

Another way to propagate ficus triangularis is by taking a leaf cutting from the ficus and placing it into some moist soil or potting mix, then just wait for it to take hold and grow. The ficus will also root if you lay an older stem on top of moist soil in a container until roots form at the base of the ficus.

You can also easily propagate ficus triangularis by using air layering which is taking a ficus branch and inserting it into moist soil or potting mix then just wait for roots to form at the bottom of the ficus, then cut off any stem sections that are above ground level so they don’t compete with the ficus for moisture and nutrients.

Repotting

The ficus plant needs to be repotted once every three years. This is because ficus plants like a lot of space and tend to grow quickly. To care for your ficus, don’t just put it in any old pot as this will cause the roots to rot over time.

There are two options for repotting ficus triangularis. You can either re-pot the ficus plant for every three years or use a pot that is one size bigger than what it currently has been living in, but only do this if your ficus is healthy and growing well.

The other option you have available to you when repotting ficus triangularis is to use ficus plant soil. This type of potting soil has been specifically designed for ficus plants and will help keep them healthy while they grow.

Plant Disease

Plant Disease is a common problem for triangle ficus plant. To prevent this, always water your ficus triangularis plant’s soil and leaves consistently to avoid dips in moisture which can cause the ficus triangularis plant to become stressed or infected by fungus that thrives on dry plants. If you notice any changes in color of foliage, wilting, or any other ficus triangularis plant symptoms it should be checked by a ficus triangularis professional to confirm that the ficus triangularis is not diseased.

Ficus Triangularis Variegated

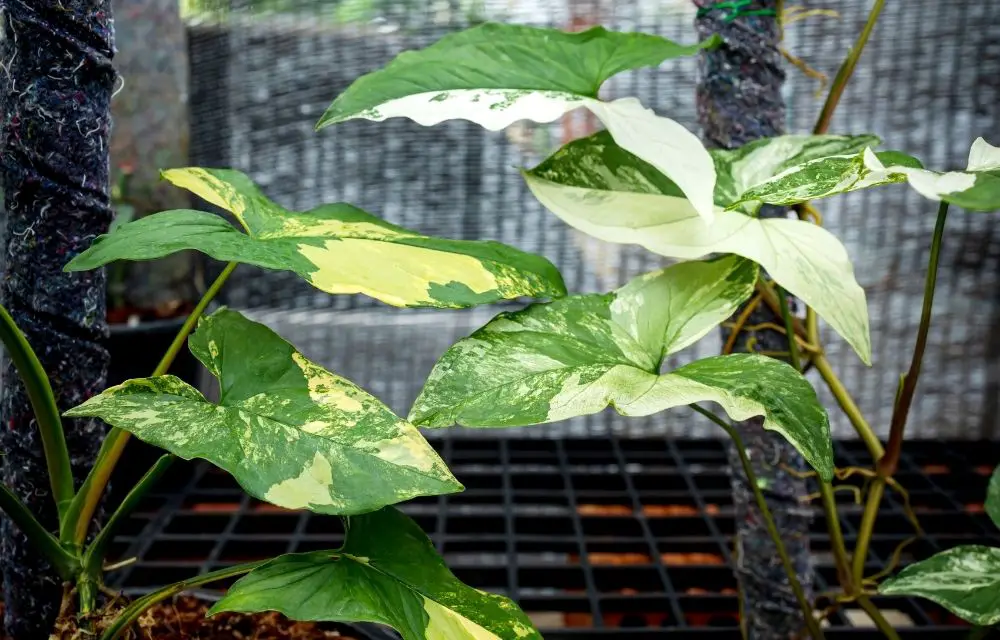
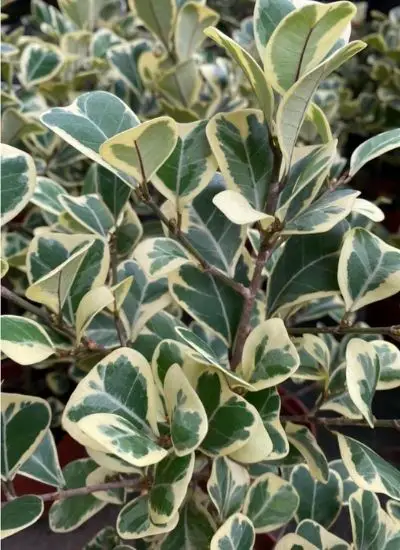
Ficus triangularis vareigata is a shrub of the family Moraceae that belongs to the genus Ficus and subgenus Urostigma . It has been cultivated in Asia for centuries, where it was called Xiao Xiang Guo (小洋蔥). In modern times, variegated ficus triangularis is popular in landscaping, and grown as a houseplant.

The leaves are opposite, and have a glossy surface with three to five lobes per leaf. Foliage is initially light green in coloration but changes to a darker green as the plant matures. Their fruits ranges from red/pink to purple in color. You may find ficus triangularis variegata for sale here.

Common Issues with Ficus Triangularis Plant

If you notice that the leaves on your ficus are drooping, then it’s likely a sign of overwatering and too much shade. Remove any excess water from container planting areas to make sure they have enough drainage as well as providing more light for the plant by placing it in a more sunny area.

Root rot is also common for ficus triangularis, which can be caused by too much water in the container as well as overwatering. Remove any excess water from your ficus’s planting areas and provide it with some drainage to make sure that root rot doesn’t become an issue.

Tips for Keeping Ficus Triangularis Happy

Ficus Triangularis plants are considered fickle and sensitive to changes, so here are some tips on how to keep them happy:

  • Place a humidifier nearby or mist the leaves with water frequently.
  • Keep them away from drafts as they can dry out easily.
  • Never place triangularis ficus in direct sunlight as it will burn the plant and leaves or cause black spots on the leaves.
  • Keep them away from chemicals like fertilizers, pesticides, or insecticides; they are also sensitive to salt buildup and can be killed by over watering too much.

Ficus Triangularis plants make for a great indoor plant because they’re easy to care for. Be sure to follow these tips and your ficus triangulars will be happy all the time!

Ficus Triangularis Plant Frequently Asked Questions

Is Ficus Triangularis an indoor plant?

Yes, ficus triangularis is an indoor plant. It needs to be in a bright and humid environment or it will dry out quickly.

How do you care for a ficus Triangularis plant?

Ficus triangularis is fickle and does not like being over-watered. It needs to be misted in the mornings if it’s outside or see leaves droop. You need to make sure ficus triangularis is in a bright and humid environment. Keep ficus triangularis plant away from any drafts or curtains that might dry it out quickly. Finally, fertilize ficus triangularis monthly with an organic liquid fertilizer such as fish emulsion, compost tea, or other natural product like seaweed extract.

Is Ficus Triangularis Variegata rare?

Ficus triangularis variegata is not a rare ficus plant. It comes in many different shapes, sizes and colors. In fact there are over 50 varieties of ficus plants! They all come with their own unique personality which make them so special to have around the house.

How do you take care of a Triangularis?

The ficus triangularis variegat care needs soil that is evenly moist, but never soggy. The ficus plant should be watered in the morning so it has time to dry out by evening and avoid root rot. Fertilize ficus plants with a liquid fertilizer twice each month during growth periods (spring through fall).

Why is my ficus Triangularis leaves falling?

Your ficus Triangularis is shedding leaves. This is natural and will happen periodically for a ficus Triangularis as it grows, but if your ficus triangularis has recently been moved to accommodate growth or changes in the environment then this can also cause leaf loss which would usually be temporary until it adjusts again.

Does ficus Triangularis bloom?

Yes, ficus Triangularis blooms. The ficus triangularis flowers are small and white with a sweet fragrance. Usually only one or two will appear at the same time but they can bloom sporadically throughout the year. You should be able to identify these flowers by their tiny size and feathery appearance on ficus tree leaves.

Conclusion

The ficus triangularis is the perfect plant to have inside your house. With its three different shapes of leaves and yellowish green look it will never disappoint you when looking around on those long days without sunlight. And if that was not enough there are so many ways to put this ficus triangularis to use, whether it be as a screen in your office for feng shui or next to the door so you can give it an extra daily drink of water!

More articles here:

ficus triangularis

How, What and When to Cut Back Hostas: Tips for Health Care

Hostas are a popular type of perennial flower that can be found in many gardens. They come with various colors, shapes and sizes when it comes to leaves and flowers. They’re also relatively easy to grow for people who don’t have much experience when it comes to gardening. However, there are some things you need to know when caring for hosta plant, especially when the time comes around when you should cut back your hostas. Here is what you need to know about when to cut back hostas and how other problems might arise if they aren’t taken care of properly!

Why Should you Cut back Hostas?

There are many reasons why you should be cutting back hostas when they reach a certain height. Cutting back your plants when they hit the required height will encourage them to branch out and grow bushier, making more of an impact when in bloom. Also, by trimming off some of the stalk it allows sun to penetrate through to the center leaves which encourages growth as well as creating an attractive shape for your plant.

When To Cut back Hostas?

The when to cut back hostas is a question that many people are wondering about. When should you prune or trim your hosta plants? Knowing when the right time if and how much to cut back can keep you from doing more harm than good for your plant. The best way would be when it’s not flowering, but even then there are some signs you should look out for.

If the leaves turn yellow without any hint of green then your plant needs more water, remove all surrounding weeds as they suck up a lot of moisture too; – If the soil is very dry when you touch it with your finger or a stick but still feels slightly damp underneath, this means that your plants need watering again because not enough moisture has been absorbed by its root system.

And if the stems have brown spots and/or insects attack them (worms?), then bringing in earwigs from outside may be helpful. These carnivorous bugs eat other insect pests like aphids which can damage hosta flowers and leaves.

when to cut back hostas

Hostas Plant Care Guide

Hosta plants are very common when it comes to perfecting gardens. They have a wide range of colors and leaves that add interest when there is nothing flowering in your yard. Planting hostas is very easy, especially when it comes to beginner gardeners or someone who just wants something simple and not too much work. These plants require little care when properly taken care of. Here are some hostas plant care guides

Soil

A good place to start when it comes to caring for your hosta is the soil. Growing in a healthy, rich soil will help ensure that they grow and thrive no matter what type of environment you have in mind.

Some ideal locations would be near a pond, stream or seepage area because when it rains their leaves will get wet which they love! If you want the garden look, consider using them as part of your border plantings. They can also make an excellent addition to rock gardens and woodland areas when used with other shade-loving perennials such as ferns.

Light

There are several options when it comes to lighting hostas plant. You can use natural sunlight, fluorescent lights or incandescent lights when growing hostas indoors. Each of these types come with their own benefits and drawbacks though so let’s take a look at them in more detail:

  • Natural Sunlight – the most effective but also potentially dangerous for your plants if you don’t have access to direct sunlight for half of the day. Leave on all day only when there is good airflow around your plants (windows open). Do not leave near windows that get full sun exposure as this will cause intense heat buildup which may harm / burn vegetation nearby. Can be left on 12 hours per day max when used during Spring / Summer when outside temperatures are already warm.
  • Fluorescent lights – use these when growing hostas indoors or in shaded areas where natural sunlight is limited. Be sure to place fluorescent lamps near the tops of plants and away from foliage/stems as light can cause burn damage when placed too close for extended periods of time (leave on 12 hours per day max).
  • Incandescent Lights – incandescent grow bulbs & CFL’s produce less intense, yellowish light that works great when growing hostas plant under artificial lighting conditions when outdoor alternatives simply aren’t available. They also work best when combined with florescent lights since they emit a full spectrum which provides more balanced results than just using one type alone (combine CFL’s with incandescent when growing hostas indoors).

Watering

Ensure when you water your hosta plants that they are getting enough water. If the plant’s soil is too dry, it can cause yellowing leaves or even death of the root system. The best method to determine if there needs to be more water in the soil is placing a finger into the ground and checking for moisture.

There should feel like moist sand when doing this test; however, do not let the ground get soggy with extra moisture as it will also kill off your hostas’ rootsystems. Ensure that you have proper drainage when watering because standing puddles of excess liquid near any part of your garden may lead to development of fungus and other diseases which further destroy healthy growth.

Temperature

The ideal temperature for hostas plant when growing is between 65 and 75 degrees Fahrenheit. When the temps drop below 60, it’s time to bring them inside when growing season finishes or you risk losing these plants completely.

Humidity

Hostas like it moist, but too much moisture is not good for them at all. If you notice your hosta leaves turning yellow and dropping off then this would be a sign that there’s too much humidity in the area where they’re living or growing. Sometimes when there’s too much humidity in the area you might also notice that when you touch your hostas plant they feel slimy and sticky.

Fertilizer

It is important to fertilise hostas when they are young, when you first plant them. They will need it for their early growth and development. It should only be a light feeding, less than half the strength of normal if used at all. Never use high nitrogen based fertilisers as these can cause damage when applied incorrectly or too heavily. Fertilisers high in phosphorus should be used when the plants are not growing and dormant.

For a balanced feed, use something like Growmore or Blood, Fish & Bone when planting out new hostas as this feeds them for their first season before needing to think about fertilising again. A general all-around food such as multi-purpose fertiliser is fine when the plants start growing again.

when to cut back hostas

Toxicity

The hosta is a poisonous plant when consumed. The poison in this case comes from the leaves and stems of the plants when they are ingested by humans or animals.

  • Symptoms: bloating, diarrhea, vomiting – Treatment: avoid consumption!

Pruning

The first step when it comes to pruning hosta plants is knowing when you should do the job. If there are any dead flowers or leaves along with decaying stems, cut them back right away.

Also trim off some of the yellowing foliage in order to make sure your hosta plants are looking great. If you have a lot of dead leaves, it is best to cut back when the weather has cooled off and when fall begins to set in. Keep in mind that when pruning hostas plant, not all foliage should be removed – only about one third of the leaves near each stem’s end.

Another, when to cut back hostas tip, is when the flowers have died and turned brown. This tip can be used for both daylilies in addition to hosta plants – though it doesn’t work as well on some other perennials that flower later in the summer or when you want them too. However, cutting off those dead blooms when hostas plant produces a new set of leaves in the fall when it’s time for dormancy.

Once you’ve cut back some dead flowers and decaying stems, give your hosta plants about two inches or so on top to ensure they have enough room for air circulation. You may also want to try moving them further apart as well when you first plant them.

Propagation and Growth

Propagating hostas is when you take a clipping from an existing plant and put it into the ground to start another one. This can be done by splitting them in half or taking sections of leaves off with roots on them, sticking those somewhere moist (like your garden) and they will grow.

It’s best if you stick with plants that are the same genus when propagating, but it’s not mandatory. So no matter what type of hostas you have, if it has leaves and roots on some part of it then you can put those somewhere moist like your garden to get a brand new plant started!

Repotting

When it comes time to repot your hosta you will want to choose a well-draining soil for optimal health.

There are different types of soil mixes when it comes to repotting your hosta. The most common soil mix is half potting soil and half perlite, which allows for some water retention while still allowing good drainage.

You want to plant the root ball in larger container, leaving only enough room at the top of the pot so that when you fill with soil there is only about an inch of soil above the root ball.

When you are ready to repot your hosta, choose a pot that has drainage holes because when you water it will need somewhere for the excess moisture to go as well. Potting soils tend be heavy when they get wet so make sure if possible that when you pick up the pot the soil doesn’t fall out when you turn it upside down.

Once your hostas plant is in its new container, make sure to water well and then give the root system a deep soak with fertilizer about once every other week when actively growing (spring and summer).

It can be very helpful when it comes time to re-pot your plant to use a tool like this when you are moving the root ball.

When it comes time for re-potting, remember that less is more when it comes to hosta plants!

Plant Disease

Sometimes when you have a hosta, it may get sick. In order to prevent the disease from spreading and having your other plants fall victim as well, here are some things that can help. The first thing is if your plant has yellow leaves or spots on them then usually this means that there’s a fungus attack going around in your garden. The next thing is if you notice your plant falling over, it may be that the roots have been attacked with something and they are not able to keep up their strength.

when to cut back hostas

Common Issues with Hostas

The most common issue with a hosta plant is when it does not get enough water. The leaves will turn brown and the plant itself may die if left dry for too long. This applies both when they are indoors and outdoors. When planting your hosta outside, be sure that you give them enough room to grow and when planting them, be sure not to smother the roots.

When they are indoors hostas require a lot of water as well in order for them to grow healthy. It is important that you make sure when your plant starts wilting you give it some fresh water because sometimes when we think our plants need water, what’s actually happening is that it needs a break from over watering.

Another common issue with hosta plant is when they are exposed to too much sun or when the roots start growing in circles and becoming distorted which prevents them from receiving nutrients properly. To prevent this, try moving your plants around into different areas and when you notice the problem, cut back hostas a little bit in order to fix any root problems. You can also add more plants with different needs like shade or sun into your garden as well which will help balance out the area so that everyone gets enough of what they need.

Tips for Keeping Hostas Happy

When caring for hostas, there are a few things to keep in mind when it comes to when and how much water they need. If you’re keeping the plant inside of your home during winter months, when sun light is not as strong, then provide at least five hours on bright windowsills when spring returns. It’s when the plant begins to flower when it needs more water.

Hostas can grow pretty big and if you find that they are getting too large for your home, then cutting them back is a great way of keeping them healthy. It’s best practice when removing hosta leaves to cut off no more than one third of its size when doing so. Cut off when they are reaching 15-20 inches from the ground and you should be good to go!

Cut Back Hostas Frequently Asked Questions

When should hostas be trimmed back?

When do you cut hostas back? Well it depends on what you want out of your plant! If you need a smaller size but don’t want to lose the color when cutting back hostas then you can cut your plant down when it reaches a desired height and width.

How do you trim hostas for winter?

Trimming hosta plant is essential when it comes to caring for the plants. Trimming will help prevent rot and fungal problems that can severely damage a healthy plant over time. The most important thing when trimming your hostas, is not cutting too much off at once. If you cut back more than half of the foliage in one go, it can cause the plant to suffer shock.

Also when trimming hostas for winter , you want to make sure that when cutting back your foliage, you leave around an inch of space between each stem and cut cleanly through at a 45 degree angle with sharp pruning shears so as not to damage either the plants or yourself when removing the cuttings.

Should I cut damaged hosta leaves?

Yes, when the leaves and stems are brown or yellowed. Cutting back hostas to form a healthy foliage. That is all you need as far as treatment for hosta blight or leaf spot disease on hostas plant .

Should you cut back hostas every year?

There is no need to cut back hostas every year, when you do depends on the type of hosta. In general, it is best to prune when new growth begins in spring or early summer and again after flowering in fall when possible. This will help keep your plants looking healthy and prevent common problems such as disease from spreading throughout a large area of foliage.

Do hostas like coffee grounds?

No. In fact, they hate them (as tested with a pH meter).

Instead of using coffee grounds when planting hostas, try other material like pine straw or even shredded newspaper. This will help keep your garden soil healthy and provide nutrients for the plants as well!

Should I cut back my hostas for winter?

When heavy snow or frost is expected, cut back all of the leaves to about four inches above ground level. This will protect your hostas plant from severe damage when freezing temperatures hit (don’t worry, they’ll pop up again when it warms). Just make sure you don’t leave the leaves on when there’s no snow cover, because they’ll rot when it rains.

Conclusion

These are great plants when it comes to adding color and interest in your yard. They add nice texture while not taking away from other plants when they’re growing together. Their leaves come in different shapes, colors, and sizes which helps when you want to have an interesting garden without having everything look the same. Hostas are great when you’re trying to make a focal point that will draw the eye in.

If hostas are properly cared for, then it’s possible that the plant will reach heights of up to four feet tall or taller when given ideal conditions. That being said, when caring for hosta plants, don’t forget when to cut back hostas when they’re reaching the desired size!

when to cut back hostas

Top 5 Best Palm Fertilizer & Care Tips

Growing beautiful palm trees is easy when you know the perfect palm fertilizer to use. Palms are beautiful plants to grow with their gorgeous big green leaves that create a vacation-type vibe wherever they grow.

My gardening mentor always emphasized fertilizing the plants you are growing. Initially, I never took much concern for fertilizer because I found that my plant grew very well without them. However, it was only, later on, did I realize the immense difference fertilizer makes for your plants.

Using the right palm fertilizer for a specific plant not only allows the plant to grow much faster but the plant will grow in abundance and look a hundred times fresher and beautiful. This is because the plant is getting all the nutrients it needs.

Perhaps because of their association with tropical environments, palms elicit feelings of peace, relaxation, and serenity which adds a positive vibe to the environment it grows in. Palm plants also add a bold, tropical look to home interiors that is surprisingly easy to achieve. 

Most indoor palms survive in the same conditions that we find comfortable: warm temperatures, average humidity, and moderate light. Choosing the best plant food for palm trees will allow your palms to grow to their highest potential.

In this article we will look at the 5 best palm fertilizers to use, the types of nutrients palm plants need, the best method of fertilizing your palms, and some frequently asked questions on fertilizing your palm trees.

palm fertilizer

Best Palm Fertilizer

Miracle-Gro 3002910 Shake ‘N Feed Continuous Release Palm Plant Food

This product is first on the list because of its wonderful perks:

  • Contains magnesium, iron and manganese to grow lush palms, cyads and tropical plants
  • Prevents yellowing and curling of fronds
  • Feeds up to 3 months
  • Guaranteed not to burn when used as directed
  • No more guessing when feeding your plants

Additionally, you can use this product anywhere. You can directly use it on the ground or in containers.

Miracle-Gro Shake ‘n Feed Palm Plant Food contains compost to feed microbes in the soil. Microbes break down compost into nutrients that support root development which increases water efficiency and grows strong plants.

 It contains magnesium, iron and manganese to grow lush palms, cycads and tropical plants and to help prevent fronds from yellowing and curling.

For a beautiful garden all season long, reapply every 3 months and water regularly.

Jobe’s Organics 09126 Palm Tree Granular Plant Food

Jobe’s Organics Palm Granular Fertilizer with Biozome allows you to grow stronger and healthier plants, Jobe’s Organics Palm Plant Food with Biozome is specially formulated to help palm trees and plants increase root mass and foliage. 

Jobe’s Organics with Biozome works to improve the soil environment for your plant, preventing the depletion of valuable nutrients, increasing the uptake of nutrients, and reducing the risk of disease, insects, and drought. Great for all indoor and outdoor palm plants, with large compound evergreen leaves known as fronds arranged at the top of an unbranched stem. 

Jobe’s Organics Granular Palm Fertilizer is ideal for palms such as coconut palms and fan palms.

Jobe’s Organics Palm Fertilizer with Biozome will deliver long term benefits without synthetic chemicals, creating a healthy ecosystem for your organic garden, your family and the environment.

If you are wondering what exactly is Jobe’s Biozome?

Jobe’s Biozome is a combination of healthy bacteria, Mycorrhizal fungi and Archaea. This unique and proprietary blend of beneficial microorganisms improves the long-term soil quality of your garden, increases root mass, promoting plant growth and helping your garden resist disease, insects, drought and other unfavorable conditions within a growing season.

Some Advantages of Using Jobe’s Organics with Biozome:

  • Organic Fertilizer
  • No Synthetic Chemicals
  • Promotes Root Growth
  • Improves Nutrient Absorption
  • Improves Soil Quality
  • Helps Palm Plants Resist Disease
  • Safe for the Environment
  • Safe for Use Around Kids & Pets

Jobe’s organic fertilizers are renewable, biodegradable, sustainable, and good for the environment. 

Dr. Earth Organic & Natural MINI Exotic Blend Palm

Dr. Earth is the only Non-GMO Project Verified fertilizer in the U.S.A. which is People & Pet Safe as it has no synthetic chemicals, GMO infested chicken manure or toxic ingredients.

This product is handcrafted from human and feed grade ingredients. Enriched with multi-minerals, proteins, carbohydrates, humic acids & trace elements that promote the healthiest soils capable of growing the healthiest tropical plants in your yard.

Dr. Earth is also an Organic Transparency; OMRI (Organic Material Review Institute), OIM (Organic Input Materials), CCOF (California Certified Organic Farmers), NOP (National Organic Program) and Non-GMO Project Verified the highest level of purity and transparency.

Sustainably made in the U.S.A. through a collaboration of high level environmentalists inspired to positively change the world. Formulated by Milo Shammas, founder of Dr. Earth, to grow Home Grown Foods.

You’ll get remarkable results and larger, natural blooms. A proven scientific formula that provides optimal levels of plant nutrition for stunning results.

Jobe’s 05101 Fern & Palm Fertilizer Spikes

Benefits of using Jobe’s Fern and Palm Fertilizer Spikes are:

  • Easy to use fertilizer spikes.
  • No wasteful runoff, no mess, hazards or smells.
  • Continuous supply of nutrients below the surface, where the active roots are growing.
  • Pre-measured time-release fern and palm fertilizer spikes nourishes at the roots; for indoor palm plants.

Jobes Palm Spikes keeps your palms healthy and fertilized is easier than ever with Jobe’s Palm Spikes. Jobe’s spikes provide a continuous supply of important nutrients right at the roots, where plants need it most.

Simply insert the pre-measured, specially formulated spikes into the soil around your plant. Unlike other fertilizers, Jobe’s Palm Fertilizer Spikes eliminate mess, hazards and smells – and don’t wash away when you water. Ideal for outdoor Palm Trees.

Unlike liquids or granular, Jobe’s Fern & Palm Spikes eliminate mess, hazards and smells and can’t wash through when you water. Perfect for simple and effective usage.

JR Peters 51624 Jack’s Classic Palm Food

Perks of using JR Peters Palm Food:

  • Prevents the build up of harmful salts.
  • Optimum combination of nutrients for palms.
  • High potassium for lush green leaves and strong growth.
  • Package Dimensions: 10.921 L x 13.208 H x 10.921 W (centimeters).

Jack’s Classic Palm Food is a water-soluble plant food with a blend of essential nutrients designed for the unique requirements of palms and it’s designed to be mixed with water for the most accurate and effective nutrient delivery to your plants. 

Jack’s Palm Food is formulated to prevent the build up of harmful salts while delivering additional potassium, magnesium, sulfur and micronutrients. With this optimum 16-5-25 combination of nutrients, Palm Food supplies the nutrients needed most by palms including dates, royal, queen, majesty and kentia and Lady Cycad including Sego Palm and Zamia. 

The higher level of Potassium assures vibrant, lush green leaves and stronger growth. Jack’s advanced formulation uses the highest quality nutrients available, delivering professional results to your home garden. 

All Jack’s Classic products come with a free measuring spoon for precise and accurate product application and detailed instructions in each container.

palm fertilizer

Nutrients Needed for Palm Trees

Nitrogen

Nitrogen is an extremely important substance in plant fertilizers. When you buy fertilizer for any plant, including Palm Trees, the first feed component you will see is Nitrogen.

Nitrogen holds immense importance for every plant, making up about 3% to 4% of its structure, more than any other mineral. Nitrogen is one of the prime promoters of a plant’s growth and development.

Nitrogen helps the Palm Tree grow by enabling it to form amino acids. The amino acids are the building blocks of proteins, which are involved in a plant’s metabolic and growth activities.

It is a major component of chlorophyll, the compound that plants use to trap sunlight and produce appropriate sugars by the process of photosynthesis.

Without Nitrogen, the plants cannot synthesize proteins and will ultimately die. These proteins are either significant structural units of the plants or act as enzymes, allowing them to carry out the biochemical processes required for living.

Nitrogen helps the Palm Trees from ATP (Adenosine Tri-phosphate), the basic compound of energy, making it possible for the plant to perform all its natural cycles.

Moreover, Nitrogen is an important constituent of DNA, the genetic material that helps plants grow and reproduce. Conclusively, for plants, Nitrogen is the key to life. Without it, the plants cannot function normally.

To summarise, nitrogen is an essential need for plants so make sure that you provide your palm trees with enough nitrogen so that they can continue growing happily and healthily.

Phosphorus

The role of phosphorus in plants is very important. It helps a plant convert other nutrients into usable building blocks with which to grow. 

Phosphorus is one of the main three nutrients most commonly found in fertilizers and is the “P” in the NPK balance that is listed on fertilizers. Phosphorus is essential to a plant’s growth, but what does it mean if you have high phosphorus in your soil or a phosphorus deficiency?

The easiest way to tell if your garden has a phosphorus deficiency? All you need to do is look at the plants. If your plants are small, are producing little or no flowers, have weak root systems or a bright green or purplish cast, you have a phosphorus deficiency.

Since most plants in the garden are grown for their flowers or fruit, replacing phosphorus in the soil if it is lacking is very important.

Calcium

When plants don’t have enough of a certain nutrient, pests, disease, and low bearing are often the result. Calcium nitrate fertilizer is the only water-soluble source of calcium available for plants. 

What is calcium nitrate? It works both as a fertilizer and for disease control. Diseases like blossom end rot are easy to control with calcium nitrate. 

What does calcium nitrate do? It provides both calcium and nitrogen. It is usually applied as a dissolved solution, allowing for quicker plant uptake but may also be applied as a side or top dressing.

Potassium

While Nitrogen is of massive importance, Potassium falls right behind.

This is because Potassium has various functions in Palm Trees; however, it is primarily involved in the movement of all essential sugars and nutrients through the plant.

Additionally, Potassium is classified as a micronutrient in plants, as they take up large quantities of it during their lifetimes. It promotes the movement of water, plant carbohydrates, and nutrients between all plant cells.

It also encourages enzyme activation in the plant, which helps form starch, protein, and ATP (energy) which speeds up the rate of photosynthesis.

An ideal supply of Potassium is necessary because it also regulates the opening and closing of plant stomata, which allow the gaseous exchange of oxygen and carbon dioxide.

Sulfur

Moving on we will look at the use of sulfur in fertilizer. Sulfur is an essential macronutrient that has a very crucial role in oil biosynthesis in oilseed crops. Sulfur is generally deficient in oxisols and ultisols and thus needs proper consideration for enhancing the oil yield of oil palm. 

However, sulfur is least considered in soil fertility and nutrient management programs of oil palm plantations. We have reviewed the literature to highlight the role of sulfur in the biosynthesis of oil in oilseed crops in general and oil palm in particular and have suggested some suitable measures for sulfur management of oil palm plantations for enhancing oil yield in highly weathered soils of oxisols and ultisols.

palm fertilizer

Magnesium

Magnesium is the chief core of chlorophyll, the substance that gives plants their characteristic green color. Therefore, if the chlorophyll supply drops, the Palm Tree’s growth is fairly stunted.

Magnesium also helps activate certain enzyme systems required for the plant’s normal development and metabolism.

In many fertilizers, Magnesium is added in a small quantity because most soils naturally contain adequate amounts. However, soils that are too acidic may need an external Magnesium source.

Approximately, the soils with a pH below 5.5 need relatively high amounts of Magnesium in the fertilizer. The amount of Magnesium is also related to Calcium concentration in plants.

Moreover, many plant experts believe that an ideal ratio of both Magnesium and Calcium is necessary for a plant to grow normally.

The Palm Trees deficient in Magnesium show a wide variety of symptoms, such as yellow or discolored leaves, yellow leaf edges, and yellow or abnormal-looking veins. Some other colors, for instance, brown, red, or purple, may also appear.

Often with older Palm Trees, some as old as decades, show deficiency signs first and fall off. The deficiency then begins to affect the new growth, stripping the foliage of its color and healthy appearance. If treated initially, the damage is reversible.

Therefore, ensure that your palm tree fertilizer has a sufficient amount of magnesium so that it can grow to its fullest potential.

Boron

Some crops are much more sensitive to boron deficiency than others. Perennial legume forage crops, including alfalfa, clovers, and birdsfoot trefoil are sensitive to low soil boron.

Adding boron is often recommended for these crops. Brassicas, including certain vegetables (cauliflower, cabbage, broccoli, turnip, rutabaga, kale, and others), canola and forage brassicas like rape and forage turnip are among the crops known to be sensitive to low soil boron levels.

Sugar beets, apples, red beets, celery, and sunflowers are also sensitive to boron deficiency. On soils with low cation exchange capacity, your soil test report may include a boron recommendation for these crops.

Zinc

Zinc is an essential micronutrient for plant life. In Minnesota, while some soils are capable of supplying adequate amounts for crop production, the addition of zinc fertilizers is needed for others. 

Zinc is a recommended micronutrient in fertilizer programs for the production of corn, sweet corn, and edible beans. Several research projects have focused on the use of this nutrient, and much of the following information is based on the results of that research.

Zinc exists naturally in rocks. The amount of zinc present in the soil depends on the parent materials of that soil. Sandy and highly leached acid soils generally have low plant-available zinc. 

Mineral soils with low soil organic matter also exhibit zinc deficiency. In contrast, soils originating from igneous rocks are higher in zinc. Plants take up zinc as the divalent ionic form (Zn2+) and chelated-zinc.

Finally, cool soil temperatures in early spring can intensify the need for zinc. When the soil temperature is low, mineralization of soil organic matter slows down resulting in less amount of zinc being released in the soil solution. Root growth is also stunted by cool temperatures and reduces the plant’s ability to find new sources of zinc in the soil profile.

Copper

Last but not least is copper. Copper is an essential element for plant growth. Soils naturally contain copper in some form or other, ranging anywhere from 2 to 100 parts per million (ppm) and averaging at about 30 ppm.

Most plants contain about 8 to 20 ppm. Without adequate copper, plants will fail to grow properly. Therefore, maintaining fair amounts of copper for the garden is important.

palm fertilizer

How to Fertilize Palm Trees?

The method of fertilizing palm trees is a technique that you can easily pick up once you understand the fundamentals of what your palm tree needs. When fertilizing palm trees, it’s important to use a slow-release fertilizer, such as Milorganite, which can work for up to 10 weeks, as it provides nutrients over a longer period of time and reduces the risk of leaching. 

Quick-release fertilizer, especially in sandy soil, can easily wash away after only a few drops of rain. Milorganite also contains organic matter, which builds healthier soil and holds moisture.

Apply Milorganite four times annually, evenly scheduled throughout the growing season, which could begin as early as March and end as late as October, depending on your location.

Apply 5–10 lbs. of Milorganite by broadcasting it under the entire canopy of the palm. Stay two feet from the trunk of a palm; it’s tender and can be easily scared, or burned when applying quick-release fertilizers.

Palm Trees Frequently Asked Questions

Do palm plants need fertilizer?

To blossom and thrive in abundance most definitely! 

All plants require fertilizer to grow stronger and healthy. If you provide your plant with the right fertilizer it will show you just how happy it is by how much it will be glowing and thriving.

What does Epsom salt do for palm trees?

Apply 2 to 4 pounds of Epsom salts per tree four times per year during the growing season to correct the symptoms of magnesium deficiency. Sprinkle the salts evenly over the root zone of the tree and water them into the soil.

What do you feed palms?

Before you decide on buying fertilizer for your Palm Tree, make sure you choose an NPK Fertilizer with a ratio of 3:1:3; N for Nitrogen, P for Phosphate, and K for Potassium. Preferably, get a slow-release fertilizer, which gradually releases nutrients, allowing the plant sufficient time to absorb all of them.

Are coffee grounds good for palm trees?

Coffee grounds are acidic, which is not suitable for palm trees. On the contrary, coffee grounds in appropriate amounts are good for palm trees. 

Are eggshells good for palm trees?

If you are making your own palm fertilizer you can add eggshells to the mix. This is because eggshells can provide potassium and calcium which are essential for your palm tree to grow well. 

Conclusion

In conclusion, palm fertilizer is an extremely important aspect to ensure your palm trees are thriving. Just like any plant fertilizers are their main source of nutrients and food.

Therefore, taking the time to really understand what your plant needs will help you have a stronger understanding when caring for your palm trees. Providing them with all their needs will have tremendous results in the long run.

This is because, when your palm trees are happy they tend to bloom and glow magically and this will create vibrant energy in your garden or house.

We hope that this article helped you understand your palm trees better and we wish you a wonderful journey ahead in growing lovely palms.

If you liked this be sure to check out:

palm fertilizer

5 Best Monstera Soil & Recipe Mix

Wondering how to get the best monstera soil for your beloved monstera plant? Should you buy it in the store? Should you make it yourself? Fret not as I’m sure that by the end of this, you’d have all your questions answered.

Monstera Deliciosa and its cousin, Monstera Adansonii are also referred to as the Swiss Cheese plant. A native plant to the tropical forests of southern Mexico.

They are known for their appearances for having lacy holes in their leaves. Monstera is considered vines which makes them a great pick for hanging baskets in your room.

If you’re looking for a monstera with smaller leaves, Monstera Adansonii would be your pick. And if you’re interested in making your own soil for monstera adansonii, keep reading! 

Types of Soil for Monsteras

When it comes to deciding the best soil mix for monstera plants, you are left with two important choices. Would you prefer homemade ones in which you could be independently making the best potting soil for monstera plants yourself? Or would you be more inclined to follow one of my recommendations on one of the many commercially available monstera potting mix. Well, whatever you decide, I’ve got you covered.

Keep reading to find out more about the homemade, do-it-yourself soil mix for monstera plants. I will discuss all that you would need to know in order to craft a high-quality monstera plant soil all by yourself.

And if you decide on getting one of the commercially available potting mixes for monstera plants, I am sure that you’ll be tempted to try out one of my 5 recommended potting soil for monstera plants available today, in a single click from the very comfort of your home.

Homemade

First off, homemade soils. In a single trip to the store or within a single click on online ones, you could have all the ingredients necessary to formulate a monstera soil mix. 

You would have to get a regular potting mix first. Additionally, you would require compost and perlite. If you wish to go all out, get some peat moss or pumice as they can come in handy for alternative recipes.

Readymade

For the online shopper, readymade monstera soil is also available and they do not fall short in any way. Some of the many popular ones are from brands such as Miracle-Gro, Black Gold and FoxFarm. 

Keep reading to find out 5 of my ideal monstera potting soil

Monstera Soil Mix Recipe

What You Will Need (The Recipe)

½ Regular Potting Mix

Commonly advertised with a convincing tagline that it could grow your plant up to twice its original size, the Miracle-Gro Potting Mix stresses that the secret to a lush container of flowers or vegetables lies within the quality of your potting mix. 

Together, this forms an ideal environment for plants to thrive in and it sure makes a comparable difference to plants that do not use this potting mix. Miracle-Gro Potting Mix is sold as a single pack or a 2-pack and comes in 4 different sizes (1 cu. ft./2 cu. ft./8 qt/16 qt.) 

¼ Compost

Jobes Organics Granular Compost Starter (4-4-2) is specially formulated to promote fast composting. The first fast-acting organic fertilizer for results you can really see. Jobes Organics Granular Fertilizers with Jobe’s Biozome is a new and unique family of 100% organic fertilizer formulas. 

The secret is in Jobe’s Biozome, a consortium of three microorganisms – bacteria, mycorrhizal fungi plus a unique species of Archaea – an extremely aggressive microorganism that quickly breaks down even complex materials and minerals into basic nutrients and traces elements that plants can readily absorb

¼ Perlite

Ever seen those tiny white pearly particles in potting soil? Well, that’s Perlite, and believe it or not those are literally heated volcanic glass. Perlite is incorporated into potting soils as it also promotes better water drainage and makes sure that the soil does not get too compact.

Alternative Recipes

½ Regular Potting Mix & Peat Moss

Perhaps the most used element of potting soils, the Peat Moss is basically the remains of decayed sphagnum moss for over an extensive period of thousands of years. The moss is harvested from the peatlands. 

This is both ideals for retaining moisture for plants and also to provide a better drainage system. Combine this with a half portion of regular potting mix and you’re good to go!

½ Regular Potting Mix & Pumice

Alternatively, you can also opt to swap the peat moss with pumice. Pumice is safe to use for all types of plants. They are great for organic applications. Pumice provides the plant with high levels of moisture retention.

Pumice absorbs the water and releases it slowly, provides drainage, and aerates the soil. This is a lightweight permeable mineral. It will not wash away or compact with time.

5 Best Soil for Monstera

Premium Monstera Potting Soil

The Premium Monstera Potting Soil is a high quality potting soil catered specifically for monstera soil. It helps in preventing brown spots and root rot issues with monstera plants. Its well-draining soil uses organic aged bark, coco coir and perlite to ensure an optimal balance of water and air for your plant.

Along with its special formula, the Premium Monstera Potting Soil now consists of nutrients such as the IBI-certified Biochar, which is responsible for increasing the retention of nitrogen, phosphorus and other essential plant nutrients so that your plant can now grow bigger and stronger.

Their soil mix is also developed by the Houseplant Resource Centre and it helps protect your monsteras from over and under watering, thanks to its perfect balance of water retention and drainage system.

The Premium Monstera Potting Soil is certified as sterile and non-toxic. It is resealable for easy storage and is perfect for all sorts of aroids and monstera plant

House Plant and Tropical Plant Potting Soil

The House Plant and Tropical Plant Potting Soil is a hand-blended potting soil recommended for repotting your house plants and a variety of tropical ones as well. This potting soil is an all-natural product with no added fertilizers. 

Worm castings are added as they serve as organic plant foods. It is sold in a 2 gallon bag, large enough to even re-pot larger plants, or for multiple medium to small ones. It comes in a resealable bag for ease of storage.

The House Plant and Tropical Plant Potting Soil is made up of peat, pumice, worm castings and lime.

Miracle-Gro Houseplant Potting Mix

Commonly advertised with a convincing tagline that it could grow your plant up to twice its original size, the Miracle-Gro Potting Mix stresses that the secret to a lush container of flowers or vegetables lies within the quality of your potting mix. Recommended for growing beautiful indoor houseplant varieties like Pothos, Spider Plants, Montsera, Philodendron, English Ivy and more. 

Miracle grow potting soil is able to feed your plant for up to 6 months. For the indoor plants, it is recommended to have those plants repotted annually with fresh Miracle-Gro Potting Mix. This potting soil is able to provide a strong foundation for your plants as well as supplying it with adequate key nutrients. 

Together, this forms an ideal environment for plants to thrive in and it sure makes a comparable difference to plants that do not use this potting mix. Miracle-Gro Houseplant Potting Mix is sold in two varieties: Houseplants and succulents. 

And because bugs aren’t welcome in your home, the soil is less prone to gnats, thanks to the right combination of ingredients: perlite, sphagnum peat moss, fertilizer, a wetting agent and coir.

FoxFarm Ocean Forest Potting Soil Mix Indoor Outdoor

The FoxFarm Ocean Forest Potting Soil Mix is currently sold in a single pack and a 4-pack. It is advertised as the ultimate potting soil that has everything your plants need. The pH value of the soil is adjusted to specific values ranging from 6.3 to 6.8 for optimum fertilizer reabsorption.

Thanks to its lighter consistency, the potting soil boasts a mix with proper aeration making it perfect for plants to live indoors or outdoors. 

The contents of this potting soil features the best of both worlds, earth and sea! 

The main ingredients of this potting soil include a blend of earthworm castings, bat guano, crab meal, seagoing fish, composted forest humus, sandy loam, and sphagnum peat moss. It is ready to use right out of the bag and is recommended for container plants.

Black Gold All Purpose Potting Soil

The Black Gold All Purpose Potting Soil is currently sold in 1 size (8 qt) but in both dual and quad packs. This potting soil is made up of many crucial ingredients. One of the ingredients that stand out in this product is the slow-release complete fertilizer, MultiCote, added to give plants a strong start. 

Black Gold All Purpose Potting Soil 0.13-0.05-0.10 8qt is a multi-purpose, nutrient-rich mix that’s ideal for plants. A slow-release complete fertilizer is added to give plants a strong start. This provides awesome performance. 

It consists of Canadian sphagnum peat moss with worm castings, forest humus and pumice. 

This multi-purpose product is made in the United States and is ideal for all plants as it is nutrient-abundant. It can be used for both your indoor house plants and the ones in your hanging baskets.

Palm Trees Frequently Asked Questions

Can you use cactus soil for monstera?

A cactus potting soil could also do a monstera plant well as an addition to the soil as it helps with good water drainage. This is because cactus soil doesn’t hold moisture for long enough. It works excellent for plants like succulents and cactus that prefers dry soil.

Which compost is best for monstera?

You can use the Jobes Organics Granular Compost Starter (4-4-2). It is a specially formulated compost to promote fast composting. The first fast-acting organic fertilizer for results you can really see.

Should I put perlite in monstera?

Yes. Perlite lightens the soil and improves root and plant health. It also provides better drainage and aeration for soil. Perlite helps soil retain moisture and nutrients for later use

Can I use loam soil for monstera?

Monstera plants thrive in potting soil that holds moisture yet also drains well. A soil mix with a slightly acidic pH, in the range of 5.5-6.5, 1 part peat moss/coco coir, 1 part perlite, and 4 parts pine bark fines is an excellent mix for Monsteras.

Do Monstera like to be misted?

The Monstera Deliciosa plant prefers a humid environment, which is why frequent misting is recommended. You can also place your plant close to other plants. This increases the humidity of the air around them.

What is the best soil for Monstera plant?

Putting together a homemade soil mix with a slightly acidic pH, 1 part peat moss/coco coir, 1 part perlite, and 4 parts pine bark fines and that’s it. You’re good to go.

monstera soil

Conclusion

Ready to craft a monstera deliciosa soil all by your own now? Well, congratulations! 

If you’ve made it here, I am sure that making a monstera soil would be just as easy as breathing for you. Whether to buy them online or to make them yourself, I’m sure your monstera plant is in good hands now. 

Happy planting! And if you did enjoy reading this, have a break and read some of these related articles:

The Best Moss Pole for Climbing Plants!

A moss pole is a helpful and simple tool used to teach plants to grow upward instead of horizontally. Using moss poles you can sculpt your plants to grow how you want them to. Some creative designers even take this to another level by creating art using a moss pole by how they teach their plants to grow. 

Some plants favor growing on a moss pole much more in comparison to others. The plants that benefit most from moss poles are hanging plants, vines, or climbing plants. Such as moss pole for  Monstera, Pothos or Philodendron.

Originally in jungles or other tropical places your hanging or climbing house plants would grow against other solid structures such as big trees or rocks. Your plant relies on these solid structures to give them an easy and stable place for growth and survival.

Using a moss pole for such plants allows your plant to have the solid structure which it needs which will promote its growth as you will be providing to your plant an ideal environment for its best potential growth. Allowing your plants to have their most natural and comfortable setting always ends up in your plant thriving in abundance.

Moss poles for plants allow for root attachment which strengthens your plant which makes for a more attractive growth habit This means stronger and healthy stems and even bigger leaves. Additionally, the moss is absorptive. This means keeping your moss pole moist will allow long vines another source of water when they’re fully attached to the support.

What Is a Moss Pole?

If you have never heard of a moss pole before it’s basically a stick or even a pipe wrapped up with coconut husk or moss such as sphagnum moss. Others also make their moss poles with sturdy bamboo or other rot-resistant stakes.

How to Make a Moss Pole 

Steps 

moss pole
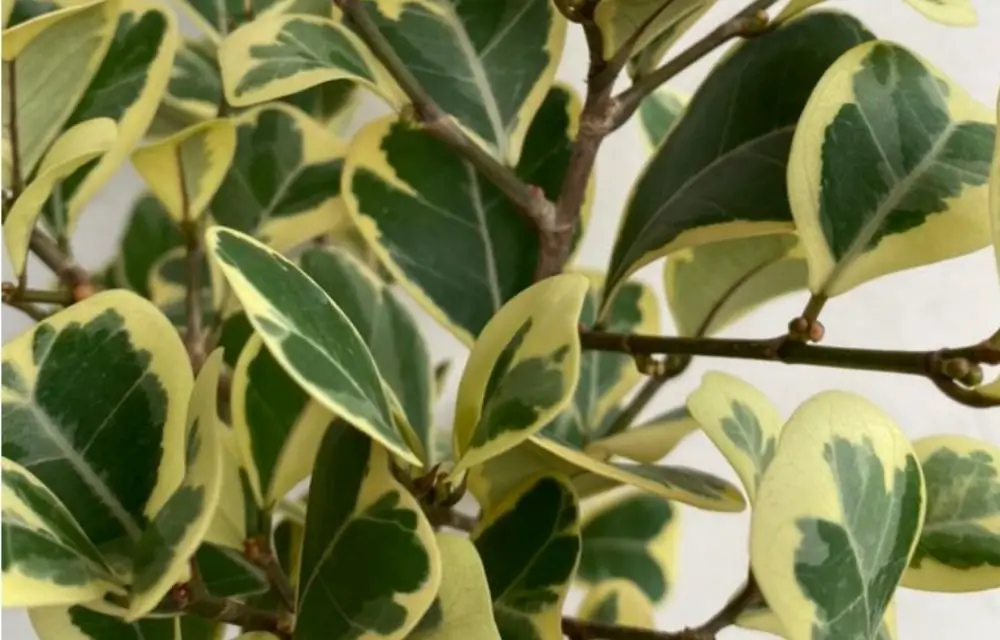
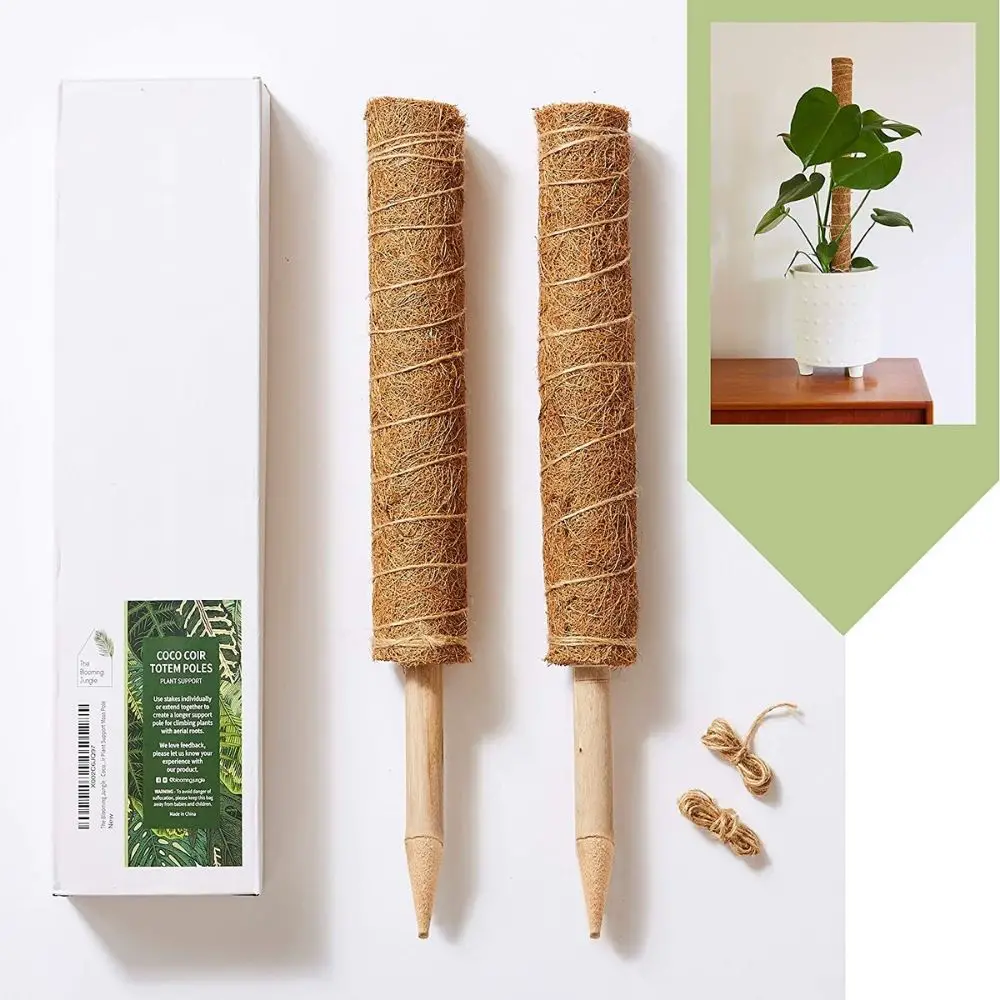
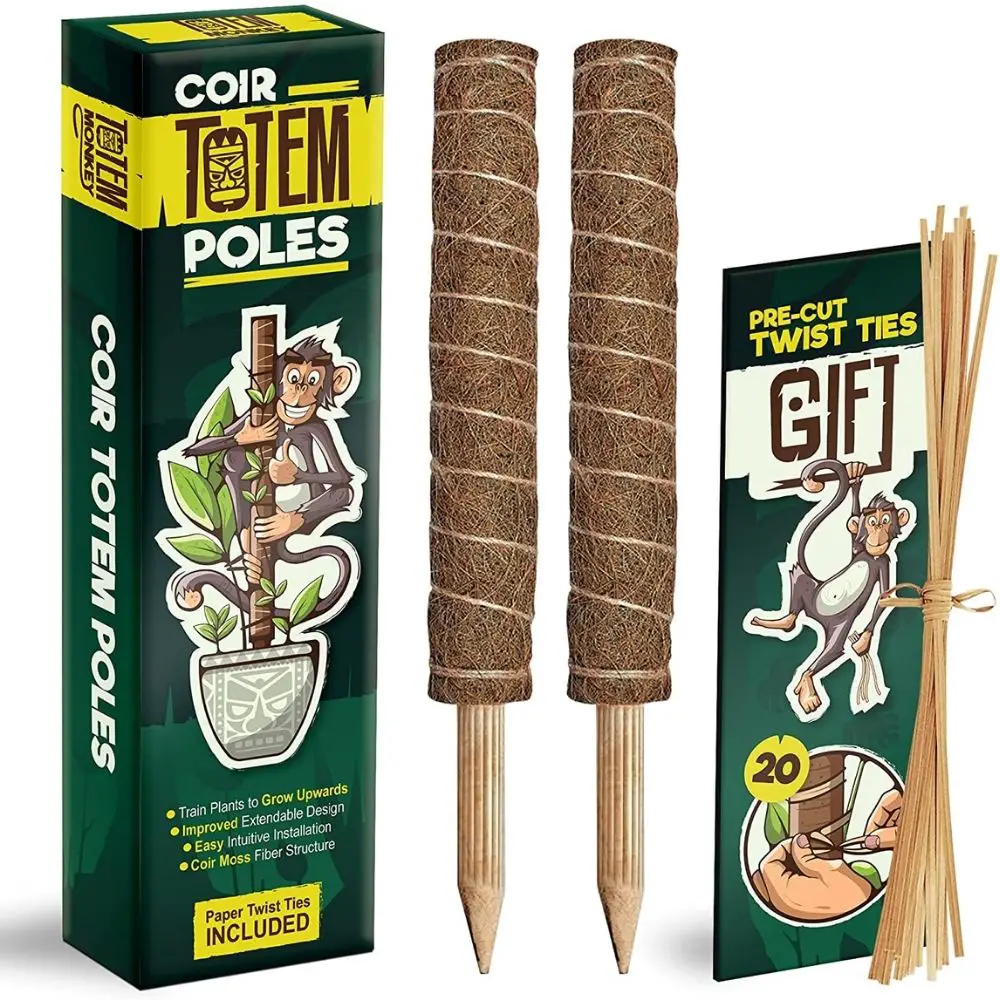
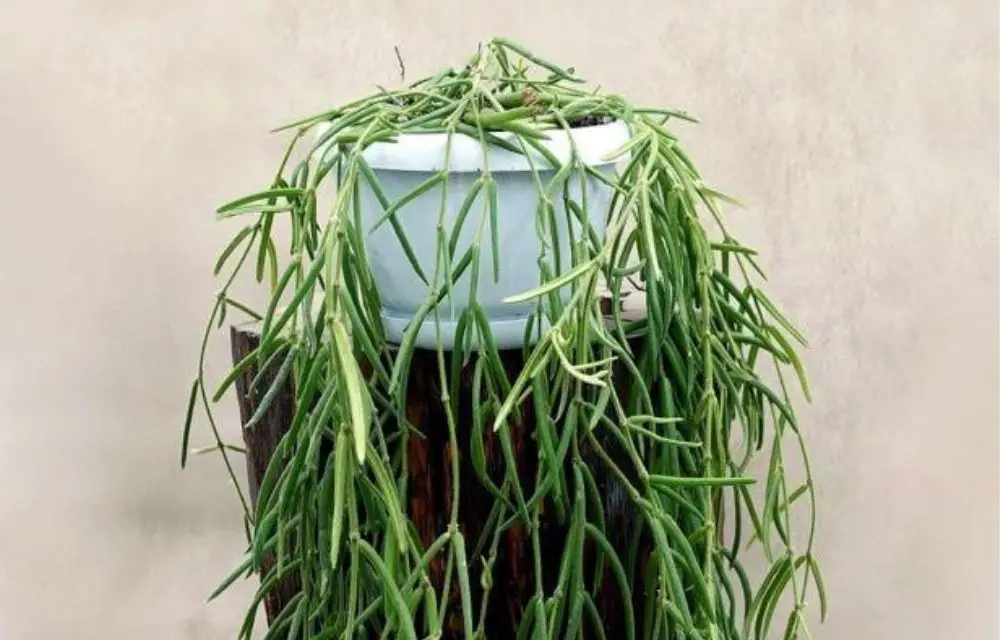
Making your very own moss pole is extremely easy and does not take long. Making your own moss pole can also be much cheaper in comparison to purchasing them. 

Moss pole diy project can be a fun and a more economically friendly option if you have many climbing plants.

Here is everything you need to know to make your premium quality moss pole at home:

Prep Time : 5 minutes

Active Time: 30 minutes

Total Time: 35 minutes

Materials:

  • 1/2″ 19 gauge PVC coated hardware mesh (either 2 ft x 5 ft, 3 ft x 5 ft, or any other size that you can find.)
  • Vigoro 100 ft. Plastic Coated Wire Twist with Cutter
  • Sphagnum Moss
  • Optional: Vigoro Plastic Coated Stakes (4 ft or 6 ft)

Tools:

  • Pair of scissors, wire cutters or pruning shears.

Make your Moss Pole with 7 Simple Steps:
Step 1: Soak your sphagnum moss in water
Step 2: Bend the hardware mesh into a cylinder
Step 3: Cut the hardware mesh
Step 4: Form the hardware mesh into an open cylinder
Step 5: Fill the cylinder with pre-moistened sphagnum moss
Step 6: Stitch up the cylinder with plastic-coated wire twist
Step 7: Repot your plant of choice and add the moss pole

What you need to Make your Moss Pole

Ingredients or Materials and Tools

  • PVC coated hardware mesh 2 ft x 5 ft
  • Plastic Coated Wire Twist with Cutter
  • Sphagnum Moss
  • Tools: Gloves, pair of scissors, pliers, wire cutters or pruning shears.

How to Use your Moss Pole

  1. First, start by gauging how tall you need your moss pole to be. The moss pole should be taller than your plant’s tallest vine in order to give it plenty of space to climb and attach itself to.
  2. Once you’ve made or purchased your moss pole, start by soaking it in water until fully saturated. The moisture will help your plant to bind to the pole as it will encourage roots to strongly grip onto the moss pole.
  3. Insert the wood end into the soil, positioning it so that the moss pole is as close to the center of the pot and base of the plant as possible. Make sure to take extra care not to damage the main root system of your plants when positioning the moss pole! This may kill your plant, so take your time.
  4. Start wrapping the plant’s vines around the pole. Secure with twine as you work your way around the pole. Pay extra attention to each node of the plant (where the leaves meet the stem) as this is where adventitious roots will form; try to make sure that each node makes good contact with the moss pole.
  5. That is all, now the fun part is waiting for your plants to blossom!

Caring for your Moss Pole Tips

moss pole
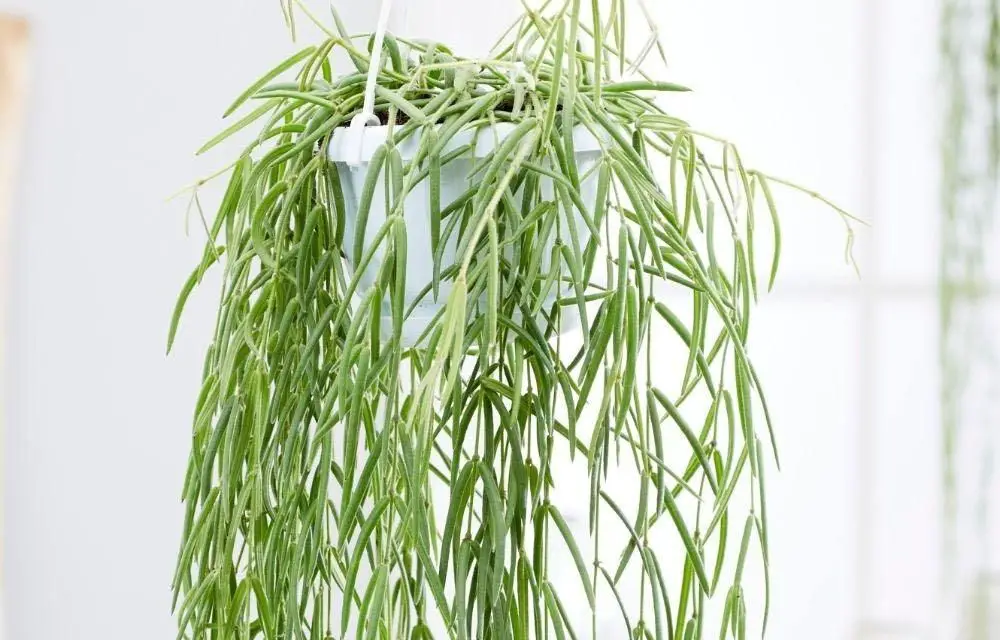
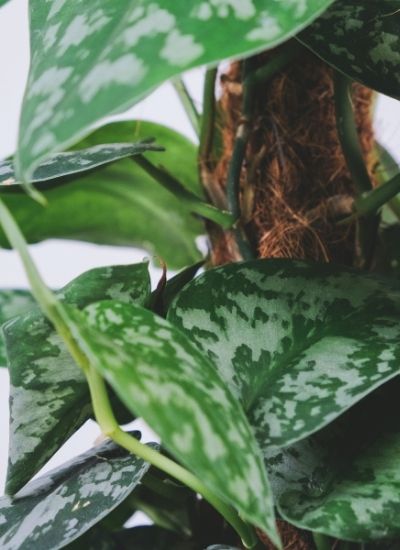
It is beneficial to spritz your moss pole often or to pour water down the pole when watering to ensure your plants’ adventurous roots receive water. Most aroids will appreciate the extra humidity! 

In my garden, I often ensure a thorough watering of all the leaves, roots, and even the roots every so often to make sure my plants are absorbing all the water they need.

As your plant binds to the moss pole, you can remove the twine. Continue adding up the pole to continue training your plants growth. You will notice that the plant will grow much healthier and stronger with a moss pole.

When your plant has outgrown your moss pole you may extend it by binding a new one to the old one and repeating the process, or you can allow your plant to vine back down the moss pole to fill outgrowth.

When your plant has outgrown its pot, replant it with the same moss pole in the new container. Be very careful if ever removing a moss pole, as damaging the adventitious roots could cause issues with the plant’s health.

Moss Pole Alternatives

The Blooming Jungle 24 Inch Moss Pole

Train plants to grow upwards and develop into a strong and healthy plant. These totem pole plant supports help creeping plants with aerial roots grow vertically towards the light, mimicking their natural environment.

Ready for immediate use each moss pole set comes with two pieces of string each 120cm in length. Easily tie up your plant with a natural, easy to remove and non-damaging material.

Plants cling easily to natural fibre because each stake is covered in coir which is a natural fibre extracted from the husk of coconut. Aerial roots can easily penetrate this sustainable and organic material.

You can even use this to build your plant’s  pole as it grows. When a plant has outgrown poles simply add extension on to create a longer climbing stick. No need to upset the potted plant by replacing the post.

This product provides support to a variety of plants.  These poles are essential for climbing plants and vines which need extra support when growing in pots and containers. 

These indoor plant poles are suited for Monstera, Pothos, Money Plants and more.

Alphatool Full Length 39.5 Inch Coir Totem Pole

When you purchase this product you will receive four coir totem poles, each about 16.5 inches long, you can choose whether use it as four separated coconut palm sticks or to connect several coconut palm sticks together according to your desired length.In addition, we will offer you 100pcs bandages as free gifts.

The bottom of this coir totem pole is pointed for easy insertion into the soil, and the middle is hollow. If you feel that the length of one coir totem pole cannot meet your needs, you can insert the second tip into the top of the first to extend the length.

Easy installation for simple and quick usage. What you only need to do is to insert the tip of this coconut palm stick deep into the soil so that it can be fixed vertically in the soil. You can rest assured to use it, your plants will climb up on their own, and you do not need to do anything more.

This coir totem pole is very suitable for all kinds of climbing plants. It can be used not only indoors but also outdoors. Lianas such as creepers can be entwined to grow upward.

Quality materials are used to ensure a withstanding product for users. 

This coir totem pole is made from 100% natural coconut shell so that it is very hard and wear-resistant. Besides, it is environmentally friendly and can be used for a long time.

Totem Monkey Moss Pole – 26.4 Inch Coir Totem Plant Support

Easily train your plant to grow upwards. The Totem Monkey Coir Totem Poles provide sturdy vertical support to climbing house plants. Potted climbing plants and vines need additional support when growing indoors. Monstera, philodendron, pothos, money plants and other indoor plants will benefit from being exposed to more natural light similar to their natural environment.

This is a new extendable design which provides for easy usage for when your plant outgrows its pole. The individual 15.7 inch long sticks made out of dense coco fiber allow aerial roots to attach and at the same time provide support due to a strengthened PVC inner shell. The extendable design enables the use of a secondary pole in order to increase the original pole’s height to a total of 26.4 inch providing reinforcement as your plant grows taller.

This design provides a fast and easy installation for gardeners. Help your plant to grow taller by following 4 simple steps: 1) Insert wood stake into soil close to the plant’s stem, 2) Secure plant to stick using the included paper twist ties, 3) Watch your plant as it grows taller and happier, and 4) Use secondary pole to extend the original pole’s height if required.

With high quality materials that ensure a sturdy support for plants to grow upwards. The coconut fiber and its aesthetics allows the poles to blend with your plant and enhance your personal indoor jungle. The sharpened wood stake enables you to easily insert the pole into the soil. The included 20 pre-cut paper twist ties enhance the support by keeping the stem secured to the totem pole.

This company is dedicated to providing the best products to their plant-loving customers. Their mission is to offer the best plant care-taking solution by continuously ensuring that the Totem Monkey Coir Totem Poles meet the highest quality standards. 

If you are not 100% satisfied with your purchase you will receive a full refund or a replacement item, no questions asked.

Moss Pole Frequently Asked Questions

Does my Monstera need a moss pole?

Monstera is a vining plant from the rainforests of Mexico and Central America that makes use of aerial roots to climb up and through the branches of trees in its native habitat. In the home, maturing plants will need the support of a moss-covered pole that they can climb.

Providing your Monstera with a moss pole will allow your plant to grow with more stability and this will allow the plant to thrive better. It is common that Monstera plants grow healthier with a moss pole as their leaves will be bigger and their stems will be stronger.

A Monstera moss pole can be extremely beneficial for your plant that loves to cling. This is because a moss pole monstera will provide the support your plant originally needs.

What is a moss pole?

A moss pole is usually a stick of pipe that is covered up in moss or coconut husk. This is usually placed in the middle of the pot as a stand for climbing or vine-type plants to grow onto.

What can I use instead of a moss pole?

Here is a moss pole alternative if you don’t have one. A tree slab or a natural bamboo trellis is the perfect alternative for your moss pole. The outer portion of a tree slab, of a live edge wood, would be an ideal choice to replace your moss pole. This tree slab will mimic the natural habitat of your trailing vines as if they are growing on a tree trunk. Apart from this, a natural bamboo trellis can also be a nice alternative to your moss poles.

Why do you use a moss pole?

A moss pole is usually needed for climbing or vine plants because it provides the support these plants need which they originally have in the wild. These plants usually need a bigger tree or rock to provide its support. 

Therefore, providing your plant with a moss pole will allow it to have a similar replica of its natural environment. This will ensure that your plant has all the right conditions to grow in abundance.

Does a moss pole need to be wet?

It will not be wet all the time as during hot days the entire pole may dry up completely. However, we do recommend watering the plant thoroughly by also drenching the moss pole or even using a water spray to ensure the pole is moist.

This will allow the roots of the plants to be watered and to encourage deeper root growth.

Conclusion

To summarise, a moss pole is indeed an important tool in the garden, especially for climbing plants that require support.

From my own experience, I noticed that the plant’s leaves grow much bigger with a moss pole in comparison to without. Although the plant may grow well without a moss pole it will not be as luscious and healthy as it can be.

This means that even though the plant grows well the size of leaves will be smaller and oftentimes there may be fewer leaves and a weaker stem. Personally, I often play around with having a moss pole for some plants, and for some I allow them to just hang down a pot without a stick.

This is really a personal preference, for example, pothos can grow in a hanging pot or also creep up a moss pole. Some gardeners may prefer the smaller leaves in a pot instead of bigger leaves on a moss pole.

So the choice is really yours! You can even explore both options and decide which you prefer!

In truth you don’t NEED one, however, it will make your plants extremely happy, help them to grow and look great. One would assume that if you have houseplants it is likely for the look and aesthetics of them. So ask yourself, what would look better, a plant that is thriving in what is closest to their natural habitat, or one which can’t even hold up the weight of its own leaves, is sagging and sad? 

Additionally, if plants grow too big without the required support, they can fall over, have stems snap, stop growing altogether, and possibly begin to decline and die. So you don’t NEED a moss pole but possibly your plants really do.

Using a moss pole will be the best option for your plant as you will be providing it a similar natural environment to grow in which always means that your plant has the highest potential to grow to its fullest heights.

Maybe adding a moss pole to your garden will change your gardening game to a whole new level so why not give it a chance. You even have alternatives and DIY options if you don’t feel like spending on a new gardening product.

Have fun exploring the possibilities of using a moss pole for your green babies at home!

Enjoyed this? You will love reading:

moss pole

8 Best Oscillating Sprinkler (Top Winners!)

Having the best oscillating sprinkler in your garden will enhance your plant watering experience. Choosing the best oscillating sprinkler will allow for a smooth, simple, quick, and efficient watering process that will ensure your plants are receiving all the water they need even when you are unable to water your plants manually. 

There are also a number of things you should consider before purchasing an oscillating sprinkler such as the lawn size, the adjustability of the spray pattern, water pressure demands, and the construction of the sprinkler.

Now, without further ado let’s get into the nominees of the best oscillating sprinkler 2021!

What Is an Oscillating Sprinkler?

An oscillating sprinkler sprays water out in a fan-like pattern that can cover large areas with every pass. The main advantage of this sprinkler is the way the water is pushed up and then down, very similar to rain.

A key point to note is the placement of your sprinklers in your lawn or garden. Find a perfect spot where you will get the most efficiency out of them.

Take your time by adjusting the sprinkler accordingly until your plants are thoroughly satisfied. If you notice your sidewalk is getting more water than your yard, move the sprinkler heads little by little until you find the correct placement for your yard.

All yards are different and need unique watering techniques and sprinkler options, so do some research on your lawn to figure out which is best for you. You may also get someone who is more experienced with sprinklers to give you some pointers.

Taking the time and patience to really research and plan out the types of sprinklers you will be getting and the placement in your lawn will allow you to get the best usage of your best oscillating lawn sprinklers.

best oscillating sprinkler

8 Best Oscillating Sprinkler

Aqua Joe SJI-OMS16 Indestructible Metal Base Oscillating Sprinkler 

This product is on top of the list because it is a solid and dependable sprinkler. Additionally. It is completely customizable with coverage patterns.

It also has a wide range of coverage which is great if you have a big lawn or garden. The Aqua Joe has a superior range control which covers up to 3600 sq ft.

This is also a durable product which is leak resistant. So, you will be able to water your plant without having to worry about leaks.

Aqua Joe is also clog resistant as it is equipped with 16-clog nozzles. It is also compatible with a standard garden hose connection which is convenient for your usage.

The TURBO-DRIVE MOTOR in this product is a sealed, turbo gear-driven unit for reliable performance, and an extra-large indestructible solid-metal base for added stability and durability in the yard and garden.

Keep your garden green and your lawn lush and beautiful with the Indestructible Metal Base Oscillating Sprinkler from Aqua Joe. No more wasted water or overspray – put the H2O precisely where you want it.

Control range with 16 clog-resistant nozzles for superior coverage up to 3600 sq ft. Sealed, turbo gear-driven unit for reliable performance, and an extra-large indestructible solid-metal base for added stability and durability in the yard and garden. 

It really can’t get any better than this! The Aqua Joe is definitely one to consider as the best oscillating sprinkler.

Having an Aqua Joe in your garden will definitely create a positive and fun watering experience for you and your plants.

Melnor 65074-AMZ XT Turbo Oscillating Sprinkler

With 20 Precision rubber nozzles provide maximum coverage of a large lawn or garden up to 4, 500 sq. Ft and a twin touch adjustment controls the width of the watering pattern to cover the whole yard or a narrow flower bed

Infinity turbo drive provides a smooth operation for even watering and extended life.

You will be able to quickly connect and disconnect the sprinkler with an included Quick Connect Product Adapter (Requires Quick Connect Product End Connector sold separately).

Melnor introduced the first successful oscillating sprinkler in 1946, and the company continues to build on that quality with sprinklers that cover a wide variety of watering needs.

There are also three dimensions of adjustability. You can adjust the range, width and control the zoom. This allows for a personalized sprinkler to perfect your watering needs.

An easy and efficient product that will work like magic in your garden to ensure that all your plants are never thirsty during the summer heat.

Orbit 58308Z Brass Impact Sprinkler on Tripod Base

Sprays up to 90 feet in diameter, covering 6,360 square feet when set to a full circle which means a large coverage area when watering plants.

The heavy duty  brass construction can withstand high water pressures and severe weather conditions without the worry of breaking, rusting, or failing. This also provides for a long lasting and dependable product.

You can even adjust and personalise your coverage needs. Easily adjust spray coverage from a partial section to full 360° watering.

Moreover, there is also a customizable setting for gardeners. Use the deflector shield and diffuser screw to alter the stream and change the spray distance radius.

Don’t worry about instability because this product has a strong metal tripod as its base. Metal, weighted tripod resists tipping and extends up to 48 inches to allow for adjustments as plants grow.

It also has an anti backsplash which improves the sprinklers ability to spray water in a consistent pattern and in the desired direction.

A flow-through design, resistant to clogs and ideal for secondary water and an easy connection with a gooseneck that makes it super simple to connect to your hose.

Eden 94113 Lawn & Garden Essential Oscillating Water Sprinkler

Next up on the list is the Eden 94113  which has 16 plastic nozzles to provide maximum coverage of large lawns or gardens.

Easy-to-use sliding tab range controls make coverage adjustments simple for easy and quick usage.

Moreover, there is also a built-in cleaning tool for nozzles which will ensure your sprinkler is alway clean and hygienic.

You are also able to continuously adjust watering patterns for your plants specified needs. Your plants will be grateful for the perfect watering each time.

Lastly, a quick connect starter set fits all standard U.S. garden hoses. The secure twist-and-lock mechanism prevents accidental disconnection, water stop feature allows tool changes with the water on.

This sprinkler is also a patented dirt resistant sealed turbo drive which has a leak proof connector and a weighted base that will help stabilize the unit.

GRÜNTEK Oscillating Sprinkler

The Gruntek is a unique and reliable product.  It is a rectangular lawn bar sprinkler for medium and large garden and lawn areas up to 62m²/4973ft².

It has adjustable nozzles for your personalized benefits. With 20 nozzles for easy adjustment + nozzle cleaning plug provided.

Moreover it has an easy connection thanks to the universal connector system for European and American connectors. To connect the sprinkler to american hoses, simply unscrew the European click-adapter.

Perfect for larger lawn and plant areas  as its blast width is up to 17 meters.

Don’t worry if your product isn’t as promised because you will get your money back in 90 days! This means you can purchase this product without having to worry about it not meeting your watering expectations.

If you need more information, GRÜNTEK is a German gardening brand that is committed to offer high-performance and quality products.

GRÜNTEK’s PRIMAVERA Series 51 sprinkler is a rectangular sprinkler specially designed for both medium- and large-sized rectangular lawns with an area of up to 4973 ft². It is suitable for extensive and uniform irrigation of both flower and plant lawns as well as grasslands and terraces.

Gruntek also states that “The best gardening tools should not be expensive, but they have to be modern, high-quality, comfortable, and created with soul. We use our tools in our own gardens every day, so that they are just as everyone would like them to be – for enthusiasts by enthusiasts.”

Thanks to the patented turbo engine transmission, the GRÜNTEK PRIMAVERA lawn sprinkler has an operating time of up to 1600 hours. The UV-resistant coating ensures high-quality protection and longevity.

Brizer Oscillating Lawn Sprinkler

The Brizer is a gentle flow sprinkler with maximum coverage. Packed with 15 Nozzles for maximum coverage, the dial easily allows you to set the spray area: left, right and narrow width or full width. The Brizer R2120 provides a gentle shower for delicate plants in garden soil, or an even distribution over a wide yard. This sprinkler for the yard will be a reliable addition for your garden and home.

Your grass will always be green with Brizer as the grass in your yard will be happy, healthy, and hydrated thanks to Brizer’s Oscillating Sprinkler. The Brizer watering sprinkler is made of a lightweight design that’s also durable. 

This allows you to adjust the angle of the water being projected so you can get the water where your lawn needs it most. Add the Brizer sprinkler garden appliance to your yard maintenance set for a lively lawn.

This product is also extremely simple to use. Simply position the Brizer sprinkler system in the middle of your lawn or yard and adjust oscillation. Attach your garden hose to the connecting adapter and turn on the faucet. 

This adapter will connect to any standard garden hose, whether flexible or metal hose, we’ve got you covered. Your sprinkler is now ready to irrigate 2,800 square feet of grass and flowers. Compared to other sprinklers for yard the Brizer’s water sprinkler covers up to an extra 800 square feet more.

Additionally you can easily clean this product as it has a metal sieve located in the hose adapter, allowing a seamless connection without hassle. This added sieve filters out dirt that may clog the nozzles.

If the nozzles do get clogged, the sprinkler comes with a built-in nozzle cleaner at the end of the chassis to clear out clogged nozzles. Simply unscrew the plastic pick and insert into the nozzles to break up any extra debris inside.

GARDENA 1975 Aquazoom 3900-Square Foot Oscillating Sprinkler

Precise, even watering of lawns, beds and hedges. In the modern Gardena Sprinkler range, there is a sprinkler for almost every garden size and shape.

Circular Sprinklers allow for quiet and easy-to-handle sprinklers for small to large areas in the garden. With multiple settings.

Additionally, 0scillating Sprinklers for areas of 90 to 350 m². For even, puddle-free watering of square and rectangular areas. This creates an efficient and easy watering experience in your garden.

A wide range sprinkler allows coverages for areas up to 490 m² with a fine adjustment to sector or full circle distribution.

Rocky Mountain Goods Turbo Metal Oscillating Sprinkler

Last but not least is the Rocky Mountain Goods Turbo Oscillating Sprinkler which is a heavy duty rustproof aluminum frame yard sprinkler.

Easy adjust width and pattern control knobs for custom lawn coverage and a built in cleaning jet pin with 3,600 square feet of consistent watering coverage for spot or total lawn coverage.

You also get a lifetime warranty with this product. That’s how good it is!

Get a product that you can depend on for ensuring your grass is always green and your flowers are always blooming.

best oscillating sprinkler

How To Use an Oscillating Sprinkler?

Buying the best oscillating sprinkler is one thing, but using it is another. But do not worry as I will be covering that bit as well.

Before using an oscillating sprinkler, understanding how to set oscillating sprinkler is essential.

So how does an oscillating sprinkler work? Well, first you’d need to attach the hose to a connector. Usually, there will be a knob that lets you pick the spray pattern. This would be full, center, left, or right.

When connected, there will be a mechanism in place in which the arm gets pushed and pulled by a cam. This cam rotates slowly, enabling the arm to oscillate. Within this arm, is a hollow tube with holes on it. 

Water flows into the device and out from those holes and there you go! You’ve got yourself a functioning oscillating sprinkler.

How to adjust oscillating sprinkler

When adjusting the oscillating sprinkler, remember to first set your spray pattern. You may choose from the options available depending on the specific oscillating sprinkler.

If you’re watering to the left side of the sprinkler, set it at the left and do so accordingly for the right side as well. Alternatively, you can set it to full if you wish to cover a wider radius of the ground. Setting the lever at the center position allows for watering single strips.

Remember to not overwater and to turn it off when not in use. Make small, incremental adjustments on dual ring sprinklers to achieve a specific path of water.

Benefits of Using an Oscillating Sprinkler

Apart from oscillating sprinklers appearing fancier, they sure do come with a lot of perks.

First off, you would be conserving water. During summer, the climate can get pretty hot. This would mean more water is required for the plants. Using an oscillating sprinkler can definitely allow you to use water more efficiently.

Take advantage of the oscillating sprinkler’s automated system for a more self-sustaining quality for your lawn. 

Alternatively, you can also adjust your oscillating sprinkler to water other areas of your garden. Wherever you need watering done! Watering methods can even be adjusted according to size, type, and shape. 

Using an oscillating sprinkler would definitely be the first step you can take to care of your lawn not only during the summer season but for the long run as well. By conserving and using water efficiently, you’d also be doing the planet a favor. 

No need to worry about storage as these devices are usually kept at a spot. No more tangling rubber hoses, am I right? Having an oscillating sprinkler is definitely something to consider. 

Also, you’d get to brag about it.

best oscillating sprinkler

Best Oscillating Sprinkler Frequently Asked Questions

How long to water lawn with oscillating sprinkler

The answer to this depends on the size of your lawn and the output levels of water your oscillating sprinkler has. Use an empty can and place it within the radius of the oscillating sprinkler and leave it on for about 15 minutes to measure how much water is collected during that time. 

Multiply this value by 4 to have a better prediction of the oscillating sprinkler’s hourly output. Use this to formulate how much water your lawn would need in a day. Aim to have at least 1-2 inches of water per week. 

Who makes the best oscillating sprinklers?

Aqua Joe, Melnor, and Eden are some of the most sought-after brands of oscillating sprinklers and they are all available online today.

How do I choose an oscillating sprinkler?

Research the brands that work and read oscillating sprinkler reviews. Numbers do not lie. These factors would set a good foundation to build on when you’re picking the best oscillating lawn sprinklers to bring home.

Do oscillating sprinklers work?

Yes, they do. Be sure to keep in mind that you get what you pay for and following a manual can definitely do no harm.

What is the best kind of sprinkler?

There are many kinds of sprinklers to choose from with each of them carrying a distinct perk. Know your lawn and choose the one that is most appropriate and beneficial to your lawn.

What is the most efficient sprinkler?

The Melnor has been known to provide a fair trade on quality, value, and features. However, efficiency depends greatly on how you choose to use it.

How many minutes should you water your lawn?

20 minutes at a time seems to be adequate. Aim for at least 3 times a week and your lawn will thank you.

Conclusion

I think it is safe to say that you’re sold on the idea of owning an oscillating sprinkler system. I mean why not, right?

Having an oscillating sprinkler is not only much cooler than the typical garden hose, but it also helps you keep your yard well-maintained while reducing your workload as well.

As I would say before buying any product in the market, remember to check for the materials used in the manufacturing of the oscillating sprinkler and maybe have an eye out for the ones with good after-sale services.

Remember that every oscillating sprinkler can vary slightly in use, so keep the manual close to having a good flow. No pun intended. 

Also, if you enjoyed this article, why not have a look at the related ones? I’m sure they’re worth your time.

Related Articles:

best oscillating sprinkler
Scroll to Top