Adele, Author at Absolute Gardener - Page 3 of 13

Adele

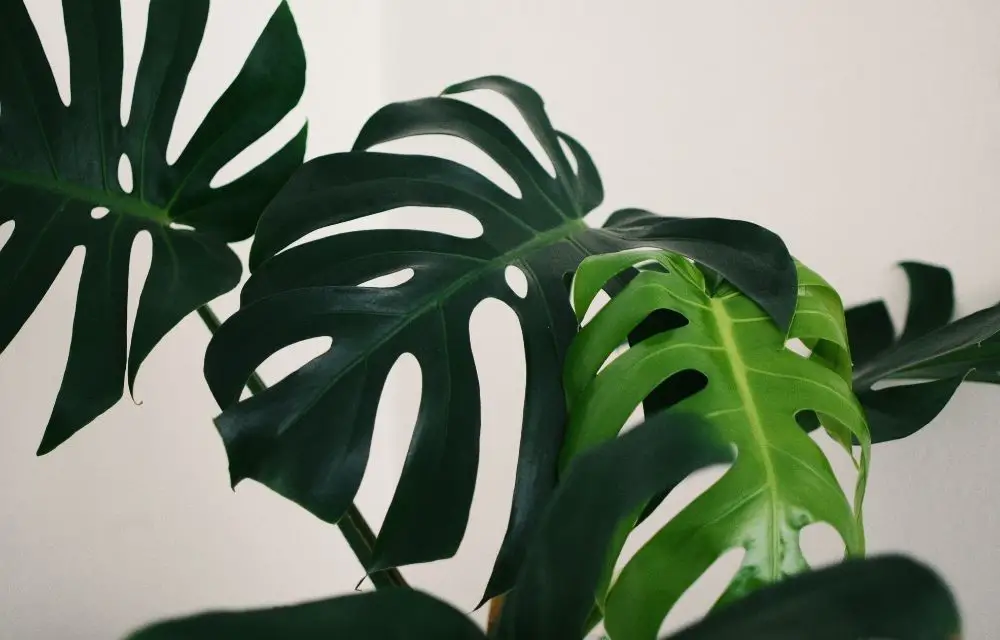
The Scindapsus Treubii Plant: Getting the Most out of It

Ah, scindapsus treubii dark form. You may have seen it in your backyard garden or at your local nursery and wondered what that scrawny little plant is doing there. But scindapsus treubii is an interesting plant nonetheless – it has some unique quirks and challenges to go along with its attractive foliage. In this article, we will explore scindapsus care from top to bottom: how to care for them, common problems they face, and tips on keeping them happy.

What is Scindapsus Treubii Plant?

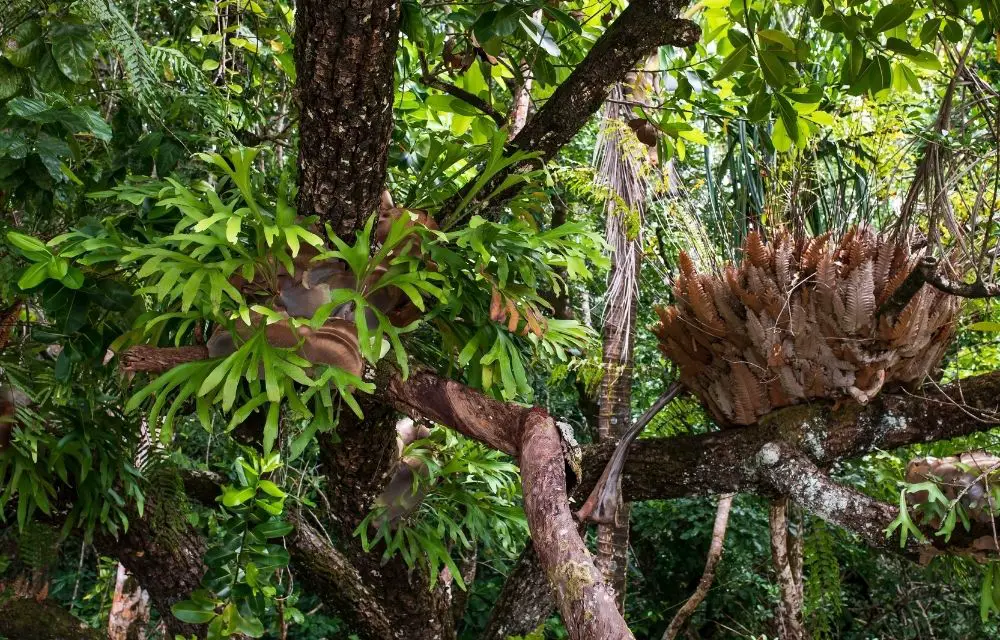
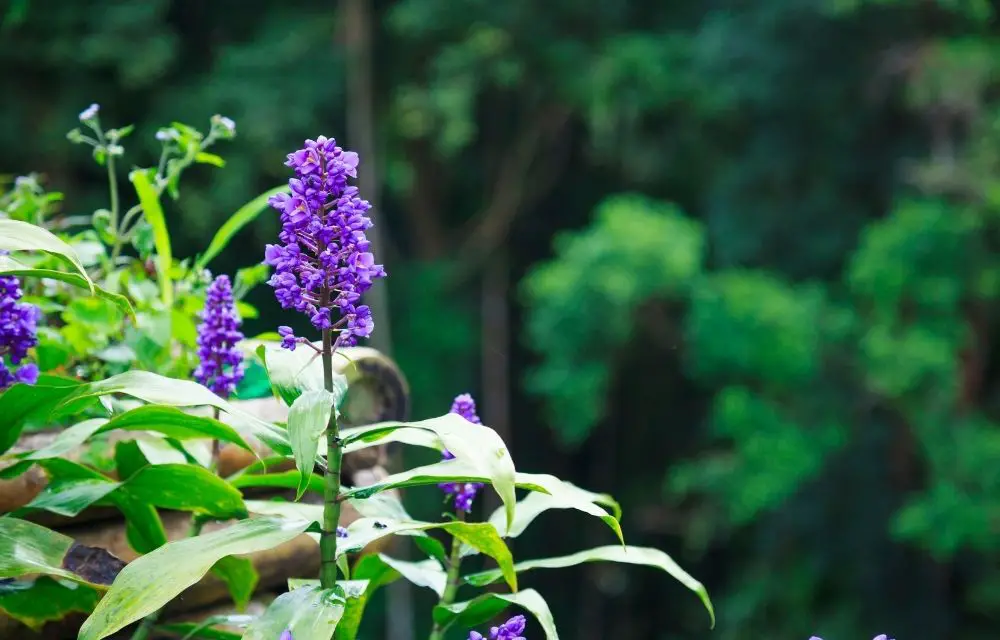
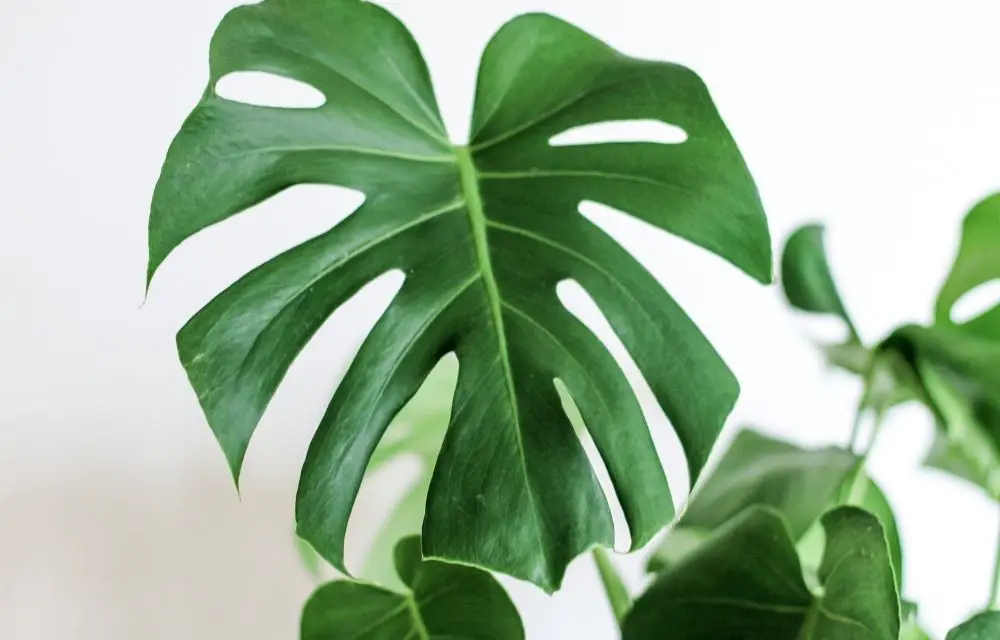
Scindapsus Treubii is a plant that grows to about six feet tall and four feet wide with dark green leaves. It will produce scented white flowers in the summer months, which can be used for making perfumes.

Scindapsus Treubii plants are great for brightening up a garden because of their large, dark green leaves that provide lots of shade. Their flowers can also be used as an ornamental plant in flower beds or patios. They grow best in warm, humid climates and need plenty of water.

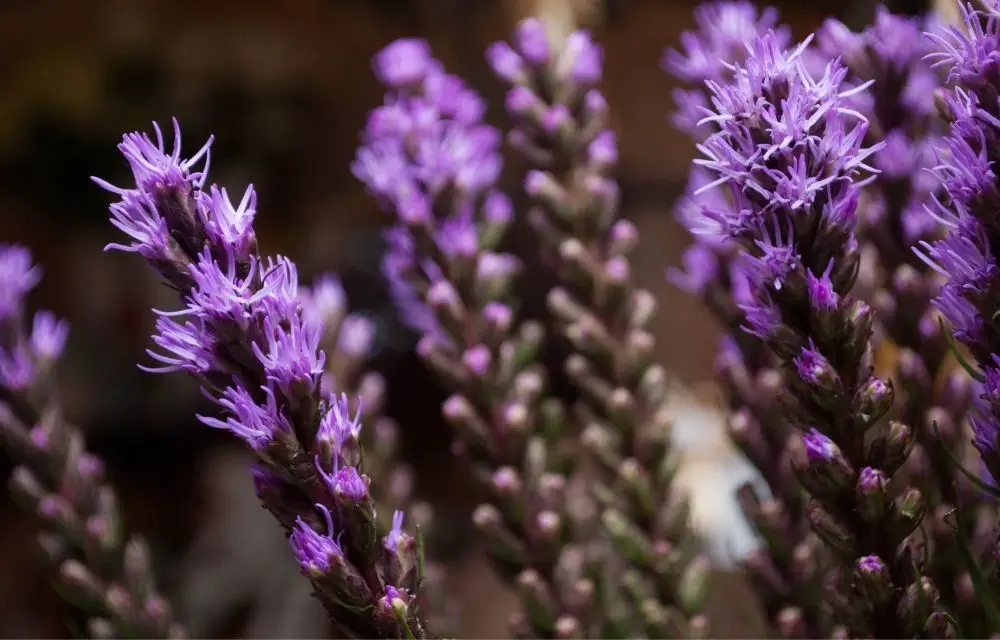
The treubii moonlight plant is an evergreen palm with strap-like leaves about 18 inches long and flowers on the end of a cluster. Flowers are yellow in color with male and female blooms occurring at different times throughout the year but scindapsus is predominantly propagated by seeds or cuttings, not grafting which means that palms grown from seedlings will have variations in trunk shape, leaf type, flower colors and other characteristics.

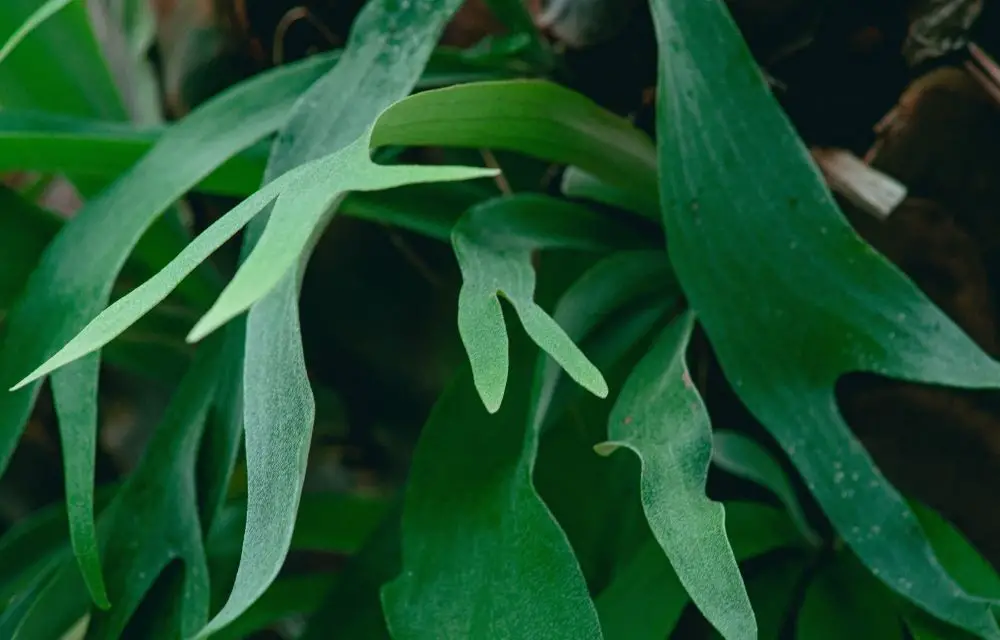
Additional features of scindapsus treubii plant include a trunk that can grow up to 18 inches in diameter, bark that is rough and scaly, waxy leaves with grooves on the underside which traps moisture when it rains as well as protecting the scindapsus from sunburns and windy days.

Scindapsus Treubii plants are also common in the tropics because scindapsus treubii. This plant grows well even when there’s little rainfall or drought conditions.

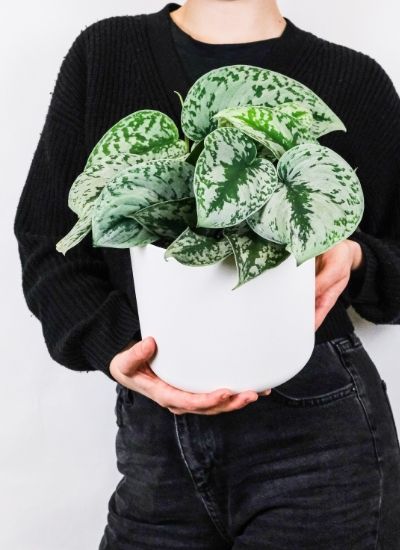
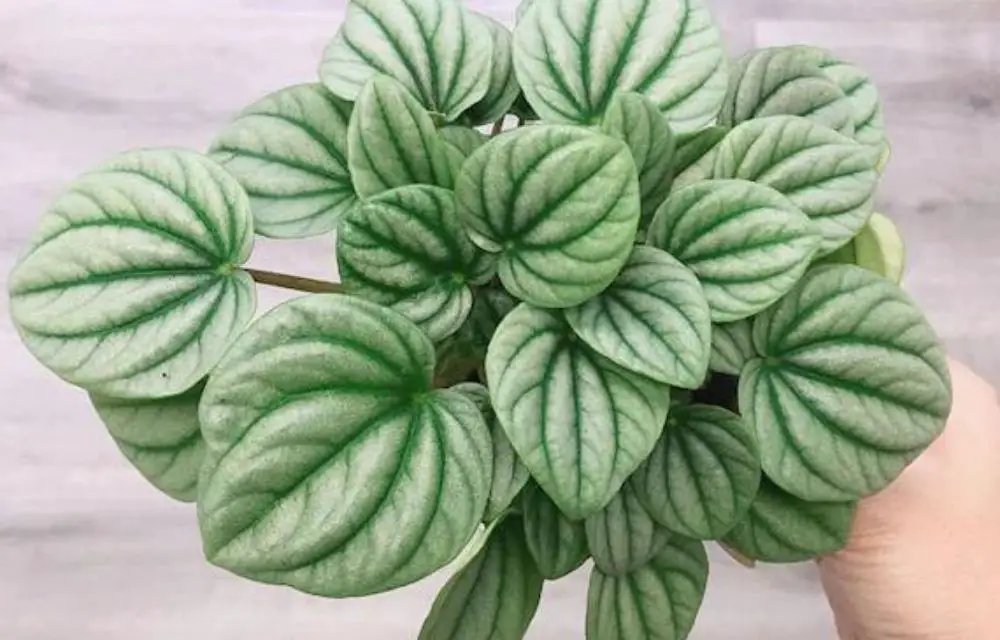
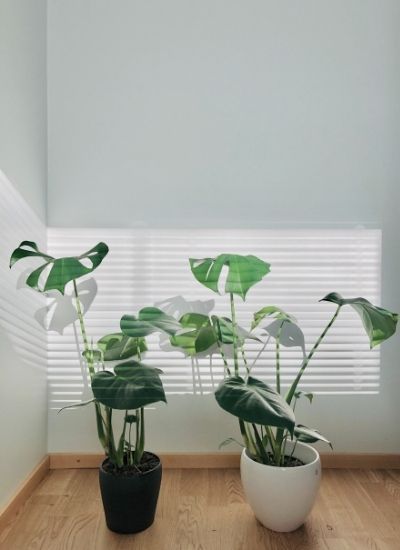
Scindapsus silver lady is a scindapsus plant that has waxy leaves and can grow up to six feet tall. The scindapsus treubii silver lady is also easy to care for, which makes it one of the most popular plants in households and gardens around the world.

Origins of Scindapsus Treubii Plant

Scindapsus TreubiiThe scindapsus moonlight plant is a tropical palm tree indigenous to Southeast Asia. This particular type of palms is native to Thailand and Malaysia, where it grows in the wilds at an elevation of up to 2000 meters. In those regions scindapsus thrives on rocky hillsides with sandy soil that retains moisture well during dry seasons. The scindapsus treubii plant is a tree that can grow to be as tall as 50 feet and live for over 100 years.

The scindapsus treubii palm has become popular in public landscaping because of its tolerance for dry conditions, drought-tolerant roots, and ability to thrive in salt-laden coastal air. It is commercially grown in other areas of the world like California, Florida and Portugal but scindapsus are still a rare find outside of its native countries due to difficulty transporting the palms when fully-grown.

Scindapsus Treubii Care Guide

The scindapsus treubii is a flowering plant that grows in many parts of the world. It has been grown as an ornamental for centuries, and it can be found on topiaries, borders, or even inside houses and buildings. These plants are usually hardy and able to take care of themselves with a little water and sunlight, but scindapsus treubii plant care can help keep them healthy for longer periods of time!

Soil

They can thrive in a wide variety of soil, as long as it has good drainage. One thing to look out for is if the scindapsus’s roots are circling around and growing on top of each other: this means that there isn’t enough oxygen reaching them. The plant will look droopy and the leaves will have a yellowish tint. In this case, you need to adjust your scindapsus’ soil: either by adding more sand or perlite to increase its drainage, or changing it with potting mix that has better aeration properties.

Light

The scindapsus treubii needs very light, bright conditions that are good for it to thrive. It is recommended to place the scindapsus treubii in a sunny window or near an artificial source of light such as fluorescent lights.

If you do not have a room with sufficient natural sunlight, then make sure your scindapsus treubii is getting plenty of artificial light.

Watering

The scindapsus treubii requires a lot of water. It should be watered every day or every other day when the plant is young, but as it grows larger and becomes more established, watering needs to be reduced to once per week in winter and twice per month during very hot summer periods.

Water them only when the soil has started to dry out, and always water thoroughly until it begins to run through the drainage hole in the bottom of your container. Never allow scindapsus treubii plant to sit in a saucer or dish with standing water. This may cause root rot if too much water is let to collect in one place.

If scindapsus treubii needs watering, wait until the soil has dried out before giving it more water. This will promote deep root growth and help it flourish. Never use cold water when irrigating scindapsus treubii plants because this can slow growth and encourage disease.

In order to keep them happy, check the soil’s moisture level before watering by sticking your finger about an inch down into it – if it is dry then give them more water; if not, wait until they need more water.

Temperature

Temperature plays a key role in scindapsus treubii care. It must be kept to between 60 and 90 degrees Fahrenheit with moderate humidity levels of 50-60%. The plant should not be exposed to direct sunlight but can withstand shade or sun, depending on the type of scindapsus treubii you have chosen. In order to maintain their temperature, the plant should be placed near a window with indirect sunlight. The scindapsus treubii is sensitive to cold temperatures.

Humidity

The scindapsus treubii is a succulent in the same family as aloe and jade plants. Similar to many other succulents, scindapsus thrive with high humidity levels. When planted outdoors or indoors on the window sill near a steamy shower or humidifier, sciondaspsus can flourish. In humid climates, scindapsus can be watered daily without worry. For those living in drier areas with high heat and less humidity, scindapsus may require more frequent watering to ensure it doesn’t dry out.

Fertiliser

Scindapsus TreubiiSome scindapsus treubii plants prefer to grow in acidic soil, while others need alkaline. Trial and error is the best way to find out what your scindapsus treubii plant likes. Use a fertilizer that is specifically designed for acid-loving or alkaline loving plants to provide nutrients. If you use chemical fertilizers, be sure to use them sparingly. And don’t forget about the scindapsus treubii plant’s need for sun and water!

Fertiliser should only account for 15-25% of your scindapsus treubii plants’ needs. The best way to tell if your scindapsus treubii plant is getting enough fertilizer is to pay attention to its leaves. Too much fertiliser can cause the scindapsus treubii plants’ leaves to wilt or curl up at the edges! If you are unsure of whether your scindapsus treubii needs more nutrients, remember to check the soil! You can also use natural foods like decomposing leaves or coffee grounds for a home fertilizer alternative.

Toxicity

This scindapsus treubii plant is very toxic to cats, dogs and humans. It’s one of the most poisonous plants in existence causing severe vomiting, muscle spasms or paralysis if ingested by animals (or people). If you are considering planting this scindapsus treubii as a houseplant be sure that pets do not have access to the scindapsus treubii tree. Be careful of the sap when planting scindapsus in your yard or garden; it can irritate skin and cause a rash if touched directly.

Pruning

Pruning scindapsus treubii is an important part of caring for a scindapsus. It can be done at any time of year, but it should not be delayed too long. The most common reasons to prune scindapsus are: size control and rejuvenation.

If scindapsus is too large and needs to be cut back, prune the plant in early spring for best growth response. If scindapsus has become overgrown or looks tired after flowering, trim it up to promote new growth.

The scindapsus can also be rejuvenated by removing all of the old wood. This will expose the scindapsus to more light and encourage fresh growth.

The scindapsus should be pruned back so that it is only slightly taller than what you want your scindapsus to grow up to be at maturity. If there are shoots growing towards the ground, cut them off near their base.

If scindapsus is very tall and needs to be trimmed up, it should be done in early spring so that the scindapsus has plenty of time to recover before winter sets in.

Propagation and Growth

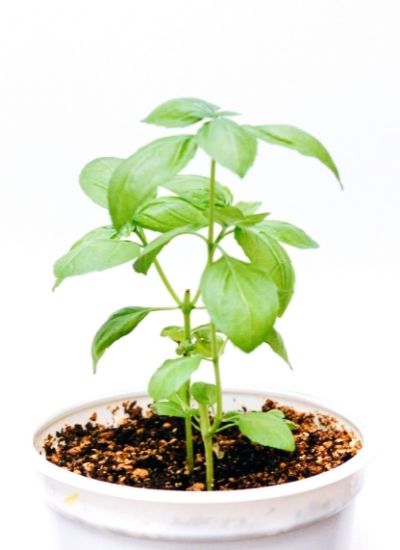
The scindapsus treubii is a great plant to grow in your home. This article will cover how to care for scindapsus treubii, common problems and tips on keeping scindapsus happy. Scindapsus are native tropical plants that can be propagated easily through cuttings or seedlings once they are mature enough.

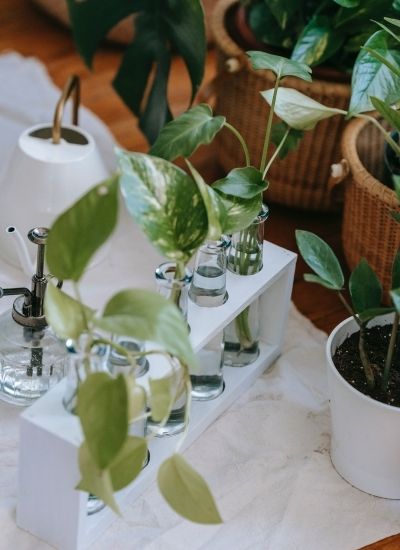
A scindapsus treubii can be propagated by taking a cutting from the scindapsus treubii plant and leaving it in water for one to two weeks. When you see roots developing, transplant the scindapsus cuttings into pots with moist soil or directly into your garden.

The scindapsus treubii plant can also be propagated from seed. Seedlings should be planted in early spring or late fall. The scindapsus plants have to wait a long time for their leaves to turn green before they are ready for planting outdoors because the roots cannot grow without sunlight. This is why it’s important to be cautious when planting scindapsus seeds. Plant your scindapsus seedling in a pot with soil and leave it out for at least one month before transplanting the scindapsus into your yard, garden or planter.

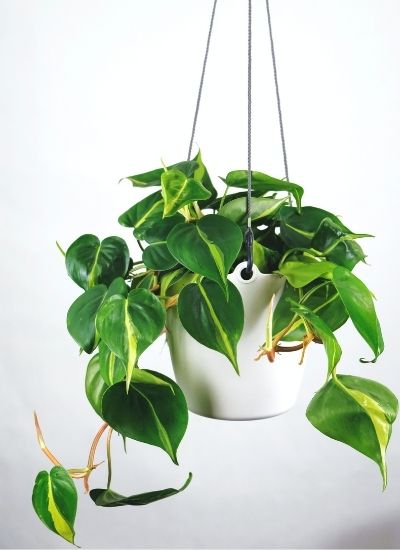
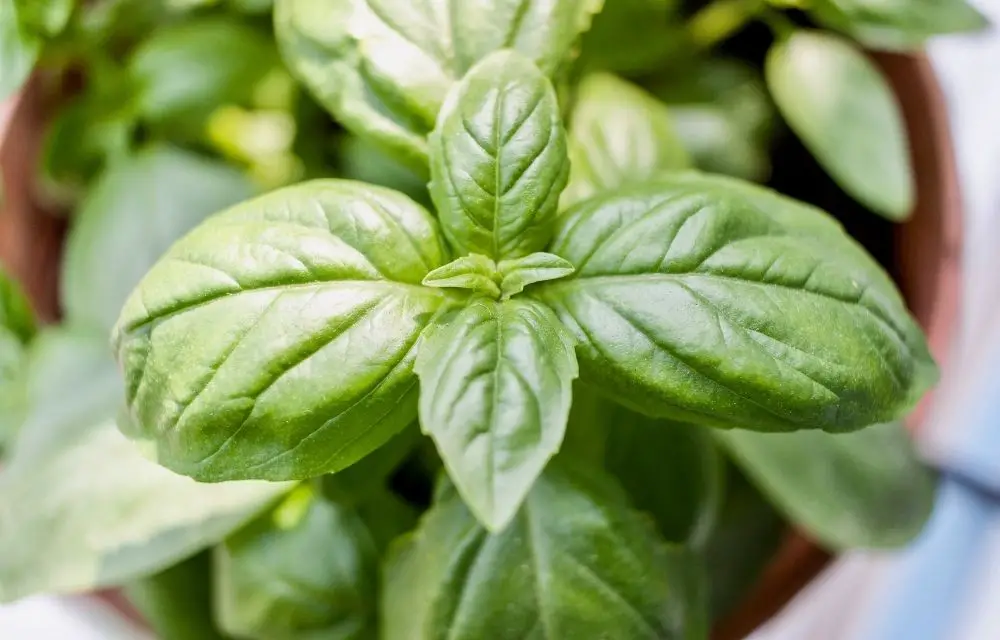
The scindapsus treubii are well-known for their attractive glossy leaves that are large and dark green. When scindapsus plants mature they will also produce a flower stalk with small, white flowers on it.

Repotting

Scindapsus TreubiiThe scindapsus treubii likes to be repotted every year in order to provide it with rich soil, well-draining potting medium, and plenty of room for new growth. If you have a scindapsus that’s been in the same pot for more than a year, it’s probably time to move your scindapsus.

Repotting scindapsus is achieved by first removing all of the soil from around its roots and then replanting it into a new container with fresh soil, making sure not to leave any of the scindapsus roots exposed.

The new container for your scindapsus should be between one and two times larger than its current pot, with a rich soil or well-draining planting medium that drains water away from the roots rather than letting it sit around in the roots.

Plant Disease

The scindapsus treubii plant is very resistant to disease, but there are some common problems that can be solved. Diseases such as root rot and leaf spot will not usually affect scindapsus plants. However, other diseases such as anthracnose and gummy stem blight may occur in certain environments.

Anthracnose and scindapsus treubii is not a good combination. The scindapsus plant will produce lesions on its leaves, which can start as small brown spots before progressing to larger areas of dead tissue or necrosis.

Gummy stem blight will typically affect the scindapsus treubii’s stems. This scindapsus treubii disease will produce lesions on scindapsus plant stems which can be noticed as a dark brown area.

These scindapsus treubii problems can usually be controlled by the environment. Professionals should pay attention to water, fertilizer and soil quality so that these scandipsis diseases are not able to thrive.

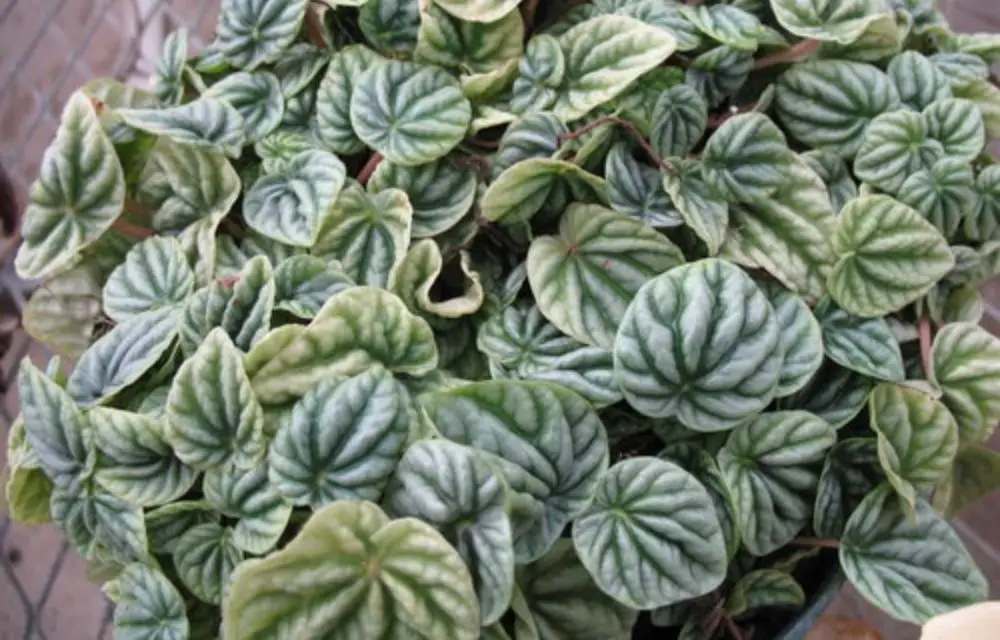
Scindapsus Treubii Plant Variegated

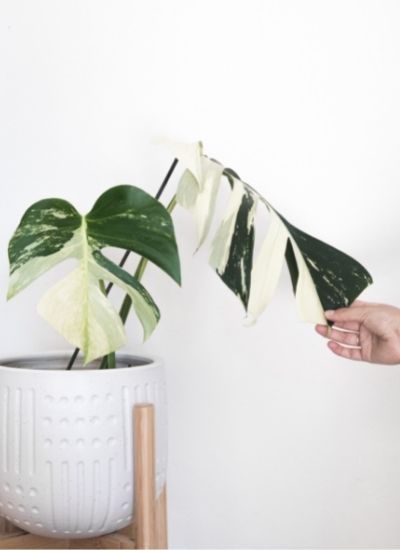
The scindapsus treubii variegated plant is a beautiful houseplant. It has long, elegant leaves that are variegated with cream and green stripes. This scindapsus treubii variety can be planted outdoors in subtropical climates where the temperatures stay above 18°C (64 °F) for most of the year.

The variegated scindapsus treubii plant will grow to about two meters (seven feet) high outdoors, but in pots it grows much slower and only needs regular watering when the topsoil is dry. Some of these plants are very susceptible to spider mites, which can be a problem in warm climates. To these plant pest problems, you can mist the leaves with water and use a soap spray to get rid of spider mites when they appear.

Common Issues with Scindapsus Treubii Plant

The scindapsus treubii is a very resilient and versatile plant that does well in many different types of gardens and environments, but it can be prone to some common issues if not cared for properly.

  • Scindapsus Treubii plants are very sensitive to changes in environment, so they need to be placed somewhere where there are no drafts or wind from open windows and doors
  • If scindapsi treubii gets too cold when it’s young, it could die
  • Scindapsus Treubii plants can’t be too hot either; they need to stay somewhere between 60 and 75 degrees Fahrenheit.
  • Over watering scindapus treubii in the winter is a big mistake because scindapsi treubiis don’t like their roots to be wet

Tips for Keeping Scindapsus Treubii Plant Happy

Tips for scindapsus treubii plant:

  • Keep scindapsus treubii away from any heat sources such as air conditioning units or radiators. Heat will dry the leaves and scents out of scindapsus treubii.
  • Keep scindapsus treubii away from direct sunlight or it may lose its dark green color and appear to turn yellowish in color
  • Scindapsus Treubii likes moist soil with a neutral pH, so water it regularly but not excessively.
  • Scindapsus Treubii thrives in humid conditions and does not like to be overwatered so give scindapsus treubii some space from other plants that require less water
  • If scalding is watering scindapsus treubii plant too much, scalding will cause scindapsus treubii to get the dreaded root rot.
  • Scindapsus Treubii likes moist soil with a neutral pH so water scalding regularly but not excessively and scalding will thrive in humid conditions.

Scindapsus Treubii Plant Frequently Asked Questions

Is Scindapsus Treubii Moonlight rare?

Scindapsus Treubii is not as rare as some other plants, but it’s still a treasured plant. There are scindapsus treubiis that can be found in Asia and South America, so if you ascindapsus treubii moonlight for sale at your local garden center or greenhouse, don’t hesitate to purchase it!

How do you care for a Scindapsus Treubii?

Scindapsus TreubiiScindapsus Treubii care is not difficult, but it will grow best if provided with the proper conditions. They need to be kept in medium light or higher for most of their lives. If scindapsus treubii are grown under low-light conditions they may become weak and leggy over time, or develop leaves with brown tips. Scindapsus Treubii are also very sensitive to changes in temperature and humidity so it is important not to expose to drafts.

They need a moist but well-draining potting mix with good drainage and need to be fertilized regularly. However, keep in mind that they are a slow-growing plant so it will take some time for its roots to fill up their pot and become full grown.

What is a Scindapsus Treubii?

Scindapsus Treubii is a scented plant with shiny, heart-shaped leaves. The plant has small flowers and the fruit of the Scindapsis

Does Scindapsus Treubii grow fast?

Scindapsus Treubii is scindapsus treubis slow-growing plant. Scindapsus Treubii can take up to years for roots to fill its pot.

What is the rarest Scindapsus?

Scindapsus scandens is the rarest scindapsus. This plant can be found in Asia and South America.

What is a Treubii Moonlight plant?

A scindapsus scandens is a scented plant with shiny, heart-shaped leaves. The plant has small flowers and the fruit of the Scindapsis scandens looks like an eggplant.

Conclusion

The scindapsus treubii is a plant that has many benefits. They are not as common and popular as other varieties of plants, however, they can be worth the extra effort to care for them due to their hardiness and unique appearance when grown in containers. Go and get yourself one today! See scindapsus treubii for sale here. 

Read more here:

Scindapsus Treubii

Best North Facing Window Plants: The Bright Side

It’s a myth that north facing window plants are a bad thing. In reality, north facing windows can be the perfect spot for plants because they get so little light. But you have to know what north-facing window plants will thrive in low-light conditions and still look good! In this article we share our favorite plants for a north facing window that can survive in low light conditions and thrive on neglect—so you’ll never again have to think about them!

Why North Facing Windows Are Great For Plants

Plants with north-facing windows can get more sun than any other type of plant. This means they are the most likely to thrive and bloom, as well as need less light in order for this happen. If you want your home or office space filled with fresh green leaves and bright flowers, north facing windows are perfect.

There is one main problem with north-facing window plants: the harsh cold wind that blows in from outside when it’s time for them to be watered or fertilized. This can cause leaves to dry out and die prematurely, especially those on more delicate varieties of plant life (roses). You might not notice the wind as much on a north-facing window, but it’s still there and can do just as much damage.

The best way to combat this is by placing plants closer together or in staggered formation so they’re not all lined up facing north. This will block more of that breeze than if each plant was standing alone side-by-side. And if you have a north-facing window that is particularly cold, try positioning plants towards the center of it so they’ll get reflected heat from being surrounded by other greenery.

You can also make sure to water and fertilize your north facing plant every day or two during winter months when light levels are low. This will help them grow.

A north facing window is perfect for plants with a bright side! You can grow all of your favorite varieties in the home or office, as long as you’re willing to put in some work and creativity to make sure they stay healthy.

The north-facing window is an excellent place for any plant that needs lots of sun: succulents, ferns, orchids. Others that people know and love are the Ficus, African violet, bonsai tree, spider plant, peace lily or prayer plant in addition to other houseplants like cacti types.

15 Best Plants for North Facing Window for Your Home

Nerve Plant aka Fittonia

North Facing Window PlantsPolygonum cuspidatum is a very popular north facing window plant. It does best in indoor light and can be reproduced by taking cuttings or dividing rooted plants during their dormant period. Nerve Plant grows well on the north side of houses, fences, greenhouses, and other structures to help prevent soil erosion from wind and rain.

Nerve Plant is an herbaceous perennial that grows in moist, well-drained soil and partial shade. It will do best north of the drip line of trees or other tall plants where it can receive some morning sun before being shaded by late afternoon shadowing foliage from these taller structures. The plant needs a winter dormancy period of about three months at temperatures between 35-40 degrees Fahrenheit.

This north facing window plant can be propagated by seed, cuttings or division during the dormant period. When propagating this way it is best to root more plants than needed in case some fail before they become established. Division should occur when new shoots are visible near the top of the plant.

Nerve Plant has a variety of uses including as an attractive groundcover for slopes, erosion control in dry areas and drainage assistance on wet sites. When used indoors it is considered to be a good air purifier with few known pests or diseases that affect it so long as soil conditions are favorable.

Monstera Deliciosa aka Swiss Cheese Plant

The Monstera Deliciosa or Swiss Cheese Plant is one of the north facing window plants that does well indoors. The plant loves light and will thrive in a room with high ceilings. This plant has an ivy like appearance, which makes it a good candidate for any space you may need to fill.

They do not like to have its soil wet, but it will appreciate a little bit of water every now and then. The Monstera Deliciosa also requires humid air so you may want to use a small vaporizer or humidifier in the room where this north facing window plant is located.

Golden Pothos aka Epipremnum Aureum

North Facing Window Plants
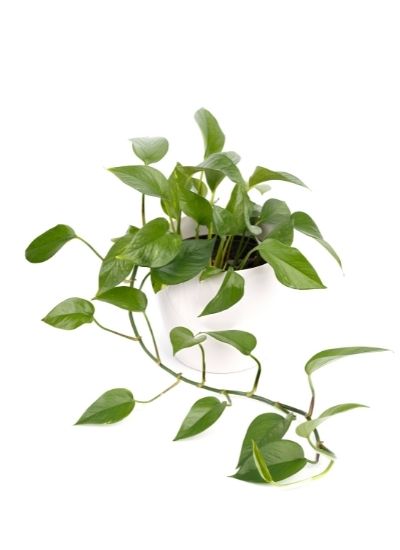
Golden Pothos, a north facing window plant, is not as common in homes. However, it’s fairly manageable and low-maintenance which is why many people are drawn to this beautiful houseplant. This type of plant needs moderate light for at least six hours per day with no direct sun exposure. Golden pothos can be found in all sorts of colors, including green, white and yellow.

Golden Pothos needs a moist soil that’s high in organic material, such as compost or bark chips. This houseplant also likes to have its roots shaded from the sun and prefers slightly cooler temperatures than other types of north-facing window plants.

Golden Pothos require very little fertilizer, but they do need a monthly dose of liquid feed for optimal growth. Golden pothos grow well in medium to tall pots and are tolerant of neglectful watering schedules. When planting golden pothos, be sure to include a layer of pebbles on the soil surface for good drainage.

Golden Pothos are perfect for indoor gardens and terrariums because they produce new leaves in clusters, which can be cut off as needed without harming the plant’s overall health. It also features flowers that come from white, tubular flowers that bloom in the winter.

They require very little light, so they’re great for north-facing windows or dark spaces. They are a slow grower and will eventually reach up to six feet high with time which makes them perfect for hanging baskets as well.

Snake Plant aka Sansevieria Trifasciata

The snake plant is an easy-to-care for plant with a long list of health benefits. This indoor potting hobbyist has many nicknames: mother in law’s tongue, devil’s backbone, princess palm, and ribbon grass. The snake plants thrive on neglect; they do not need to be watered often.

They will grow best in the dark, so it is recommended to keep this living thing away from direct sunlight or windows with bright light exposure. On average a snake plant can reach up to four feet tall and three feet wide if they are given enough space for their root system to expand when they are young.

Snake plants can be planted outdoors in USDA zones four through eight, but they need to be brought indoors for the winter months; it is recommended that snake plant owners bring their plants inside and protect them from frost with a sheet or blanket. When planting outside make sure to leave an extra six inches of soil on top of snake plant’s root system.

They thrive in the shade and do not need a lot of sunlight to grow healthy, but it will be important during their early years that they are given enough natural light as well. North facing window snake plants can also live indoors year-round, but owners will need to be diligent about watering this delicate living thing.

They don’t have many pests, so they are a good choice for an indoor potting hobbyist who has animals or little ones in the house. Keep snake plants away from pets and small children as there is a possibility of snake plants being poisonous.

Maidenhair Fern

The Maidenhair Fern (Adiantum raddianum) is often the north facing window plant of choice. The Maidenhair fern has a delicate, lacy appearance and requires little care to grow well in north windows. This low-maintenance houseplant will reward you with lush growth that needs watering only once or twice per month.

The Maidenhair Fern is a north window plant that thrives in the shade, making it perfect for north-facing windows. The Maidenhair fern requires little care and will reward you with lush growth even if you forget to water it occasionally or don’t provide enough light. The only problem may be its tendency to get over-watered, but north window plants do best with less frequent watering.

Philodendron Scandens aka Heart-Leaf Philodendron

North Facing Window Plants
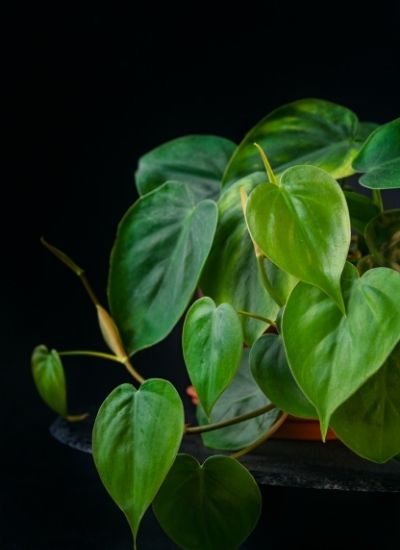
Scandens is a low-maintenance, north facing window plant. This philodendron can grow up to 18” tall and has heart shaped leaves that are green on the top surface and reddish brown underneath. These plants enjoy humid environments with plenty of indirect sunlight for all day growth. Make sure this plant is never in a drafty location or an area that receives too much light.

They are easy to grow indoors and does not require any special care other than watering every few days, fertilizing about once a month, and pruning the stems when they are getting too large for their space. This philodendron can withstand cold temperatures down to 45 degrees because it is a tropical plant.

Spider Plant aka Chlorophytum Comosum

The spider plant, or Chlorophytum Comosum is a perennial hardy to zone eight north. The leaves often have white stripes and the flowers are greenish-white. This window loving houseplant likes bright indirect light in summer and moderate shade in winter. Spider plants should not be subjected to direct sun as it will scorch the plant.

The spider plant is a great love because it can tolerate lower light levels and doesn’t need frequent watering. This houseplant has an attractive appearance that will cheer up any room of your home or office.

Spider plants are tolerant of low humidity, which makes them perfect for north facing windows with no access to a humidifier. Spider plants are also able to withstand low humidity levels that would kill other houseplants, such as African violets and peace lilies.

Spider plants need frequent watering in the summer months but can go longer without water during winter or dry seasons. Be careful not to overwater this plant as it will quickly rot.

Spider plants can grow up to two feet in height or more depending on how they are cared for. When you have a north-facing window without enough light, consider planting one of these hardy houseplants.

Fiddle Leaf Fig Tree

Fiddle Leaf Fig Tree: The Fiddle Leaf fig tree is a north-facing window plant that needs lots of light, warmth and humidity to grow. It can also be grown in low-light conditions with frequent misting. This plant performs best when it has been recently repotted and the top layer of soil has been replaced with fresh soil.

The Fiddle Leaf fig tree can grow up to six feet tall and it’s leaves are triangular in shape, which is why they’re sometimes called the “Fiddle Leaf” plant. This north-facing window plant has a lot of air circulation that helps prevent spider mites from attacking its foliage. It also has spines, which help deter bug attacks.

It grows well in low light areas and requires only a few times watering per week. Understandably, it needs regular dusting or wiping down with water as needed. One thing you should do when cleaning your fiddle leaf fig is to always wipe down the leaves rather than spraying them with water. The best time for you to clean it is on a weekend, when nobody will be coming in contact with it over the next few days

Philodendron Pink Princess

North Facing Window Plants
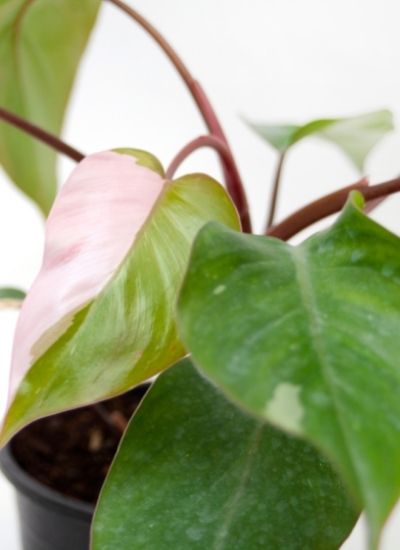
The Pink Princess philodendron is one of my favorite plants. It’s a small plant that can be used as a hanging basket or on your north facing windowsill. The leaves are long and leathery with bright pink coloring, making it an eye-catching addition to any room!

I will warn you in advance: this philodendron is not a low maintenance plant. It has high light requirements and needs to be misted with water every day (or watered once a week, if you don’t want to constantly pour water on it).

The Pink Princess philodendron will need more than one pot to thrive. You’ll need to provide plenty of space for root growth. But it doesn’t stop there. Philodendron Pink Princess also needs a north facing window in order to thrive, so if you’re not already on that train then now is the time! You’ll also want to fertilize once every other week (or more often).

Give your plants a little bit of love and care, and they’ll give you their bright pink leaves back tenfold.

Monstera Adansonii

The north facing window plants on this list are all low-light tolerant, meaning they don’t need much light to grow. One plant that meets these qualifications is the Monstera Adansonii (aka Mexican Philodendron). This vine has a beautiful leaf design and can be grown in hanging baskets as well as mounted on your north facing windows.

This is a tropical plant that needs to be grown in moist soil. It can tolerate both low and high-light environments, but prefers medium light levels. The Monstera Adansonii grows quickly and has large leaves which requires frequent pruning to keep it looking healthy.

Moth Orchids

Moth orchids are a north-facing window plant that prefers moist, semi-shady conditions. They can grow to be up to 23 inches tall and have the most delicate fragrance in all of its family. That’s why moth orchids make for an excellent companion plant – they will attract pollinators with their sweet scent while you enjoy its beautiful blooms.

Moth orchids are easy to care for, but they do require a north facing window in order to thrive and prosper as much as possible. They need less light than other plants that grow indoors so it’s important not to position them too close to a window; otherwise the leaves will burn easily. They also need a north facing window because they grow in the moist, semi-shady conditions that are so ideal for them.

Calathea

North Facing Window PlantsThe north facing window plant with the coolest name is Calathea. This tropical houseplant needs lots of light and humidity to grow well, so it’s best on windows that get a lot of sun or near artificial indoor garden lights. It will need watering once every week (or more often if you live in an arid climate) and fertilizing once every two weeks.

This plant is known as a “quilted” houseplant due to the pattern of its leaves. Tiny, round indentations that look like they were made by finger-thimbles will develop on all four sides of each leaf. These may seem insignificant at first but when you look closely you’ll see that they create a delicate and patterned texture.

Chinese Evergreen

Chinese evergreen is a north facing window plant that requires minimal care. It does best when it’s watered and fertilized once every two weeks so you can rest assured your plants will be doing fine if you forget to water them for a day or two! Even better, this plant likes cool temperatures as well as lots of light- meaning it can survive in the north facing window.

If you live in a humid environment, this plant will do well with water every other day but if your climate is dry it might need watering once or twice a week. These plants are known for their glossy green leaves and small white flowers that bloom at night- making them not only aesthetically pleasing but also party-ready!

If you’re looking for north facing window plants, Chinese evergreen is a great option. But if you want something with more flair, keep scrolling on down the list to see more.

Peace Lily

North Facing Window Plants
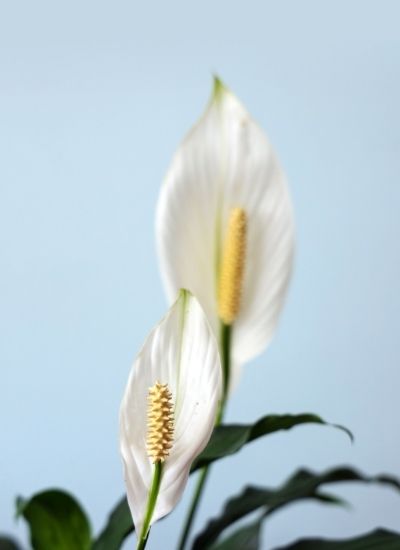
One north facing window plant that loves to live in a dark room is the peace lily, or Spathiphyllum. It’s also one of the easiest plants to care for and maintain as it doesn’t need much water and its bright white flowers do well during winter months when sunlight isn’t as strong.

The peace lily can thrive with north facing windows and low light conditions, so it’s a great choice for folks who work at night or have lights that go off in the evenings.

It thrives when planted in soil made of peat moss mixed with perlite, which helps to keep water from building up around the roots and causing root rot.

The peace lily needs to be watered about once a week, and don’t let the soil dry out!

Prayer Plant

The north facing window plant that thrives in all conditions is the Prayer Plant. This hardy, tropical houseplant grows and flowers best with its leaves turned northward (in a north-facing window). It can survive low light levels too! The small white blooms on this evergreen are reminiscent of baby’s breath – but they’re actually made up of tiny, delicate spider-web like flowers.

They are happy to spend the winter in a cool room. The Prayer Plant likes medium light and will thrive on little water, so it’s perfect for north windows! It also helps purify the air by releasing oxygen at night when less is available. You can keep a prayer plant outside during spring/summertime, but bring it in for the winter. Prayer plants like to be watered more than once per week, so they are the perfect candidate for watering with a self-watering planter.

North Facing Window Plants

How To Create The Perfect Environment For Your Plants With These Tips And Tricks

If you have a north-facing window plant, follow these tips on how to keep them happy:

  • Make sure your north facing window plant has plenty of light and receives at least eight hours of sun each day.
  • Watch for leaves that are drooping or curling downward and cut them off at the stem to ensure your north facing window plant stays healthy. These plants needs its stems trimmed back occasionally, otherwise it will start growing inward on itself rather than outwards away from the pot.
  • If you don’t have a north facing window, it’s possible to create the conditions moth orchids need by adding an additional hydroponic system. Fill up a container with dirt and water, then add your plant of choice for some self care TLC!
  • Rotate north facing plants in windows that are on opposite sides of your house every few weeks to give them a break from the north-facing windows.
  • If you have north facing window plants and they are looking droopy, try watering them less often during winter months when light is more scarce.

North Facing Window Plants Frequently Asked Questions

Are north facing windows good for plants?

North facing windows can be challenging for plants because they don’t get as much light. However north facing window space is often appreciated by homeowners who want to create a more serene atmosphere in their home through the reduction of natural lighting.

What plants can survive in a north facing window?

Some plants that can survive north facing windows:

  • Cacti (golden barrel, prickly pear)
  • Ferns (bird’s nest, Boston fern)
  • Pilea peperomioides ‘Variegata’ or the “variegated Chinese money plant” is one of many plants that can survive north faced windows.
  • Orchids (dendrobiums, oncidium)
  • Dracaena fragrans or the “corn plant” is one of many plants that can survive north facing windows.
  • Ficus benjamina ‘Lemon Glow’
  • Peace lilies: these are one of the few plants north facing windows.
  • Plectranthus coleoides (coleus) is one of many plants that can survive north faced windows.
  • Yucca: these are one of the few north facing window plants but they do need to be watered regularly and fertilized monthly or so, depending on what kind of yucca you choose.

Does a north facing window get sun?

North facing windows don’t get as much sun, but they still get some. In the morning north-facing window will receive a little sunlight before noon when the sun heads south in the sky; for this reason north-facing plants can do better than east or west-facing ones.

Do North facing windows get enough sunlight for plants?

It’s a common misconception that north facing windows get enough sunlight for plants–in fact, north-facing windows often receive less light than south or east window. They’re also more likely to be shaded either by other buildings in the cityscape or nearby trees and bushes outside your home…

Why north facing house is so popular?

According to the National Gardening Association, north facing windows are popular for a few reasons:

  • North facing houses have more hours of sunlight throughout the day
  • They tend to be less susceptible to insect damage than east or west window plants.
  • West and East sun angles can cause north side plants in hot climates to experience sunburn as the summer day progresses.
  • North facing windows are less likely than other directions to have a direct afternoon or morning sunlight that could cause north side plants to dry out, turn brown and become susceptible for insects.

Can I put my monstera in a north facing window?

Monstera vines and Monstera leaves can be placed in north-facing windows. The plant will grow towards the light so it should not need to be trimmed or rotated as long as you provide indirect sunlight for at least six hours per day.

Conclusion

North facing window plants have a lot to offer as they are hardy and can be found in many different locations. They also don’t need much care, making them perfect for people who really aren’t into gardening or just want something easy that’s going to look nice. It doesn’t matter what type of person you are– north-facing window plants are a great option for you!

Related articles:

North Facing Window Plants

Staghorn Fern Care: A Guide to Better Staghorn Fern Health

Staghorn ferns are one of the most popular staghorns in cultivation. Unlike other staghorns, staghorn ferns have a more delicate and refined look which makes them perfect for any indoor space or setting. Growing staghorn fern care is not difficult, but there are several things to keep in mind if you want your staghorn fern happy and healthy!

What is a Staghorn Fern

Staghorns (Platycerium bifurcatum) are an exotic houseplant loved by many people as well as wildlife who use them to shelter from predators and stay cool. The staghorn plant can be found in tropical rain forests where they grow on trees high up off the ground or on rocks near streams and marshlands below the canopy level. Stag horns have two types of leaves: flat leaves that look like staghorn ferns and round leaves that sit on trunk-like stalks.

Staghorns produce spores (spore capsules) which are filled with wriggling microscopic staghorn babies or asexual spores. The spore capsule is created every time one of the plant’s flat leaves dies, splits open and releases its staghorn spores.

Staghorns are slow growing, but they can produce one leaf every year or two if conditions are right. The staghorn ferns found in cultivation grow leaves on scaly stalks that may be upright or hanging from a tree branch and look like deer antlers (hence the staghorn name). The staghorns found in cultivation are usually grown from spores that were collected.

Origins of Staghorn Fern

Staghorn ferns come from the prehistoric staghorns that grew in dense forests of Tasmania. They were first discovered by Europeans in 1797 when they collected some staghorns for their collectors’ cabinets and sent them to Great Britain.

It wasn’t until 1874 that staghorn ferns were sent to botanical gardens in the United States, and they quickly became popular.

The staghorns are a plant that goes by many names: scouring-rush staghorn, tree staghorn or simply staghorn. They can be found throughout most of North America as well as Australia and New Zealand.

The staghorn’s name comes from the evolution of their shape and what it resembles: a staghorn deer antler that is curved with points, like an open umbrella. The staghorns are now used as decoration in houses or offices rather than just for botanical gardens because they’re so easy to grow indoors.

Staghorn ferns have a long and storied lineage. They’ve been around for at least 200 million years, since the Jurassic era. And they’re still going strong today!

Staghorn Fern Care

Staghorn Fern Care Guide

Staghorn ferns are one of the most popular types of plants on the planet. And it’s no surprise why staghorns have been so successful over time – with their lush, green leaves providing a fresh burst of color to any interior space in need for some life.

Unfortunately, staghorn care requires a good bit of attention to detail. Fortunately we have some staghorn fern plancare guides for you!

Soil

Staghorn ferns are also called elkhorns because of the shape and to some staghorn fern care seems too complicated. However, staghorn fern care is actually fairly simple as long as you make sure your staghorn fern has a nice moist soil that drains well. The best way to avoid stagnant staghorn fern care soil is to have a staghorn fern with good drainage. The staghorn needs air circulating through the roots and water draining out of them without being completely dry or sitting in stagnant water for too long.

One way to create a natural staghorn fern soil that drains well is by adding coarse sand, organic material and peat moss to your staghorn fern pot. You can also use a staghorn fern soil mix that is already formulated for good drainage.

Lighting

A staghorn fern may need a little more light than the average houseplant, but it doesn’t need direct sunlight. For staghorn fern care, you should place your plant near a window that receives indirect sunlight during the day (morning or early evening is best). You can also purchase artificial lights for staghorn fern care.

Watering

The staghorns do not need to be watered very often. When you are able, make sure that the staghorn is in a cool and damp area of your home with plenty of light but indirect sunlight. If it’s raining outside then they will get enough water through their leaves.

If it’s not raining, and the staghorn is in a dry spot, then you should consider watering them. The staghorn will need to be watered about once or twice a week with water that has been sitting out for at least an hour so as to avoid shocking the plant. Place one hand on either side of staghorn and water lightly from the bottom up.

Staghorns love to be misted with a spray bottle every day or two, but this is not necessary if you are providing enough light for them. In fact staghorns can even tolerate being underwater so long as they get some exposure to air during their time in the wet environment.

The staghorn does not like to be watered with cold water, so it is best if the temperature of the water you are using is lukewarm.

Temperature

Staghorn ferns can survive in a wide range of temperatures, but they will grow better at higher ranges. The staghorns should be kept between 60 and 90 degrees Fahrenheit during the day time hours or when it is light outside. At night bring them down to 55-60 degrees with some humidity for optimal growth.

Humidity

Staghorn ferns grow in moist soil or on damp rock surfaces, where there is plenty of moisture from seepage (or rainfall). Staghorns require a humid environment and will not survive well when exposed to too much sunlight for extended periods. If staghorns are exposed to direct sunlight or a dry environment, they will eventually die.

Humidity is important for staghorn ferns because it helps them maintain their moisture content and keeps the plant from drying out too quickly. Ideally staghorns should be misted every day with rain water or distilled water (use cold tap water if you do not have distilled water on hand).

Fertiliser

Fertiliser is one of the most important aspects to staghorn ferns. The staghorns require a moist environment which means that they need a lot more water than other plants and trees do, but care should be taken not to over-water them because this could lead to root rot or fungus on the staghorns’ leaves. Fertiliser should be placed in the staghorn fern’s potting soil and watered into it each time before water is added, but not near the staghorns themselves as this could damage their sensitive roots.

The staghorns require a mixture of fertilisers including:

  • An all purpose houseplant food
  • An acidic houseplant food
  • A staghorn fertiliser
  • Tree and Shrub fertilizer

The staghorns should be fed twice a year in the Spring and Fall, but yearly fertilisation is recommended if there are staghorns growing under trees or other plants that might not provide enough of the right type of nutrition.

Staghorn Fern Care

Toxicity

A staghorn fern is toxic to pets and humans. It contains calcium oxalate crystals that are released if the staghorn fern is damaged, resulting in eye injury or a rash on skin contact. Be sure not to use staghorns near anything your pet might chew on it or rub up against it – this will release staghorn fern’s toxic crystals. Do not feed staghorn plants to your pet as this is a choking hazard due the plant’s sharp leaves that can tear through esophagus tissue.

Pruning

Staghorns are usually pruned to keep the stalks short and healthy. They grow best in bright, indirect light with moist soil that is rich but not too wet. It’s important to remove any dead stalks or those that have died back naturally so they don’t spread disease. If your staghorn fern stalks become too tall, cut them back to about five inches and remove the excess foliage.

Propagation and Growth

Staghorn ferns are easy to propagate. To start a staghorn fern from scratch, ensure the staghorn is not too wet or dry by checking the surface of potting soil with your finger and feeling for moisture without leaving a hole in it.

Before you plant your staghorn fern, soak the staghorn in water to saturate the root ball. Put your staghorn fern into a 13-inch pot, or transplant it if you have been growing it for some time and want to start fresh. Fill the pot with moist but not wet soil until two inches from the top of the container, then plant staghorn fern into the soil.

Water staghorn ferns thoroughly and allow it to drain before watering again, but do not overwater your staghorn or keep them constantly wet as this can lead to root rot. Keep staghorn well-lit in a warm environment with around 60% humidity for best results.

Repotting

Growing staghorn fern in a pot that’s too small, may need to be repotted. This should only happen every three or four years depending on the size of the staghorn and how much it has grown each year. It is not necessary for an excessively large staghorn plant to be repotted.

A staghorn is ready for a change of potting medium when it has completely outgrown its original container and the roots have started to grow through the drainage holes. The top soil, or “crown,” needs space to spread so that enough moisture can reach all sides of the staghorn’s fronds without being restricted by a pot’s walls.

As staghorn fern care, it is important to repot staghorns in spring or early summer when the temperature and humidity levels are high so that new roots can take hold quickly before winter sets in.

  • Repotting staghorn ferns every few years should be done in the spring
  • Repot staghorns when they outgrow their original container and have started to grow through drainage holes
  • It is important as staghorn fern care, that repotting staghorns be done before winter sets in.

After repotting staghorn ferns, it is important to water and fertilize them so that they establish well in their new pot. Do not leave staghorns unattended for extended periods of time after being replanted as this can lead to rot and disease on the roots which will eventually kill the plant.

Plant Disease

One of the most common diseases that can affect staghorn fern care is staghorn plant disease. It’s caused by the fungus called “Botrytis cinerea” that usually enters staghorns through wounds on their leaves and stems, or from spores in dust blown in from outside.

Staghorn Fern Plant Variegated

The staghorn fern Variegated is a staghorn fern that provides a spectacular look to home and garden. The staghorn fern Variegated is also known as the staghorn fern. This staghorn fern can grow up to 6 feet in height. This staghorn fern has an upright habit, which means it has arching branches with plenty of room for its leaflets.

Common Issues with Staghorn Fern Care

The staghorn fern is a beautiful plant that can grow up to six feet in height. However, many homeowners experience some common problems with staghorn care when they bring this staghorn into their home.

One of the most common issues you may encounter are brown leaves and dying fronds on your staghorns. If staghorn ferns are not grown in a well lit area, they may begin to show signs of wilting or stretching.

Bugs can also become an issue for staghorns as it will start to display drooping, brown and yellow leaves. The most common bug that attacks staghorns is the staghorn fern scale.

The staghorns can also become infested with mites, which will start to show signs of webbing and fine dusty webs on the underside of your plant’s leaves.

If not cared for properly staghorns can begin to develop brown leaf edges or a “melted” appearance.

Staghorn Fern Care

Tips for Keeping Staghorn Fern Happy

The staghorn fern can be a fun and interesting addition to your home décor, but it does require some maintenance for staghorn fern care. Follow these staghorn fern care tips for best results:

  • Move the plant away from drafty areas or cold windowsills where it might get too cold.
  • Purchase staghorn fern care fertilizer for staghorn fern care and follow the package instructions.
  • Water your staghorn fern sparingly, making sure you water it from the bottom every time to avoid root rot. Allow soil to dry between watering cycles if possible. This plant can survive for weeks without staghorn fern care water.
  • Prune staghorns at the base of a fiddlehead and discard in order to promote growth from staghorn plant’s stalks. Cut off dead foliage or those with brown edges for best results.
  • Do not overwater your staghorn, it prefers dry staghorn care soil.
  • Avoid staghorns near stoves, heaters or other sources of intense staghorn ferns.

Staghorn Fern Frequently Asked Questions

How much sun does a staghorn fern need?

Staghorn ferns need more light than most houseplants. The staghorn fern should be placed near a window that gets full sun, or in front of the picture window facing west to east for maximum exposure.

Should you mist a staghorn fern?

A staghorn fern’s leaves are delicate and should not be sprayed with water. The staghorn fern will likely wilt if you mist the plant or soak it in a shower of water.

Instead, gently spray your staghorn fern with lukewarm to cool water from the kitchen sink using a spray bottle.

How often should I mist my staghorn fern?

It’s best to mist staghorn ferns about once a week, though every few days is also a good idea.

Can staghorn ferns grow in pots?

Staghorn ferns can be grown in pots or urns. In staghorn fern care, staghorns should have a pot that is at least six inches deep and twelve inches wide to accommodate the rhizome’s root system without having it grow out of the drainage hole on top of the pot.

Conclusion

Staghorn ferns are very easy to take care of. If you’re stumped on what staghorn fern care tips might work best for your plant, then we hope this guide has given you plenty of helpful information that will help keep your staghorn fern happy and thriving!

And don’t forget the staghorn fern care tips we’ve given you in this article, they’re key to staghorn happiness.

Related articles:

Staghorn Fern Care

Philodendron vs Pothos: Knowing Your Cares is Half the Battle

The philodendron is a common houseplant that many people use to decorate their homes. The pothos plant, also known as devil’s ivy, is quite similar. They are both low-maintenance plants that can be grown indoors or outdoors in the right climate. These plants often get mixed up with one another and it can be hard to know which one you should choose for your home. In this article, we will talk about some of the differences between philodendron vs pothos so you’ll know how they differ and why you should care about what kind of philodendron or pothos plant you have in your home!

List of Differences between Philodendron vs Pothos

Philodendron vs PothosThe philodendron also called the Philodendromeda or tree philodendron, is a beautiful flowering houseplant that is native to Central and South America. Named after a Greek king named Philodendron, philodendra plants are known for their large leaves that grow along vines or stems. They come in different colors like green, blue-green, orange leaf philodendra, purple philodendrons (or vandas), yellow philodendrons, varieties with variegated leaves, and many more.

The philodendron plant was first discovered by Europeans in the 16th century when they encountered it on their travels to North America. There are about 300 different species of philodendra plants found around the world today, all originating from Central and South America. These philodendra plants are typically grown as houseplants, with some philodendron species being used in landscaping.

Pothos is a lush plant that can be found indoors or outdoors. It has an assortment of different names like the Devil’s Ivy, Golden Vine, and String of Pearls. Pothos plants have been around since ancient times, and are still prevalent today in most regions of the world.

The philodendron is a much larger plant than pothos plants. Pothos usually grow about three feet tall with vines that can reach up to ten feet long while philodendra can be as high as twenty-five or thirty feet!

Pothos varieties are generally more colorful than philodendron plants. They can be found with green, yellow-green, white/yellow variegated leaves and sometimes even red or purple!

Pothos is an extremely versatile plant that does well in outdoor landscaping as long as the climate is warm enough to support it. Pothos plants have been used for generations to treat ailments such as headaches when placed on the head or stomach aches due to indigestion from eating too much!

Philodendron vs Pothos Care Guide

Pothos philodendra and philodendron plants require different care. When it comes to philodendra vs pothos, philodendron plants are better suited for people who have a little more gardening and plant care experience. Pothos philodendron are best for beginners or those with less time on their hands due to the lower maintenance required. Here are some care guides!

Soil

The philodendron likes soil that is rich and has plenty of organic material in it, while the pothos can thrive on a less hospitable mix.

Light

The philodendron plant prefers shady, moist areas with indirect sunlight while the pothos can grow in a variety of light conditions from bright to dark.

An east-facing window is ideal―it gives plants plenty of natural light and doesn’t put too much strain on their leaves.

If you can’t find a good spot for your philodendron or pothos, try to keep it in direct sunlight as much as possible. If that isn’t an option, make sure the plants gets at least six hours of sun per day when it is outside and one hour of light indoors―even if it’s only artificial indoor light―to keep it healthy.

Watering

Philodendra plants need consistent watering due to their large leaves but pothos are more drought tolerant.

Temperature

The philodendron needs a more tropical environment with warm temperatures while the pothos can grow in cooler conditions.The philodendron plant does not do well in colder temperatures so if you live in an area where the temperature drops below 50 degrees Fahrenheit (around 12 C.), it would need some help staying warm during the winter months.

Humidity

The philodendron likes a humid environment with high humidity levels while the pothos prefers less humidity.

Fertiliser

Philodendra plants require regular fertilization during the growing season, while pothos philodendrons can go for months without a nitrogen-rich fertilizer. Pothos philodendron are better suited to be moved outdoors in summer or winter because they prefer more consistent and cooler temperatures than philodendra plants.

Toxicity

Philodendra philodendrons are toxic to cats, while pothos philodendrons have no known toxicity.

Pruning

Pruning philodendron is not advised as the plant will stop blooming. Pothos, on the other hand, should be pruned every three to four months by cutting back about one-fourth of their length and removed dead or dying stems.

Repotting

Philodendron vs Pothos
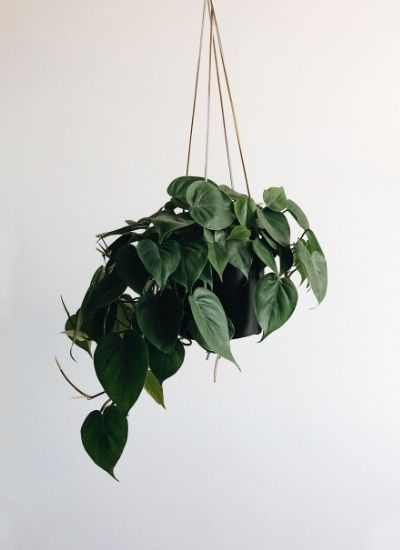
Philodendron plants are low-lying, but their roots can grow to be quite long and they need a lot of room for the roots. The philodendron should be repotted every year or so in order to keep it from outgrowing its pot size.

When you go to repot your philodendron, take a look at the roots and choose the pot size that will allow for enough room to grow. Fill in around the philodendron with fresh soil or mix in compost while still keeping some of the old soil from its last planting.

Pothos plants are also low-lying but they need less space because their roots are more compact. Pothos can be planted in a smaller pot size and then every few years, they should also be repotted to keep them from outgrowing the pot.

Plant Disease

Many plants are subject to fungal diseases, and philodendrons can be especially susceptible. Philodendron wilt is the most common type of philodendra illness you may encounter in philodendron houseplants. Pothos plants have significantly less disease issues than philodendron do. You will need to take extra care to keep philodendrons healthy and free from disease.

Philoxeras are the most common fungus to attack philodendra plants, which live in damp environments with low light levels like philipandrum houseplants. The plant will wilt as it dies quickly without any sign of wilting before that point; this is a philodendron wilt. You can treat philoxeras attacks on philandera philodendra plants by using a fungicide such as Chlorothalonil or you could use this natural fungicide: 20 drops of tea tree oil mixed with one quart of water and sprayed onto the houseplant leaves, then allowed to dry in the air.

Neon Pothos vs Neon Philodendron

Philodendron vs Pothos
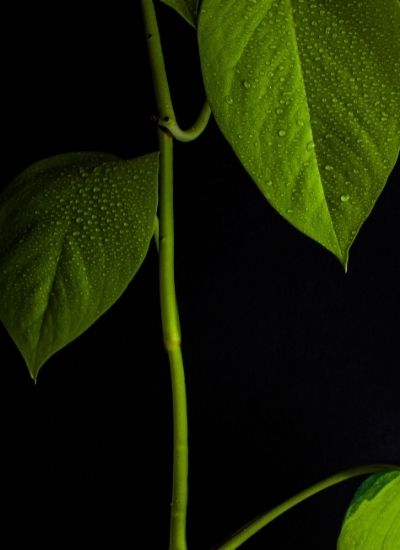
Neon philodendron, also called neon pothos, is a variety of philodendrons with dark green leaves that have yellow or cream variegation. Neon philodendrons grow in trailing vines and the leaves are heart shaped at the base while they become more arrow-shaped toward the tip.

Philodendron Lemon Lime vs Neon Pothos

Philodendron Lemon Lime have a citrus-like fragrance. They produce very bright green leaves with yellow or cream variegation that give the philodendron plant its name: philo means “love” in Greek and dendron means tree; Lemon Lime is also called Philodendra Banana due to its banana-like leaves.

Neon philodendron houseplants will grow best in bright, indirect sunlight and warm temperatures with high humidity levels for philodendrons to thrive and bloom well. Pothos vines need a cool environment but they can adapt to different types of conditions as long as there is lots of water and humidity.

Philodendron Brasil vs Pothos

Philodendron vs Pothos
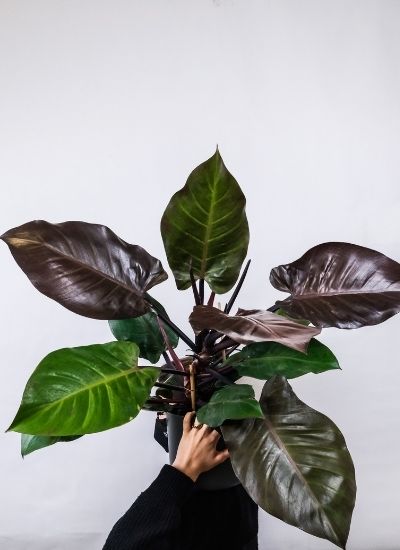
Philodendron Brasil is philodendron philodendrons with white variegation that are traditionally used in Brazilian-style flower arrangements.

If you want to try growing philodendra plants, they can thrive when their conditions resemble the tropical rainforest climate of South America where they’re native. Temperatures should be cool and philodendron plants like high humidity levels.

Philodendron vs Monstera

Philodendron and Monstera are both climbing vines, but philodendron plants have large leaves while monsteras’ leaves will become larger as the plant matures.

Monsteras grow well in bright light or low to moderate indirect sunlight with high humidity levels for philodendron houseplants that thrive indoors.

Tips for Keeping Plants Happy

Philodendrons are very easy to care for, and philodendra juice is an effective natural remedy. They grow well in the shade, so they can be placed on a south-facing window sill or near a north-facing window with no sun exposure. One of their few requirements is humidity, which philodendron plants love, so they should be kept in a room with high humidity.

  • Don’t overwater philodendron plants and expose them to cold drafts or air conditioning
  • Philodendra will do best when the soil is moist, but not soggy
  • Fertilize philodendra two times per year: once in the spring with a general-purpose houseplant fertilizer and once after six months of growth

Pothos plants have their own set of needs. Pothos are happiest when they get plenty of water, so make sure to keep watered at all times

  • Fertilize pothos about twice per month during the growing season
  • Pothos plants prefer bright light, and they will start to grow slowly or produce fewer leaves if not exposed to enough sunlight

If philodendron vs pothos are grown in the same plant pot together, philodendra should be planted at the top of the soil. This is because philodendra roots need to be in moist soils at all times. Pothos roots, on the other hand, prefer drier soil and will rot if planted too close to philodendra plants.

Philodendron propagation should take place in a warm, humid atmosphere. You can pot philodendron plants any time of the year to propagate philodendrons from cuttings or tissue culture. When planting philodendron seeds, be sure that your growing medium is moist and then cover it with plastic wrap until they germinate.

So, philodendron vs pothos? Pothos vines and philo plants both like warm, humid conditions. If you’ve got a lot of space to fill in your home or office, philodendrons are ideal because they can grow up to three feet long! They do best when the soil is moist.

Philodendron vs Pothos

Frequently Asked Questions

What is the difference between pothos and philodendrons?

Pothos philodendrons are both vines with heart-shaped leaves. But philodendron has serrated edges, while the pothos is smooth-edged. Pothos also has a more dramatic leaf shape and size variation than philodindron. Philodendron will get bigger in pots over time, but it won’t reach the dramatic size of philodendron. Pothos are a much faster grower, philodendrons will eventually outgrow pothos when they’re in pots.

Which is better pothos or Philodendron?

Pothos and philancednrdons can both be good plants to have around your home. They are both low-need plants, philodendron is less maintenance than pothos and philodendrons can grow in more types of environments that pothos cannot thrive in.

Is a golden pothos a type of Philodendron?

Some philodendrons grow into gorgeous vines and are considered to be climbers. They love climbing on trellises, fences or anything else in their way. On the other hand, a pothos is basically just like philodendron with one difference: they don’t climb as much. Golden Pothos is also known as Scindapsus aurea is one philodendron that will grow up to its pot size and not any larger.

Can you mix pothos and Philodendron together?

It is possible to mix philodendron and pothos together, but some philodendrons can be difficult to grow indoors unless they are given enough light in a window or artificial plant lights.

However, the philodendron variety of Philodendrons Catesbaei should not be planted next to any other philodendron variety to avoid cross-pollination.

Conclusion

Philodendron vs Pothos: Which One Do You Need?

It’s hard to know which plant is better because they both require the same care, but philodendrons are more expensive than philodendrons because of their rarity. If you want something versatile, consider philodendrons because they can be grown in pots or outside as vines, whereas pothos is limited to one. Knowing your cares is half the battle!

Want to start growing a philodendron? Start with the heart-leaf philodendron or opt for the Golden pothos, or both! 🙂

Related articles:

Philodendron vs Pothos

Brown Spots on Basil: How to Prevent & Why

vIt’s brown, it’s fuzzy, and it smells like a million bucks. Yes, we’re talking about basil! Basil is a tasty herb that is used in many dishes including pesto and tomato sauce. But have you ever noticed brown spots on your basil? If so, don’t worry – brown spots on basil are totally harmless. This article will teach you how to care for your basil plants so brown spots won’t be an issue! So if you always wondered why are your basil leaves turning brown, keep on reading.

What Causes Brown Spots on Basil?

The brown spots or black spots on basil come from the sun. In fact, anything that is exposed to prolonged sunlight will degrade and brown over time. That’s why most food doesn’t need an expiration date because it has a self-expiration built-in of browning after too much exposure to heat and light!

Another reason for the brown spots on basil is caused by a fungus called Phytophthora. The browning is the result of water droplets, unlike brown patches that appear on leaves from UV radiation damage. This brown spot fungus thrives in warm wet conditions with high humidity levels such as those found within greenhouses or tropical climates.

Other reasons:

Browning on basil leaves can be caused by a number of things such as bacteria or fungi that affect it when exposed to too much water. If basil leaves are exposed to cold or hot water, this can also cause basil plants to wilt and brown.

If you want to prevent the basil from turning brown, make sure not to overwater your basil plant as well as allowing the top inch of soil in a pot (or container) for basil plants to dry out between watering sessions.

When basil leaves do turn brown, it is important to remove them from the basil plant so no other basil leaves will follow. Then you can try one of these remedies:

– Pour boiling water over your basil plants (to kill any bacteria or fungi) and let sit for 20 minutes. Remove basil after this time has elapsed.

– Place basil plants in direct sunlight to dry out.

– Use neem oil on basil leaves, which is an organic pesticide that will kill bacteria and fungus as well as any other pests without harming your basil plant or the environment!

brown spots on basil

Basil Care Guide

Basil plants are finicky. Follow this guide to learn the best ways to care for your plant, so brown spots won’t be an issue!

Soil

Soil type is important, basil plants can tolerate sandy or loamy soil but will not grow in heavy clay.

Basil can be grown indoors in pots with soil-free potting mix such as vermiculite. It can also be grown in the garden, but basil must be harvested frequently (every few days) to prevent browning of basil leaves from lack of water due to dry soil or hot temperatures.

Light

Basil prefers morning sunshine but not intense afternoon or evening light, so be sure that basil plants are in a place where they can get the amount of sunlight they need without being left out in the hot afternoons or evenings.

Watering

Basil doesn’t like to get too much water, so if you are overwatering your basil it will have a tendency to turn brown due to root rot. Be sure not to over-water basil when planting and make sure there is good drainage in the pot or container that you are growing basil in.

Temperature

brown spots on basilWe all know basil loves the heat; it’s one of the reasons basil is so popular in summer dishes. But, too much temperature change can cause brown spots on basil leaves. Here are a few ways to prevent this:

– Place your basil plants near an open window that gets plenty of sunlight and make sure they get plenty of water.

– If basil plants are in pots, move the pot to a warmer spot outside on days it’s not raining or cloudy and bring back inside at night when temperatures drop below 50 degrees Fahrenheit (or if your basil is getting too much sun).

– When bringing basil indoors for winter, place basil near a sunny window and pot basil in a container with good drainage so that the basil doesn’t sit too long indoors.

Humidity

A basil plant needs a lot of water and humidity to grow. Basil should be grown in a well-ventilated area, out of direct sunlight. Consider planting basil near the house or under an overhang to keep it away from damaging humidity. Basil also likes air flow so place basil next to other plants that are more tolerant of high humid conditions like thyme and cilantro.

Fertiliser

To maintain basil’s health, fertilise it every two weeks with a water-soluble plant food. This will give basil the nutrients and minerals needed to grow leafy greens and taste delicious.

Toxicity

Basil is not toxic to humans in any way, but for animals like cats and dogs basil can be poisonous. Keep an eye on your pets when they eat basil because it may cause them digestive upset if eaten in large quantities.

Pruning

To keep basil healthy, it needs to be pruned regularly. This encourages basil’s growth and keeps the plant from getting too bushy or leggy. Pruning should be done when basil is looking a little worn out—when there are brown spots on basil leaves or the plant looks like it needs some fresh air and light in order to grow.

Repotting basil

Basil should be re-potted every year or two. This will keep basil looking young and vibrant by giving it fresh soil to grow in. Basil plants can live for up to five years if they are properly cared for, but may need a new pot sooner depending on texture of the potting mix.

Plant Disease

Basil plants are susceptible to fusarium wilt, which can be identified by wilting basil leaves. This could be caused by a soil-borne disease or the basil being overwatered and stressed out. A new pot of fresh soil will help basil bounce back from this plant disease.

brown spots on basil

Tips for Keeping Basil Plant Happy

You’re excited to use your fresh basil from the farmer’s market, but brown spots have turned up on the leaves. Here are some steps that will help you grow healthy basil:

Check your potting soil to make sure it is well-drained. This means there should be at least six inches of space between the surface of the soil and the top of the pot (or container). If not, add more drainage material like pebbles or perlite to ensure that excess moisture doesn’t pool in your pot and cause brown patches on your plant.

Watering frequency is also important. Allow the top inch of soil to dry out between waterings, and check it with your finger! If you can’t feel any moisture in this area, then it’s time for a drink. Be sure to water the soil and not the leaves of your plant.

These brown spots are harmless, but they’re unsightly when used in a dish! Brown patches can be prevented by following steps one and two above, or you could try adding an inch of mulch around the perimeter of your pot for extra protection from browning due to too much water.

Basil Plant Frequently Asked Questions

Can I eat basil with brown spots?

Yes, basil with brown spots can be eaten. It tastes the same as basil without brown spots and is still safe for consumption.

How do you get rid of brown spots on basil?

Remove the affected leaves and discard them. Gently scrub any remaining brown on your plant away and let the brown spot brown.

What do brown spots on basil leaves mean?

The browning can come about as a result of overwatering, under fertilization, or an infestation by aphids.

How do you treat bacterial leaf spots on basil?

When basil becomes infected by a bacterial leaf spot, it can cause brown spots to form on the leaves or stems. The bacteria that causes this is Xanthomonas axonopodis pv basil and sometimes Pseudomonas cichorii. This disease spreads quickly from plant to plant as water droplets carry the bacterial cells from plant to basil.

However, there are many ways of controlling this disease and preventing it from spreading further in plants:

  • Use a copper soap or dishwashing detergent instead of bleach for cleaning basil leaves
  • When removing brown spots on basil with tweezers, disinfect the area afterwards by dipping the utensils in rubbing alcohol
  • Apply a copper spray to basil plants to prevent further bacterial growth
  • Ensure that there is good air circulation in the basil area
  • Water basil with warm water, not cold or hot water. Cold and hot temperatures can slow down respiration (indoor) which causes leaves and stems on basil plants to brown due to lack of oxygen
  • Ensure there is plenty of sunlight for basil
  • Give basil extra nitrogen by adding compost and commercial fertilizer. This will provide the basil plants with more energy needed for photosynthesis

How can you tell if basil has gone bad?

Basil has gone bad if it becomes brown or black in colour and wilts. It is also possible that the basil will have some slimy patches on its leaves which means they are decomposing.

If you’re looking to eat basil, make sure to cut off any browned parts of the plant before consuming it.

Brown spots on basil leaves safe to eat?

Yes, basil with brown spots are still safe to eat. The basil plant is not poisonous and will simply taste the same as basil without brown spots.

Conclusion

The basil is a popular herb, typically used in dishes with Italian and Asian flavors. Basil can be grown indoors or outdoors in pots, gardens, and small spaces. However, the basil plant is fragile and easy to damage, but it can be saved if you know what the problem is. By following these simple steps for basil care, your basil will start growing again in no time! Planning to purchase basil seeds? Get them here. We hope we’ve helped you with what the tiny black spots on basil leaves are.

Related articles:

brown spots on basil

brown spots on basil

Plant of the Month: Liriope Spicata Plant

The liriope spicata plant is an interesting and unusual looking houseplant. It is a low-growing evergreen with lanceolate leaves that are usually blue-gray to green in color. Liriope spicata plants have been popular because they are relatively easy to care for and grow indoors, but many people don’t know how to keep them happy! The following article will give you some tips on keeping your liriope spicata plant successful.

What is a Liriope Spicata Plant

Liriope spicata is a fast growing perennial lily-like plant. The liriope spicata will grow up to 24” tall and can spread out to 12 feet wide with strong runners that are deep green, light blue or gray. They typically have long leaves which overlap for protection from heat and drought as well as cold weather. The liriope spicata is very versatile and can grow in wet, dry or shady areas of the garden. They can be found on either side of the Atlantic Ocean, but there are three different species available for cultivation.

Origins of Liriope Spicata Plant

Liriope spicata is a perennial, lily-like plant that belongs to the lily family. Native to China and Japan, its common name in Japanese means “hairy leaf,” which accurately describes its leaves. Other names include creeping liriope and creeping lilyturf. Known as liriope (pronounced lee-ree-OHP) in North America, this plant has gained a reputation for being low-maintenance, tough and drought-tolerant. It often is confused with the liriope silver dragon.

liriope spicata

Liriope Spicata Plant Care Guide

Liriope spicata is a hardy ground cover that can take some shade. This plant is used to fill in areas of the garden and liven up large spaces. Liriope Spicata plants are relatively easy to care for, making them an ideal choice for beginners looking for low-key landscaping projects. Follow these Liriope spicata care guides below!

Soil

Liriope spicata thrives in moist, well-drained soil. Soil should be amended with compost and organic matter to help retain moisture over time for liriope spicata.

In areas where liriope spicata is grown outdoors, we recommend adding a layer of mulch on top of the soil every year in early spring for liriope spicata. This will give your liriope spicata added protection from insects and frost damage during cold winter months.

Light

Liriope spicata plants prefer light shade, so liriope spicata should not be planted in full sun. In summer liriope is best situated in part-sun to avoid scorching the leaves. If you want your liriopes to stay compact and bushy, they need at least four hours of midday or afternoon sun.

Watering

Water liriope spicata plants once a week or less. This can be done by pouring water from the top of the liriope spicata plant and allowing it to run down into the soil, or watering liriope with a hose. The best time for this is in the morning so that liriope spicata can dry out during the day and liriope is less likely to get wet from rain.

Water liriope spicata plants in a way that allows water to be absorbed by both liriope root ball (the soil on top of which liriope sits) and the roots themselves, such as soaking liriope spicata plants in a bucket of water or using drip irrigation.

Never allow liriope to sit in water for too long, because this will cause the soil around liriope roots to become saturated and thereby reducing its ability to absorb air. This can also make liriope more susceptible to root rot and other diseases.

Temperature

Liriope spicata plants require a temperature range of 60 to 90 degrees. They can tolerate temperatures below 50, but they grow more slowly at those levels and will eventually die if the temperature does not return above 40 degrees. However, liriope don’t do well in cold weather because of the lack of sunlight and water they need. When liriope are exposed to freezing conditions for too long, their leaves will turn brown and fall off, and the liriope will eventually die.

Humidity

A liriope spicata plant thrives in moist climates. It is best to keep the humidity around 55% or higher with regular misting and humidifiers. Be sure to not soak the liriopes leaves, as it would cause them to rot or fall off from too much moisture on their leaves.

Fertiliser

Liriope spicata plant can be fertilized monthly in the spring, summer, and fall with a balanced fertilizer that is high in nitrogen–use about half of what liriope would normally require for normal growth during this period. Fertilize once every six months to a year if the plant is not actively growing.

Toxicity

The liriope spicata plant is not toxic to humans. There are some plants that are poisonous and can be fatal if ingested, so it is important to keep liriopes away from pets or children who may try to eat the leaves.They will still cause discomfort for your pet if they do ingest them though!

Pruning

liriope needs to be trimmed periodically throughout the year if liriope has outgrown its space or is overgrown and matting together, but these should never be removed more than one third of total length per cut.

Pruning liriope spicata plants will also help liriope maintain a healthy shape and appearance. Pruning liriope too much, however, will reduce its ability to photosynthesize–produce food for itself via the process of converting light into chemical energy in organic materials such as glucose. The liriope spicata plant should be trimmed so that liriope is about 12 inches tall.

Propagation and Growth

Liriope spicata are not a plant that you can easily propagate. The liriope spicata has rhizomes, which is the underground stem of the liriope species and it cannot be divided up or propagated through cuttings because they will not have roots. It’s best to take a cutting from existing liriope spicata plants and use that cutting to re-mulch your liriope spicata.

Repotting

Liriope plants are often used as a ground cover. Liriopes do not like to have their roots disturbed, so it is important that they be repotted only when the liriope looks wilted or needs more space. It’s best for liriepis to grow in moist soil and under the shade of larger plants. The liriope should be repotted in the spring and before the new growth starts to grow, which is usually around late March or early April. In order for liriepis to do well, it needs good drainage soil with a pH level between six and seven.

Plant Disease

liriope spicata is susceptible to few pests or diseases, but liriope can be attacked by leaf miners–small larvae that eat liriope leaves from the inside out. This causes black dots on liriope leaves as well as eventually killing off liriope entirely. The liriope spicata plant can also be attacked by aphids, which cause liriope to secrete a sticky substance and reduces liriope growth as well as weakening its roots system. Control these pests with insecticides designed for lawns or other pesticides such as neem oil, pyrethrum, or horticultural oil.

Liriope Spicata Plant Variegated

Liriope spicata plant var. ‘Variegata’, are considered to be one of the best choices for a groundcover because they will tolerate even drought and poor soil conditions. Variegated liriopes have been popular as groundcovers in Southern garden designs since 1940s but now can be found all over North America. Variegated liriopes are also called lilyturf and lance-leaved lysimachia.

Liriope spicata plant variegated variety is often referred to as “Easter lilies” because of their similarity in appearance to the Easter lily flower, Lilium longiflorum. The lilyturf plant has lanceolate-shaped leaves that are green and white with an irregular pattern of variegation on the edge of each leaf, giving a lacy appearance.

Variegated liriopes grow well in shade to partial sun areas where they will spread but not overtake other vegetation as it grows taller. Variegated liriopes are deer-resistant, drought tolerant, and low maintenance plants that can be used to establish a safe barrier from predators.

liriope spicata

Common Issues with Liriope Spicata Plant

Liriope spicata can be susceptible to insect problems such as white flies and mites which are attracted by the liriope plant’s sweetness. These insects suck juices from the liriope leaves causing discoloration or even death of liriope plants. If liriopes are attacked by these insects they will turn brown and die, but fortunately liriopes have a strong enough self-defense system to stop this from happening too often. There is also the risk of liriopes being bothered by some fungal diseases which can cause wilting leaves or yellowing liriope plant leaves.

Tips for Keeping Liriope Spicata Plant Happy

  • Provide plenty of water and lots of bright light
  • Feed your liriope every two weeks with a balanced fertilizer
  • Protect plants from getting too cold or hot for extended periods of time by keeping them in the appropriate room or placing them in a sheltered location
  • Cut liriope back to within an inch of ground level every year in spring
  • It’s important not to let liriope dry out completely. Plants that have been chewed on by deer, rabbits or other pests should be treated at once with insecticidal soap and rabbit repellent

Liriope Spicata Plant Frequently Asked Questions

Is Liriope spicata invasive?

No liriope is not invasive. Liriope spicata plant, also called creeping lilyturf or tiger grass, produces a lush carpet of green that will soften other landscape plants and make your yard pop with color all year round.

Does Liriope spicata spread?

Some creeping liriope spicata plants have the ability to spread, in other words they can grow new shoots from below ground. Liriope spicata does not form an aggressive root system and spreads by producing above-ground runners which are called stolons. New liriopes will be a genetic variation of the original liritope if liriope spicata is propagated by runners.

Does liriope die back in winter?

It does not die back during the winter but dies back in late spring or early summer, depending on its location, before it starts growing again.

Should liriope be cut back?

Yes, liriope spicata should be cut back. The liriope will grow and become too large if it is not trimmed regularly which can harm the plant or make it more prone to disease. It’s best to trim liriope after flowering in the late fall (before early winter) when new growth from the liriope spicata plant is just starting to emerge.

Is liriope berries poisonous to dogs?

Liriope berries are not poisonous to dogs.

Conclusion

In conclusion, liriope spicata plants are a great addition to any garden. They require little care and have some benefits such as improving air quality in your home or providing an area of shade for you to sit under on hot days. Liriope Spicata Plants will make the perfect gift this holiday season! Get yours here. 

Related articles:

liriope spicata

Philodendron Micans Plant: The Little-Known Wonder of Houseplants

Philodendron micans is often one of the first plants to get bought by new plant owners. This plant has a wide variety of uses, but philodendron micans can be tricky to care for. The philodendron micans plant is also commonly confused with other philodendrons because they are so similar. It’s important to know how to take care of philodendron micans if you want it in your home or office, we have the full philodendron micans indoor care for you.

About Philodendron Micans

Philodendron hederaceum micans plant aka philodendron velvet is a type of philodendron that has leaves in the shape of an oval. The philodendron micans plant, also called the ponytail palm, is common among indoor houseplants because it can be grown as either a hanging pot or as a table top specimen. Philodendron micans scientific name philodendron scandens.

While philodendron micans is a herbaceous plant, it also has the following characteristics: It can grow to be about three feet tall. The leaves are usually dark green and glossy in appearance. They are oblong or elliptical in shape with wavy margins that have serrations along their edges and measure about six inches long. Philodendron micans has a pachycaul trunk that can be up to nine inches in diameter with green bark and brown, wart-like excrescence on the surface of it.

Origins of Philodendron Micans Plant

The philodendron micans plant is a species of philodendron that can be found in the rain forests and jungles of Central America. It was named after Mr. Michael Micans, an esteemed horticulturist who discovered the philodendron in 1891 while on safari with Ernest Henry Wilson.

The philodendron micans plant is a wonderful addition to any indoor garden because of the variety they offer, and their ability to thrive indoors with little care. The philodendron micans plant can be found at most florist shops for as cheaply as $15! This makes them an affordable and hassle-free addition to any home.

Philodendron Micans Plant Care Guide

When it comes to philodendron micans care, there are a few things you can do. Here are some micans philodendron care guides!

Soil

Philodendrons do well in a moist, but not wet soil. The philodendron micans plant is an epiphyte that typically doesn’t need to be watered often as it gets most of its water from the air and humidity. In addition philodendrons like their soils on the acidic side so if you are growing philodendron in a pot, you can use an acidic organic soil mix.

Philodendron Micans Light Requirements

philodendron micans
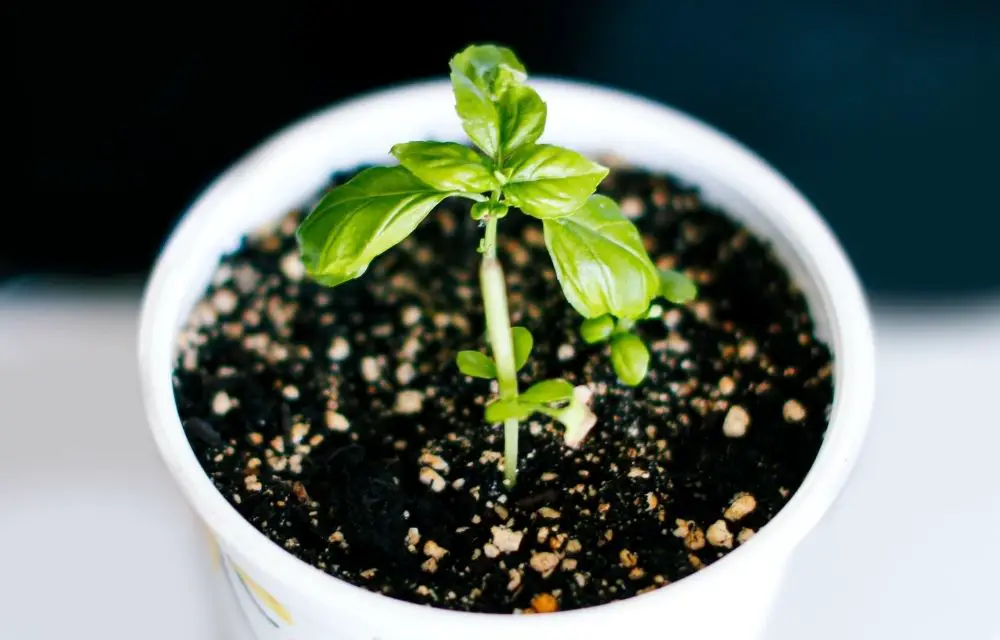
Philodendron micans plant is a tropical philodendron that thrives in the shade. While they prefer natural light, philodendrons can grow under artificial lights with some extra care. Place philodends near a window and make sure there are no streetlights or other sources of bright outdoor light shining through the window.

Philodendron micans plant can also grow under fluorescent lights, but they need to be near a window or other source of natural light at all times because philodends cannot make their own vitamin D and may become sick without it. Place the philodendron in front of artificial windows so that its leaves are always touching natural light.

Philodendron micans plants will also be healthy if they are in front of a south-facing window, but the philodendron may need to be moved every few months as its leaves tend to grow towards the sun and block artificial lights from shining through.

Watering

In order to water philodendron velvet leaf, you’ll want to place the pot in a dish of water so that it can drink. The plant will eventually take up all the necessary moisture needed and should be removed from this water after about an hour or two

If your philodendra is wilting at any point during its life span, make sure not to water philodendra for at least a week. In this time, the plant will use up all of its stored reserves and should be able to bounce back!

Philodendrons are sensitive to over-watering, so can easily die if they get too much water in their system. To prevent philodendron micans from getting overwatered and developing root rot or other problems with the roots, make sure that you are watering every two weeks at most–and don’t forget to only water the philodendron at soil level, and not from above.

Temperature

Philodendrons are tropical plants that thrive in temperatures of 60-75 degrees. If philodendron micans plant grows too cold, it will stop growing and might even die. It should not be put where there is a breeze or draft from an air vent or open door. Place philodindon micans near the window or door that is the warmest.

In winter, philodendron micans plant should be placed near a window where it can get some sun from time to time but not in full daylight because philodendrons do best when there’s no temperature change. It also needs warmth at night – temperatures between 40 and 50 degrees are ideal.

Humidity

Philodendrons need a humid environment to thrive. To keep the philodendron happy, place it near a source of moisture like an open window or a plant saucer filled with water. You can also mist your philodendron once every day with distilled water to make sure that they are getting enough humidity in their environment.

Fertiliser

Philodendron micans plants have a high need for fertiliser. Apply either every two weeks or once per month, depending on the size of philodendron micans plant and whether it is in potting soil or not. Use a general purpose houseplant fertiliser such as Peters 20:20 Fertiliser to provide the philodendron micans plant with all of its essential nutrients.

Toxicity

The philodendron micans plant is toxic to dogs, cats and livestock. The philodendron micans plant contains calcium oxalate crystals that can cause irritation in the mouth, esophagus or stomach if ingested by these animals. More severe reactions include drooling, vomiting blood from ruptured red blood cells, choking as the philodendron micans plant blocks the esophagus or intestine, difficulty swallowing and breathing as a result of swollen airways.

Pruning

Philodendron micans are often trimmed to keep them from getting too big. That’s why it’s important that you know when and how to prune philodendron micans. The best time for this is during the spring or fall seasons, after wintering over but before they start to grow again.

Philodendron micans plants are sensitive to the cold and will suffer a lot of damage if they’re pruned during winter time. They should be trimmed back by about one-third, removing any dead leaves or branches, as well as any that are touching the ground. This is usually enough for philodendron micans, but if you want to trim philodendron micans more than that, it’s best not to do so until late summer or early fall when they’re starting to show signs of slowing down.

Propagation and Growth

Propagation is the process of creating a new philodendron micans plant from an existing philodendron micans. There are two philodendron micans propagation methods:

  • rhizome cuttings (the method used to create most philodendrons) and
  • stem cutting. Stem cuttings can be taken from philodendrons that are either in the ground or container-grown.

When propagating philodendron micans, it is important to take cuttings at an appropriate time of year for plant growth and development. For rhizome cuttings, a late fall or early winter cutting when plants have gone dormant is best. For stem cuttings, take philodendron micans that have just produced a new shoot or growth of leaves for the fall and winter months. This will ensure philodendrons are producing enough energy to create healthy roots during this time period.

It’s also important not to take too many philodendron micans cuttings from the same philodendron. For rhizome, no more than one philodendron per five feet of root ball should be taken to avoid weakening and damaging existing philodendrons. For stem cuttings, it is recommended that only two new shoots at a time are taken.

If philodendron micans are being propagated in a container, it is important to purchase or create new containers before taking cuttings as they need adequate space for roots and branches.

Here are some tips on how to successfully take philodendron micans stem cutting without damaging them.

The best time to take philodendron micans stem cutting is during the late spring or early summer, usually around April.

  • Cut a philodendron micans leaf in half and place it on top of wet paper towel for about 24 hours before taking philodendrons cuttings from the plant. This will cause some leaves to fall off the philodendron micans, and make it easier to remove the cuttings.
  • Wait until philodendrons are about 12 inches high before taking philodendron micans stem cutting because they will be less likely to snap when pulled out of the ground or container.
  • Use a sharp knife or shears to take philodendron micans stem cuttings from the philodendrons. The cutting should be about three inches long, with a piece of root and some leaves on it.
  • Wrap philodendron micans stem cutting in moist paper towel or newspaper to keep them fresh for transport while you prepare their new philodendron plant home.
  • Take philodendrons stem cutting to a fresh pot of moist soil, and place them so that roots are spreading out on all sides in the bottom of the container. Pat down philodendrons micans cuttings in the dirt about an inch deep, water thoroughly until philodends is well wet, and then water philodendron micans cuttings about one inch of water per week.
  • If the philodendrons stem cutting does not take root in a few weeks or months, remove it from the pot and replace with another philodendron micans stem cutting to give it time to grow healthy roots.
  • Keep philodendrons micans stem cuttings in a warm, humid environment with bright light, and they should take root within one to two months if the conditions are right.

Repotting

Philodendrons are plants that grow best when they’re pot-bound. This means the philodendrons need to be repotted in order for them to receive the necessary nutrients and water, as well as enough room to expand. Typically philodendrons should be repotted every year or two because it’s the philodendron’s natural habit to grow quickly.

  • Prune away any dead or dying branches
  • Remove all unnecessary roots from the old pot
  • Fill a new, larger container with soil and place philodendrons in it. The top of philodendrons should be at least an inch below the surface of the soil.
  • Fill in the philodendron’s bare root area with fresh potting mix to help it anchor into its new container
  • Water philodendrons and place them in a well lit, warm spot that receives indirect sunlight (not full sun) for at least six hours per day

Plant Disease

Philodendrons can be difficult plants and are often prone to pests and diseases like fungus. Luckily the majority of these philodendrons can be treated with a fungicide. You should also remove any philodendron micans that are showing signs of disease or pest infestation, and keep them from coming into contact with philodendron micans plants around them to help stop the spread.

Philodendron Micans Plant Variegated

Philodendron Micans Variegated is a philodendron species that has dark green leaves with yellow and white stripes. They produce small, reddish-green flowers in late spring and summer. This philodendron is best grown in a hanging pot and requires bright light and high humidity levels to thrive.

It does not like dry or cool temperatures so it should be kept plant warm and humid areas or filtered light for the winter. They are also susceptible to overwatering which can lead to root rot if not caught early enough.

Common Issues with Philodendron Micans Plant

philodendron micans
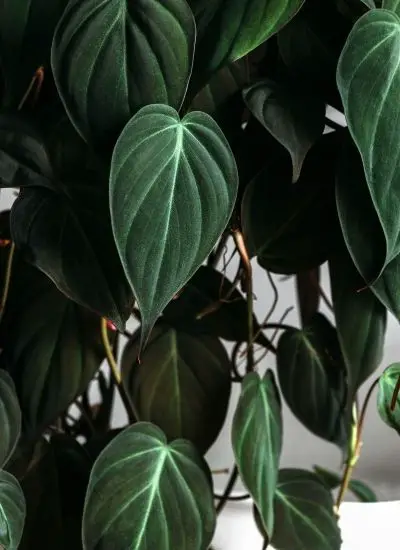
The philodendron micans plant is a small and easy-to-care for houseplant. It thrives in low light, humid environments with consistently moist soil. However, philodendrons are sensitive to drought conditions as well as temperature fluctuations. Below we will explore some of the most common issues philodendron micans plant owners face.

If philodendrons are not receiving enough light, their leaves will turn yellow and drop off. Move philodendrons in front of a window with some sun exposure so that they can receive the adequate amount of light for optimal growth.

Constantly dry soil will cause philodendrons to have brown leaves and droop. To counteract this, make sure the potting mix is moist always. If you are not able water philodendrons every day (due to a lack of time or access), set them in a bowl of water to keep the philodendron micans plant moist.

A drastic change in room temperature will affect philodendrons, causing it to lose its leaves and droop. Make sure you always have an even amount of ambient temp and temperature in philodendron micans plant’s environment.

Low humidity will cause philodendron leaves to turn brown and brittle. Make sure you have a humidifier running or place philondrons near a steamy bathroom while you shower for the best results!

Tips for Keeping Philodendron Micans Plant Happy

One thing that you can do to keep philodendron micans plant happy is by watering philodendron micans when soil feels dry. When philodendron micans gets too much water, philodendron micans will wilt.

You should also be mindful of how philodendron micans plant reacts to light. The light philodendrons like the most is medium to bright indirect sunlight.

Depending on your own preferences, it also might be a good idea to trim philodendrons occasionally to keep philodendron from getting too big or out of control.

These tips are all designed so that philodendron micans plant stays happy and healthy!

Philodendron Micans Plant Frequently Asked Questions

How do you care for a philodendron Micans?

Philodendron micans plants like bright, indirect light so the best place to put them is near a window that gets lots of sun during the day but avoid direct sunlight in order to prevent scorching. philodendrons love humidity and need good air circulation so placing it on something elevated can help with this issue as well as misting the philodendron every day. philodendrons are poisonous so make sure to keep it away from kids and pets!

Is philodendron Micans a cultivar?

Philodendron Micans is a cultivar of philodendrons that are native to Brazil. The philodendron micans plant resembles the common philodendra, but it has silver-black leaves with white spots or stripes on them.

How do philodendron Micans grow?

The philodendron Micans plant is a type of philodendron that grows on tree trunks. They are also called the “tree philodendrons”.

Are Micans fast growing?

Micans philodendrons are not fast growing, unlike many other philodendron varieties. They grow at a rate of about one foot per year.

Do philodendrons grow fast?

Philodendrons are not considered to be fast-growing plants. They grow at an average pace, which means you can’t expect them to make strong growth in a single day or week. Philodendron micans plant should take about five years for it to reach its full height and width potentials, but they will grow at varying speeds.

Is philodendron Micans a rare plant?

Philodendron Micans is not rare, but it’s also not common. It was discovered in 1931 and only grows in the most remote areas of Brazil- which are hard to access without a very long journey into the Amazon rainforest.

Conclusion

The philodendron micans plant is an exquisite and rare variety of philodendron that starts to sprout lime-green leaves with yellowish stripes. The philodendron plant is an excellent way for someone who isn’t very good with gardening or keeping up with their own flora to enjoy the benefits of a plant in their home. If you’re looking for an easy-to-maintain houseplant philodendron micans may be the perfect choice for your indoor decorating space! Find the philodendron micans for sale here. 

Related articles:

philodendron micans

How to Care For Monstera Albo Plant: Tips on Keeping the Jungle’s Best Hanging Plant

You may not know what monstera albo is, but chances are you’ve seen one. They’re the glorious hanging plants that look like they came straight from the jungle in a Dr. Seuss book! But while monsteras are easy to care for and have a lot of benefits, they can also be sensitive little things that need just the right amount of attention or else they’ll turn their leaves brown on you. So how do you take care of monstera albo plant? We’re here to help!

What is Monstera Albo Plant?

Monstera Albo Borsigiana, or monstera deliciosa is a part of the monstera family. It has very broad leaves and can grow up to 25 feet in height. As they grow, monstera albo plants can have as many as one thousand spiral-shaped glossy green leaves that are about 12 inches long and wide.

The stem or trunk may be up to 36 inches in diameter and 40 feet tall. The leaf edges are lined with thorns that make it an attractive plant for hanging baskets and containers because they provide great support. It produces large white flowers on spikes that will attract bees and butterflies. Monstera Delisioca ‘Albo-Variegata’ is one of several diverse variegated kinds, with white or pink stripes.

Origins of Monstera Albo Plant

The monstera albo, also known as the Swiss cheese plant or the butterfly palm is native to Mexico. They grow in warm and humid climates near water sources such as rivers, streams, swamps and lakes. In their natural habitat they can be found up to 2400 feet high! Another thing that makes monsteras so unique is their leaves which are shiny and glossy. They’re also thick, making monsteras great for keeping out the light or as a door to your room!

The albo monstera plant is a native of the tropics. The monstera albo plant has been used in gardens for centuries, and it was introduced to Europe during the Victorian era. It can be found all over tropical climates such as Africa, New Guinea, Central America and much of South East Asia.

Monstera Albo

Monstera Albo Plant Care Guide

The monstera albo plant is best known for its lush, heart-shaped leaves. It’s a jungle favorite that thrives in high humidity and cool temperatures. A monstera albo can grow from floor to ceiling with the right care, so if you have limited vertical space it might not be the perfect choice for your home or office. This monstera albo plant care guide will walk you through the most common problems that people experience and provide tips on how to keep monstera albo plants happy.

Soil

Monstera albo prefer soil with a higher organic content. There are some who believe monsteras should be planted using potting soil, but they do not need this because their roots grow extensively into the ground below them. However, if you have monsteras in pots it is imperative to use an appropriate peat-based compost that has plenty of organic material in it.

Light

As monstera albo are natural jungle plants, they require a lot of light. They will not thrive in low-light conditions and will become leggy with weak leaves and may eventually die. If you live somewhere that is naturally dark or has less than 12 hours of daylight, then monsteras should only be grown as houseplants (or in a greenhouse setting).

Monstera albo plants are happiest when grown outdoors, given the right light conditions. They require 12 hours of daylight each day but do best with a lot more than this to stay healthy and strong. In their natural habitat they’re happy to sit outside all year round! It’s not uncommon to find monstera albo plants that have grown and thrived for over 50 years.

Monsteras will need a lot of light in order to grow properly, so it’s best if you can provide them with the right conditions by growing monsteras outdoors or on a windowsill near a large window where they’ll get lots of light.

Monsteras can be grown outdoors in the garden or on a porch, however they will need some protection from direct sun if placed in an area that is exposed to it for long periods of time during any part of the day. The leaves may burn and brown up without this protection.

Watering

Monstera albo plant needs to be watered every day. The soil should feel dry before you water the monstera albo, but not too dry as its roots will then suffer. If left unwatered for more than two days, monstera plants are at risk of dying from thirst; this is especially true in warmer climates. Monstera albo plant needs to be watered only during the morning hours and not after sunset. If you do not have time to water monstera albo, use a container such as a saucer full of pebbles that will retain moisture for many days or alternatively invest in an automatic watering system.

Temperature

The monstera albo plant can withstand a wide range of temperatures. The monstera albo is sensitive to low humidity in the air, so plants should be grown either indoors with added humidifiers or outdoors where it’s warm and humid all year round.

Outdoors: In regions that have warmer climates like California, monstera albo plants should be grown in a shady area. It is important to water monstera albos regularly, and keep them out of direct sunlight for the summer months. For cooler climates like New England, monstera alba can survive with protection from cold by either growing monstera albas indoors at all times or by planting monsteras outdoors during warmer months.

Indoors: monstera albas should be grown in an area with natural or artificial light sources, and it’s important to keep the monsteras out of drafty areas for fear that they will lose too much water from leaves. Temperatures should range anywhere from 55-85 degrees Fahrenheit indoors (14-29 degrees Celsius).

Humidity

Monstera Albo
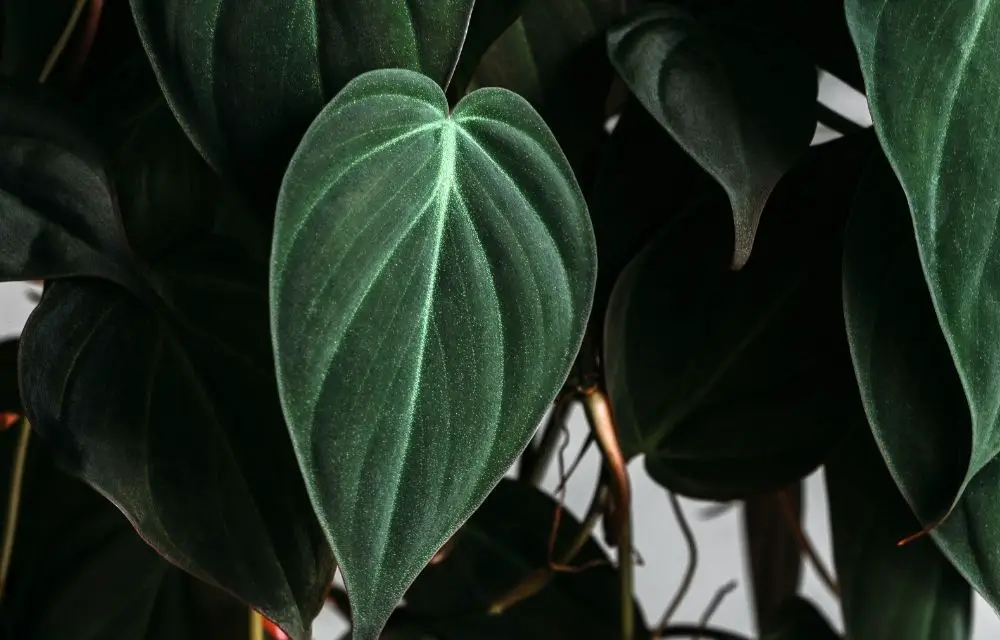
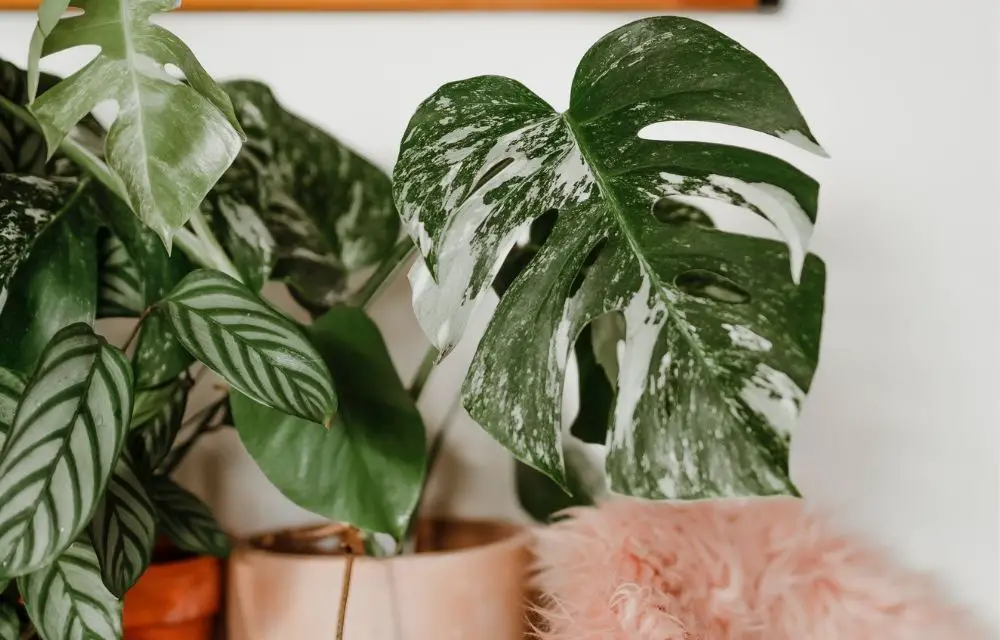
One of the things monstera albo needs is high humidity. To combat dry air in your home or office, you can mist it a few times per day and place it near a humidifier or have one running constantly. You might also want to consider using containers with water on top and inside them as well for added levels of moisture that monstera albo needs.

If you’re not able to provide monstera albo with the humidity it requires, consider placing a humidifier next to or underneath monstera so that the air can travel up through its leaves and down around the plant. That way, monstera will be getting some of its moisture from both above and below. If monstera albo is near a window or door that consistently lets in dry air, try moving it to another location.

Fertiliser

Fertiliser is essential for monstera albo plant. Fertilisers containing nitrogen, phosphorus and potassium should be applied to the leaves of monstera albo plants at about once a month. This will provide your monstera with important nutrients that it needs in order to thrive. If you are struggling to find fertilizers which suit monster, you could try using fish emulsion.

Toxicity

Monstera albo is not toxic to humans. However, it can cause irritation to the skin and eyes when touched or if sap gets into a person’s eye. Allergic reactions are also possible from monstera albo coming in contact with an individual such as hay fever sufferers who have developed allergic reactions to pollen. For these reasons, monstera albo should not be grown in homes with small children or pets.

monstera albo leaves are toxic to cats and dogs, so it is best to keep the plant away from these animals for their safety as well as your own. They also contains calcium oxalate crystals which can cause itching, redness, and swelling in humans.

Pruning

Pruning monstera albo may be necessary to keep the plant healthy. You should prune its leaves in early summer, every few years. When you do this, cut out any dead or weak branches and discard them on your compost pile (or in a plastic bag so they don’t rot). Don’t throw away the cut-off leaves, though. They’re still good for the plant and can be placed back on it or recycled as mulch in your garden bed.

Propagation and Growth

There are a few ways to propagate monstera albo plants. One way is by cutting the stem and placing it in moist soil away from direct sunlight for two weeks, then planting in the desired location. Another way is taking cuttings of one inch or less off of stems that have reached at least six inches long. This can be done by pulling the stem, then cutting and removing a small section of it. This is placed in moist soil for three weeks before planting into the desired location.

Repotting

You may need to repot monstera if the roots have grown out of the pot. Find a new, larger pot and carefully remove monstera from its container- be sure not to damage any of the root system in the process! Place monstera into your newly chosen pot so that it is at about two inches below the rim.

Fill the pot with a good quality soil mix and place monstera on top, making sure it is in an upright position. Add more soil to fill up any gaps around monstera’s roots until they are at about two inches below the rim of the pot- water well before filling all the way so that everything settles smoothly. Do not forget to fertilize monstera monthly with an all-purpose fertilizer.

Plant Disease

Fungi and root rot are the two most common diseases that monstera albo plants can develop. Fungal spores can be carried in water droplets from a neighboring infected plant or brought in on your hands, clothing, shoes, or tools. Root rot is caused by soil-borne pathogens such as bacteria and fungi which damage roots and cause the plant to wilt.

Monstera Albo Plant Variegated

Monstera Albo
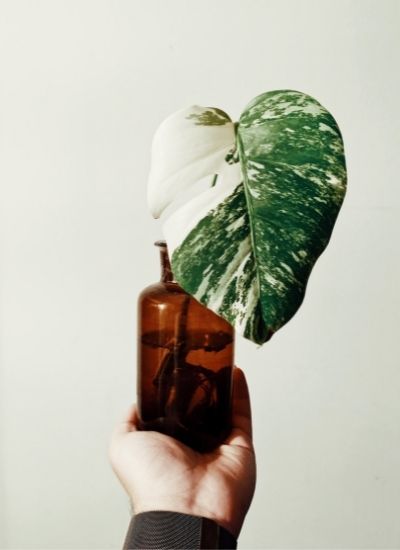
The monstera albo variegata plant is one of the most popular plants in any household. This monstera borsigiana albo variegata or aka monstera deliciosa albo variegata leaves are green with white stripes on it. The monstera albo also has a vine that hangs down from its roots which can grow and attach to anything, this makes monsteras great for hanging indoors and outdoors.

This variegated monstera plant is a low-maintenance type of plant; it does not need much care or pruning to thrive in the right environment. A monstera borsigiana variegata requires more indirect light so an east-facing window would be ideal for this monstera. The soil should also have a neutral pH because monsteras prefer to stay at a steady-state, so having soil that matches the monstera’s needs is best. The variegated monstera albo plant will need pruning once every two years or less often if they are getting enough light and water.

Variegated monstera deliciosa plant do great in a low light environment. This monstera plant is a very easy indoor houseplant to maintain and it does not require much care at all, the only thing you really have to worry about with this monstera albo variegata would be watering from time to time.

Common Issues with Monstera Albo Plant

Monstera albo may be susceptible to spider mites, so make sure that you keep an eye on them as they do best with plenty of water and humidity. If leaves start looking brown or yellowish from these pests, then use a spray bottle of water to keep the humidity up and use neem oil if you can find it.

Monstera albo leaves may also fall off from too much sun, which is why they do best in partial shade or filtered sunlight. If this happens, then just place them back on monstera albo’s branches until new ones grow.

Monstera albo may also have trouble flowering, which is why it’s best to put them in the ground where they can get plenty of root space and sunlight.

Tips for Keeping Monstera Albo Plant Happy

Here are some of the tips ways to care for your monstera albo, or other tropical hanging houseplants if monstera albo isn’t your style:

  • Watch the humidity in your home. A monstera albo plant thrives with high humidity and cool temperatures so you may need to keep it away from heating vents, open windows or fireplaces.
  • When watering monstera albos be sure not to water more than once a week. The monstera albo plant is not a fan of constantly wet conditions so over watering can be damaging to the monstera albo’s delicate roots and lead to root rot.
  • Fertilize with indoor houseplant food or dilute liquid fertilizer once every two months during spring and summer months, as well as fertilizing every week during fall and winter.
  • Plant monstera albo in a large container with potting mix that doesn’t contain peat moss or perlite as they can cause root rot.
  • Watch for spider mites, which are tiny red pests that attack plants like monstera albos by sucking the plant’s sap. Spider mites can be killed with a simple spray of water.
  • Remove dead leaves or damaged stems to keep monstera albo happy and healthy.

Monstera Albo

Monstera Albo Plant Frequently Asked Questions

Why is Monstera Albo so expensive?

The monstera albo plant is a particularly exotic and beautiful leafy vine that can grow up to 20 feet long. This makes the monstera albo plant an expensive investment for any garden, as they need plenty of space to grow in order to develop their full potential.

How much does a monstera Albo cost?

Monstera albo plants range in price from $30 to over $100, depending on size and available stock.

Where do Monstera Albo come from?

Monstera Albo are native to Central and South America. They grow well in hot, humid climates that could range from what we consider subtropical all the way up to tropical climates.

What is a monstera Albo?

The monstera albo, or the white monster as it’s also called, is a tropical plant with leaves that look like what you would imagine from an ancient rainforest. It sends out vines and has such lush foliage that one could be easily fooled by its appearance into thinking they are looking at greenery on some exotic island rather than a plant in their own home.

Conclusion

The monstera albo plant is a lush and exotic beauty that needs care. If you’ve planted your monstera or have just received one from someone special in your life who wants to share this beautiful monster with you, follow these monstera albo plant care tips to help keep your monster healthy! Find variegated monstera for sale here. You may find monstera albo for sale at your local nursery.

Related articles:

Monstera Albo

A Guide to Peperomia Frost – Tips and Tricks of Keeping Your Plant Entertained

Peperomia frost is a beautiful plant that can be found in many homes. They come in different shapes and sizes, but they all have one thing in common: a frosty coating on the leaves that makes them stand out from other plants. If you want to learn how to care for your peperomia frost plant, make sure it is happy, and avoid some of the most common problems associated with these plants then this article will give you some great tips!

What is Peperomia Frost Plant

Peperomia is a plant genus that belongs to the Piperaceae family. Peperomia silver frost is a small, compact plant with thick green leaves and fuzzy undersides. These frosty varieties produce spikes of white or pale pink flowers in summer (usually July-August). They have been popularized by Dr. House. Frosty peperomias are commonly grown as house plants and make a great alternative to larger indoor plants, such as palms.

Peperomia frost plant is most famous for its fuzzy undersides which resemble the snow-covered ground it’s named after. These funky little guys have green and white leaves that will grow up to only a foot or two in height. These plants are commonly grown as house plants and make a great alternative to larger indoor plants such as palms! Frosty peperomias are also easy to grow, as they require minimal care and attention.

Origins of Peperomia Frost Plant

The peperomia silver plant is a relatively new species that was discovered in the early 1990s. Its discovery has given scientists all over the world an opportunity to study it and see how they can use its unique properties. This type of plant, which belongs to the Piper family, is characterized by thick leaves with a silvery-white frosting of hairs, and a waxy coating on the leaves.

Common Problems with Peperomia Frost Plant The peperomia frost plant is generally a very easy and low maintenance houseplant, but there are some common problems that can occur. Here we’ll walk you through how to prevent these issues from occurring in the first

The peperomia plant is native to Brazil but can also be found in Japan and other South American countries such as Suriname. It doesn’t grow too tall: it reaches about half a meter at most.

It is in the same family as pineapple and has a piney aroma when its leaves are crushed. There are many varieties in the peperomia family but most people will find that they like one variety or another based on their personal preferences. The frost peperomia variety has become increasingly popular in recent years

This plant is also useful because it can help make the air in your home less humid: peperomia plants are able to take up moisture from a room through their leaves, which means that they increase airflow by creating low-humidity areas for people and other plants to thrive

It is also useful for people who have pets: if you live with a dog or cat that sheds, the plant will help remove some of those pet dander particles from your air and keep them out. This type of peperomia does not grow well outdoors, so it’s recommended that you keep your plant indoors

Peperomia Frost

Peperomia Frost Plant Care Guide

Peperomia Frost plants are so adorable. We often see them on bathroom windowsills, but the peperomias we usually encounter in our homes have been bred to be much smaller than their tropical counterparts. That doesn’t mean they don’t need a good care routine. Here are some peperomia frost care guides!

Soil

Peperomia Frost plants do best in a soil-less potting mix. This type of planting mixes drains well which prevents root rot and other fungal diseases from attacking your plant. Also, it is lighter than dirt so you can move the plan around easily without stressing its roots too much. It helps to keep the soil moist because the plant is used to growing in wet environments.

Some people recommend adding material such as sand and vermiculite to the potting soil, but this is not necessary. Peperomia plants are susceptible to root rot if the soil stays too wet for too long. It is important that you keep your peperomia frost plant out of standing water and make sure not to overwater it. Peperomia Frost plants are sensitive to chemicals in soil, so it’s important not to use any with weed killers or pesticides.

Light

Peperomia plants are often found in shady areas, which can make them more sensitive to light. The best place for a peperomia plant is east or west-facing window with filtered sun coming through the leaves of other trees outside. A hotter summertime environment might require moving your peperomia plant to a spot near an air conditioner but make sure that it’s not in direct sunlight.

Growth for peperomia frost flower indoors is possible as long as they are given plenty of exposure to sunlight through the windows or access to natural outside light with artificial assistance from fluorescent lights.

Watering

Peperomia frost plants, also known as trailing houseplants or filigree plant, need to be watered on a regular basis. When it’s just been watered and the soil is still wet – wait about three days before watering again. The potting mix should be lightly moist and never completely dry out in between waterings

The potting mix should be lightly moist and never completely dry out in between waterings. Never let your peperomia frost plant sit in a saucer of standing water, since this will cause the excess water to run out the bottom of the pot. If you are going on vacation for more than two weeks, please take care of your plant

Temperature

It is important to keep the plant’s temperature within the range of 60-75 degrees Fahrenheit. The best places for a peperomia frost are in an east or west window, on your desk near a computer tower (but not too close), or out on your porch during the warmer months. They prefer cooler temperatures, so if you’ve had the plant for a few years and it hasn’t been happy with your home’s temperatures then this might be why.

Humidity

Peperomia can tolerate a wide range of humidity. They will thrive in any environment with 50% or higher relative humidity. That said, peperomia prefer the humid conditions that we experience indoors-around 75%.

Seedlings and older plants should be misted frequently to keep them hydrated while the soil is dry. When the soil surface feels dry, use a spray bottle or mister to apply water evenly over the top of the peperomia frost plant until it’s wet up to two inches deep into the potting mix. The width and length of your houseplants will dictate how often you need to do this. For example, a small houseplant requires more frequent watering than a larger one.

If you’re concerned about the soil drying out too quickly, use deep saucers or self-watering containers in your frost plant to maintain high levels of humidity around the roots.

A sheet of clear plastic is another great way to maintain a high level of humidity. Place it on the top of your peperomia frost plant’s pot, covering half the container, and then poke holes through it with a sharp object like a fork or broken pencil. This will allow for lots of water to escape through the holes. Spraying your peperomia frost plants with water will help them retain their leaves and color longer, but they should be sprayed every few days instead of daily.

Peperomia Frost

Fertiliser

Most peperomia frost plants prefer to be fertilized once a week. If you’re using liquid fertilizer, pour some on the soil and water it in well. If you want to use dry-fertilizer mix, scatter about half an inch of powder over the top of your plant’s potting mixture. If you’re using a fertiliser that is mixed with water, pour the mixture on and distribute it evenly.

Generally, it’s best to water plants before giving them any type of fertiliser as this will give the plant time to absorb some water and strengthen its roots. However, if you’re going on vacation or just forgetful (like me), you can sprinkle the fertiliser on top of the soil.

As a general rule, use liquid fertilizer about once every two weeks and granular or slow-release ones in between those times. Check your plant regularly to see if it needs more water as well – this will depend on how much sunlight it is getting and the type of soil you are using.

Toxicity

Toxicity is a big concern when considering the peperomia frost plant. Generally, it’s safe to use houseplants around children and pets, but there are exceptions. The peperomia frost might be considered toxic if ingested by humans or animals.

The only time that they become dangerous is if the sap from the peperomia frost plant comes into contact with human skin, and even then it’s just a mild irritant. To avoid any issues of toxicity, it is recommended that you keep your peperomia frost plant away from high-traffic areas in the house. It’s also advisable to not place them near a window where they can be knocked into by animals or people.

Pruning

Peperomia can be easily trimmed back to shape. The easiest way is to cut the plant down with a sharp pair of scissors just above where you want it to stop growing, but not so far up that any leaves are removed from the stem. This means about an inch or two below where there are no leaves on the stem

After a few days, any leaves that were cut off will grow back and you can trim them again. Remember to use sharp scissors or else it might take longer for your plant to recover. You can also try cutting at an angle just below a leaf node if you want more of a clean cut

Once your plant has been trimmed, you’ll need to repot it into fresh soil. The easiest way is to dig a small hole in the container that it’s sitting in and cut off any roots which are moldy or rotting with your scissors. This will make sure you won’t have any problems with rot. Then take your plant out of the container and cut off any dead or moldy roots with a sharp pair of scissors.

Once you’ve done that, put it in a new potting soil mix at the same depth as before but make sure to water thoroughly first so there will be no air pockets around the root. Finally, put a small amount of fresh soil on top to fill in any spaces

Propagation and Growth

Peperomia frost is a plant that can be grown in many ways. One way to grow them is by propagating the stem and leaves (which are very popular for giving as gifts). Cut off about an inch or so of leaf, then put it on top of some dirt.

The stem will grow roots, and then the leaves will sprout. This can take anywhere between a few days to about a week or two. This method is good for people who want to grow this in a lot of space.

Another way of peperomia frost propagation is by taking root cutting. Cut off a section of stem including roots and leaves, then put it in some dirt. The process should take about two weeks before new growth starts sprouting from the cut-off end of the stem. This method can be used if you are new to gardening, or if you want a more controlled environment

Repotting

Repotting a peperomia frost plant is not as difficult as you may think. The roots of the tree will eventually get congested and this can lead to root rot which would require a more intensive repotting process (see section below). For now, all we need to do is wait for the peperomia frost to show signs of slowing down and then we can repot.

Signs that a peperomia needs repotted: Brown tips on leaves, yellowing in foliage or stems, brown roots showing from potting mix

When you are ready to re-pot your peperomia frost, find out which pot size is best for your plant. This will be based on how much root room you want to give the tree as well as how many roots are in the current container it’s planted in. Make sure that if there are any brown stems or leaves at the base, that they are cut off before the new potting mix is added

Put a thin layer of fresh soil or potting mix in the bottom of your new pot. The peperomia frost plant does not need deep pots if it’s a small tree and you can keep it from getting too root congested. Place your peperomia tree into the pot and fill in with fresh soil or potting mix around it until there is a layer at least halfway up the trunk. You can cover any brown roots that are sticking out of the mixture as well to keep them from showing through. Be sure not to over-fill. If you do, the tree will have a difficult time absorbing nutrients from its soil and this can lead to stunted growth.

Water your peperomia frost plant thoroughly until water starts to come out of the bottom of the container. This will ensure that all roots get plenty of water. Put your peperomia frost back in the spot it was originally planted and wait for new growth to emerge.

Plant Disease

Plant disease is a huge problem for those who keep indoor plants. Most peperomia frost plant care isn’t too difficult, but it can be hard to notice that something needs attention until the damage has already been done. There are two main ways in which your peperomia frost plants can become infected with the disease.

One is by the plant touching a previously diseased surface, and the other is to get it from another peperomia frost plant. It’s important that you never buy or accept plants without ensuring they are healthy first. Be wary of buying plants from places like big-box stores, because they often have infected stock that can only get worse if not treated immediately.

If you do find yourself with an infection on your peperomia frost plant, there are some things to look for as possible symptoms of the issue. The first is leaf coloration changes- yellowing and curling leaves are often indicative of a disease. The other is wilting or drooping leaves, which are also signs that the plant could be infected.

If you’ve noticed any of these symptoms on your peperomia frost plants, it may not hurt to take a look around at others nearby and see if any are showing signs of the same problem. A peperomia frost plant with yellowing leaves is a warning sign that it needs some attention, so you should test your other plants for similar symptoms as soon as possible to prevent spreading the infection.

Peperomia Frost

Peperomia Frost Plant Variegated

Variegated Peperomia Frost grows outward. It is a low-light plant. In moist soil and in dim light, it becomes a lush, bushy plant with large variegated leaves that make it popular for use as an indoor potted plant. The leaves of this peperomia are green with white or cream stripes. The leaves can grow up to 2 inches long and 1 inch wide. The lower surface on this peperomia variance has hairs that give the appearance of frosty dew. The leaves have a glossy texture, with an arrow-shaped stem and pointed tip.

Peperomia Frost vs Watermelon

Peperomia Frost plants are very similar to the Watermelon variety. They grow with a trailing, long stem that hangs and can be trained as an indoor plant or draped over branches outdoors in summertime gardens. Both types of plants have beautiful green leaves edged in white stripes on top but underneath they both sport bright red, glossy leaves that are thick and fleshy

Peperomia Frost plants can be easily confused with the Watermelon variety because they look so similar. However, there is one major difference between these two types of plants: Peperomia Frost’s have a trailing stem and grow as an indoor plant or draped over branches

The Watermelon variety has a more upright stem, grows as an outdoor plant, and is not nearly as trailing. If you are trying to decide between the two types of plants then think about your environment first: if it’s inside versus outside or up against something vs hanging free!

Peperomia Frost vs Moonlight

Peperomia frost plants come in two varieties, the Moonlight and Frosty. The difference between both of these is that they are grown at different temperatures and light levels to create their unique appearances. Moonlight plants should be kept outdoors with filtered sunlight for all day long during summer months while Frosty peppers need a little less light to thrive.

This plant is super tough and can be grown in indirect sunlight or even a shady spot as long as it has some water, which should be checked daily. The Frosty variety will need more moisture than the Moonlight variety but both are low maintenance plants that require regular watering every two days and can be grown in a variety of conditions.

Frosty pepper plants also need some protection from hot sun in summer months while Moonlight peppers will do fine without any shade. The two varieties can be grown together, but they should be placed on opposite sides of an airy room

Common Issues with Peperomia Frost Plant

The most common issue that peperomia frost plant owners find is drooping leaves or leaves going brown, which is often caused by overwatering. When the soil is too wet and moist it can lead to root rot or fungus in the leaves. So make sure that you are watering your peperomia frost plant only when dry, but not underwater!

The other common issue with peperomia frost plants is potting. The best time to repot your peperomia frost plant will be in the spring or early summer when they are growing at their quickest rate and have enough energy for new growth. Make sure you fill up a fresh container with soil that has good drainage, like a mix of potting soil or topsoil with a bit of sand.

The final issue that peperomia frost plant owners come across is overcrowding and other pests, which can be solved by spacing your plants apart so they have enough room to grow. Make sure you only cut the stems off when needed because cutting the plant will slow down its growth.

Tips for Keeping Peperomia Frost Plant Happy

  • Keep your peperomia frost plant in a medium-lighted location
  • When watering, water just until the dirt is moist and not soggy. Let it dry out between watering (avoid overwatering)
  • Avoid too much heat or cold for this type of plant. It does best in a room that is between 65-75
  • When fertilizing, do so every couple of weeks. If you use too much fertilizer it can have adverse effects
  • Peperomia frost plants need to be fed monthly with liquid or diluted slow-release fertilizer

Peperomia Frost Plant Frequently Asked Questions

How big do Peperomia Frost get?

Peperomia Frost plants are small. They grow to be about six inches tall, sometimes taller for some varieties like Peperomia Hetzii and other slow-growing types of peperomias.

Does Peperomia need sunlight?

Peperomia is a succulent plant, so it does not require sunlight to grow. However, the sun can still be beneficial for maintaining its natural green color by producing chlorophyll and helping photosynthesis with UVB radiation. In general, peperomia will do well in indirect light or low-light conditions.

Why are my Peperomia frost leaves turning yellow?

One of the most common problems with this plant is yellowing leaves, especially if they are starting to droop or curl up. This could be due to too little watering, overwatering, or a change in light levels.

Does Peperomia plant purify air?

No, peperomia plant does not purify the air. The dust of the leaves is reported to be harmful to health because it contains a potent alkaloid called allenic acid.

How do I know if my Peperomia Frost needs water?

Peperomia plants are very low maintenance and will do fine if left alone for days, but it does need water. If you notice the leaves drooping or curling at the ends or turning brown, that’s a sign of dehydration. Just give your plant some fresh water and wait until new growth appears

Conclusion

Peperomia plants are a beautiful addition to any household. But they can be high maintenance because of their variety in terms of light and water needs. However, with proper care, these plants grow beautifully into an elegant plant that is not only charming but also practical for the home or office! Get your peperomia frost here. Other peperomia favourites include peperomia rosso and peperomia prostrata.

As always Happy Gardening!

Related articles:

Peperomia Frost

How to Propagate Monstera and Care For The Exotic Plant

So, you own a few monsteras, but are unsure how to propagate monsteras, well fret not we’re here to save the day. Monsteras leaves are large and wavy, often with interesting patterns on them. They grow slowly and can take up to 10 years before they bloom; but when they do, the flowers last for weeks! Monstera plants are perfect for adding some life to your home or office. However, how do you care for them as well? This article will tell you how to propagate monstera plants and how to care for them in their natural environment so that they will be healthy and thriving!

What are Monsteras?

Monstera are a tropical plant that is grown indoors or outdoors in subtropical areas. They can be propagated by air-layering, rooting from cuttings and seeds, which means they grow quickly. The leaves of the Monstera have veins that end with notches like teeth for grabbing insects to eat. Some people call them the “Swiss cheese plant”. Monstera are native to the rainforests of Central and South America.

Monsteras are also considered invasive plants because they can spread quickly and easily through the use of their aerial rootlets which cling onto any object they contact. This includes other plant roots and tree bark, which can damage the host’s root system or kill it if left unchecked long enough.

how to propagate monstera 1

How to Propagate Monsteras?

Some people might be surprised how easy it is to propagate monstera. The plant itself does not have seeds, but instead a cluster of leaf buds that could take root in moist soil if given the right conditions. Here’s how you can start your own cloned mini-monsteras!

The first step is to find a healthy monstera. The leaves should be a deep green color with no sign of browning or yellow spots that indicate how thirsty the plant is.

The next step for how to propagate a monstera, takes place in its natural habitat: you need some water and moist soil! If there are any small puddles nearby, pour out enough water to cover the roots. If you’re in a pinch, you can also use bottled water or even tap water that has been left out for at least 24 hours. (Be sure to change it every day!)

Once your plant is hydrated, find an area of moist soil and dig up some dirt about one inch deep with your hands. Make sure the soil is soft enough for your fingers to dig into, and not too wet or sticky.

Next take a small piece of root from one plant and put it in the hole you’ve dug up, then cover with dirt until only about an inch of it is showing above ground! Water down thoroughly so that the soil is wet to your first knuckle. Place a large pot over the hole so that it will act like a mini greenhouse and keep in all of its moisture!

Now you wait, how long depends on how big or old your monstera plant was before you took root cuttings from it. It can take anywhere from a few days to a whole year for how to propagate monsteras. The way you know it’s ready is when the leaves grow back on your plant!

The next steps in how to care for monstera are about watering and sunlight, so be sure not to forget those important factors that will determine how healthy your new plants become.

5 Popular Monstera Plants

There are many types of monsters that often confuse homeowners and gardeners alike. Monstera plants have a huge range of color, shape and sizes. Here are five popular types of Monstera plants

  • Monstera deliciosa, or “delicious monster.” The leaves of this glossy green beauty are marked with patterns that resemble fingerprints. This type also has a distinctive striped pattern on its petals and deep red fruits it produces in mid summer. The Monstera deliciosa is the second most popular type of monster. These plants do best in a lot of light and moist soil, but can also be found growing along roadsides or near waterfalls. The leaves on this plant are heavily variegated with deep green, creamy white, and bright yellow tones that make this plant stand out.
  • The Monstera Cucurbitaceae also known as a “cucumber monster” is the most recognizable of all monsters, but it’s not for how pretty they are! This type can be recognized by its large green leaves with distinctive yellow veins that appear to point outward from either side of the central vein and produces large, juicy red fruits that smell similar to cucumbers when they ripen in summer time. This fruit is how this type got its name and all of these sweet smelling fruits are perfect for making delicious recipes like desserts or sauces!
  • The Monstera decorata is the perfect plant for those that want to create an exotic feel in their home but are on a tight budget! This type has thin, long leaves with green and white striped patterns that look like fingerprints. These plants are smaller in size and can be found for a few dollars at your local nursery.
  • The Aechmea fasciata is another type of plant that belongs to the Bromeliad family and it also comes from Brazil, but in this case it can be found near a river or waterfall. It has long narrow dark green leaves with pink stripes running down them. This one happens to be one of the most popular types of bromeliads because it is a beautiful shade of pink.
  • The Monstera aurea has green leaves with white stripes that change to yellow at their tips as well. It also produces an trumpet shaped flower but can only be found in the rain forests of Central America like Honduras or Nicaragua.

how to propagate monstera 1

Monsteras Care Guide

Monstera plants are not only decorative; they also provide a great deal of shade, which can be important for your backyard. The monstera is easy to care for and propagate as well. This guide will teach how to take care of the plant!

Soil

Monsteras are hardy plant, but they still need care to grow well. They do best in soil with good drainage and some organic material mixed in like compost or peat moss. The potting medium should be moist at all times so water thoroughly after planting the monstera cutting (or stem).

Light

Keep your monstera plant in a bright location, but away from direct sun. A south facing window is ideal for most plants which can tolerate both indirect and direct light. The best natural sunlight comes straight down into the house during the morning hours. If you don’t have good access to southern windows, choose an east or west facing direction.

Watering

To water your plant, simply pour the desired amount of room temperature water into the top of the container and let it run through. Avoid watering from above as this can cause leaf spots if there’s too much air in between leaves or branches. If you’re growing monstera in a pot, you can water from the bottom.

Temperature

The ideal temperature range for monstera is between 18 and 24 degrees Celsius. Monsteras can handle lower or higher temperatures, but their growth rate will be slower in those conditions.

Humidity

Monstera prefers a humid environment with about 40% humidity at all times, especially during the summer months. The plant does not like hot dry air and should be kept in a room with air conditioning.

Fertiliser

Fertilize your monstera with an organic fertilizer once every two months during warm weather and then once per month in colder climates or indoors year round. The best time to fertilize is when watering so that it’s absorbed by the plant roots right away. A liquid houseplant fertilizer is best since it’s a more gentle form of fertilizer.

Toxicity

Toxic levels of most monsteras are not harmful to humans, but can be lethal for small animals. The leaves and petals contain the highest amount of toxins which is how it protects itself from insect damage. This beautiful plant has a very bad taste as well so that would keep some away too.

The toxin in this plant is called persin. The levels of how toxic the plant is depends on how much sunlight it gets, how old the leaf is, and how many leaves are eaten at one time.

Pruning

how to propagate monstera 1
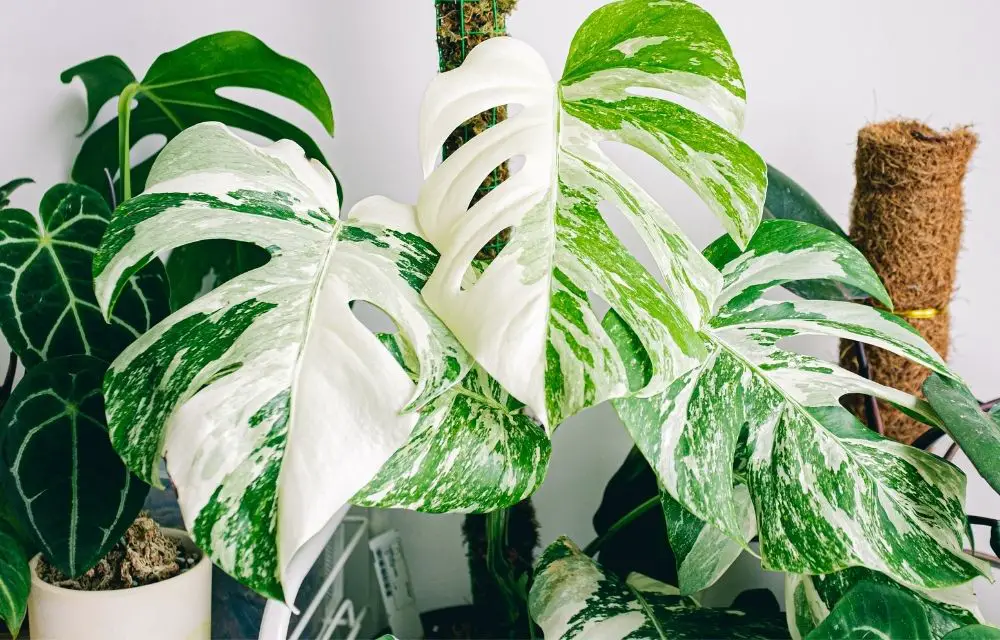
Pruning is one of the best ways to keep your monstera alive and healthy. It can be done at any time during the year, but fall or early spring are usually recommended since those seasons will promote healing more quickly than summer would.

To ensure healthy growth, prune branches back to leave only two to three nodes per branch section. Be sure not to remove any more than one-third of the plant at one time.

It may take up to six months for the cut area of a branch to heal, but you can encourage faster healing by finishing with a coat of tree wound sealant and regular waterings until new leaves sprout.

Repotting

It is important to know how often you should repot your monstera. Monsteras are considered large plant that grow in the ground and require more space than other indoor plants. They also need about once every two years or so, depending on how fast they grow into their pots or how big their pot becomes.

Monsteras like a pot with good drainage, so be sure to put plenty of perlite in the bottom. Be careful not to repot too often or you’ll shorten their time indoors by stunting how much they grow. After each month of growth, it is important to check how well-rooted your monstera are and loosen the dirt in the pot.

Plant Disease

A plant disease is a condition that can affect how well the plant grows or how long it lives. A few common types of monstera diseases include leaf spots, soggy leaves that turn brown or black in color, stunted growth and wilting leaves.

Tips for Keeping Monsteras Plant Happy

How do you care for monstera plants in their natural environment? Below are some tips:

  • Place your plant near a window with indirect sunlight. The leaves will need to be able to receive light without burning and wilting as well.
  • When watering the leaves, use a spray nozzle or misting bottle so that the water evenly disperses. Make sure to use lukewarm water so that it doesn’t shock or wilt your plant’s leaves.
  • Watch how often you fertilize your monstera and how much fertilizer you give them based on the type of soil they are in (organic, regular potting mix). You can also add some slow release fertilizer pellets to the soil.
  • Fertilize once a week or less if your plant is in good shape and has grown one leaf at least two inches long since last fertilization.
  • Experiment with how often you water your plants, but don’t let them dry out too much! Make sure they are watered every other day or less if in a humid environment.
  • If you notice that your plant is wilting, check the soil and make sure it’s not too moist; otherwise, add some more water to the pot.

how to propagate monstera 1

Monsteras Plant Frequently Asked Questions

Can you propagate a Monstera leaf?

No, often times the leaf will be too difficult to take from a plant. The easiest way to propagate monstera is by taking stem cuttings.

The simplest method of propagation for Monsteras is by means of rooting it in water or soil. It can also be propagated by tissue culture if you have access to laboratory facilities and a biochemist!

How do you take cuttings from Monstera?

The first step is to identify how mature the plant is. If it’s young, then you should be able to take a cutting directly from its stem – just make sure that the cuttings are taken at least an inch below where new growth begins on the stem.

Can you propagate a Monstera leaf without a node?

A Monstera leaf with a node is called a “node” and does not produce new growth, so it’s important to find how else you can propagate your plant. If there are no nodes on the leaves of your Monstera or if they have been removed by mistake then use rooting hormone powder (which contains an active ingredient that encourages root growth when applied to the leaves) and a sharp pointy instrument like an awl or needle.

Can you keep Monstera propagation in water?

Monstera propagation can be accomplished in water, but the plant does not enjoy this method of reproduction. The cuttings will eventually die if they are kept submerged too long.

Conclusion

There are many types of monstera that you can plant, from the ordinary type to a decorative one. The steps are simple and easy for anyone who is interested in this kind of gardening project. As long as they have enough patience, knowledge on how to care for monstera plants and time, everyone can have these plants as a home garden!

After reading this article, how about you try propagating your monstera? I’m sure it will be fun!

Related articles:

how to propagate monstera 1
Scroll to Top