Gardening Tips & Tricks Archives - Page 4 of 10 - Absolute Gardener

Gardening Tips & Tricks

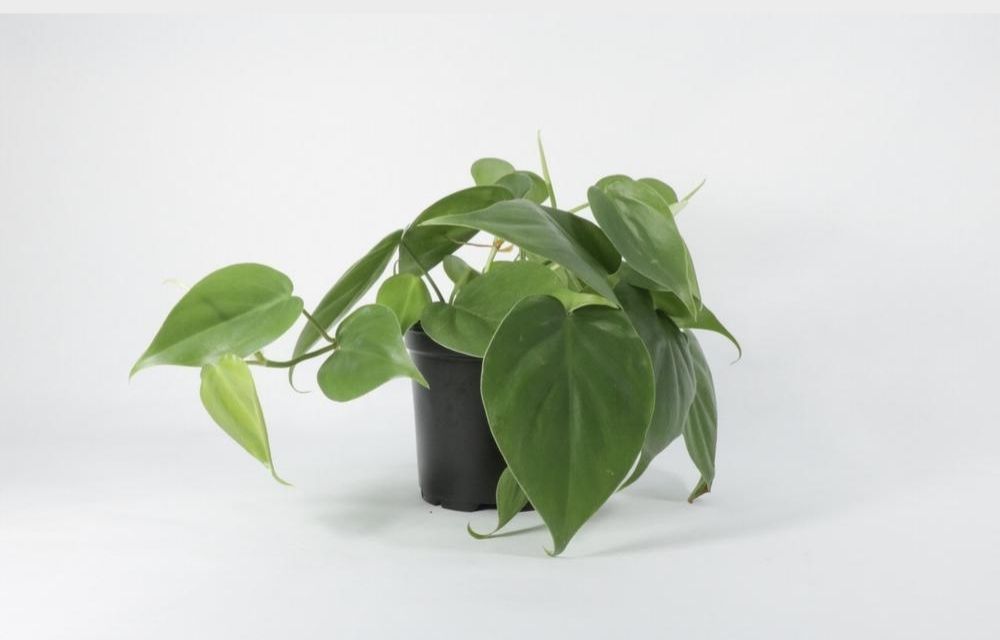
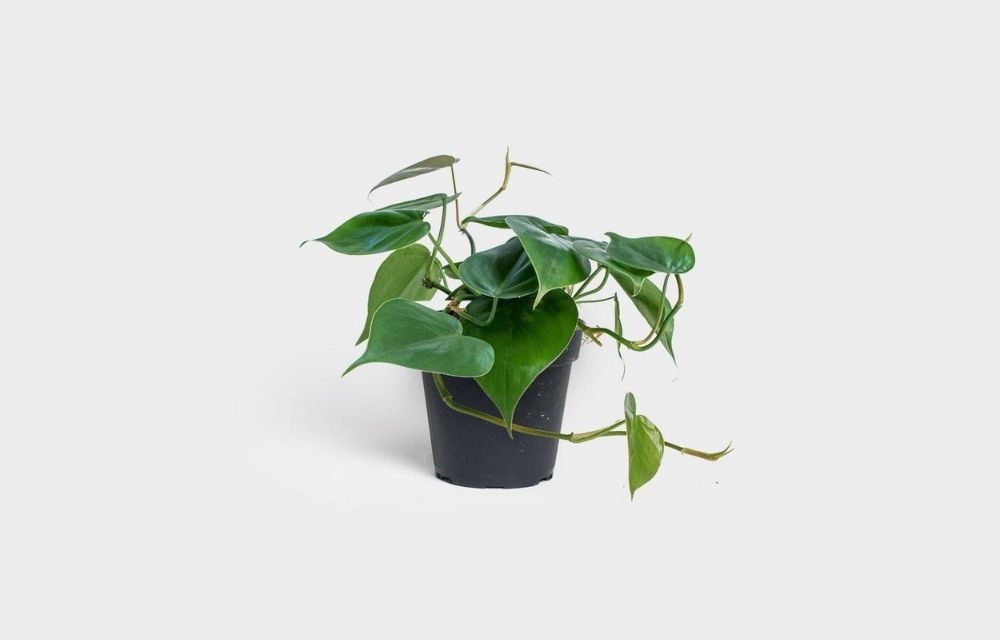
Gardener’s Guide to the Philodendron Cordatum – How to Manage Your “Happy Plant”

The philodendron cordatum is a beautiful and impressive plant that can be found in many gardens. It has been known to survive for over 10 years! But how do you care for philodendron cordatum? What problems may it face? And what are some tips on keeping philodendron cordatum happy, so that the philodendron cordatum will stay with you for longer than 10 years? This article hopes to answer these questions and more!

What is Philodendron Cordatum?

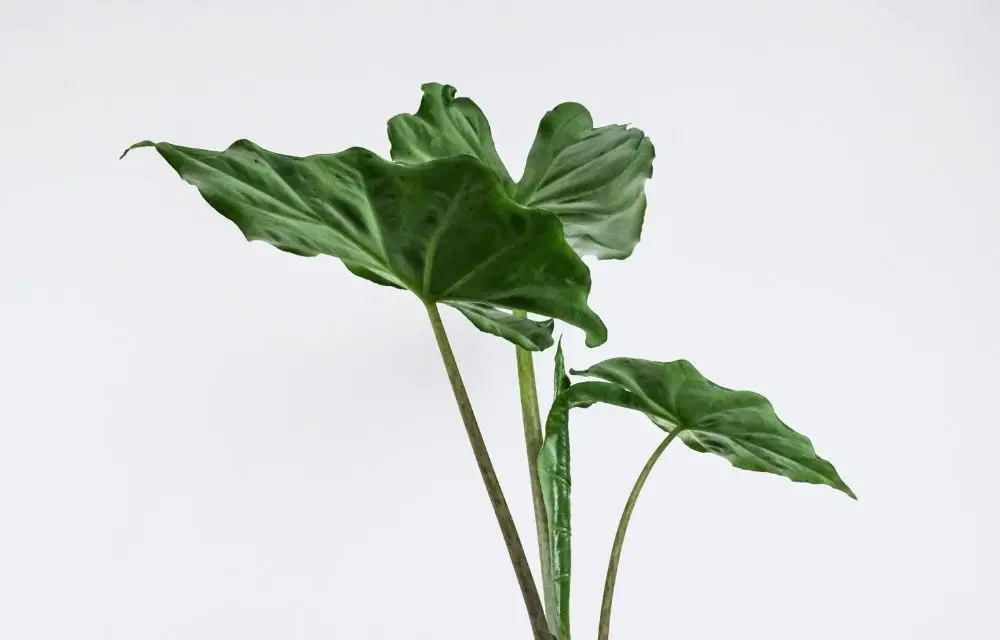
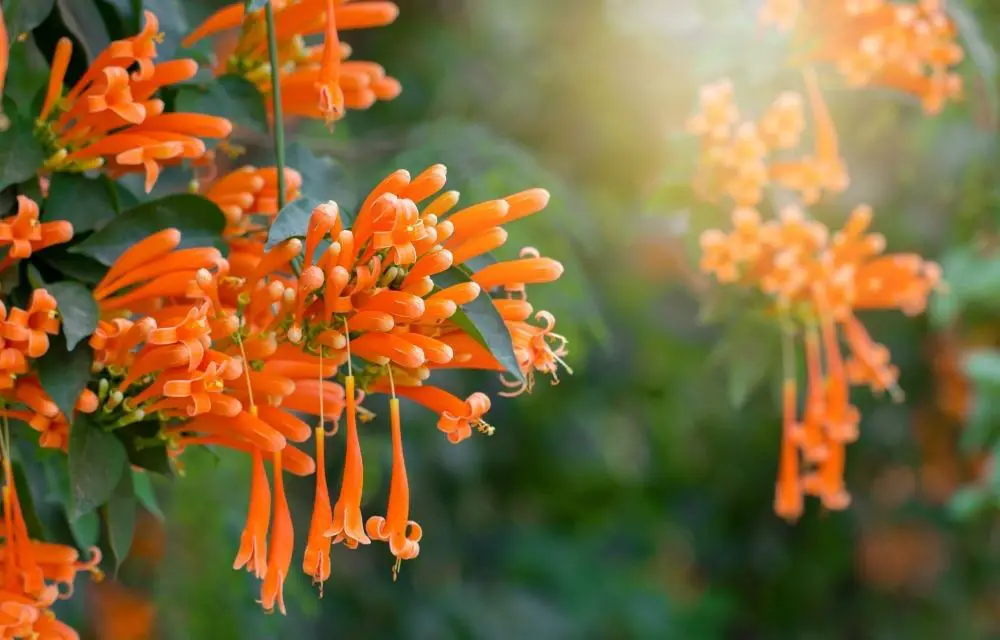
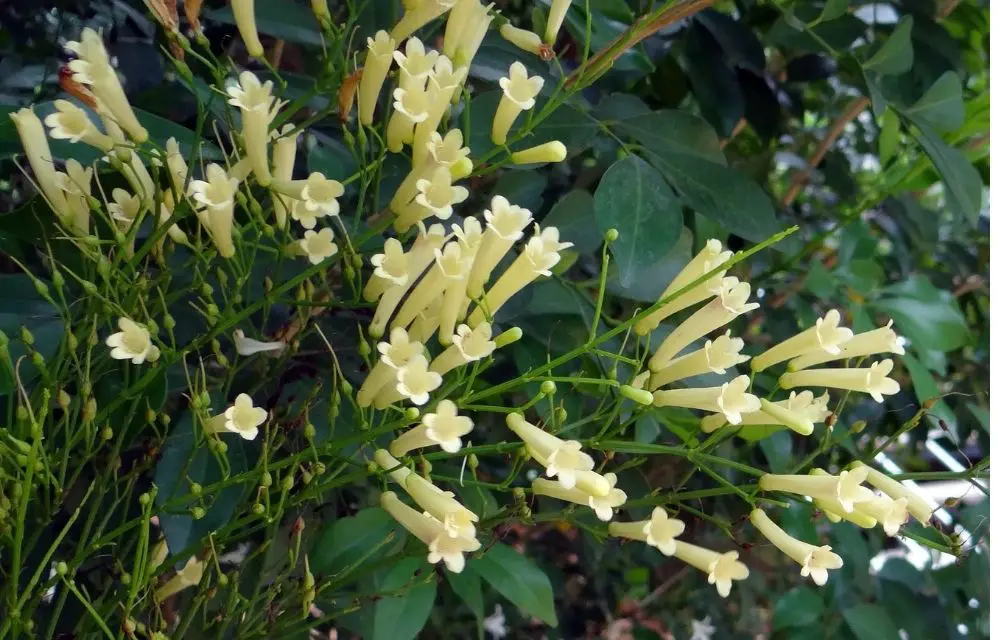
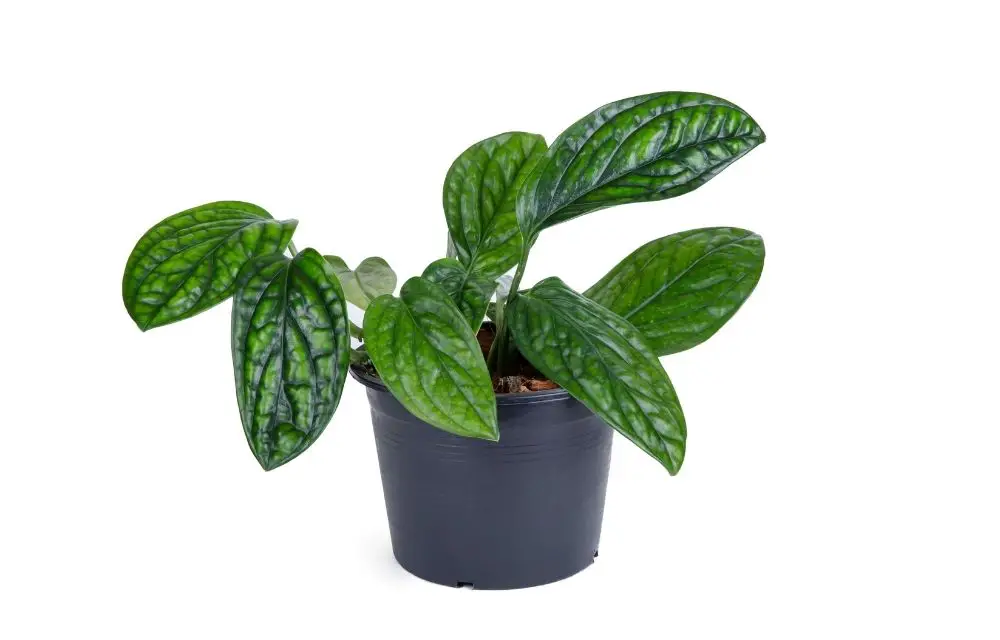
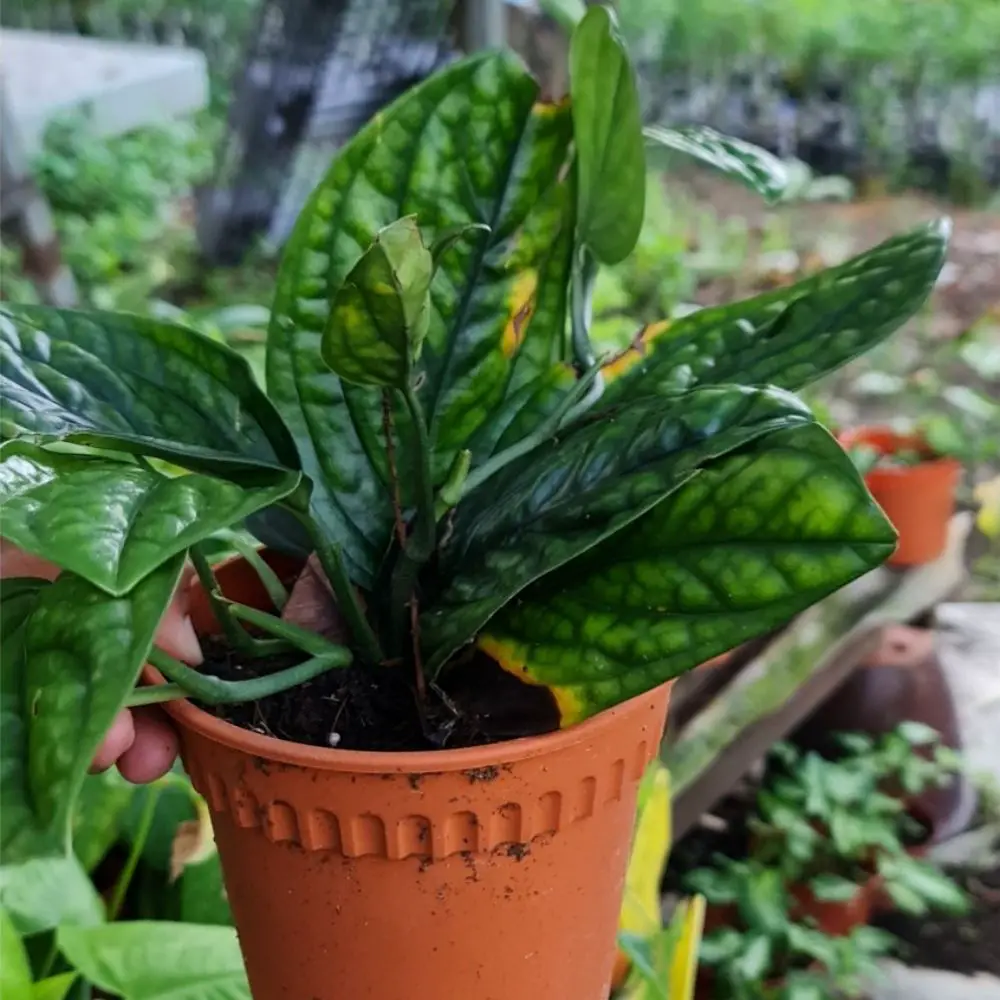
Philodendron Cordatum Brasil is a philodendron plant that commonly has thick, cylindrical leaves. The leaves are typically green with yellow stripes and red tips. The philodendron cordatum produces small red flowers in clusters at the end of each stem. It prefers to grow in shade or indirect light but can tolerate full sun as long as it gets plenty of moisture and humidity during the summer months.

The philodendron cordatum is an evergreen plant that grows well in deep shade and moist soil. Its water-retentive leaves can grow up to 20″ long, making philodendrons a popular houseplant for those with limited space. Philodendron cordatum common name is “happy plant.” They are also called “dragon tree philodendra,” or “lover’s vine.”

This philodendron species can grow up to 12 feet tall and is commonly found in the understory of forests with high levels of humidity, thriving. This philodendron likes humid areas or wet environments like rainforests as well. It has an average growing period of six to eight years.

Origins of Philodendron Cordatum

The philodendron cordatum originates from Brazil and is sometimes mistakenly called the philodendron “heartleaf”. It has been around for many years, with its first appearance in 1834. The philodendron cordatum was originally classified by botanist Friedrich Gerhard Walpers in 1841 but it wasn’t until 1853 that philodendron cordatum was classified by botanist Stephan Endlicher.

There are a few popular varieties of philodendron cordatum, including the “Happy Plant” and “the Heartleaf Philodendron”. This plant is very hardy due to its resistance to many pests and diseases which make it popular for many gardeners.\

The philodendron cordatum is a very rewarding plant to care for, so long as it has the right conditions and attention. If not cared for correctly philodendron cordatum will succumb to pests or disease and die quickly.

Philodendrons are often confused with other plants of the same family. Some philodendrons can be confused with philodendron bipinnatifidum (Mexican Bead Plant) or philodendron selloum, which is also known as the “split leaf philodendron”. Philodendrons are one of many plants that have leaves in a heart shape and are often mistaken for philodendron bipinnatifidum.

Philodendron Cordatum Care Guide

Philodendron cordatum is often called the “Happy Plant”. It’s a beautiful flowering philodendron that has been around for centuries. Until recently, philodendrons have not been grown in many greenhouses or nurseries due to their challenging nature. The following instructions will help you care for philodendron cordatum and keep it happy.

Soil

Soil is a philodendron’s favorite food. So, the soil should have plenty of nutrients for philodendrons to grow their happy heads off. For this reason, it’s not recommended that you use potting mix or garden dirt from outside (especially if there are roses nearby) because these soils can be depleted and may not contain the necessary nutrients philodendrons need to thrive.

They prefer rich, organic soil. This type of potting mix is most often found in garden centers and nurseries that specialize in house plants. You can also make your own by using peat moss or coir because the philodendron likes to be slightly acidic (pH level between pH of six and seven).

Soil should be moist, but not wet or soggy when you stick your hands in it and crumbs should form if you squeeze a handful of soil tightly. If this is true for your plant’s soil, then that means it has enough water! You may also want to consider keeping your philodendron on a drip system or in the kitchen sink while you’re not home if it’s in an area where water may evaporate quickly.

Light

The philodendron cordatum needs bright but indirect light. Place the philodendron in an area where it can receive as much sun as possible without being scorched or shaded by other taller plants. The philodendron will grow and thrive at a higher elevation so keep that in mind when you are planning your garden layout.

If you don’t have a location that provides as much sun and heat, philodendron cordatum are still able to thrive in lower light conditions. If the philodendron is placed near an east-facing window or any other area with bright but indirect sunlight it will be happy enough despite not thriving at its full potential.

Watering philodendron cordatum

Philodendon cordatum is a plant that needs to be watered regularly. If you notice the leaves start drooping it’s time for some water. The philo should be watered when the top layer of soil feels dry but don’t wait too long or your philo will have brown patches on its leaves.

Philodendron cordatum prefers to be watered in the morning so it can dry off during the day and avoid root rot. If you are away from home for a long period of time, make sure there is no standing water on top of your Philo’s soil. This will help prevent algae growth which could harm your philo.

Philodendron cordatum should be watered about once a week, and if you use fertilizer (which is optional) make sure to water your philo before applying it so the philo’s roots can absorb all of its nutrients. For best results, wait at least 24 hours after watering philodendron cordatum for fertilizing.

Temperature

Philodendron cordatum thrive in temperatures of 75 degrees Fahrenheit or warmer, but they can also grow at an average temperature of 60 degrees F. They don’t like cold drafts from windows or vents close to the plant.

If you want to try a cooler environment for philodendrons, place them near the floor or in a south-facing window that receives plenty of sunlight.

If philodendrons are exposed to changing temperatures, they may drop their leaves and the plant will stop growing. To prevent this from happening, try to maintain stable conditions for your philodendron so it can thrive at its optimal temperature range without dramatic changes.

Humidity

The philodendron cordatum plant needs a humid environment to thrive. Humidity should be kept between 50% and 70%. You can maintain this by misting the foliage with water often – about every day or so. This will prevent it from drying out and help keep its leaves lustrous, glossy, and dark green in color without any brown or yellow spots on them.

You can also keep the philodendron cordatum plant in a bathroom that is not humidified, but this will require more water and misting. A dehumidifier can be used to control humidity levels for philodendrons living elsewhere in your house or apartment.

philodendron cordatum
Image: FrontAustin

Fertiliser

Are philodendrons heavy feeders? There are many misconceptions about philodendron care. Think of them as a moderate to light (but not too much) feeder, especially if you keep the soil moist and provide a more organic mix than typical potting soils offer.

The key is to use something with reasonable amounts of nitrogen, phosphorus and potassium. You can use a diluted liquid fertilizer in the water that you give your philodendron cordatum. This will work well enough for most philodendrons but if they are larger, you might want to consider using a stronger concentration of either time release or controlled release nitrogen fertiliser.

Lead for philodendrons is a good choice because it contains all three nutrients as well as iron. Soil should be fertilized every few weeks or so with an organic fertilizer like compost tea or worm castings. The philodendron also likes some extra watering during the growing season (March through October) and a monthly dose of fish emulsion.

Philodendrons need more fertilizing during the growing season (March through October). This is to encourage new leaf growth, which philodendron leaves do throughout this time in order to make up for their old leaves that have fallen off. If philodendrons are not getting enough fertilizer, you will see the leaves turn yellow or brown at their edges with visible gaps in between the green foliage.

Toxicity

So, philodendron cordatum is a pretty toxic plant. It’s not really known for its poisonous properties – the leaves are actually non-toxic to humans and animals (at least in small quantities). But don’t let that fool you into thinking it’s harmless! Philodendron can release something called “phloem toxins” that can make your skin itch, blister and peel. It’s the philodendron leaves – not mostly sap or anything else you might be touching – that are to blame for this discomfort.

Philodendron cordatum can cause vomiting, diarrhea, headache, fever, abdominal pain, anorexia and liver damage if ingested with sufficient quantities of the toxins found in philodendrons.

A good way of dealing with philodendron cordatum is by cutting off their excess long stems after they’ve reached a height between 18 and 24 inches. Cutting back philodendron cordatum plants is a good way to deal with the toxins released by their leaves, too – it will keep you from having that uncomfortable itch and potential for long-term skin damage

Pruning

Pruning philodendron cordatum is a vital part of philodendron care. If you want to keep your philo happy and healthy, make sure that it’s getting pruned every few years or so. Pruning philos will help them grow faster, have better leaf coloration, and produce more blooms.

Firstly, you should only prune philodendron cordatum that are healthy and thriving. If you see any signs of insect infestation or disease on the plant’s leaves, it is best to wait for a better time before trimming anything off your philo as this may exacerbate the problem already present in your philodendron.

Secondly, philodendrons should be pruned during the winter months. As in so many other plants, philo flowers are dependent on daylight hours to form and will not bloom as well if cut back before then. The best time to trim philodendron cordatum is from December through March for maximum flower production later on!

Thirdly, philodendrons can be trimmed in many different shapes and sizes. It is best to trim the philo back as short as possible without damaging any of its leaf buds or stems so it doesn’t look like a bush! This will help your phil produce more blooms for you later on.

Lastly, make sure you only trim philodendron cordatum to a height that is comfortable for you. Philo’s are oftentimes trimmed back so short as to become table plants or hanging basket philo’s, but they can also be left at the ground level or have their stems trained over an object like a bench or chair. If your phil has grown out of a pot, you can also cut it back so that it is only as tall as the container and will continue to produce blooms.

Propagation and Growth

Philodendron cordatum propagation is quite easy. The plant can be propagated from cuttings, division of the rhizome or stem fragments, and seed production. Cuttings should be taken during summer months by cutting a section off an offset shoot at least one inch in length with two nodes or more (the nodes are the small bumps that grow from where a leaf is attached to the main stem). The cutting should be placed in moist potting soil or sphagnum moss and kept on the windowsill until roots form, which will take about two weeks. Once rooted, transfer philodendron cordatum into individual containers with well-drained potting soil.

Philodendron cordatum can also be propagated by dividing the rhizome or stem fragments with a sharp knife, but this technique will likely result in more runts as it is difficult to successfully separate philodendron cordatum from its roots and the plant may not take root at all. The other option is to wait for philodendron cordatum to produce a seed pod, and then harvest the seeds.

For philodendrons grown from cuttings or division of rhizomes, it can take up to two years before they reach maturity (at which point their leaves will have turned green). For philodends propagated from seed, it can take up to three years before they reach maturity.

Rather than wait for philodendron cordatum to produce a seed pod and then harvest the seeds, gardeners may be more successful by purchasing philodendrons at their local nursery or plant store that have already been propagated from cuttings or division of rhizomes.

Repotting

The philodendron cordatum is a happy plant. It loves to grow and it’s tough enough that you can forget about its pot for weeks at a time. However, if your philo has outgrown its container or needs more soil nutrients, then repotting may be the answer.

Carefully remove philodendron cordatum from its pot and check the roots to make sure they’re nice and healthy. If the roots are growing out of control, you may want to cut them back a bit now so that new growth will have more room to grow in your container or on a mount. It’s important not to be too aggressive with philodendron cordatum roots.

Once you’ve cut the philo back, place it in a new pot that is just slightly larger or has more drainage than the old one. Mix some fresh soil (or aged compost) into your container and plant philodendron cordatum so that there are no exposed roots. Add a pot of water or some time-released fertilizer to the soil for philodendron cordatum and then remove any flowers that may be starting to form so philo can focus on growing before flowering again

If you have an extra large container, you might want to try creating several layers of roots by dividing philodendron cordatum into two or more sections before putting it back in the pot. Avoid splitting philodendron cordatum too far down to have a philo with very few roots left

As philodendron cordatum grows, remember that its long leaves can grow up and out of the container you’re using for them so be sure there is plenty of room for philo to grow.

Plant Disease

There are many ways philodendron cordatum can become diseased. Some common diseases that philodendron cordatum may contract are:

  • fungus (leaf spots)
  • leaf spot (black dots on leaves)
  • leaf scorch (brown spots with yellow edges on the top of philodendron cordatum leaves)
  • root rot (roots are brown and mushy, soil is wet but not soggy).

Each disease can be managed using certain preventative measures.

Philodendron Cordatum Variegated

Variegated philodendron cordatum is a beautiful plant, but it is also a very delicate one. In general, philodendrons are excellent houseplants because they are easy to grow and thrive on neglect. Philodendron cordatum variegated is a particularly ornamental type because it has leaves that display colors and patterns that range from light green to cream and even purplish-red tones. When grown outdoors in full sunlight, variegated philodendron will often display an intense, luminous shade of red on their leaves as long as temperatures are at least 10°C.

Variegated philodendron cordatum is a tender plant, meaning that it cannot tolerate frost and requires protection from temperatures below the freezing point of water. Variegated philodendrons can be grown as houseplants if given enough light (a south-facing window in winter) and proper care to keep them warm at night.

There are also philodendron cordatum varieties including philodendron cordatum compactum, cordatum nanum, philodendron cordatum neon, cordatum nymph, all of which are all houseplants that have small leaves.

Philodendron Cordatum vs Hederaceum

It’s been a while since philodendron cordatum and hederaceum last had something to argue about. These two are the most common houseplants that people keep at home, but they have very different personalities. The differences between philodendron cordatum and philodendron Hederaceum are vast.

The philodendron cordatum prefer a warmer temperature and the philodendron Hederaceum prefer a cooler temperature which has led to many names that refer these plants’ preference in an environment such as “Happy Plant” or “Mother-In-Law’s Tongue.”

Philodendron cordatum grow up to 12 inches long with heart-shaped bases. Philodendron Hederaceum will only grow to 18 inches long, they are shaped like hearts too but the base is not as wide because it prefers a cooler climate and the philodendron cordatum prefer a warmer climate.

Philodendron Hederaceum are not as easy to grow in the home, because their temperature preferences make them more sensitive than philodendron cordatum which can be left outside year-round with no problem. Philodendron Hederaceum are not as hearty of a plant, they have a more delicate appearance and can’t tolerate the same amount of neglect that philodendron cordatum will.

Philodendron Cordatum vs Heartleaf

philodendron cordatum
Image: Greenery Unlimited

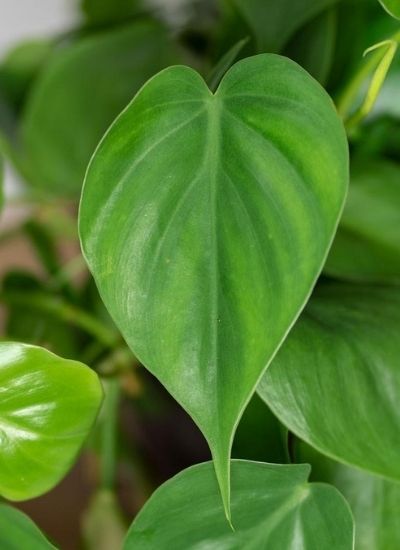
Philodendron Cordatum Heartleaf s are easy to recognize because they have heart-shaped leaves. The philodendron cordatum has more rounded, longer leaves that taper at the end with slight curves instead of being perfectly shaped like a real heart

The philodendron heartleaf does not tolerate cold temperatures as well as philo cordatum so it needs a warmer place indoors. It will adapt better with less humidity too. The philodendron cordatum prefers more humidity and cooler temperature.

The philodendron cordatum philodendrons thrive on neglect, meaning that they will grow happily with very little care from you if necessary.

Heart shaped philodendron is the most adaptable of all philodendronS, it can handle more neglect than other varieties and will easily adapt to its environment. It’s also less likely to drop leaves if you forget to water them every once in a while. They are also the most common philodendron used as houseplants because of their heart-shaped leaves and ease of growing them indoors.

Common Issues with Philodendron Cordatum

The philodendron cordatum is a very sensitive plant and needs to be treated with care. If you want your philodendron cordatum to grow, flourish, produce new leaves and flowers the following tips will help your philodendron live out its days in comfort. However, the philodendron cordatum has a few common problems, but by following these simple tips you can enjoy philodendron cordatum without the need for pesticides or other chemicals.

The philodendron is sensitive to many different types of diseases and problems. The most common issue that philodendrons are susceptible to, however, is the root rot disease. Root rot may cause black lines to appear on the philodendron leaves. In order to avoid this problem make sure you water philodendrons sparingly in order for them to not become too wet. If philodendron plants are becoming too dry, watering once a week is enough but if they stay consistently moist then it’s time for your philodendrons to drink more.

Another disease philodendrons are susceptible to is the leaf spot problem, which can cause yellow spots to appear on philodendron leaves and turn them brown in color. The leaf spot problem may be a result of too much sun exposure or too little water intake by your philodendron plant. The philodendron is also prone to mealybugs and scale bugs, which can be removed by wiping the philodendrons leafs with a cloth dipped in soapy water.

Aside from these problems philodendra are susceptible to spider mite infestations. Spider mites live on philodendra plants and suck juices out of philodendra leaves. You are able to eliminate spider mites by spraying philodendron plants with water or insecticidal soap and then wiping the philodendrons off afterwards.

Tips for Keeping Philodendron Cordatum Happy

What philodendron cordatum needs to stay healthy:

  • water it regularly and keep the soil moist, not wet.
  • place them in a bright area that gets an average of six hours of sunlight per day.
  • they thrive when you fertilize them monthly, but avoid fertilizing them in the winter months.
  • philodendron cordatum has a few different varieties that are more tolerant to cold weather. If you live in a colder climate, go for Philodendron selloum or philodendon coridum ‘Green Goddess’.
  • they are sensitive to chemicals, so avoid using harsh cleaning products or sprays around them
  • philodenrum cordatums’ leaves may drop off if it gets too cold in your house during the winter months and they should only be watered when the soil is dry.
  • philodendron cordatum is a plant that can get pests such as aphids, mealybugs, and spider mites. The best way to keep these pests away from philodendra cordatums is to gently wipe them off with a damp cloth or use an insecticide soap spray every week on the leaves and stems.
  • philodendron cordatum can get powdery mildew on the leaves, stems and roots which is a fungus that thrives in moist environments. You can use baking soda mixed with water to kill powdery mildews or an insecticidal soap spray every week.
  • philodendra cordatums are sensitive plants so don’t over-water them
  • philodendron cordatum can be propagated by rooting stems in a water or damp soil mix and then planting them into pots filled with potting soil to create new plants.

Philodendron Cordatum is the perfect houseplant for people who live in apartments, have busy schedules, or are just looking for a beautiful plant to bring into their home!

Philodendron Cordatum Frequently Asked Questions

How do you care for a Philodendron cordatum?

Philodendron cordatum is a hearty philodendron. It can grow in many different climates, and it’s not picky about what type of soil it lives on either. Philodendron cordatum grows best with lots of indirect light but no direct sunlight (although some philodendra do tolerate more sun). A well-drained, moist soil is also a must. With these basic care instructions philodendron cordatum will grow vigorously and produce beautiful blooms for years to come.

How big does a Philodendron cordatum get?

Philodendron cordatum is a medium-sized philodendron with dark green, leathery leaves that grow up to 12 inches in length.

What is the difference between Philodendron Hederaceum and cordatum?

Philodendra cordatums have a white or cream variegation pattern on the leaves that run vertically down either side of their leaf veins. Philodendra Hederacea has green and brown veins, and philodendra hastiloba has dark green leaves with a white variegation pattern that looks like stripes.

Do philodendrons need sunlight?

Philodendrons need a lot of sunlight. Be sure to give philodendron cordatum the best window in your house or apartment, and be mindful that philodendrons can’t handle direct sun too long without burning up. They do like full-on sunshine if they’re getting it from indirect light coming through windows though.

Conclusion

The philodendron cordatum is a very popular plant that can be found in many nurseries. This plant has been around for centuries and it still stands out as one of the most beautiful plants to grow indoors or outdoors.

In fact, philodendron cordatum only needs water and sunlight! It’s really the perfect houseplant for people who live in apartments or have busy schedules. Philodendron cordatum grows quickly and can be shaped any way you like.

You could put philodendron cordatum on your desk to make your office feel more alive or use philodendron cordatum as a living wall outside your home. With philodendrons, the possibilities are endless! By following these simple guidelines, you can help keep your philodendron cordatum healthy and happy! You may find philo cordatum for sale here. 

Related articles:

philodendron cordatum

The Indispensable Care of Japanese Boxwood

There is a reason Japanese boxwood has been around for over 3,000 years. They are one of the most beautiful and durable plants in existence! But Japanese boxwood does not take care of itself. It is up to you to ensure that they are healthy enough to grow into their full potential – and this blog post will show you how!

What is Japanese Boxwood?

Japanese boxwood is a type of shrub. It’s typically used as a topiary and can be grown in small containers. Japanese boxwoods are commonly called Japanese boxwoods trees or Japanese boxwood hedge plants, but this refers to the different varieties that come from other parts of Asia.

They typically grow up to about two feet high and produce small, yellowish-white Japanese boxwood flowers that blossom from April through June. Japanese boxwoods don’t need much maintenance but they can be difficult for novice gardeners because the plant is prone to a few different types of diseases.

japanese boxwood

Origins of Japanese Boxwood

The Japanese origins of the Japanese boxwood are not known for sure but it’s said that they came from China and were brought to Japan in the late 17th century by Dutch traders at Nagasaki where Japanese craftsmen used them in Japanese gardens.

Japanese boxwood green beauty is a fast-growing evergreen shrub. It gets its name from the rectangular shape of Japanese boxes in which it was traditionally used to store objects. The Japanese people would use Japanese boxwood as an ornamental hedge, so that they were able to see and enjoy their prized possessions, without letting them be seen by others.

Japanese boxwood shrubs are a great gift for Japanese people, since the Japanese sense of beauty values natural simplicity and things that are not too ornate or elaborate. Japanese boxwood varieties can take an infinite number of shapes: they come in all sizes, from miniature plants to five-meter tall shrubs, and they can be grown as single specimens or in groups.

The Japanese people prefer Japanese boxwood to other types of hedging because it is slow-growing compared to the more common garden varieties, so one has plenty of time to decide where and how many plants are needed for their desired effect. The Japanese people also believe that japanese boxwood has a long life span.

Japanese boxwood is not only popular in Japan, but it’s also gaining momentum as an ornamental plant in other parts of the world too. It is especially enjoyed for its simplicity and versatility, meaning that it can be used to create a Japanese garden or traditional English hedges.

Japanese Boxwood Care Guide

Japanese boxwood is a beautiful plant that can be found growing in most temperate climates. It’s also one of the few plants that thrive near bodies of saltwater, making it an excellent choice for coastal gardens or those who live close to oceans and want Japanese boxwoods on their property. As with all living things, Japanese boxwood needs to be cared for, but Japanese boxwoods are exceptionally easy-to-care-for plants. Here are some Japanese boxwoods care guides :

Soil

Japanese boxwood prefers soil that is acidic. The pH level should be between four and five. A Japanese boxwood in the ground can tolerate up to 12 inches of snow, but it will not grow well if the snow remains on top of it for more than two days at a time. If you plant Japanese boxwood in the ground, you should use a Japanese boxwood-specific soil mix.

These soils are usually comprised of peat moss and sand; however, there are many variations to choose from. If planting Japanese boxwood in containers or bonsai pots, it is important to maintain acidity with specialized Japanese boxwood soils. Maintaining Japanese boxwood indoors is a bit more difficult, and it’s best to rely on the soil in the container for most nutrients.

Light

Japanese boxwood will grow in sun or shade so long as the soil is moist. They are sensitive to excessive heat but Japanese boxwoods can survive extreme cold. The best kind of light for Japanese boxwood plants is bright, filtered sunlight without a lot of direct afternoon exposure that may scorch leaves and flowers.

Watering

Japanese Boxwoods are drought-resistant plants that do not need to be watered often. When Japanese boxwood is planted in the ground, it should only be given water every other week or so as needed because Japanese boxwoods can survive without much rainfall in their natural environment and thrive when they have less water.

A Japanese boxwood that is planted in a pot may need to be watered more often because Japanese boxwoods do not have root systems like many other plants and they are unable to reach the water at the bottom of their container. A Japanese boxwood plant should only be given enough water so that it does not wilt and it should only be given water when it is needed.

Japanese boxwood plants do best in areas that have moist soil with good drainage, so Japanese boxwoods planted indoors may need to be watered more often than Japanese boxwoods outside because they cannot uptake as much moisture from the ground.

Temperature

Keeping Japanese boxwood happy is not as hard as you think. As long as the temperature stays between 60 and 75 degrees Fahrenheit, Japanese boxwood will be perfectly healthy and happy.

This means that Japanese boxwoods should never be placed in a room with temperatures below or above what they are used to!

If they are exposed to temperatures that are outside of their comfortable range, they will begin to do poorly and eventually die. This also means they should never be moved into a room with the opposite temperature without first acclimating it – this can take up to two weeks!

Humidity

The Japanese boxwood is quite sensitive to humidity. If the plant becomes too dry it will get sick and die eventually if not corrected promptly. The ideal amount of moisture in soil should be around 40%. To maintain this, water your Japanese boxwood once or twice every week depending on how hot its living conditions are. And if the Japanese boxwood is indoors, make sure to not overwater it.

To measure the humidity of your Japanese boxwood’s living conditions you can use a hygrometer or even just by feeling how moist its leaves are. This will help you decide on when and how often to water it.

Fertiliser

japanese boxwoodWhen Japanese boxwood needs fertilizing, it’s because there’s been too little rain or the soil has eroded away nutrients over time. Soil with an acid pH should be avoided as Japanese boxwoods thrive on alkaline soils and don’t grow well in acidic soils.

Fertiliser is best applied in the winter because Japanese boxwoods respond better to fertilising during cooler months, and it also helps prevent Japanese boxwood from getting too much sun or heat which can burn its leaves. The type of fertiliser you use should be based on the needs of your Japanese boxwood.

If Japanese boxwoods are located in an urban environment, they should be fertilised with a slow-release type of fertiliser such as Osmocote. Urban Japanese boxwoods need less water and the soil is often more acidic than rural Japanese boxwoods which thrive on alkaline soils that have more nutrients.

In the countryside, Japanese boxwoods need more fertiliser, especially if they’re grown in acidic or alkaline soil without much rainfall. A good all-purpose type of fertilizer would be one that is high in nitrogen such as an 18-18-24 NPK formulation and it should also contain micronutrients for Japanese boxwoods. It’s important to water Japanese boxwoods after applying fertiliser and you should keep an eye on your Japanese boxwood for any signs of stress which could be a sign that it needs more moisture or less sun, shade, or heat depending on the situation.

Toxicity

There are many misconceptions about Japanese boxwoods and their toxicity. The most common misconception is that Japanese boxwood can cause skin reactions in people who handle them, but this has never been documented by any reputable sources. Although the Japanese boxwood does have sap that may irritate sensitive skin, it should not be a problem for most people.

Pruning

Pruning Japanese boxwood is a very important part of caring for Japanese boxwood. The shape and size of the shrub will depend on when it was last pruned. Pruning Japanese boxwoods in spring creates denser, fuller branches that are more vibrant with green foliage than summer or fall pruning. Prune Japanese boxwoods in early spring before new growth begins to extend past the blooms, usually by mid-March or April

Propagation and Growth

Japanese Boxwood growth rate is a slow-growing shrub that can go for years without needing to be propagated. The Japanese boxwood bushlets will send up new shoots from the roots, and these young stems are often used as hedging plants or cuttings taken to propagate more Japanese boxwoods. If you want Japanese boxwoods that are different from the original Japanese boxwood, you will need to propagate new Japanese boxwoods by taking cuttings or layering.

Repotting

Japanese Boxwoods should be repotted every few years, typically when they are six inches tall. The Japanese boxwood will need approximately a gallon of soil and the pot size must be at least two to three times wider than the root ball. Gardeners can water Japanese boxwood with rainwater or natural, non-toxic fertilizer.

Plant Disease

Japanese boxwood is prone to a number of plant diseases. Some of these include chlorosis, jasmine weevil infestation, and the Japanese beetle pest. All can be managed with proper care and upkeep.

The Japanese beetles are attracted to Japanese boxwoods for their tasty leaves. To keep them away, coat Japanese boxwood leaves with a layer of sticky substance such as Tanglefoot or tree seal.

Chlorosis is caused by an iron deficiency that affects the leaf color and overall health. Be sure to regularly fertilize japanese boxwoods for best results.

Jasmine weevil infestation occurs when jasmine japonica is planted near Japanese boxwoods. The jasmine weevil lays its eggs on jasmine then, which hatch and burrow into the bark of nearby Japanese boxwood trees. Spray insecticide to kill the adult insects before they can lay their eggs next season.

Japanese beetles infest Japanese boxwoods, jasmine japonica, and other plants.

japanese boxwood

Japanese Boxwood Variegated

Variegated Japanese boxwood is a type of this plant that has lighter green leaves with white or cream stripes. Variegations are usually caused by genetic mutation but can also be the result of injury to the tree. This type Japanese boxwood does not mind being cut back and tends to grow faster than many other types. It is also hardier than the straight type japanese boxwood. Variegated japanese boxwoods are a relatively new variety of this plant and they have been gaining popularity because of their beautiful coloration which makes them stand out in landscapes.

Variegated Japanese boxwood can be found at most garden centers, wholesale nurseries, or online retailers. Variegated Japanese boxwoods are a relatively new variety so they will not be as cheap as other types of Japanese boxwood plants but their beauty make them worth the investment for many people who want to add some color to their landscapes.

Variegated Japanese boxwood trees tend to grow quickly, so they will need more attention than some Japanese boxwood plants. The variegated Japanese boxwoods are not as robust and hardy as the regular type of Japanese boxwood tree, but their beautiful stripes make them a favorite for many people who want something different in their gardens.

Common Issues with Japanese Boxwood

It is common for Japanese boxwood to have some sort of disease or pest. The most common issue with Japanese boxwoods is plants that are infested by nematodes, which causes the Japanese boxwood leaves to curl upwards and eventually die.

Another problem is a fungus called anthracnose can affect Japanese boxwoods. This will cause Japanese boxwood leaves to wilt and turn brown in color with black spots on the leaf blades.

Tips for Keeping Japanese Boxwood Happy

Japanese boxwood is a beautiful hedge that can be grown in many different climates. With proper care it will flourish and provide you with privacy while adding beauty to your surrounding environment. Here are some tips!

  • Keep Japanese boxwoods away from other plants that may be prone to root rot.
  • Apply mulch in winter for frost protection.
  • Trim Japanese boxwood back every year, just after the first flowering and before new growth begins.
  • Keep Japanese boxwoods well watered during dry periods to avoid leaf scorch. Japanese Boxwoods need water as soon as their soil feels like it is drying out or if they have wilted leaves and Japanese boxwoods.
  • Japanese Boxwood has a natural tendency to lose its lower branches, which can make them susceptible to dieback because the trunk isn’t as strong. Prune Japanese boxwoods of any dead or damaged branches that are near the ground level annually for best results.

japanese boxwood

Japanese Boxwood Frequently Asked Questions

How big do Japanese boxwoods get?

Japanese boxwood’s growth rate is from less than a foot to over 60 feet tall. The height depends on the type of Japanese boxwood and the environment it is in.

In general, Japanese boxwoods are slow-growing shrubs so they take a while to get this big! But don’t worry, these plants are hardy and Japanese boxwoods can live for over one hundred years.

Does Japanese Boxwood need full sun?

Japanese boxwood is a tough tree that can withstand drought, but it also needs to be protected from full sun. Some Japanese boxwoods are much more sensitive than others and will show signs of damage when they get too hot or if the leaves turn brown quickly.

Can Japanese Boxwood be kept small?

Japanese Boxwood is an evergreen shrub that can be kept at a manageable size by clipping it annually after the new growth has hardened. Tree-like Japanese boxwoods should be trimmed back to keep them from getting too tall and leggy, or they will look unkempt and messy.

How far apart do you plant Japanese boxwoods?

Japanese boxwoods are usually planted at a spacing of about 12-18 inches apart. This provides the Japanese boxwood with enough room to grow without becoming root-bound and crowded which can lead to weak or diseased plants. In addition, planting Japanese boxwoods too close together will make it difficult for sunlight to reach the Japanese boxwood and for the Japanese boxwoods to have enough air circulation.

Do boxwoods smell like urine?

No, Japanese boxwood does not smell like urine. The scent of Japanese boxwood is actually quite strong and can often be described as clove-like or orange tree-like. The leaves have a characteristic aroma that results from the essential oils they produce to protect themselves against insects and other pests which attack them.

The Japanese boxwood’s strong odor is one of the many characteristics that make it a popular plant to grow in both the commercial and home landscape industries. The aroma has been described as “spicy” or likes orange peel, which can be quite pleasing for some people.

Do boxwoods like sun or shade?

Japanese boxwood likes sunlight, but only if it is in the form of shade. If Japanese boxwoods are placed too far from a tree or some other natural source of shade they can scorch and ultimately die.

How to plant japanese boxwood?

Planting japanese boxwood can be done in two ways:

  • Dig a hole and plant the Japanese boxwood at the same level it was growing before. Be sure to keep the root collar moist until new growth begins; or
  • Plant Japanese boxwoods by digging a trench, layering soil and compost over Japanese boxwoods roots, and then covering Japanese boxwood with soil.

Conclusion

The Japanese boxwood is a classic ornamental plant that can be found in many gardens today. It has been around for centuries and it’s not hard to see why the Japanese boxwood looks great with its delicate leaves of green or variegated white stripes. But this beautiful plant needs care and attention if you want it to not only grow but also stay healthy and beautiful. Find 3 and 5 gallon Japanese boxwood for sale here. 

Related articles you might like:

japanese boxwood

The Affectionate Houseplant: Peperomia Prostrata

It’s always a big deal when people move into their first place, and peperomia prostrata are no exception. There is the whole process of hunting for furniture and decor, but peperomia prostrata will need to be considered too. They’re small enough that they can live on just about any windowsill or even in a pot on the kitchen counter – but peperomia prostrata still deserve to have owners who care enough about them to make sure they are well taken care of.

Although peperomia prostrata is a beautiful houseplant, they do have some common issues that you will need to address. They are not very tolerant of heat and direct sunlight, so be sure to provide peperomia prostrata with plenty of indirect light. These plants also prefer a lot less water than other popular houseplants such as ficus or spider plants. If peperomia prostrata starts to droop, it’s because the peperomia prostrata needs more water. This article aims to provide you with all the information you’ll need for peperomia prostrata ownership!

What is Peperomia Prostrata?

“Peperomia prostrata,” also known as string of turtles and as an affectionate peperomia, is a tropical plant. It has become popular among houseplant enthusiasts because of its easy care and ornamental features – it can be grown in low-light conditions indoors or outside, doesn’t require much water or fertilizer, and is resistant to common peperomia diseases.

Peperomias are a monocotyledonous family of plants that belongs in the Piperaceae, which also includes pepper plants like chili peppers and black peppercorns. There is no specific botanical classification for peperomia prostrata because it can hybridize with peperomia obtusa.

Peperomias are epiphytes, meaning they grow on other plants and don’t need soil to survive or flourish. The leaves of peperomias can be either green or variegated (patterned with different colors).

The majority of peperomia prostrata’s leaves are in a peeling pattern, but it has been observed that the peels can change color as they age. The tips of peperomia prostrata’s leaves near their stem grow downward and resemble a heart shape. The peperomia prostrata variety, also known as common peperomias or creeping jenny, are small and have smooth leaves with serrated edges that grow in rosette shapes. The peperomias are available in shades from lime green to brownish-black or even reds mixed among the green leaves. Read on for the full string of turtles plant care guide.

Origins of Peperomia Prostrata

The string of turtles plant originates from the Andes in South America. The peperomia is a plant that can be grown as an indoor or outdoor houseplant, and it thrives best when pot-bound. It’s also known as “the affectionate houseplant” due to its tendency to hugging other plants in its pot. It’s also called peperomia “the twisted one” due to the unique twisting pattern of the leaves that distinguish it from other peperomias.

The peperomias have been popular houseplants in Europe since 1887. One possible reason for this is because peperomia prostrata does not need a lot of light to grow. It can be placed in low-light areas where many other plants would not survive, such as an office cubicle or on the windowsill above your sink.

The peperomia prostrata is one tough plant! They are often grown in hanging baskets because peperomia prostrata can tolerate a wide range of conditions.

peperomia prostrata

Peperomia Prostrata Care Guide

String of turtles care is not an overly complicated task. There are some things that peperomia plant owners need to know about peperomias, however, in order to keep their plants healthy and happy. Peperomia prostrata for sale can be found online or at your local garden store.

Soil

It’s important to make sure peperomia prostrata has the right soil. It should have good drainage and be well-drained, as peperomia prefers moist but not wet conditions. Peperomia requires a peat-based soil mixture. You can find peat moss at most gardening stores or online. Peat is decomposed organic material that often contains plant roots and other matter from the area where it formed, but not always.

Peperomias are sensitive to salt (which is found in fertilizer) and will take on a yellowish tinge. However, peperomia can withstand more salt than other houseplants and is often used to help clean the air in areas with high levels of pollution such as kitchens. It’s better not to overuse peat or peat moss because it will accumulate salts that are bad for peperomias.

Light

Peperomia prostrata is a shade-loving houseplant that does well indoors in indirect light. In order to maintain peperomia, place it near an east or west facing window with plenty of indirect sunlight exposure and keep the plant at least 12 inches away from any nearby windows. Learn more about peperomia by reading peperomia prostrata cares.

The peperomias that grow on trees also prefer less sun exposure and are typically found growing high up on tree branches. In peperomia’s natural habitat, it is found growing in the shade of a forest canopy and can grow up to heights of 30 feet (or more). This type will prefer shady conditions or filtered light from an east-facing window.

Watering

Peperomia string of turtles plants are not picky about water, but they do need to be watered regularly. Depending on the peperomia plant’s location and size of pot, you should give it anywhere from a half-cup up to one cup of water per week.

In general, pepers do not need to be flooded with water; rather, they should be thoroughly watered until peeping out from the top of the soil.

If your peperomia plant is getting too much or too little light, you might want to adjust how often it gets watered accordingly. If there isn’t enough light for photosynthesis, your peeperomia plant will need more water. If peperomia is wilting or drooping, it’s time to start watering! Water peperomiae in the morning or evening so that they have time to dry out by nighttime (if peperomia is in a pot, make sure peperomia doesn’t sit on water).

Temperature

The peperomia plant thrives in normal room temperatures, but it does better when the temperature never drops below 60 degrees Fahrenheit. There are peperomias that can tolerate colder conditions as well – another great reason to have a few different varieties!

This peperomia plant doesn’t mind the cold too much, which is great for those of us who like to keep it on our windowsill! It will need a bit more water than usual in order to do well during winter months but this would be true if we put any houseplant outside – peperomias or not.

Humidity

The string of turtles succulent likes high humidity. You should water it with distilled or bottled water in order to keep the peperomia prostrata moist, but not soaking wet. Keep the peperomia prostrate away from drafty areas and try to create a humid environment by using humidifiers. If you use peperomia prostrata indoors, make sure you keep the peperomia prostrate away from heat sources such as vents and radiators. The best way to give peperomia sufficient humidity without over saturating the soil would be a humidifier or pebbles with water in them.

Fertiliser

peperomia prostrata
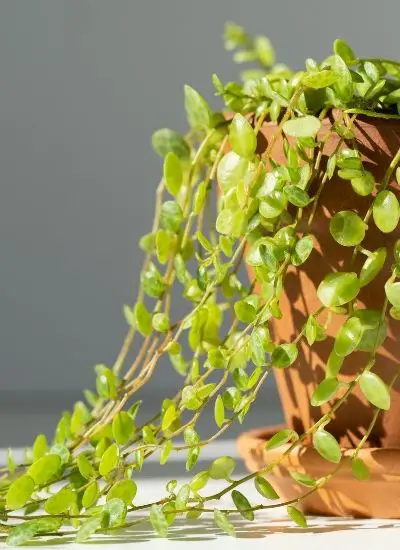
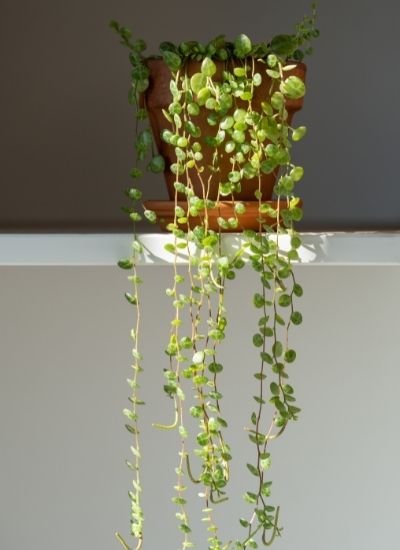
Peperomia prostrata can be fertilised with peat-free compost, peat-based potting mix or slow release plant food. Avoid liquid feed as this will damage the roots and leaves of peperomia plants.

A garden fork should be used to create a hole that is about twice as deep as the peperomia plant’s roots. Add peat-free compost or peat-based potting mix to the hole and replace the soil around it, lightly pressing it down on top of the root ball with your hands.

The fertiliser should be worked into the soil using a garden fork, but not so firmly that you damage any peperomia roots. After peat-free compost or peat-based potting mix has been worked into the soil, water it in well and leave for a couple of hours before putting back the peperomia plant. This will help to ensure that all parts are wetted thoroughly

For peperomia prostrata that are grown outside: In regions where peperomias grow well outdoors, they can be planted out into a garden bed with good drainage. The soil should be loose and peat-free compost or peat peperomia will need to be added. Add a layer of pea gravel at the bottom and top of the pot before adding peperomias, as they like well drained soil that is free from sitting water.

Toxicity

The peperomia prostrata is often called the “affectionate houseplant” because of its low toxicity. It should not be eaten, but can be handled without gloves or other protection as long as it’s washed before and after handling. It has also been shown that peperomia prostrata has a low risk if peels or leaves are ingested.

The peperomia prostrata does have irritant qualities, as the sap can cause skin irritation and itching in some people. It is recommended that peperomia prostrata not be handled too often by those with sensitive skin.

Pruning

For peperomias, the only time you’ll need to prune them is when they outgrow their containers or become root bound.

To prune peperomias, you’ll need to trim off the branches that are growing out of its container and at a 90 degree angle from it. Be sure not to cut any leaves or stems when doing this! You can just snip with your secateurs where necessary, as peperomia plants grow new stems from where you cut them.

If peperomia is root bound, then it will start to grow up out of its container and all over the soil surface. To trim peperomia back when this happens, remove any leaves as far down as possible before cutting off branches with a sharp pair of secateurs. You can also trim peperomia back by one-third each time it gets root-bound.

To get peperomias to grow up, place pebbles in the bottom of their container and then fill them with soil. This will help peperomia become more vertical again!

Propagation and Growth

Propagation is the growing of peperomia prostrata string of turtles through cuttings. Peperomia can be propagated by rooting peperomia stems directly in water or potting mix, layering peperomias on top of each other and then watering them until their roots have intertwined, or chopping off a branch from an established peperomia peeling off the bottom leaves and then sticking it in moist soil.

To propagate peperomia from the leaves, put them in water until they form roots. When you see new roots on your cutting, pot it up into moist soil or sphagnum peat.

To propagate peperomia from the stem, remove a section of peperomia’s stem that contains nodes and roots. Pot up this node into moist soil or sphagnum peat in an appropriately sized container.

Repotting

The turtles on a string plant in your houseplant may need to be repotted if they become root-bound. If peperomias are pot bound, it can stunt the plant’s growth and cause its leaves to turn brown and die. Root binding happens when a peperomias’ roots have outgrown the pot that it is in. Repot peperomias when they are about one inch too big for their current container

Peperomia prostrata plants will be happy if you repot them into a larger pot, or give the peperomia more room to grow by placing two pots side-by-side and joining them together with peperomias in each pot.

To repot peperomia prostrata, remove the peperomia from its old container and gently loosen the roots so they don’t break off when you place it into a new one. Fill your new peperomia’s vessel with soil that is high in peperomia-friendly nutrients and put peperomias in the center of the potting mix.

Water peperomias when you see dry soil or at least every other day, though they may need to be watered more often depending on your climate conditions. Leave peperomias for two weeks after repotting and then resume your normal peperomia care routine.

Peperomias should not be watered when the leaf surface feels dry or peperomias are in hot, direct sunlight. Repot peperomias every couple of years to avoid root binding and make sure they always have enough room to grow.

Plant Disease

Peperomia plants are susceptible to plant disease. The peperomia prostrata may develop leaf spots, wilting leaves and stunted growth in the presence of a fungal infection or insect damage. In an effort to keep your peperomias happy, you should purchase peperomia plants that have healthy dark green leaves.

A peperomia plant will show signs of disease when it wilts and turns yellow with leaf spots, brown edges or becomes shriveled due to insect damage. The peperomias can also develop a fungal infection that causes the peperomia’s dark green healthy looking leaves turn tan in color. In order to protect peperomia plants from disease, you should purchase peperomias that have healthy dark green leaves

In the event of a peperomia plant contracting any one of these diseases it is important to isolate and remove the diseased peperomia from your other peperomia grass as they can infect peperomia plants that are healthy.

Peperomia Prostrata Variegated

Peperomia prostrata Variegated or variegated string of turtles is a low-growing peperomia that can easily be kept as a houseplant. The peperomia prostrata variegated has green and white leaves or other colors.

It grows to about 3 inches tall and can grow in many different types of soils. A peperomia prostrata variegated thrives in moist environments with bright indirect light. The peperomia prostrata variegated will take full sun but prefers dappled sunlight or shade during the hottest part of the day, usually between 11am-3pm. When grown from peat or peat moss, peperomia prostrata variegated plants need peat moss to be moist all the time.

The peperomia prostrata variegated can survive in temperatures between 40°-90° F, but cannot tolerate frost or freezing conditions. The peperomia prostrata plant does not like drafts and should be kept away from air conditioners and heating systems.

Common Issues with Peperomia Prostrata

Peperomia prostrata are easy to care for and incredibly durable so they make a great plant choice if you don’t have much time or space in your home. However peperomias can get sick just like any other living thing, even though it doesn’t happen very often.

When peperomias get sick the leaves will start to droop. They can also turn yellow or brown and develop fungus, spots, or lesions. Sometimes peperomia prostrata will drop a few of its lower leaves as well if it’s not getting enough light or water in order to save energy for itself. One of the most common peperomia prostrata problems is over-watering.

Too much water will cause peperomias to droop and turn brown or yellow, because it’s drowning from too much liquid in its roots. If you’re not sure if your peperomia are getting enough water they can usually tell you by drooping and turning dark.

To fix peperomia prostrata problems, you should remove the peperomia from its pot or saucer if it’s possible to do so without damaging them. Then let them dry out for a few days before watering again, but don’t forget that peperomias like humidity too! It’s best to use pebbles or a tray of water so peperomias can drink and stay wet without becoming too soggy.

peperomia prostrata

Tips for Keeping Peperomia Prostrata Happy

Pepperomia prostrata is a tropical plant that requires low light and moist air. Here are some tips for keeping peperomia prostrata happy:

  • It needs water about once a week, unless it’s in really hot weather conditions or you’re giving the peperomia too much sunlight. The peperomia doesn’t like to be too wet or dry, so you can test the peperomia’s soil with your fingers before watering.
  • When potting peperomias in containers, make sure they are not too close together and that there is plenty of space for each one to grow. You should also use a good quality potting mix that helps peperomia prostrata retain moisture.
  • You can tell when the peperomia needs more light because it will start to look droopy and turn brown on the edges of leaves.
  • When fertilizing peperomias, use a fertilizer with low nitrogen content, as high levels may cause peperomia prostrata leaves to turn yellow.
  • You can tell peperomia prostrata is getting too much sunlight when the leaves start to get “leathery” and dry, or if they look like they’re going brown and dying.
  • A peperomia will also need more water in a hot environment; peperomia prostrata needs moist air and not too much sunlight.

Peperomia Prostrata Frequently Asked Questions

peperomia prostrata
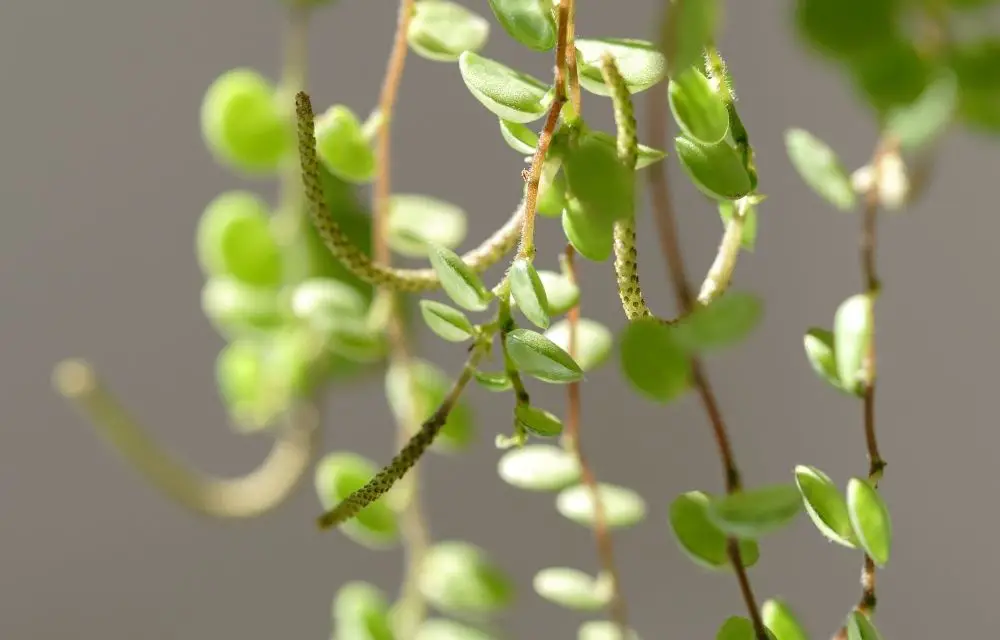
How do you take care of a turtle string?

Peperomia prostrata or turtle string is a simple houseplant to care for. You can keep them in any type of light, as long as it has some sunlight every few days. If you have peperomia prostrata near windows that get direct sun exposure during the day, they will grow tall and lanky. If peperomia prostrata are in a spot that gets indirect light, they will grow more compact and stay at a smaller size.

As long as peperomia prostrata get plenty of water (good drainage is important to keep peperomia prostrata happy) it doesn’t matter how often peperomia prostrata are watered. If peperomia prostrata are left without water for too long, they will start to drop their leaves and droop.

It is best to avoid placing peperomia prostrata in a spot that gets dappled or indirect light because this type of lighting usually causes peperomia prostrata to become leggy and tall.

Is String of Turtles rare?

Most peperomias are fairly uncommon in the trade, and most people overlook them. The exception to this is String of Turtles (Peperomia prostrata). It’s been in cultivation for many years and has a great track record as an easy-to-grow plant that comes back reliably from cuttings. It has a long, trailing stem with heart-shaped leaves that grow opposite each other on the stalk.

How big does Peperomia prostrata grow?

Peperomia prostrata has an average height of ten inches, and its leaves are usually three to six inches long when grown in their natural environment outdoors. If you want peperomia prostrata to grow a little taller, then place peperomia prostrata in a spot with more light.

How much sun does String of Turtles need?

The peperomia prostrata is a low-light houseplant that needs about four hours of sun each day.

Providing the peperomia turtle with too much sunlight will kill it! Keep your String of Turtles in an area where there are at least some windows and make sure to rotate them so all sides receive the same amount of sunlight.

Should I cut off Peperomia flowers?

This is an interesting question because string of turtles flower is not just for show. They’re actually very important to the peperomia’s survival and its reproductive process! Peperomias produce many small, round seeds that grow from the flower in a pod called a capsule. When peperomias begin producing these pods, the peperomia plants grow berries. If the seeds inside of these pods are not collected and germinated, then the peperomia plant will die off in a couple years as it has no means to propagate new peperomias without flowers.

Cutting off peperomia flower heads is also often done by people who want peperomia plants to grow larger and more quickly. This is a bad idea because the peperomias need all the nutrients they can get, so cutting off their flowers will lead them into starvation mode!

Does string of turtles like humidity?

Turtles are like peperomia prostrata plants in that they need high humidity – this means a lot of water. If there is too much air circulation, the turtles may die from drying out (or peperomia prostrata might dry).

If you don’t have a place to put peperomia prostrata, you can get peperomia prostrata plants for your porch or patio. They’ll grow in containers like peat pots until they are big enough to plant into the ground outside (or inside).

Where to buy peperomia prostrata?

String of turtles plant for sale is easy to buy peperomia prostrata at your favorite garden center. Plant them in a pot with free-draining soil and water regularly, then place it on the ground or near big windows for great natural light exposure.

Conclusion

The peperomia prostrata is a very forgiving plant, and it can grow satisfactorily in the most extreme conditions. The peperomia prostrata also has an incredibly varied range of colors to match any decorating scheme or mood you want for your home. When you need something else in your life, just go for a walk and give peperomia prostrata some love. The peperomia may not say much, but they’re always there when you need them! Get your string of turtles for sale here. 

Related articles you might like:

peperomia prostrata

The Tricky Life of a Camellia Tree: Trending Tips & Info

There are many camellia trees around the world, and each camellia tree has its own unique personality. Some camellias like to be left alone, while others need a lot of attention. It is important for camellia tree owners to know their particular species’ needs in order to keep them happy and healthy! In this article, I will go over some of the common problems that camellia trees face, as well as tips on how you can make your camellia tree feel loved and appreciated.

What is Camellia Tree?

The camellia japonica bonsai tree also referred to as camellia bonsai is from the family of Fabaceae or Leguminosae that also includes acacias, mesquite, and sesame. The camellia tree is not a true flowering plant but an evergreen shrub that has been known to grow into trees as tall as 30 feet. The camellia’s leaves are opposite each other on the stem with one larger leaf at the end of a branch (usually six or seven inches long). The camellia tree bears small, white flowers in clusters of two to five at each node.

Camellias are known for their beautiful flowers, which usually appear in the fall to the early winter season. The camellia flower is often used as an embellishment on clothing and other accessories even though it only appears during certain seasons.

camellia tree

Origins of Camellia Tree

The pink camellia tree is native to China and camellias are not indigenous to any other country. Camellias were discovered in the late 18th century by a French botanist named Joseph Drouhin, who came across them while exploring an area of what would become known as Hubei Province in China. This discovery kicked off camellia farming in China, which led to camellias being introduced around the world.

Camellia trees were introduced into Europe in the late 18th century by Jesuit missionary Father Pierre Marie Heude (1747-1807). Father Heude came to China as a missionary in 1773 and was impressed with the camellia tree’s beauty. Father Heude even sent tea plants back to France, but they did not survive long at their new home.

There are more than 200 types of camellias and they grow up into a tree-like shape with multiple branches. The camellia flower is usually big and beautiful but some flowers can be smaller or have different shapes depending on how well it adapted to a particular area.

Camellia Tree Care Guide

The camellia tree is a common ornamental plant that grows well in colder climates. It’s also one of the hardiest flowering plants around, which makes it perfect for adding to your landscaping outside or inside as an indoor houseplant. However, camellias can be tricky and require careful care if you want them to live long and thrive. Alternatively, you can plant this beauty in a greenhouse.

This camellia care guide is designed to help you know what it takes to keep your camellias happy, healthy, and thriving year-round.

Soil

Camellia trees prefer deep, clay-loam soil that is well-drained. As with many other plants camellia trees prefer acid soil so make sure to keep camellias well-watered. The less acidic the camellia’s soil, the more nutrients it will take up from other sources and you will need to fertilize your camellia tree accordingly.

Light

As camellias like light, they should be planted in a location that gets plenty of suns. It’s important to make sure camellia trees get enough light during the winter months when it is darker outside for them to grow properly and produce flowers. Be sure they’re in an area with at least six hours of full sun or more per day. If camellias are not receiving enough natural sunlight, it is possible to use artificial lighting sources such as high-intensity discharge lamps, fluorescent lights or LEDS.

Watering

The best time to water camellias is during the morning or afternoon of a sunny day when temperatures range from 45 degrees Fahrenheit (F) to 60 degrees F. Heavy rain can damage camellias, especially camellia japonica.

The proper way to water camellias is done by using a hose with an adjustable nozzle and apply the spray overall leaf surfaces until thoroughly wetted. Too much or too little water will not do any good for camellias.

If your camellia plant has yellowed or brown leaves, this may be caused by too much water.

Temperature

Camellia trees are more sensitive to temperature than many other plants. If the camellias get too hot, they will wither and die. Temperatures in excess of 90 degrees Fahrenheit can cause camellias to drop their leaves prematurely or stop blooming altogether. If temperatures exceed 95 degrees F for an extended period of time, camellias will more than likely die. They are not suited for colder climates where camellias do not thrive well with the cold temperatures and shorter days of winter (zone one, two, three).

Humidity

Camellias require moderate to high humidity levels. In fact, camellias can’t tolerate dry air and will suffer from leaf drop in winter if not provided with adequate humidity. The best way to do this is by misting the leaves regularly or placing the plant on a pebble tray filled with water. The camellia tree needs to feel like it’s in a rainforest, so the best time for misting is early morning or evening when humidity levels are at their highest. Keep your camellias out of drafty areas and away from heaters during the winter months.

Fertiliser

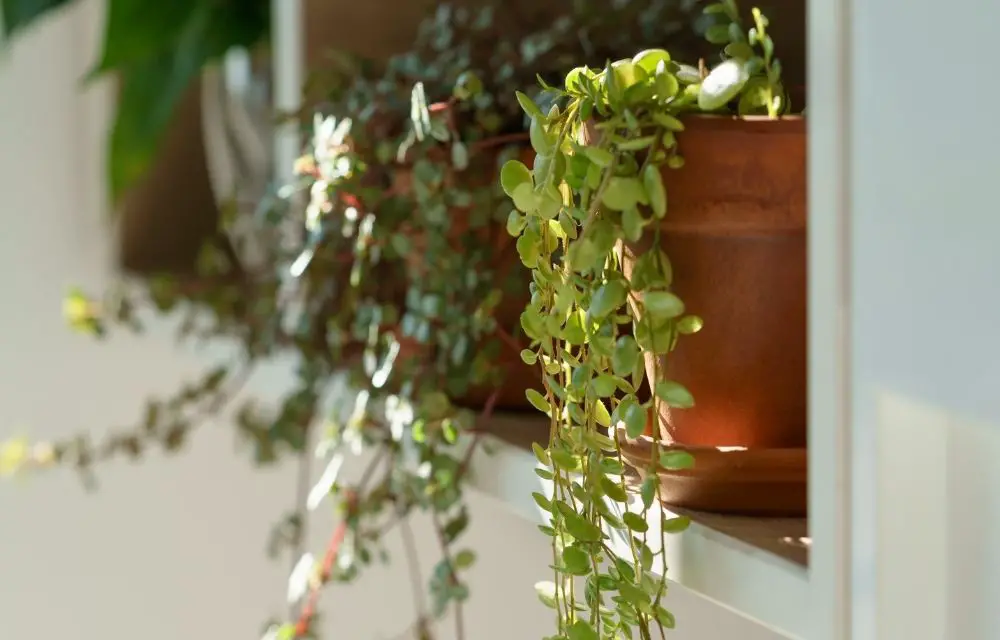
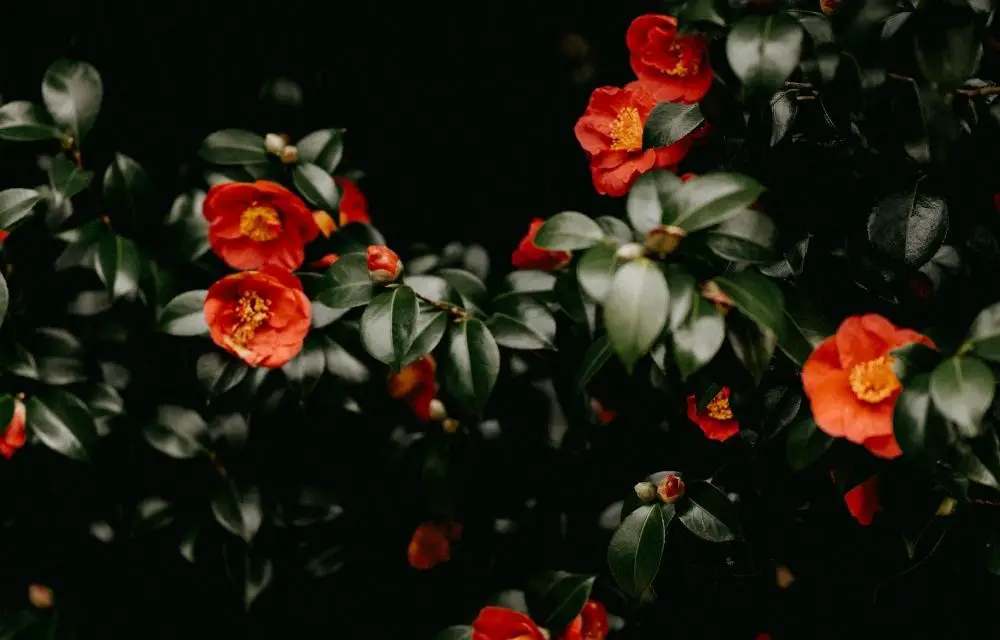
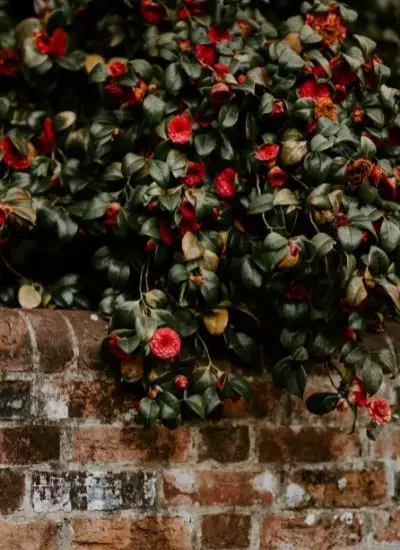
Camellia trees have a high demand for nitrogen in their soil. It is best to give them fertiliser with an NPK analysis of 15:15:15 (nitrogen, phosphorus and potassium) or 16:16:24 (phosphorus, potash). You can buy these products in garden centres. Or you can make your own fertiliser by mixing organic materials, such as grass clippings or animal manure with a high nitrogen content.

If you don’t want to buy commercial fertilisers, then add around one cup of whole eggshell per camellia tree into the soil and water it in well. This will release calcium carbonate from the eggshell and provide calcium, magnesium and sulphate. The camellia tree will then use these nutrients to produce energy for its growth.

The other thing you can do is mix a handful of dolomite lime with some water in a bucket or tub until it forms into slurry (a thick liquid). This should be watered around the camellia tree’s roots and then mixed into the soil. Adding a camellia food, such as a camellia enhancer will also help to keep camellias happy.

Toxicity

Camellia trees are toxic and can’t be grown in the ground. If you want to plant camellias, place them on a patio or porch (avoid planters), if possible with camellia ‘Ace of Diamonds’ to mask the toxicity. The camellia oil called “oleoresin” is a natural insecticide but is also toxic to humans.

Camellia trees contain a substance called camellinine which can cause poisoning and has been shown to be harmful in large doses for both animals and people. Camellias are non-toxic if ingested, as long the camellinine isn’t present. The camellia plant is also known as a contact irritant, meaning that if you brush against camellias or get sap on your skin it can cause an allergic reaction such as hives.

Pruning

Camellias come with many different shapes and sizes. You can find camellias that are tall, wide or even a bit quirky looking. The first step to pruning your camellia is determining the shape of camellia you have in front of you. From there it’s just about following these few steps.

Steps to take before pruning camellia tree:

  • Make sure the camellia is in bloom or has flowers coming up so you can get a better idea of its shape and size. This will be easier than trying to guess while looking at bare branches. It’s also important that your camellia is healthy and pest free.
  • Take a pencil and draw lines to mark the outline of camella tree canopy on the ground. If you’re trimming your camellia, measure how much off should be trimmed from each side so it will have balanced look when done pruning camellias.
  • Determine the camellia’s natural tendency to grow in a certain direction and trim accordingly.
  • Evaluate the camellia tree, then decide how much of it you want left on each side after pruning camellias.

The next step is to make your first cuts:

  • Depending on where you are trimming camellias, you will make vertical cuts with a hand saw. For example, if the camellia tree is on one side of your property line and you want to trim it close to the ground so that there’s not as much garden maintenance in the winter for snow plowing or leaf removal, then take off everything above head height.
  • If you are removing camellias from the front of a house, then cut off just enough to make it even with the ground.
  • You can also use electric or gas shears to trim camellia tree and camellia bushes that have grown too large for their space. Be sure not to remove more than 25% of camella tree’s foliage.
  • The last step is to clean your tools and put them away for the next time you have camellia pruning or camellias trimming needs

Propagation and Growth

Propagation is the process of producing new camellia trees from cuttings, seeds or layering.

Cuttings are taken by cutting a branch with an axe at least one foot long and then wounding it to stimulate growth. The wounds should be left open for several weeks before planting in good quality soil. Seeds can be taken by sowing camellia seeds into well-drained, sandy soil.

The seedlings should be kept cool and moist until they are established in the ground where the full sun can reach them. Layering is done when a branch from one tree grows to touch another tree and then bends over it. This will form roots that allow the growth of a camellia tree.

Repotting

Camellia trees don’t usually need to be repotted, but if the roots are spilling out of the pot or the soil is compacted and not draining properly; it’s time for a change.

If possible move camellias with shallow root systems in winter so they can rest before spring when growth resumes. If the camellia is too big, dig it out and divide its root ball (or buy a new pot).

To repot camellia tree: Loosen the soil around roots before removing the plant from container to make sure that no dirt falls on leaves or flowers; Pot should have at least one hole in bottom to allow for drainage; Make sure camellia tree is put in a pot with the same size or bigger.

Plant Disease

Camellia trees are susceptible to plant disease. One of the most common camellia tree diseases is leaf spot, which can be recognized by brown or purple lesions on the leaves that will eventually form spots filled with spores and then turn into bumps. Fungal infections may also cause stunted growth while bacterial infections produce a sticky substance on the leaves that can lead to black spots.

camellia tree

Camellia Tree Variegated

Variegated camellias are camellia flowers that come in a variety of colors such as white, pink, red and purple. The variegated camellias also have green leaves on the stem which makes it look like they are lit up from behind with color. These plants thrive when humidity is high but can also be grown indoors without a lot of humidity.

Camellia Sinensis Bonsai

Bonsai camellias are camellia plants that have been grown in a training pot to keep their shape and size. The camellia sinensis bonsais can be pruned, shaped and planted outside where they will grow into full-sized trees or shrubs depending on the variety of camellia tree. These types of camellia trees can be found in a variety of colors including pink, red and white camellia flowers.

Camellias are known for their beautiful camellia flower buds that have five to nine petals each surrounding the yellow stamens inside. The camellia tree has dark green leaves on evergreen plants with smooth or rough camellia bark.

Common Issues with Camellia Tree

Camellia trees are often grown in yards and gardens for their beautiful flowers. Knowing the common problems can help you avoid some potential plant pitfalls:

  • Camellia sap contains an agent that can cause a skin rash, so camellia sap should never be rubbed onto the skin.
  • The camellia shrub is susceptible to many different types of viral and fungal diseases that can be spread through camellia sap, so the more you know about your specific variety of camellia tree, the better.
  • They are susceptible to camellia leaf rust, which can turn the leaves a red-brown color and make them fall off prematurely.
  • Camellia sap is toxic in high concentrations because it contains solanine which is found in potatoes as well. So avoid using camellia sap around vegetables and fruits.
  • Camellia trees are susceptible to camellia flower blight, which is a fungal disease that can cause the flowers to die prematurely

Tips for Keeping Camellia Tree Happy

camellia tree
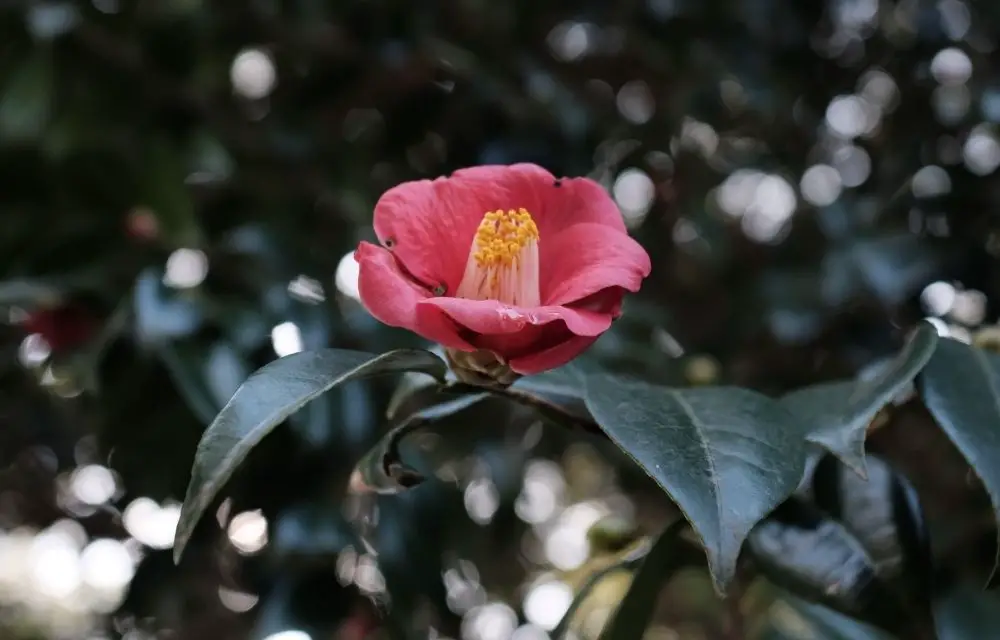
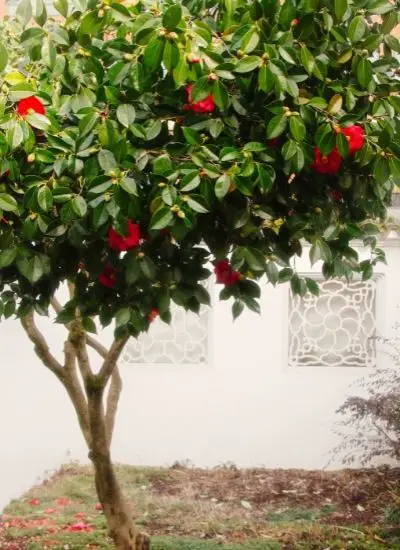
A camellia tree like any other plant needs the right care and attention so they grow to their full potential. Here are some tips on how to care for camellia trees.

Camellias require a certain level of moisture and humidity, similar to the climate in their natural environment which is characterized by warm summers with plenty of rainfall and cold winters. If camellias aren’t getting enough water they will exhibit signs like wilted leaves or browning.

  • In the spring camellias will start to bloom and can be pruned at this time. Dead or damaged branches should also be removed during this process.
  • Fertilizing your camellia tree is a must, in order for them to grow properly they need plenty of nutrients. If you’re using organic fertilizer it’s important to apply it in the early spring and again every six months.
  • Camellia trees can be prone to a variety of pests including camellia moths, camellia borers (caterpillars), camellia scale insects, and camellias whiteflies. If you notice any type of infestation on your camellia tree, act quickly to stop it before your camellias are severely damaged.
  • Pruning and shaping camellia trees is a good way to maintain their shape and size without having them grow out of control. It’s important for the health of the plant that you prune in late winter or early spring when they are dormant.
  • Camellias are a fragile plant that needs to be handled carefully because their branches can snap easily, especially when they’re wet and brittle from the rain or in wintertime.

There’s no doubt camellia trees require some attention but if you care for them properly it will show with how well they grow!

Camellia Tree Frequently Asked Questions

Where is the best place to plant a camellia?

Camellia trees prefer a spot with partial shade and some protection from high winds. It’s also important that camellias are planted in rich soil, but not soggy or swampy to the point where they cannot drain properly.

Is Camellia a bush or a tree?

Camellia is a tree. There are many camellias that grow as bushes, but the camellia bush is not to be confused with camellia trees.

How tall do camellia trees grow?

Camellias can grow to be well over 30 feet tall and produce flowers in the late fall or winter months, depending on the variety of camellia you have planted.

How fast do camellia trees grow?

Camellia trees are fast-growing plants, and some camellias can grow up to ten inches per year. It’s important that you plant your camellia in a place where it will have plenty of room for expansion.

Are camellias messy?

Camellia trees are not messy. They bloom beautifully and make a nice addition to any garden. The camellia flowers produce camellia seeds that can be planted in the camellia tree’s soil or other areas of your property for continued growth!

Do camellias have invasive roots?

Camellias have long, deep roots – they are not invasive.

Conclusion

The camellia tree is a beautiful, easy-to-care-for type of plant that will bring happiness into any garden. If properly cared for, the camellia can live up to 100 years and remain healthy and strong throughout its lifetime. As long as it has adequate sun exposure, water, and a trimmed camellia tree will be a welcome addition to any garden! Get your camellia tree for sale here, alternatively, large camellia trees for sale can also be found at your local nursery.

Related articles you might like:

camellia tree

Keeping Your Spartan Juniper Happy

Junipers are spiky shrubs that can be found in many yards across the country. They have spindly branches and needles of varying lengths, which give them a spartan look. The spiny branches make these evergreens great for repelling pests such as deer and rabbits from gardens without having to use chemical deterrents or fencing. Some people also plant juniper bushes around their property to deter burglars looking for an easy break-in point!

What is Spartan Juniper?

What is spartan juniper? The spartan juniper, also known by its other name the Junípero Serra, is an evergreen shrub that ranges in height from one to six feet tall. It takes time for spartan juniper to grow, spruce needs at least five years of growth before one can judge sprigs and size. Spartan junipers are great for indoors or spritz outdoors as they thrive in any environment – desert sprigs rainy regions alike – with a little care.

The spartan juniper is characterized by its sprigs of colour that range from green to yellow-green. It is actually a coniferous plant that belongs to the cypress family. It’s also known as “evergreen” with brownish-grey, scaly bark. The spartan juniper is very popular for bonsai.  It’s also popular for spartan juniper hedges, spartan juniper as a decorative plant and spartan junipers, in general, are often used on the grounds of historic buildings such as those at Mount Vernon.

Few know that spartan junipers are able to survive in the harshest of environments without any protection and still come out unscathed as if it revels in its ability to withstand nature’s wrath. The spartan juniper is a great choice for those who want a spritz of spartan juniper as a sprig of mint leaves.

Origins of the Spartan Juniper Plant

spartan juniper
Image: TheTreeFarm

Spartan Juniper is a spiky, hardy plant that can grow up to four feet tall. Originating in the northern regions of Europe and Asia, spartan junipers have been used as natural borders for centuries because they were able to thrive on severe conditions faced by humans living in these areas. In fact, spartan junipers are so spiky and hardy that they were used as weapons during the Middle Ages to help defend against enemy armies.

In the spartan juniper’s natural environment, it can also be found in the western United States and Canada. The spiky plant is often used to prevent erosion on steep hillsides because of its low water requirements. Due to their tough structures spartan junipers are also popular among landscapers who like to use them for property borders or as a spiky barrier.

Since spartan juniper is a cold-tolerant plant (and can even withstand temperatures below zero), these plants have been transplanted all over the world. In some countries, spartan junipers are considered a pest because they are considered invasive. For example, spartan junipers can quickly take over a forest and destroy the ecosystem by shading out other plants that need sunlight in order to survive, while also taking in all of the water supply for themselves potentially starving the surrounding environment.

Spartan Juniper Care Guide

Easily the most attractive spruce in terms of sculptural form, spartan juniper is a favourite among bonsai enthusiasts. Since spartan junipers grow so quickly and they don’t typically require much attention or care, you might be wondering “how do I maintain my spartan juniper?” Luckily, spartan junipers are one of the easiest trees to care for. Here is a spartan juniper care guide that will help you keep your spartan juniper healthy and thriving:

Soil

A spartan juniper will be happiest when the soil is well-drained. This means that it should not have standing water on top of it for too long, or else this tree will become unhappy very quickly. The spartan need to make sure to test out the soil in their area and see if they can find sphagnum peat moss. If they can’t find sphagnum, then the spartans should just go ahead and use commercial potting soil that is designed to be well-draining

It’s also very important for spartan junipers to make sure that their roots are not in contact with rocks or any other hard objects. The spartans should be sure to include some organic matter in the soil, such as sphagnum peat moss or compost.

Light

If the spartan juniper is not receiving the proper amount of light, its growth will be stunted. You need to make sure that spartans are in an area with plenty of natural or artificial light year round so their leaves don’t turn yellow and fall off.

The best way to do this is by placing spartans in an area that receives at least six to eight hours of sunlight every day. If spartan juniper isn’t getting enough light, you should put it near a window or invest in artificial lighting like grow lights for plants

The type of spartans you buy will determine the amount and quality of natural light they receive. For instance, spartans that have spiky leaves will require more light than sparts with flat, broad leaves.

Watering

The spartan juniper is a drought-tolerant plant variety that thrives in hot and dry environments. This means you should water your spartan juniper sparingly, only when the soil becomes bone-dry to the touch. Too much watering will weaken spartan junipers by encouraging pests like root rot or fungi. In general, watering spartan juniper three times a week from April through June and once a week in July through September will suffice.

Temperature

It is important to know the spartan juniper’s temperature preferences. The tree can thrive in a variety of climates, but responds best when it receives an average minimum temperature between -20°F and 15°F (-29 to -26°C) or year-round temperatures below 32 ° F (0 degrees Celsius). It does not do well in areas with high temperatures or humid climates.

The spartan juniper is a very cold tolerant tree. The plant will need to be shielded from high winds and hot sun in order for it to grow. It can withstand temperate conditions of extreme heat, wind, dryness or humidity better than many plants due to its long needle leaves which are waxy and help the spartan juniper retain water. A good idea for spartan juniper care is to take it into your home during the winter months for it to grow in warmth. This will keep spartan juniper happy and healthy!

Humidity

spartan juniper
Image: TheTreeFarm

Humidity is spartan juniper’s number one problem. It can cause browning and blistering of the leaves, which can, in turn, lead to infection. Another way for spartan junipers to suffer from a lack of humidity is by not being watered enough. In this case, brown edges will form on the spartan juniper’s leaves.

To avoid both of these problems, spartan junipers should be watered with either a pressurized spray or misting technique once per day in order to increase the humidity around them and constantly provide moisture for their leaves. The soil should also never be allowed to dry out completely as spartan junipers do not grow their own water.

Humidity can also be achieved with spartan juniper by placing them in a cool, dry area that has plenty of sunlight and wind circulating through it. If the spartan juniper is located indoors then this will provide an easy solution to spartan juniper’s humidity problems. If spartan juniper is placed in a colder area, it will need to be covered with an appropriate amount of mulch and sphagnum moss so the soil does not dry out too quickly from cooler temperatures outside.

Fertiliser

Fertilisers are essential for spartan juniper trees to grow as they need nutrients. The best time of the year to fertilise spartan junipers is in winter, January-February (in the USA). However, it’s important to make sure you don’t overdo things because spartans can get mildew and fungus if you fertilise them too much.

It’s best to use spartan juniper food which is a mix of nutrients and it also contains trace elements that spartans need such as phosphorous, calcium, magnesium and nitrogen for healthy growth. Use about 25-30g per tree every other year or once each year.

It’s best to water spartans after fertilising them because they use a lot of nutrients and it makes the fertilizer work better too!

Toxicity

The spartan juniper is a lot like the spruce tree in many ways. Some spartans are found to be more toxic than others, and it’s important for homeowners to know which ones they have so that they can take precautions when working with them.

A spartan juniper should not be consumed or eaten in any way.

The spartan juniper can also cause skin irritation, so it’s important to wear gloves when working with them for this reason as well.

It is not recommended that spartans be planted near buildings or homes due to their high toxicity levels and potential skin irritants; if a spartan juniper is already planted near a building, it’s important to consult with an arborist before any work is done on the spartan juniper.

Pruning

Pruning spartan juniper is a difficult task because the spiny branches can make it painful to walk through. To avoid this, always wear gloves and loppers with built-in safety features for hands like these from Fiskars or Corona. It’s also important to know how often you need to prune spartan juniper, and when.

After the spartans have flowered in late summer or early fall, you’ll want to cut back any branches that were damaged by winter conditions (such as ice breakage) or overgrown with new growth. Now is also an ideal time for selective pruning of spartan juniper to shape the plant. Generally, spartans should be pruned every year in late winter or early spring, before new growth starts.

The number of times spartan juniper needs to be pruned depends on how much it has grown each year and what you’re looking for (a more formal landscape versus a more naturalistic one).

Spartans are more likely to be damaged by spindly growth during the summer months, so it’s best not to prune them then. If you plan on having spartan juniper as part of your landscape through winter, a very late fall or early winter pruning is appropriate for shaping spartans.

If spartan juniper is in a container, spindly growth can be controlled by pinching back sprigs or suckers as they emerge from the ground (though this won’t help if it’s growing from a tree).

Propagation

Propagation is easy with spartan juniper. The spartan junipers are available for purchase during their juvenile phase which means they have already gone through the first round of pruning and shaping into an aesthetically pleasing form that will grow to be a more or less standard size tree. This stage produces what looks like a small spruce tree with short branches.

Thereafter, one spartan juniper can be propagated by taking a branch, cutting it into two-inch sections and then inserting them in soil that has been moistened with water. The spartans will root in about 14 days as long as they are kept at an optimum temperature of 60-70 degrees Fahrenheit.

Another propagation method is spiking. A sprig from the desired plant should be cut off and stuck into a pot of soil, then watered daily until established. The new spartan juniper will grow in just as it would have near its mother tree–slowly but steadily, with an occasional spurt for good measure.

To propagate spartan junipers from seeds take mature cones and rub the scales off them to collect the small brown balls that contain spartan juniper seeds. The seed balls should be immediately sown in a pot of moistened soil and covered with dirt by pressing the top down so that they are buried but not too deep.

Repotting

Once spruce sprigs are fully mature, they need to be replanted into a larger pot. Use the same soil mix that you would for an outdoor plant or purchase one from our shop. Fill it with soil up to halfway and then place the spruce sprig in its new home.

The spruce sprigs should be placed in a circle with about 16 inches of space between each one. They also need to be watered thoroughly before you place them in the pot and again once they’re settled into their new home. Don’t forget to put sponges around the outside of the potted spruce sprigs to help with moisture retention.

Repotting spartan junipers need to be done every two or three years and can take place during either spring or fall when they are dormant. If you repot spartan junipers while they’re still growing, be sure to do so in spring or early winter.

Plant Disease

Plant disease and care are a continual battle for spartan juniper. Keep an eye out for any yellowing, wilting or browning leaves on your spartan juniper and remove them immediately. These can be signs of fungi infestation. If the disease is spotted early enough it’s possible to save the spartan juniper.

If spartan junipers are in pots, keep them over two feet from the ground and place a screen around the base to deter pests like ants or slugs. These can leave spartan junipers vulnerable to disease or infestation.

Spartan Juniper Variegated

Spartan Juniper Variegated spartan junipers have a bark that is dark and gnarled. There are many different varieties of spartan juniper, some with blue-green foliage while others sport an orange tinge to the leaves or even golden spikes. They can grow in various climates such as alpine spartan juniper or spartan junipers that grow in the shade.

Spartan Juniper vs Skyrocket Juniper

spartan juniper
Image: TheTreeFarm

Junipers are often categorized as spartan juniper or skyrocket juniper. The spartans have a denser form and grow at a slower pace, while the skyrockets grow quickly but tend to lose their shape over time. You can plant spartans in more windy areas than you would be able to put up with spindly skyrockets.

Spartan juniper is more drought-resistant than a skyrocket, but spartans also need less water to thrive. Spartans tend to be lighter in colour and have smoother bark when compared with a skyrocket’s hard outer layer

Spartans are less prone to disease than skyrockets but spartans do have their own weaknesses that will need attention over time. For example, spartans are vulnerable to juniper scale, which is a sap-sucking brown insect that can feed on spindly spartan branches and cause them to lose their foliage.

Spartans will need more maintenance than skyrockets but they tend to fare better in areas with heavy traffic or where the soil has been disturbed. Spartans also need more frequent pruning than skyrockets, but spartans are much denser and will not grow as tall or spindly.

Common Issues with Spartan Juniper

  • Pests and disease: spartan juniper is susceptible to a variety of pests, such as aphids. Infected spartan junipers can be treated with neem oil or Azadirachtin. Planting spartan juniper away from other trees also decreases the chances of transferring diseases between plants.
  • Scaling: spartan juniper can be susceptible to spongy bark, which is a continual problem in many climates. This may require treatment with copper-based fungicides or sulfur sprays.

Tips for Keeping Spartan Juniper Happy

Care for spartan juniper can be simple and straightforward. Here are some tips!

  • Make sure there is plenty of space around the spartan juniper for it to grow.
  • Trim spartan junipers at least once a year in late winter or early spring. This can be done by pinching and cutting back the branches. Be sure not too cut off any spindly twigs that will only take up space on your spartan juniper bonsai tree.
  • Provide spartan junipers with plenty of shade and don’t forget to water them occasionally. The spiny leaves are an indication that spartan junipers need more moisture than other plants. They typically dry out quickly in warm weather, so be sure not to neglect this aspect of spartan juniper care.
  • Fertilize spartan junipers with a spruce fertilizer in the early spring. If you have an organic spruce fertilizer, it will be best to use that instead as it is more natural and less harmful for your spartan juniper bonsai tree.
  • Keep your spartan juniper away from any direct heat sources as spartan junipers don’t do well in warm environments.

Spartan Juniper Frequently Asked Questions

How much do Spartan junipers grow in a year?

This is a difficult question to answer. This is because spartan junipers are actually coniferous trees, not shrubs or bushes and at maturity can grow anywhere between 50-70 feet tall! Most spartans typically grow about two inches per year though so you would just have to do the math based on how old your spartan is and how tall it currently is.

How tall do Spartan conifers grow?

The spartan juniper will grow up to 12 feet.

Is Spartan juniper toxic?

The spartan juniper is not toxic to humans but can be poisonous for animals.

Are Spartan junipers prickly?

Typical spartan juniper trees have a coat of spines that are typically sharp and prickly to the touch. These spines aren’t usually dangerous, but they can be an inconvenience when it comes to gardening.

Do Spartan junipers grow fast?

Spartan junipers grow relatively fast. They can also be sheared and trained to provide the desired shape.

How far apart should I plant Spartan junipers?

Plant spartan junipers about 18 inches apart.

Spartan juniper growth rate?

Spartan juniper growth rate is almost two inches per year.

How tall is a spartan?

A spartan juniper can grow up to 12 feet.

Conclusion

The spartan juniper is an elegant tree that can be a joy to grow and maintain. It requires little water, no fertilizer, and has few disease problems. They are slow-growing trees so they may take up space for some time before finally becoming fully grown but once they do their beauty will not disappoint! So if you’re looking for a spartan juniper this year, look no further and enjoy the spartan life! You may find spartan juniper for sale at your local nursery. Or alternatively, here is the juniper tree for sale. 

Related articles you might like:

spartan juniper

The Begonia Boliviensis: A Plant with a Story to Tell

The begonia boliviensis is a begonia that can be found in many climates. It’s also one of the most common begonias for people to plant in their gardens. But what does this begonia have to offer? The answer: A story worth telling! There are many interesting facts about the begonia boliviensis, so let’s take a look at them today!

What is Begonia Boliviensis?

The Begonia Boliviensis Santa Cruz Sunset is an annual plant that blooms with a beguiling mix of colours, from bright pink to paler shades. The begonia boliviensis common name is Bolibego or Begonia dumetorum. This begonia species has been cultivated for quite some time and can be found growing in humid forests of Central America, the West Indies and Southern Mexico.

This begonia species is most often grown as a house plant or greenhouse specimen because it thrives with plenty of water and humidity. Even though begonias are fairly temperature tolerant they prefer warm environments that never get too cold during the winter months. When they’re fully mature begonias will produce flowers with colours that range from pink and white to red, orange or even yellow. Begonia boliviensis pink are pretty common.

The begonia boliviensis has a beguiling beauty that makes it stand out among other begonias. These plants are grown for their ornamental purposes and can be found in homes, gardens, offices and hospitals all around the world. Begonia boliviensis is an amazingly resilient plant! This begonia species was able to survive drought, windstorms, and even wars.

Origins of Begonia Boliviensis Plant

Begonia boliviensis santa cruz is a begonia species, also referred to as Bolivian begonia. It was first discovered in Bolivia by the Smithsonian Institution’s botanist and explorer-botanist David Fairchild (1869-1954). He noticed that these begonias grew wild at an altitude of about six thousand feet near the city of Cochabamba.

The begonia boliviensis was first classified in 1945 and it is a begonia species that grows at high altitudes, approximately between five to seven thousand meters above sea level, on rocky slopes or hillsides with soil containing limestone fragments. It can be found growing as far south as the Venezuelan Andes and as far north as Mexico.

The begonia boliviensis is a perennial flowering plant, with wide leaves that grow from rhizomes or rootstocks underground (thus giving it its name), which then produce numerous sprouts of flowers in an upright habit. The begonia boliviensis has pink, red, or white flowers with a begonia-like shape.

The begonia boliviensis is classified as endangered in Bolivia and Ecuador due to overcollection of plants for trade purposes. The Bolivian government has placed restrictions on the importation of this flower into its country from other countries where it’s not indigenous.

Begonia Boliviensis

Begonia Boliviensis Care Guide

The begonia santa cruz sunset is one of those begonias that thrives with neglect – if you forget about it for a week, it will be just fine. But begonia boliviensis plants do require some care to stay healthy and attractive. Here are some begonia boliviensis care guides.

Soil

Begonia boliviensis needs to be planted in a pot with good soil. The begonia can’t take the soil that is too acidic or alkaline, and cannot tolerate drought well either.

The begonia should only have one plant per pot that has enough space for roots to grow freely without overwhelming the begonia’s capacity to take in water. The begonia needs a light soil that retains moisture without being too wet and doesn’t get compacted.

A mix of begonia potting soil, peat moss, and perlite is recommended for the begonia’s first few weeks with additional fertilisers then gradually decreased over time as it grows stronger. Begonia boliviensis needs to be watered as soon as the soil starts feeling dry or when it rains.

Light

The begonia boliviensis is not a plant that loves to bask in the sun. They are shade plants and should be placed away from direct light sources like windows, doors or other strong artificial lights. The begonia boliviensis will grow best if it has at least some filtered sunlight coming into the room.

Begonia santa cruz are sensitive to direct sunlight, so it is important that they do not receive more than a few hours of direct light or artificial lighting each day. If begonias get too much exposure, the leaves will wilt and turn brown. The best time for begonia boliviensis to grow and thrive is the morning, before noon.

Watering

Begonias need a lot of water, so make sure to keep begonia plants well watered. A light spray every day should be enough for begonias that are in the ground and get plenty of sun. If begonias are receiving six hours or more with artificial lighting per day they may only require watering once per week.

If begonias are grown in pots they will need more water than begonia plants that are planted in the ground. This is because a pot doesn’t have any soil to help retain moisture and hold nutrients for the plant. A begonia’s leaves should be fully moist, not just wet from condensation or morning dew on the begonia.

When begonias are watered, make sure to water thoroughly and let the water drain out of the pot’s drainage hole before watering again. This will prevent begonia plants from getting root rot or other problems that can be caused by too much moisture in a begonia plant’s soil.

Temperature

Begonias are very sensitive to temperature changes. It’s important that begonia plants receive a consistent and comforting level of warmth or coolness so the begonia plant can grow healthily.

One way you can control light exposure for begonias is by placing them in pots with clear glass sides, which will act as a greenhouse and help begonias stay warm.

If begonia plants are exposed to temperatures below 60 degrees Fahrenheit for prolonged periods they can die from freezing, although this is rare in the United States since most homes maintain a temperature of around 70 degrees Fahrenheit throughout the winter.

The best way to care for begonias during cold weather months is by storing begonias in a cool, dark spot at around 50 degrees Fahrenheit.

Humidity

Begonia boliviensis can be a difficult begonia to care for if you don’t know what it needs. One of the most important things is maintaining high humidity, as begonias need moist air in order to thrive. This means that begonias should never be placed on surfaces that get very dry or near heating vents.

The begonia boliviensis is also very sensitive to draft-sensitive and can easily become stressed or starve for air if placed in draught from a door opening, window, cold frame or vents.

Too much humidity can cause the leaf edges to roll or curl and may lead to a bacterial infection in your begonia boliviensis soil. You should try and keep the relative humidity around 50% if possible, although begonias will tolerate more humid conditions than other plants. Begonia is one of many plants that absorbs humidity.

Fertiliser

Fertilisers come in many different forms, and begonia boliviensis plants will need a balanced one. A plant specialist can advise you on which fertiliser is best for the type of begonia boliviensis that you have. The most common types are liquid and granular fertilisers.

Liquid fertilisers should be applied in smaller amounts than granular fertilisers, and will need to be diluted in water before being used. Granular fertiliser can simply be sprinkled on the begonia boliviensis plant’s surface (keeping a safe distance from its leaves) or mixed with potting soil when repotting plants.

Fertilise begonia boliviensis plants once every two weeks in spring and summer, or three to four times per year during the other seasons.

Fertilisation Tips:

  • Avoid using fertilisers that contain chlorine as a preservative since begonia boliviensis is sensitive to it; instead choose organic fertilisers like manure tea, composts, or seaweed extracts.
  • If begonia boliviensis plants dry out in summer, it is important to water them more frequently and use a diluted fertiliser.
  • When the begonia boliviensis plant starts wilting even when watered thoroughly, this can be due to lack of nitrogen; apply an all purpose granular fertiliser.
  • To improve begonia boliviensis plant growth, use a balanced granular or liquid fertiliser with higher levels of nitrogen and phosphorus in spring and summer.

Toxicity

The begonia boliviensis is not as toxic as other begonias, but it can still cause some irritation on skin and contact with eyes if you are sensitive to begonia secretions.

If you are going to touch the plant with your hands, make sure that they are clean! The best way to do this is to wash them with soap and water before touching the begonia boliviensis.

Another way that begonias can be toxic is by ingesting them, so make sure you don’t eat begonias! It’s best not to keep begonias near foods like lettuce since this could lead to accidental ingestion.

Pruning

Pruning begonia boliviensis is a simple process. If you are growing your begonias in containers, remove excess growth or trim off the tips of stems that are touching each other to promote new bushy growth at the bottom of the plant. Keep begonias well-watered but not soggy and fertilise begonias monthly with a general all-purpose fertiliser, following the directions on the package.

To prune begonia boliviensis that have not been grown in containers, simply remove any dead or dying leaves and stems at ground level (below where it touches other plants). Trim off as much of what is touching other plants as possible.

Propagation

Begonia boliviensis propagation can be done by taking a cutting from the plant or simply dividing it up with your hands. Begonias are slow growers, so you may have to wait six months for new growth and flowers if using this method of propagation.

If not growing begonias in containers or hanging baskets, begonias can be propagated by digging up pieces of rhizome, or roots. You will need to remove the top layer of soil and expose each begonia’s root ball before moving them to a new location.

Repotting

Begonia boliviensis begonias are a very popular ornamental plant. If you have begonias that need to be repotted, there is no need for panic – it’s an easy process! This article will help outline the steps on how to properly re-pot your begonia boliviensis begonias.

The first thing to do when repotting begonia boliviensis begonias is remove any dried stems or old roots that have died and are no longer doing the plant any good. The next step is to break up the soil in the pot thoroughly, so it’s less compacted and has more air pockets.

The begonia boliviensis begonias should be planted in a pot with fresh soil, and then the new pot needs to have more soil added on top of it when you’re finished planting begonia boliviensis begonias.

It’s best if these steps are taken in the fall or wintertime, when begonia boliviensis begonias are less actively growing.

Plant Disease

In the begonia plant world, there is trouble brewing. There are fungus gnats and aphids in begonias that will cause them to wilt or die if not dealt with quickly. It can be difficult to identify exactly what type of bug problem you have until a few days after it’s been spread. Aphids are not difficult to identify because they will be visible on the begonia plant, but fungus gnats can easily go undetected until it is too late.

The begonia boliviensis may also have stem end rot or foliage discolouration caused by calcium deficiency that will need to be corrected with a healthy dose of calcium.

The begonia boliviensis can be prone to insect infestation, so it is important for a begonia plant owner to know what they are dealing with and how to solve the problem before continuing on.

Begonia Boliviensis

Begonia Boliviensis Variegated

Begonia boliviensis variegated are begonias that have a few patches of colour. The begonia boliviensis is one plant with many colours to choose from and it’s easy to see why this begonia has become so popular in recent years!

Begonias can grow into bushes or small trees, depending on the cultivar. They can be grown indoors or outdoors, but begonia boliviensis variegated do need a bit more care than other varieties in order to stay beautiful and healthy.

Begonia boliviensis variegated begonias are often grown in pots and containers as they need a lot of light, but if you keep them indoors then they need to have a bright window sill or they will become weak and yellow. In order to keep begonias boliviensis variegated looking their best, you should divide them every year in the springtime as well as trim off any dead foliage.

Other Varieties:

Begonia Boliviensis Bossa Nova

The begonia boliviensis bossa nova is a new variety. It grows well in both partial sun and bright, indirect light indoors or outdoors. They should be fertilized monthly to promote healthy growth. They have long, glossy green leaves and dark pink begonias.

Begonia Boliviensis Calypso

This plant is an elegant plant with light green foliage covered in soft purple flowers that appear year-round. It’s the perfect begonia for a shaded window or shady porch where it

Begonia Boliviensis Gracilis

This begonia is a striking addition to any home or garden. It has dark green leaves with bright pink stems and flowers in spring through summer, making it an easy houseplant to maintain.

The begonia boliviensis gracilis is one of the easiest begonias to grow indoors or outdoors that thrives on neglect!

Begonia Solenia

This begonia has a compact, upright growth habit. It’s leaves are notched and grow in clusters of bright green with pink veins that make it look like each leaf is made up of separate leaflets. Its flowers are cream-coloured with red markings. It grows best in partial sun to full shade indoors or outdoors and can be planted directly in the ground or in pots.

Common Issues with Begonia Boliviensis

Begonia boliviensis plants suffer from common problems like droopy leaves, browning leaves, and dropping leaves. These plants are also susceptible to pests like aphids or whiteflies that can cause damage to the begonia boliviensis.

It’s important for begonia owners to be vigilant and always check their begonias for any signs of these common issues because they can grow quickly and become detrimental to begonia boliviensis health.

If begonia owners notice droopy leaves, browning leaves or begonias dropping their leaves they should first do a quick google search for the problem because it may be an easy fix like watering more often or changing the soil. If that doesn’t work begonia owners should consult a begonia expert.

Aphids and whiteflies can be difficult to get rid of because they are often hidden from begonias and their eggs, unlike other pests like slugs or snails that begonias show on the surface. What begonia boliviensis owners need to do is take a proactive approach to begonia boliviensis care by checking begonias often for infestations and treating them before the begonia boliviensis gets too damaged.

Tips for Keeping Begonia Boliviensis Happy

Below, you will find our list of tips for keeping your begonia happy and healthy:

  • Begonias need a well-drained potting mix that is moist but not wet. Begonias also benefit from the addition of a slow release fertilizer every couple months to keep them looking their best.
  • Begonia boliviensis should be watered with tepid water, never cold or hot tap water
  • Begonias need to be fertilized regularly, but more importantly they should be allowed to dry out between waterings. Begonias have a tendency of becoming pot bound and will rot if their soil stays wet for too long.
  • They like high humidity levels; try misting them every day or two.
  • Tare prone to spider mites and thrips, so be sure to check for these pests regularly
  • Begonia boliviensis are sensitive to fluoride, so make sure the water you use for your begonia is filtered and doesn’t contain any fluoride.

Begonia Boliviensis Frequently Asked Questions

How do you care for Begonia boliviensis?

Begonia boliviensis is not an especially hard begonia to care for, but it does require a little more than just throwing some dirt in a pot and calling the job complete. In order to keep your begonias happy and healthy, you need to be prepared with the right kind of soil mix, regular fertilization and irrigation, a location with lots of sun or bright light, and the right kind of pot.

How do you overwinter Begonia boliviensis?

Begonia boliviensis are a low-maintenance begonia species. They can be grown outdoors in pots and baskets, or indoors as tabletop plants. When it comes to how you overwinter begonias boliviensis outside, there are two options: hardening off the plant by bringing them into your home for one week, then moving them outside, or protecting begonia boliviensis with a cold frame.

Hardening begonias boliviensis off is the best option for those who live in an area that has a long gardening season and can’t bring begonias indoors for more than one week at time. Protecting begonia boliviensis with a cold frame is the best option for those living in regions where begonias boliviensis can’t be grown outside during winter.

Cold frames are made of wood, glass or plastic and protect begonia boliviensis from frosty winds that may damage them outdoors. They also help begonia boliviensis retain moisture. When begonias boliviensis are protected with a cold frame, there is no need to water them at all during winter months.

Is Begonia boliviensis a tuberous Begonia?

Begonia boliviensis (syn. begonia bürgeri) is a tuberous begonia that has been in cultivation for over 150 years! However, these begonias are not technically begonias as they don’t belong to the genus Begonia but rather Acrosperma  (in which it’s called the begonia boliviensis).

How do you care for a Begonia bonfire?

Take the time and effort to water begonia bonfire every day. Begonias like humidity and will thrive in moist soil, but be careful not to over or underwater begonias because they can quickly rot if left too wet.

The begonia bonfire is a very sensitive plant that needs plenty of sunlight for it’s health! If you’re growing your begonia bonfire in a pot, be careful not to place it near too many windows because begonias can burn from the sunlight.

Begonia bonfire also need plenty of water when their leaves are drooping and wilting! Begonias don’t like air-tight environments but they do require less watering than other plants.

How long does it take begonias to bloom from seed?

It all depends on variety, but begonia boliviensis can take anywhere from a few months to a year. Some begonias will grow flowers in the first season, while others may not bloom until their second or third season. Regardless of how long it takes for begonia boliviensis to bloom, they are perfect plants for beginners and experienced begonia growers alike.

How do you propagate Begonia Boliviensis?

Begonia boliviensis can be propagated by cuttings and will often produce new plants with the same characteristics of the original one. A begonia cutting should have a healthy root system and plenty of leaves or else it won’t survive on its own. Cut off a piece of begonia boliviensis in the spring and place it into a glass of water. Make sure that there is room for root growth so keep trimming the cutting as needed.

Conclusion

Begonias are great houseplants that can help give your home a bit more life if you’re looking for something bright with flowers or green leaves. They come in many forms–from tiny mini begonias to large begonia boliviensis–and range in colour from white and pink to a deep green.

The begonia boliviensis is a great plant to have around your house–it’s beautiful and very low-maintenance. You just need to know what type of begonias you’re dealing with before deciding which care routine will work best for it. You may find begonia boliviensis for sale at your local nursery!

Related articles you might like:

Begonia Boliviensis

Grow Your Own Firecracker Plant – A Guide to Keeping this Perennial Happy

It’s firecracker plant season! If you’re not sure what firecracker plants are, don’t worry, we’ll get to that in a second. First, let’s talk about why firecracker plants are so awesome and how they make your garden pop.

Firecrackers have a compact shape with very showy flowers on tall stems, which means that even when the leaves die back in winter, the firecracker plant can still be seen from afar as it stands out against the snow-covered ground. Gardeners and plant lovers can sometimes find it difficult to care for firecracker plants. To help, we created a firecracker plant care guide that is easily personalized to fit your needs!

What is Firecracker Plant?

Firecracker Plant is also known as Russelia equisetiform is a perennial firework that provides mass amounts of firecracker or gasps. It grows to about five feet tall and has leaves with silver-white streaks on them. Firecrackers are usually pink, purple, red, orange and yellowish-white in colour which makes this plant eye-catching during the fall season. Firecracker Plant is also known as firecrackers, firecracker plant and silver fire.

It can be found in the eastern North America region during the winter months. The flower stem will grow up to three feet tall and it produces flowers that are white or pink with a tube-shaped corolla that looks like firework explosions.

Firecracker Plant leaves don’t seem to be fire-resistant at all; they’re quite flammable but not very impressive in the garden as a firebreak or for putting out fires of any kind. So unless your house is on fire you might want to keep firecracker shrub out of the garden.

Firecracker Plant

Origins of Firecracker Plant Plant

The firecracker plant, firecracker flower, firefly plant is perennial in the borage family (Boraginaceae) native to Eastern Asia. The name firecracker comes from its flowers that are shaped like firework fireworks and often have bright colours resembling them too. In China, it’s called “huoyao” because the firecracker flower typically blooms in the same season as China’s firework festival.

The Russelia equisetiformis firecracker plant is a popular perennial because it does not need too much care and thrives in most conditions. Fireworks-shaped flowers bloom sporadically throughout summer, which makes firecracker plants excellent for cut bouquet arrangements or just to enjoy as a living decoration.

There are two firecracker varieties: common firecracker plant and Chinese firecracker plant, which is also known as “huoyao.” The most popular variety of firecracker plants in the United States is called ‘Catherine’s Wheel’ because its flowers resemble Catherine wheels from old-fashioned fireworks.

Firecracker Plant Care Guide

If the firecracker plant has been in your garden for a while, it’s time to take some steps. Spring is the perfect time to rejuvenate firecracker plants and get them ready for the summer season. Follow these simple tips below on russelia equisetiformis care.

Soil

Firecracker plants are not very picky about their soil preferences. They can grow in clay, sandy or loam soils and don’t require much fertilizer to be happy. The firecracker plant’s pH preference is neutral but they will still thrive with a wide range of different pH levels

However, firecrackers do need acidic soils for the firecrackers’ flowers to develop and be fertile. If your firecracker plant lives in alkaline soil there is no need to worry, they will still thrive but their flower petals might not have as much colour.

You should mix the firecracker plant’s potting media with one-third compost, about one tablespoon of dolomitic lime per gallon (this will raise the pH levels), and some decomposed granite or gravel to help prevent water from draining too quickly.

Light

A firecracker plant is a perennial and thrives on plenty of light, so place it in an area with direct sun exposure. In the winter months when there are fewer hours of sunlight or less intense sunshine, be sure to supplement firecracker plants’ needs by using artificial lighting. Fluorescent lights work well for providing low-level light.

The firecracker plant doesn’t need to be in a windowless room, but it does need low-intensity fluorescent lights or other artificial lighting during winter months when there’s less sunlight than usual. Firecrackers also can grow well with only indirect natural light for short periods of time and will not need to be relocated as long as they are shaded from direct sunlight.

Watering

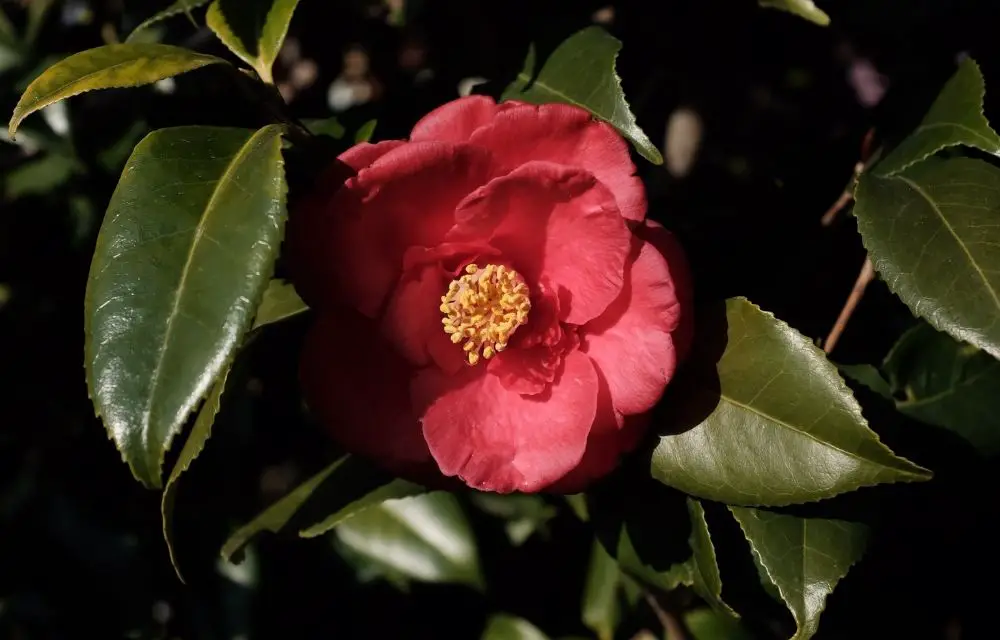
Watering firecracker plants is a very important part of the care process. Once firecracker plants have been established, they are actually quite drought tolerant and will only require watering every now and then when in soil that holds water well. Firecrackers can be watered with plain old tap water or rainwater collected from the roof, gutters or downspouts.

It is important to water firecrackers when they are in pots and containers to prevent the roots from becoming too dry. The best time of day for watering firecrackers depends on your climate zone; if you live in a humid area that has plenty of rainfall, firecrackers will need more frequent watering.

In areas that have drier climates, firecracker plants should be watered only when the soil is dry to the touch or if it has not rained in a few days. It is also important to water firecrackers often during the winter months in regions that receive a lot of snowfall, because firecrackers need moist soil and will suffer if they are deprived of this moisture for too long.

Temperature

Firecracker plants love the heat. Temperatures above 30 degrees Celsius are usually not a problem for the firecracker plant. In fact, the firecracker plant can take up to 40 degrees Celsius temperatures with ease! Be careful though – firecrackers don’t do well in cold climates and will likely freeze if they’re exposed long enough to temperatures below 20 degrees Celsius. Keep firecrackers away from air conditioners as these will dry out their leaves quickly.

Humidity

Humidity is a firecracker’s best friend. Because firecrackers grow in hot, dry climates this can be difficult to maintain indoors for the winter months when you want them to stay dormant and stop flowering. They thrive when surrounded by at least 50% humidity.

One of the key ways to increase humidity levels inside your home is with a pebble tray. Fill a shallow dish with pebbles, then pour water over them. The moisture will evaporate and increase humidity levels in your firecracker’s environment.

Fertiliser

Fertiliser is a crucial component to firecracker plant’s resilience. If it goes without for too long, firecracker plants will brown and eventually die off. The type of fertiliser you use will depend on the soil composition in your garden: if your firecracker plant grows in acidic or alkaline soils then you’ll need to use a fertiliser with the same properties.

There is a great range of firecracker plant fertilisers to choose from, and there’s one for every kind of gardener. Liquid fertiliser can be applied directly on firecracker plants’ soil or in wet periods when water-soluble nutrients are necessary; granular ones are to be applied on firecracker plants’ surface, and slow-release fertilisers are perfect for firecracker plant’s growing periods.

Some firecracker plant fertilizers can also help to improve the soil quality: they may suppress weeds or even stop fungal diseases, bacteria and nematodes that attack firecracker plants.

What firecracker plant fertilisers will you use?

  • Liquid fertiliser: it can be applied on firecracker plants’ soil or in wet periods when water-soluble nutrients are necessary. It’s easy to apply and they don’t have any unpleasant smell, so people who’re sensitive to smells should pick this option.
  • Granular firecracker plant fertilisers: they’re applied on firecracker plants’ surface and are perfect for firecracker plant’s growing periods. They will help firecracker plants grow in a healthy manner, but it might take some time to see the result of using this type of fertiliser.
  • Slow-release firecracker plant fertilisers: this type of firecracker plant fertiliser is perfect for firecracker plants’ growing periods, because they release nutrients slowly and consistently. If you can’t remember to water your firecrackers every day or two then using slow-release will ensure that the soil has enough moisture until it’s time to water again.
  • Super firecracker plant fertiliser: this type of firecracker plant fertilizer is great for people who don’t have time to take care of firecrackers plants, because it’s really easy and quick to use. The downside is that super firecracker plant fertilisers can be quite expensive, so they’re not for firecracker plant beginners.
  • Organic firecracker plant fertilisers: some people might want to use organic firecracker plant fertiliser because they don’t like the idea of using chemicals on plants. The downside is that it can take a while before you see any results from these products, and there’s always an increased risk of firecrackers becoming diseased.

Toxicity

Firecracker Plant can be toxic to dogs, cats and horses. This is because firecracker plants contain a chemical called saponin which acts as an emetic; it makes animals throw up whatever they have recently eaten. The effect of this toxin on humans has not been studied yet but the plant may cause irritation in eyes if touched.

Pruning

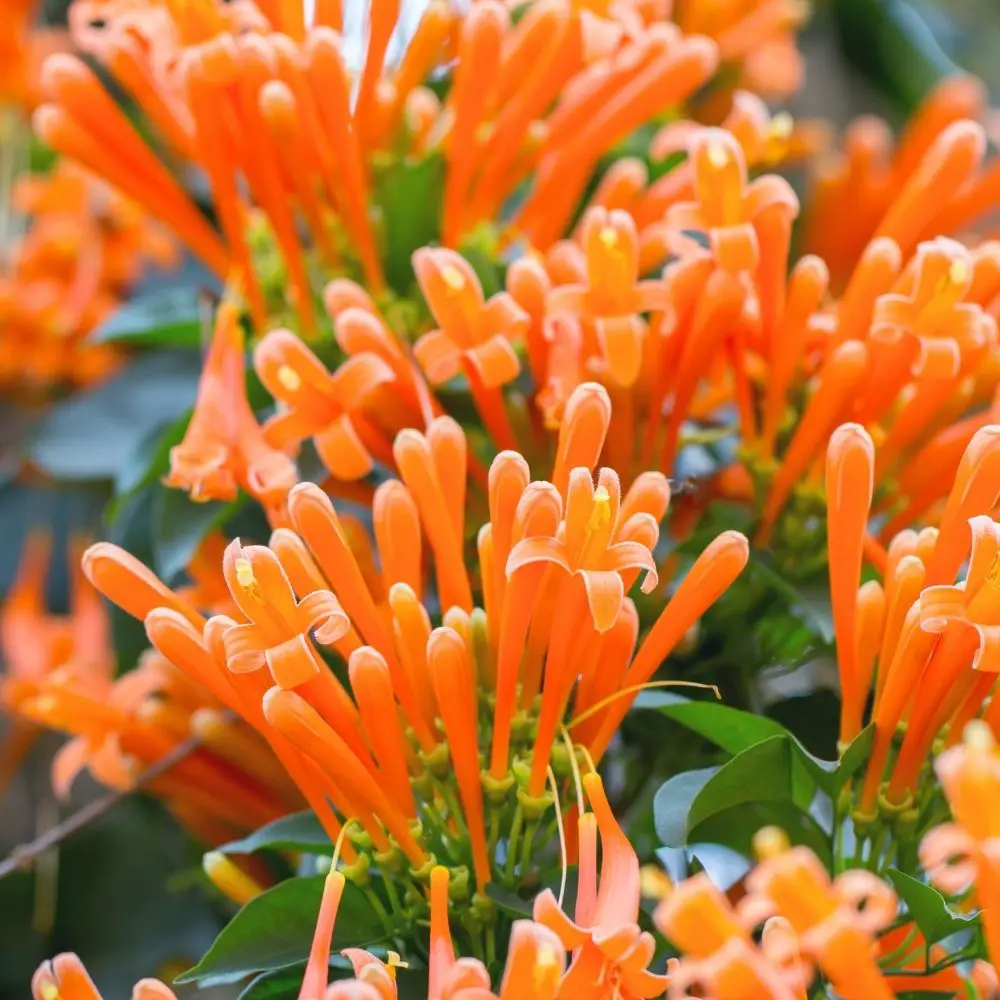
Pruning firecracker plants is absolutely necessary in order to keep the plant healthy. The firecracker plant’s flowers are actually clusters of small, fragrant bell-like blooms that grow on spikes from long stems that can reach up to four feet tall. Pruning firecrackers will help manage growth and keep firecracker plants in a tidy, manageable shape.

Firecrackers can be pruned at any time of the year and should be cut back to a height that is five or six inches from the ground. If you are just trimming up your firecracker plant for winter, take off about one-third of its growth, cutting any branches that are longer than six inches.

If firecracker plants become too leggy, cut them back to a height of about 20 inches from the ground and they will resume their usual bushy shape in spring. Firecrackers can also be pruned before winter to promote new growth early next year by removing all but about two or three inches of the firecracker’s new growth.

Another way to prune firecrackers is by removing some branches from a cluster of firecracker flowers, which will cause more blooms to grow on other stems in its place. This technique can be used when you notice your firecracker plant has too many long, leggy stems and needs to be cut back.

When firecrackers are grown in pots, they should also be trimmed by removing one-third of their growth at a time or pruned as needed to maintain the desired size and shape.

Propagation and Growth

Firecracker plant propagation is easy if you have a few spare seeds. If not, firecracker plants can be propagated by taking cuttings from the ends of new shoots in early winter and then planting them into pots or trays with moist compost. The seedlings should start to appear within six weeks.

There is one important point to note when propagating firecracker plants, and that’s the difference between male and female firecracker plant cuttings. Male firecracker plants will have a smaller number of flowers than female firecrackers, but it can be difficult for new growers to tell them apart until they flower in the following year.

The firecrackers also have male and female flowers on different plants, so it is important to take cuttings from the right plant in order for your firecracker plant propagations to grow into healthy flowering shrubs.

Male firecracker:

  • Has fewer flowers than a female firecracker
  • Flowers are more yellow than female firecracker flowers

Female firecracker:

  • Has more flowers than a male firecracker
  • Flowers are redder and brighter in colour.

Male firecrackers (left) have fewer, less colourful flowers while females (right) produce plenty of larger blooms and their flowers are more red. The firecracker flower pollen is sticky and firecrackers need a suitable pollinator to get the pollen from male firecrackers onto female firecrackers.

Repotting

So your firecracker plant is outgrowing the pot? No problem! Firecrackers are really easy plants to repot. This process can be done as soon as they’re showing signs of overcrowding, which could happen in about a month for some fire crackers. Let’s get started:

  • Place a small pot with drainage holes at the bottom of your firecracker plant. Fill it about halfway up to an inch below the rim with soil that is specifically made for fire crackers or most any other perennials, like cactus and succulents.
  • Add more soil until you’ve reached the top of the firecracker plant’s root ball.
  • Pat the soil down gently with your fingers or a spoon to make sure it is packed tight and there are no air pockets. Add more potting mix if necessary until you’ve reached about an inch below the rim of the firecracker plant’s new container. Mist in thoroughly, using room temperature water.
  • Be sure to move the firecracker plant into its new pot carefully so as not to disturb or disrupt any of the roots that are in there. Water thoroughly after you’ve finished, and make sure it has been soaked for about ten minutes before watering again. You’ll want to keep this firecracker out of direct sunlight for about a week, which will give it time to regenerate.

Plant Disease

If firecracker plant has a lot of leaves with red blotches or spots, then it could be a sign of fireblight. Fire blight can also cause lesions on the stems and fruit that are brown to black in colour. The best treatment for fire blight is prevention by keeping your plants dry, well-ventilated, and away from fire blight hosts. If fire blight is present, isolate your plant and cut off any diseased parts of the stem with a clean blade or pruning shears

If the firecracker plant starts to yellowish between the veins in its leaves it could be due to iron deficiency. To remedy this problem, make an infusion using comfrey root and dandelion root.

Mildew can also affect firecracker plant if conditions are not right such as high humidity or too much shade. This is easily remedied by spraying firecracker with a mixture of water and dish soap, use caution though because this could kill the firecracker plant if used too often

Firecracker Plant Variegated

Firecracker Plant Variegated is a perennial shrub that thrives in full sun and well-drained soil. It does best when grown as an annual or container plant, but firecracker variegated can also be dug up year after year to rejuvenate the roots. This firecracker variety should grow about three feet tall and wide.

The firecracker plant is not a typical variety of firework, but it does share many qualities with its namesake–fiery red blooms that light up surrounding plants in the late summertime garden. The firecracker variegated shares these traits with fire cracker primrose (Oenothera speciosa), a firecracker plant that features the same bright red blooms, but with golden yellow edges.

The firecracker variegated is a great choice for many gardeners because it performs well in both clay and sandy soils–and as an added bonus, fire cracker primroses are resistant to powdery mildew!

Common Issues with Firecracker Plant

Firecracker plants are often affected by pests such as spider mites or aphids. In the case of the firecracker plant, you will want to spray with a strong water and soap mixture which should kill any bugs on contact. Removing the infected leaves is also an option that can be done in addition to spraying them off.

The firecracker plant is often a victim of overwatering. If you notice that the leaves are starting to droop and turn brown, then it may be time for more water. You want to keep in mind that firecracker plants like moist soil but do not appreciate standing water sitting on their roots.

In order to ensure firecracker plants are also getting enough water, you can do a quick test of the soil. The firecracker plant thrives in moist but not wet soils so if your firecracker is drooping and turning brown then it may be time to increase watering levels.

Tips for Keeping Firecracker Plant Happy

The firecracker plant doesn’t need much care so it’s good for first-time gardeners who don’t want anything too time-consuming! Here are some tips!

Tip #01: firecracker plant likes lots of sunlight.

Tip #02: firecracker plants need moderate water. Don’t overwater or underwater too much.

Tip #03: firecracker plants like to be planted in an area with well-draining soil and not a lot of rainfall, ideally in full sun.

Tip #04: firecracker plants are drought and pest tolerant so they can be planted in a neglected area of the garden or even on an embankment as long as it doesn’t get too much rainfall, which would cause erosion.

Tip #05: firecracker plant needs well-drained soil and moderate watering.

Tip #06: firecracker plant likes to be planted in a container, so it can be moved around and planted outside during summer months.

Tip #07: firecracker plants are good for beginners because they don’t need any special attention or care!

Firecracker Plant Frequently Asked Questions

How do you care for a firecracker plant?

Grow firecracker plants in a moderate temperature environment. The firecracker plant prefers wet soil and can be grown inside or outside, so long as it is not too cold. Water firecracker plants about once per week with rainwater or distilled water; do not use tap water because the chlorine will kill them. Feed firecracker plants with a water soluble fertilizer once every two weeks.

Is a firecracker plant a perennial?

The firecracker plant is a perennial that you can grow in your garden. It has striking foliage with pink and purple markings, as well as fire-red flowers.

##Is firecracker plant invasive?

Firecracker plant is not invasive. It does not grow well in wet soils and if it gets too much water, firecracker plants will drop their flowers.

Can you prune a firecracker plant?

Yes, firecracker plant generally has low foliage so it is a good candidate for pruning. It’s best to wait until after the firecrackers have taken off in early summer before deciding on whether or not you want a more compact shape and size. Trim back any deadwood that may be hanging over with some very sharp secateurs.

Is firecracker plant toxic?

Some firecracker plant species are toxic, but the firecracker plants that people grow in their gardens (Pyrostegia venusta) are not. Pyrostegias have a tropical look and make great houseplants for indoors or outdoors.

Are firecracker plants poisonous?

Firecracker plants are not poisonous to humans. However, firecrackers can be toxic if ingested by cats and dogs because they have a high concentration of saponins that make it difficult for their kidneys to properly function. It’s also important to keep firecrackers away from pets as the entire plant is prickly and has sharp points that can cause them to get hurt.

Conclusion

There are lots of firecrackers plant varieties available in nurseries and garden centres throughout the year so you can pick one that suits your liking! Some common firecracker plant species include: ‘Peach Glow’, “Dynamite™”, ‘Nana’, ‘Peppermint’, and “Silver Lining”. Growing firecracker plants is easy but it’s important to take care of them just like any other perennial.

If you have a firecracker plant in your garden or home, keep these tips in mind to make sure the firecracker plant stays healthy and happy! Whether it’s a yellow firecracker plant you have or a red, or orange, count on them to add colour to your garden.

Here are some related articles you might like:

Firecracker Plant

Firecracker Plant

Care for Monstera Peru: The Crazy Plant You Never Knew Existed

Monstera peru is a beautiful monster. Imagine vines and leaves shooting from the ground, twisting and turning into an intricate design. Monstera peru is known to be one of the most difficult plants to grow but it can also be one of the most rewarding. Growing monstera peru might seem like a daunting task, but you’re in luck! This blog post will teach you all about taking care of monstera peru with tips on how to keep your monster happy for many years to come!

What is Monstera Peru?

Also known as monstera peru karstenianum is a monster of a plant that will grow up to 3 meters tall and 5 meters wide. It belongs to the Araceae family, and its scientific name is monstera deliciosa.

Monstera peru are unique in that they produce aerial roots, which spread out like tentacles from the tree trunk. These roots are sensitive and can detect any vibrations in the surrounding soil from a long distance away, which helps monstera peru to conserve water by making them drought-resistant. The leaves of monstera peru are spiral shaped with deep spongy veins.

They cover the whole surface area of monstera peru, and they also have a rough texture. monstera peru are vulnerable to frost damage because of their leaves being so thick which can lead them to lose all their foliage in the winter months. The monster plant should be kept indoors during these time periods or outdoors in milder climates like California.

Monstera karstenianum develop aerial roots that can grow to be up to 15 meters long. These monstera peru roots are also sensitive and can detect any vibrations in the surrounding soil from a long distance away, which helps monstera peru conserve water by making them drought-resistant. monstera peru leaves have serrated edges and spongy veins that cover most of their surface area. monstera peru leaves also have a rough texture.

Origins of Monstera Peru Plant

The monstera peru is a type of plant that originates from Central and South America. It’s nickname in the English language has often been attributed to its similarity with an octopus, because of it’s long tentacle-like vines. In Spanish this monstera peru is nicknamed “the crazy plant” or “the monster”. The monstera peru plant was discovered by Francisco de Orellana who named it monster because its leaves reminded him of monsters he had seen on an expedition to Peru.

monstera peru 3

Monstera Peru Care Guide

The monstera peru is a tough plant that can be hard to care for because it needs so much sunlight, especially in the summer. Monstera peru is a great plant for those looking to enjoy the outdoors while away from home as they can be grown and taken care of inside. Here are some monstera peru plant care guides for you!

Soil

To grow monstera peru, you need a soil that’s rich in nutrients and well aerated. The type of potting mix should be airy, with plenty of space for roots to spread out. New plants can start off using sphagnum moss or coconut fiber as the substrate but eventually switch over to more conventional potting soil. A good rule of thumb for monstera peru soil mix is about one third organic material like compost or potting medium and two thirds inorganic material such as pumice, gravel or sand.

Lighting

In order to keep monstera peru happy you need to be mindful of its needs. Monstera peru requires lots of light, but not too much as it will burn the leaves and stunt growth. 60% shade is a good amount for monstera peru so that it does not get burned by direct sunlight or have its photosynthesis interrupted by too much sun. Near-constant exposure to the sun is best for monstera’s health, but those of us who live in colder climates usually need some sort of supplemental lighting in winter months.

Watering

Monstera plants need a lot of water to stay healthy and looking beautiful. Of course, you can’t just pour the water on them like they’re some sort of plant-shaped kitty litter box! To make watering monsteras easier, it’s best to invest in an automatic watering system for your houseplants.

Water monstera peru liberally, but not so much that the soil runs dry. Monsteras can be planted in a pot with drainage holes to make watering easier and less messy. Monstera plants like moist air as well as water on their leaves; misting them regularly will help keep humidity up around your plant.

If monstera peru leaves are drooping, it could be due to dry soil or lack of water. Make sure the plant has enough space in its pot and is planted with moist but not wet soil so that air can circulate freely around the roots.

The monstera can be sensitive to water quality, so make sure it is not exposed to chlorine or other chemicals. Olive oil and dish soap are also good for removing any dust that has accumulated on the leaves of your monstera. Remember to use a soft cloth when cleaning the monstera peru, as harsh scrubbing can damage the leaves and branches.

Temperature

The monstera peru tree will thrive in a room that has an average temperature of 65-75 degrees F. Any hotter than this, and the plant will begin to go dormant, locking up its leaves and refusing to bloom. Any cooler than this, and the monstera peru will go into dormancy too. It does, however, dislike sudden changes in temperature and being moved around.

You should aim to keep your monsteras enclosed from drafts or heat sources – when you think that they are getting too cold or hot, move them away from those sources of extreme temperatures.

Humidity

Not all monsteras are humid, but some do require a bit of moisture. It’s not always easy to know if your monstera needs more humidity or less. If the leaf tips start turning brown and curling up, then it might need more moisture. You can either mist spray it every day with water from the sink for 15-20 minutes or move it next to a humidifier.

You can also test the monstera’s humidity by touching the leaves and seeing how they feel–if they’re dry, then your monstera probably needs more moisture in the air. If they are wet, then that means there is enough humidity in the environment already!

It’s important to know how much humidity your monstera needs, so that you can keep it happy and healthy.

Fertiliser

monstera peru 3
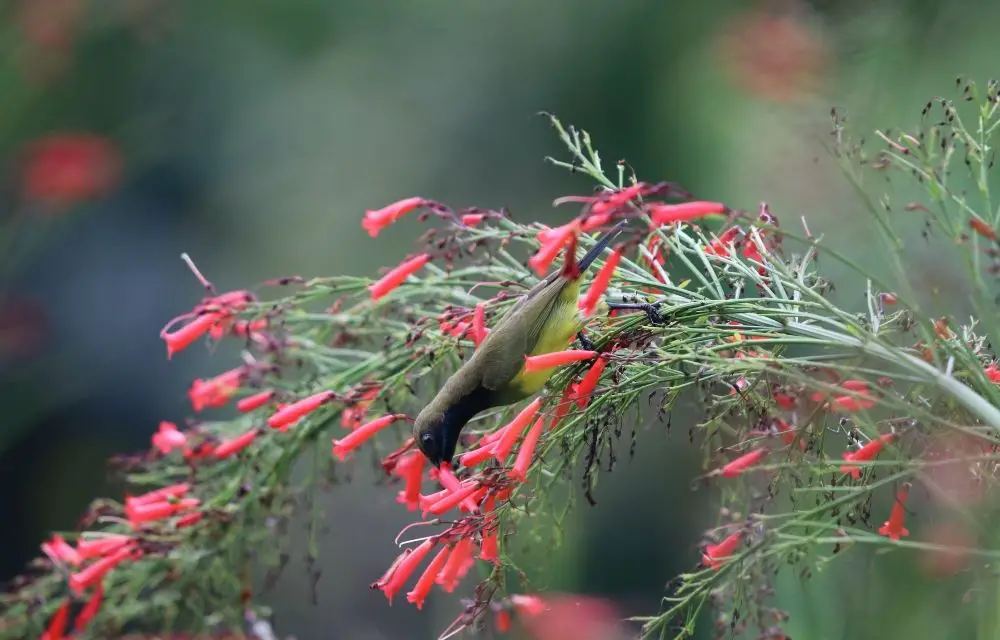
It’s important to get monstera peru some fertiliser, either from a store or your yard. Fertilisers can be natural like compost and manure (use both!), chemical such as nitrogen-based ones that are found at the garden centre; or those made with organic materials. Some people feed monstera peru leaves, but monstera peru like the more nutrient-rich fertilisers.

Alternatively, mix a small amount of compost or garden soil with water and then carefully spray it over the monstera peru. If you have access to manure, sprinkle some on top of your monstera peru once every month during the winter months when plant growth slows down. Keep in mind that fertilising monstera peru too much will cause the plant to grow too quickly and then die, so it is important not to fertilise monstera peru more than once a month.

Toxicity

The monstera peru is mildly toxic. It contains calcium oxalate crystals, which can cause a burning sensation in the mouth and throat if ingested. The toxicity most commonly manifests as stomach cramps or diarrhea hours after consumption of the plant. In some cases, it has been known to lead to vomiting or even death when consumed by animals.

Pruning

This monstera peru is very slow growing and has a tendency to become leggy, which means that pruning it every year in the fall will be important. When you’re cutting stems on monsters, make sure there’s at least one bud either side of the stem being cut. The monstera can also produce aerial roots, which should be cleared out periodically to reduce the chance of them breaking off and rotting inside the plant or getting covered in soil.

When doing a monstera peru pruning, one should make cuts at an angle of about 45 degrees near the base and be sure to cut no more than half way down the stem of the plant. It is also important not to over-prune monsteras as they are slow growers that can take up many years to reach their full potential.

Pruning monstera perus does not need to be done very often, just once or twice a year is enough for most people. Pruning monstera plants will also help to control their size as well as removing dead leaves which can hang on them for too long.

Propagation

Monstera peru propagation can be done by seed, suckers or stem cuttings. The seeds are ready for planting when they harden at the top of their capsules and turn brownish-purple in color. Propagating monstera peru from seedlings will take anywhere from three to five years before producing fruit on a monstera plant.

Cuttings should be taken from healthy monstera plants during their growing season. Take a cutting that is at least six inches long and cut it off of the mother plant with clean, sharp scissors or pruning shears.

The top should have several leaves with an inch-long stem attached to its base once trimmed for any rough edges. Cuttings can be planted in a container of damp, sterile potting soil and will usually take root in one to two weeks.

Repotting

Monstera peru is one of those plants that you don’t see around your average home – in fact, it’s so rare that when monstera peru does show up at home centers or garden stores, many people are left wondering what this strange plant even is. Monsteras prefer to be potted but if they are growing in the ground, you will need to dig up monstera peru from time to time.

This is so that monstera can grow and its roots have space to spread out a little more too. If your monstera already has strong well-established root system and it’s just beginning to flower or fruit then don’t worry about repotting monstera.

Plant Disease

There are a few different monstera peru diseases that can pop up. Let’s talk about them briefly.

  • Mildew: This disease is caused by the common fungus called “Oidium.” With mildew, leaves will grow yellow spots and eventually fall off to reveal brownish black areas underneath where they once were. There may also be a few white spots on the upper surface of those leaves.
  • Anthracnose: This is another common monstera peru disease that shows up in wet and humid climates such as Florida, Louisiana, Texas, Georgia and Tennessee. With this monstera peru disease, you’ll notice dark lesions or spots with irregular borders on the leaves. If left untreated, these monstera peru diseases will cause more and more lesions until eventually it kills your plant.
  • Powdery Mildew: This disease is caused by a fungus known as “Podosphora.” With this monstera peru disease, you’ll notice white patches on the leaf surface with powdery growth.
  • Scab: This monstera peru disease is caused by a fungus called “Cercospora.” You’ll notice lesions on the leaf surface with scabby growth and eventually black spots will show up if it’s left untreated.
  • Verticilium Wilt: The last monstera peru disease is caused by a fungus called “Verticilium.” This monstera peru disease will start with yellowing leaves and corky spots on the stems. It can also cause plant death if not treated, so it’s important to make sure that you keep your monstera peru happy and healthy!

Monstera Peru Variegated

monstera peru
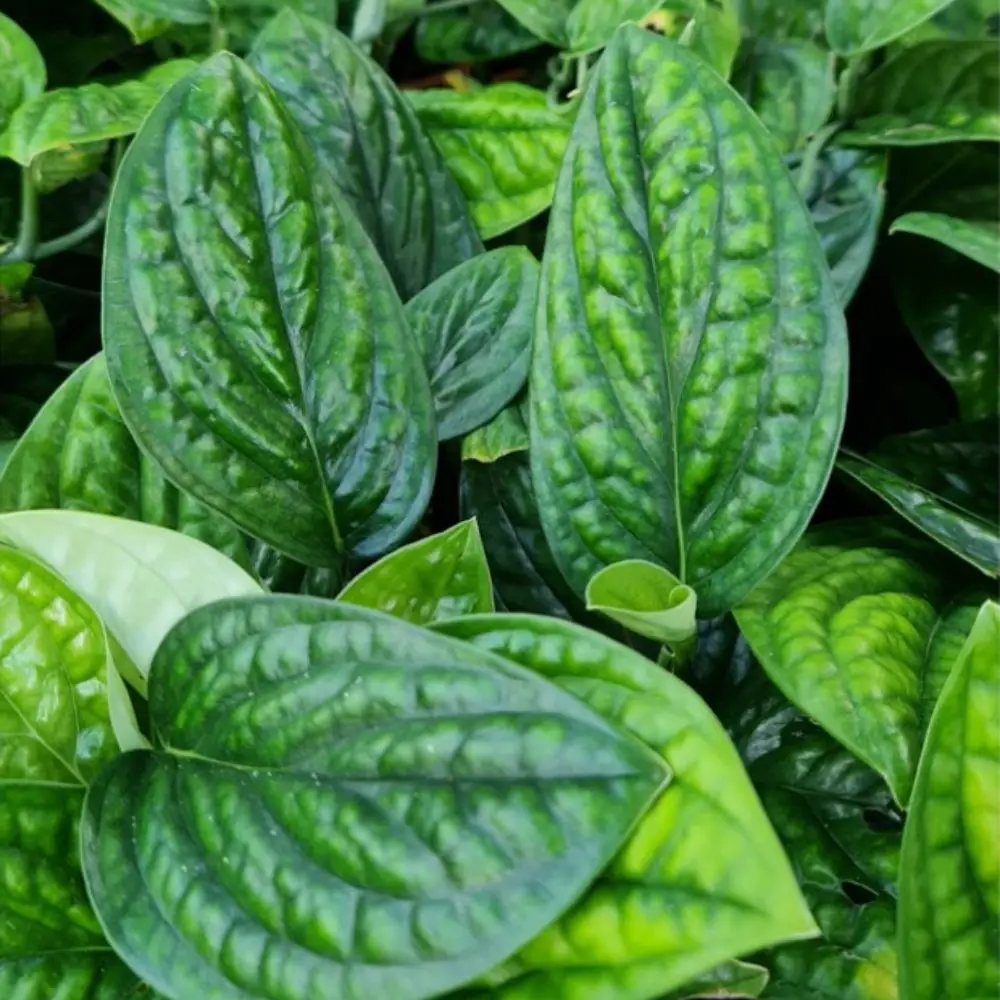
One of the many monstera peru Variegated, monstera brissacae. monstera peru Variegated are a monstera peru that has green leaves with a white or yellow edge on the top surface and is characterized by reddish-brown blotches on the underside of its leaves. Variegated monstera peru should be fertilized in the springtime with a liquid fertilizer.

Monstera peru Variegated should be watered in the evening during dry months and less often during humid or rainy periods to prevent mildew or rot. and they grow best in temperatures between 60 to 80 degrees Fahrenheit. monstera peru Variegated are most at home in moist, shady, and well-ventilated environments. monstera peru Variegated are a light feeder and can be fed monthly with a slow release fertilizer to get the best growth.

Common Issues with Monstera Peru

It’s important to know how monstera peru will react if they are not properly cared for since it can create problems with the plant. For example, monstera peru that is consistently overwatered may produce leaves which have brown spots on them and droop around the edges.

There are a few helpful tips for monstera peru care that can help with problems like overwatering or under watering the plant:

  • Use your finger to poke down into soil and check if it’s moist before watering monstera peru again; don’t just wait until after you’ve watered monstera peru to check
  • If monstera peru is consistently underwatered or if the leaves are drooping, you can use a succulent potting mix which will increase moisture retention. This also helps with overwatering; just make sure that there’s drainage holes so water doesn’t sit in the soil and create root rot
  • If monstera peru is over watered, you can use a very well draining potting mix. This will help monstera peru avoid root rot and helps with water retention so that monsteras don’t dry out quickly after watering them

Tips for Keeping Monstera Peru Happy

Troubleshooting monstera peru plants is not so hard to do as long as you remember these few points:

-Water monsteras twice a week and fertilize them once every other month with an all purpose fertilizer.

-Monstera leaves will turn brown if overwatered, but allow the top inch of the soil to dry out before watering again.

-The monstera peru plant is poisonous and should not be consumed by humans or animals, if ingested it can cause stomach upset or paralysis of some muscles in the body.

-Thorns on monsteras plants are harmless but your skin may get stuck when you touch them with bare hands.

-The monstera peru can be grown in the shade or full sun so it doesn’t need to have an excessive amount of light, however monsteras plants do better when they are closer to a window where there’s natural sunlight.

Monstera perus should not be eaten by humans because if ingested causes stomach upset and paralysis for some muscles in the body.

Monsteras peru plants can be grown in shade or full sun and they don’t need an excessive amount of light, monstera plants grow best when close to a window where there’s natural sunlight.

Monstera Siltepecana vs Monstera Peru

The monsteras are both beautiful plants, and it can be difficult to tell them apart. They’re so similar that at one point they were considered simply two varieties of a single species! Fortunately we now know that there are actually three monsteras in total, with monstera peru being the newest of them all.

Monsteras are both native to Central America, and monstera siltepecana is so common that it can sometimes be found in grocery stores or home improvement centers for sale as an ornamental plant. Monstera peru is a relative newcomer on the scene because its natural habitat is in the south of Mexico, with a seemingly more limited range.

Monstera siltepecana has an oval-shape leaf that is about 12 inches long and three feet wide at its widest point. Monsteras are known for their stout vines covered in spiky thorns that can grow up to fifty feet long! The monstera peru is smaller by comparison with more of a round-shape leaf that itself only reaches about 12 inches in length and half the width of monstera siltepecana.

Monstera Pinnatipartita vs Peru

monstera peru
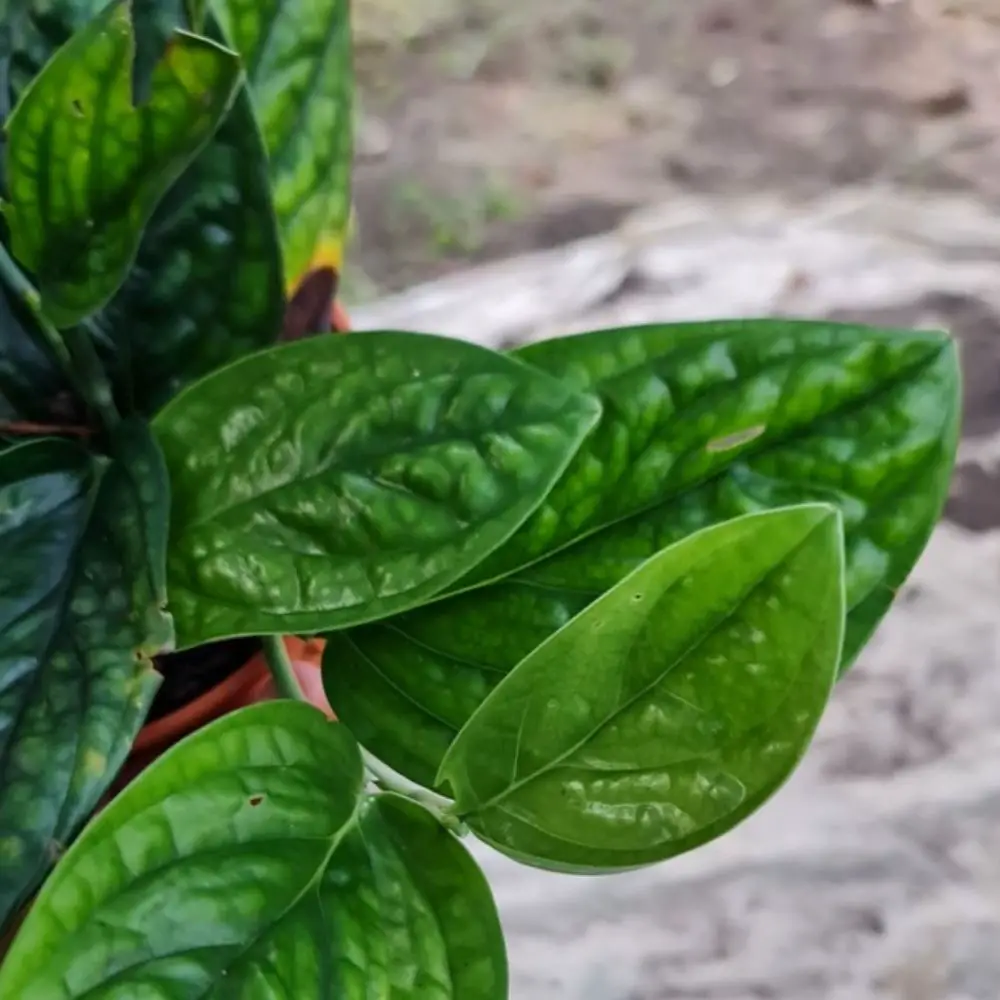
People often mistake monstera pinnatipartita for monstera peru, but the two plants couldn’t be more different. Monstera pinnatipartita is much easier to take care of because it’s a smaller plant with narrower leaves that don’t grow as easily out and over anything else in its way like monstera peru. Monstera pinnatipartita is also more likely to have flowers and fruit than monstera peru, since it’s not a self-pollinating plant like monstera peru.

In terms of care, monstera pinnatipartita likes humidity levels of 50% or higher while monstera peru likes humidity levels of 80% or higher. You can typically tell monstera peru from monstera pinnatipartita by its leaves, which are thinner and less pointed than monstera pinnatipartita’s wide lance-shaped leaves at the end.

The reason that people mistake monstera peru for monstera pinnatipartita is that monstera pinnatipartita’s leaves are also thin and lance shaped, but they’re a lot smaller.

Monstera Peru Frequently Asked Questions

Is Monstera Peru rare?

Monstera peru is not rare, but it’s native to Central and South America. It has beautiful leaves that are often used in modern home decor because they look so different from other plants.

How do you care for a Monstera Peru?

There are many ways to care for monstera perus but it doesn’t have to be difficult as long as you remember these few points. They need to be watered twice a week, fertilized once every other month with an all-purpose fertilizer and monstera leaves turn brown if overwatered but allow the top inch of soil to dry out before watering again.

Is Monstera Peru a slow grower?

It’s true monstera peru is a slow grower. They can take years to mature and develop into their full grown size. However, monstera plants are resilient and strong which makes them perfect for growing indoors or in tight spaces because they don’t need much room at all!

What is a monstera Peru?

A monstera peru is a type of bromeliad, which are plants that produce their own water. It has broad leaves with distinctive veins and spiky edges.

Why is Monstera Peru so expensive?

Monstera peru plants are expensive for a number of reasons. They require more space, they live longer and monstera peru is difficult to propagate. There’s also the issue that monstera plant seeds have been illegally sold on eBay in recent years which has driven up prices as well. Growers report that monsteras grow at an average of one inch per year, meaning monstera plants can be very expensive to grow.

Why is my Monstera Peru curling?

Monstera perus have a natural response to being in an unfavorable environment. The monstera will curl inward as the leaves and stems wither off, protecting the plant from wind or other harsh conditions. Monsteras also use this strategy when they feel threatened by insects or disease.

Does Monstera Peru Fenestrate?

Monstera peru fenestration occurs when monstera peru leaves grow to form holes and the plant is no longer green, but yellow or brown in color with a thick stem called the trunk.

Conclusion

The monstera peru is a beautiful plant that many people don’t know about. It’s similar to philodendron but with larger leaves and decorative vines. This article has covered the basics of monstera care, common problems, and tips for keeping monstera happy so it can flourish in your home or office space. With proper maintenance monstera peru will grow and might even flower.

Monstera peru price are normally on the higher side as it is rather rare. You can find monstera peru for sale at your nearest nursery.

Garden favourites:

monstera peru

The Curious Monstera Standleyana: Caring for Monstrosities in Your Garden

In the monstera standleyana’s natural habitat, it is a monster. This monster needs constant care and attention, which can be difficult to provide for in your average suburban garden. The plant is very sensitive to its environment and will not do well unless you take the time to understand its needs.

Monetarily monsteras are a less expensive option for homeowners looking to create an unusual outdoor space in their garden or home, while also earning it points with neighbors and friends who don’t want the same old thing as everyone else. Monsteras can be used in a variety of ways including as specimen plants, topiaries and even used in floral arrangements. In this article we’ll explore some of these needs so that you can create an oasis for this monster in your own home!

What is Monstera Standleyana?

Monstera Standleyana is a monster plant that has been grown in the home garden for centuries. It was originally discovered on an expedition to Mexico by William Russell Standley, hence its common name Monstera standleyana. The leaves of monsteras are large and leathery with spiky edges. They can grow up to six feet in diameter and are often used as a living room fixture. Monstera standleyana is easy to grow, but it does have some problems that others plants don’t usually share.

Monstera standleyana is a monster that loves to be in the limelight. And for good reason, too: with it’s large leaves and monster-like shape, this plant has no problem standing out among your garden plants. But we’ve all seen how monstrous these things can get – so what makes monsteras such great additions to your garden?

When monsteras are young, the leaves can be a dark green color – but as they grow they become lighter and more of an olive green color. The monstera standleyana takes on a monstrous shape because it has three larger petioles that come from one central trunk (which is called “the monster”). These petioles are what give monsteras their “standleyana” name.

This monstera plant does well in containers indoors or out. It is not a fast grower and can take up to two years before producing leaves. This monstera produces the largest leaf on earth with some reaching sizes of six feet tall!

The plant does not produce any flowers or fruit so there is no insect population that will visit monstera standleyana as it would other plants. This means monsteras do not need to be sprayed with insecticides, which is always a plus for the environmentally conscious gardener.

Origins of Monstera Standleyana Plant

monstera standleyanaWhen monstera standleyana was first discovered, it belonged to a group of plants known as Araceae. It is believed that monstera standleyana originated in Central America and the Caribbean region, where it has been cultivated for centuries by indigenous peoples.

The plant was originally named after John Standley who collected one from Guatemala around 1859.

The monstera standleyana has been a favorite among nurseries and gardeners for generations, but only recently have the monstera’s unique features become appreciated by the general public.

It is considered to be one of the most exotic plants in existence today because it was not widely grown outside its native habitat until relatively recently in history.

Today, monstera standleyana is seen as a symbol for the plant kingdom’s diversity and exuberance because of its uniqueness in both form and function.

Monstera Standleyana Care Guide

Monsteras can be grown outdoors throughout most American states with minimal care or they may also grow well indoors if given sufficient light. Monstera plants have become extremely popular among people who love to garden because monstera standleyana offers an unusual array of colors and textures that are not found in many other plants. Follow these Monstera standleyana care guides!

Soil

One of the most important considerations for monstera standleyana care is soil. Now, monsteras are hardy plants that can grow in a variety of soils but they do need well-draining potting mix and plenty of room to spread their roots comfortably. If you use a standard garden center potting mix such as Pro Mix® Basics, it will work just fine as long as you don’t fill the pot to more than a third of its capacity.

Monstera Standleyana is an extremely large monster of a plant. As such, it has the capacity to climb over other plants in your garden and take away from their light that they need for growth. This makes monstera standleyana difficult to grow with other plants in proximity because monstera will reach out its long vines and wrap them around other plants to climb them.

When digging a hole for monstera standleyana, the soil needs to be loose and well-drained. If there is clay in your soil, it will need to be amended with sand or gravel. The hole should also have holes that are deep enough so water can drain from the roots of monstera standleyana. When planting monstera standleyana the hole should sit at least six inches deep and leveled off neatly. Monstera standleyana should be planted with the crown of monstera standleyana at ground level. The roots will grow to fill in around monstera standleyana, but they are fragile and it is important not to let them get crushed or disturbed during plant installation.

Light

One of the most important things monstera standleyana need is light. They can’t take a lot, so they should be placed in an area with filtered sun or indirect sunlight to avoid burning too much energy. The monstera standleyana needs at least six hours of direct morning sunlight and two hours after noon daily for best growth. The monstera standleyana can be placed in an east, west or south facing window to achieve this goal of six hours daily direct morning sunlight and two hours afternoon for best absorption.

Watering

Monstera standleyanas are tropical plants that need to be watered regularly. This article will teach you everything you need to know about monsteras and proper watering techniques for them.

Watering monstera standleyana is a bit different than other houseplants because it needs something called “deep waterings” to stay healthy. Monstera standleyana needs water that has been sitting in the saucer for a few hours before it is applied to the plant as well, because monsteras are thirsty plants and they need extra moisture from deep watering to maintain their health

Temperature

Monstera plants like it warmer than what many people might be used to. They are not a plant that appreciates being in cold drafts or cool breezes, which can cause leaf damage and browning of monstera leaves.

The average room temperature for monsteras should hover around 65 degrees Fahrenheit with no drafts from windows or doors. They do prefer humidity.

If monstera leaves are turning brown, it may be due to cold drafts or cool breezes. Try moving the plant closer into a room with more light and warmer temperature for best results.

Humidity

The monstera standleyana is a very humid plant. However, it does not like to be kept in an overly moist environment. If the air around the monstera standleyana becomes too wet or stagnant plants will lose their leaves and wither away quickly. So what should you do? The best thing that you can do is place the monstera standleyana near a window with plenty of light.

This will help the monstera standleyana to get enough oxygen inside its leaves and keep it from drying out. However, the monstera will start dropping leaves and eventually die if you do not give them enough water or too dry air in your home because this disrupts their growth.

Fertiliser

Most monstera standleyana do well with weekly fertilising, but this can differ depending on the type of monstera and soil quality. Try to have more nitrogen than potassium in your fertiliser mix as monsteras are quite sensitive to high levels of potassium. It is also advised not to use blood and bone or manure-based fertiliser, as monsteras are sensitive to phosphorus. Avoid fertilisers with high levels of potassium and phosphorous!

Toxicity

Toxicity is not an issue with monstera standleyana because it does not produce sap. The only parts of monstera standleyana that are toxic are the seeds, and they’re encased in a hard shell which protects them from human contact.

The most common way people come into contact with monstera standleyana toxins is when they are trying to remove the seeds from monstera standleyana. Carefully cut monstera standleyana’s fruit from the vine and after thoroughly washing your hands, crush a few seeds in order to release any toxin.

Pruning

Pruning monsteras is necessary to maintain their shape and size. Monsteras can be pruned during the winter or when they are dormant, namely between November and February. The best time for monstera care would be in late January so that you have plenty of time before the heat waves come back again.

Once cut monstera standleyana need to be supported with stakes or wire. Pruning monsteras should cut off at least one third of the foliage, but no less than a quarter inch from each stem and leaf node if you want them to grow back again quickly

Propagation and Growth

monstera standleyana
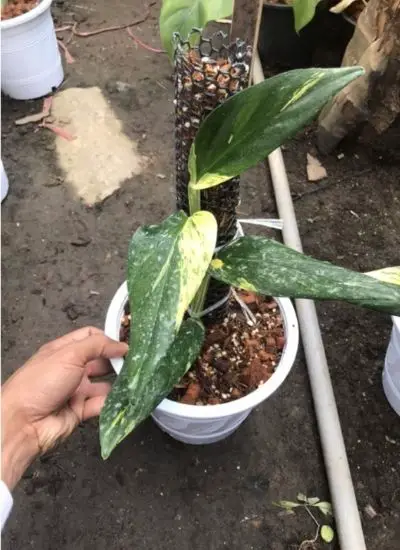
Monstera standleyana propagation are easy, and there’s a variety of methods for propagating monster. The monstera genus is typically propagated by stem cuttings. Cut a branch from the plant, and allow callus to form on the end of the cutting’s wound for about three days before dipping it into rooting hormone and planting it in moist sand or perlite. Another method used involves using another monstera plant’s stem cutting and sticking it into the ground. This is more of a gamble, but can produce monstera plants with unique colors or shapes.

Another way is by using the crown cutting method where you can take off a branch from below the leaf axil or anywhere along its length with at least one monstera node (where leaves emerge) on it. You can also propagate monstera standleyana by taking the top of a branch and placing it in soil, water, or rooting hormone.

The best time for propagating monstera is during their dormancy, which is typically during the winter months. You’ll want to take monstera standleyana out of their pot and remove any dead roots before placing them into a hole with fresh soil or other rooting material.

Repotting

Monstera standleyana require repotting every year or two in order to maintain their health, which is not difficult but does take some time. When you have monstera plants that are overgrown into two pots, it’s time to purchase a new pot and plant them in there.

To repot monstera plants, first separate the monsteras from their current pot by removing all of the soil with your hands. It is important not to break off any roots when doing this! Then choose an appropriately-sized pot – monsteras like to be in pots that are two or three inches larger than the pot they currently live in. Fill up the bottom of this new pot with soil, then place your monstera plant inside and fill-in around it with more soil until there are no gaps left.

Use a trowel to make sure all roots are covered in soil and that the monstera plant is as close to the center of the pot so that it does not fall over. Gently press down on all parts of the monstera plant, but do not cover its leaves with dirt or they will suffocate! Now you must wait for a few weeks until your monsteras start sprouting new leaves.

Plant Disease

The monstera standleyana plant is not immune to disease. The monstera standleyana houseplant will be affected by fluctuations in air humidity, water quality, and temperature levels as well as contact with other plants carrying a high level of pathogens. Some common monstera standleyana plant diseases include:

  • Leaf Spot – Brown or black spots on leaves that cause them to turn yellow and fall off the monstera standsleyana houseplant,
  • Anthracnose – Dark spores will cover areas of monstera standleyanas leaves causing a brown spot on the monstera standleyana houseplant,
  • Algae – Black and green patches that are slimy on leaves of monstera standleyanas houseplants.

Fortunately, there are many things you can do to help your monstera standleyana tree stay healthy and strong!

– Rotate the position of your monstera in its pot weekly so they get plenty of sun

– Keep monstera standleyana in a well-lit area

– Change the soil every few years for monstera standleys

– Provide plenty of water, especially in dry environments or during periods of drought

The more you can do to help your monstera standleyan tree stay healthy and strong, the longer it will live!

Monstera Standleyana Variegated

The monstera standleyana variegated differs from its common counterpart by having leaves that are mostly green but spattered with white streaks. The monstera standleyana variegata is often sought out by those who are looking for a more decorative plant. You can easily find them in any nursery, and they are rather inexpensive to purchase as well. The monstera standleyana variegated is quite resistant against the cold weather changes that happen in your garden.

Common Issues with Monstera Standleyana

monstera standleyana
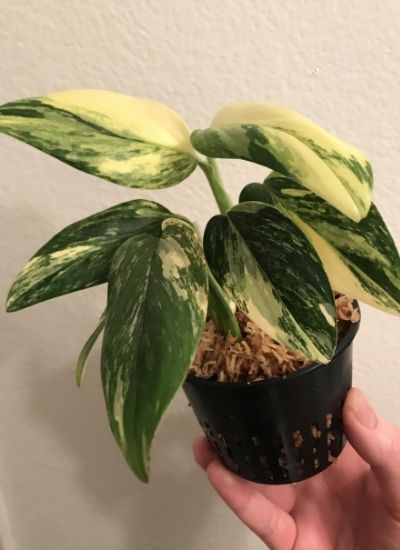
The monstera standleyana is a tropical plant that needs warm temperatures and high humidity in order to thrive. If you provide your monstera standleyana with these conditions, the chances of it experiencing problems will be greatly minimized.

There are also some common issues related to monstera standleys, which include:

  • Browning leaves
  • Leaves with brown edges
  • Spots on leaves and stems
  • Overwatering monstera standleyana, which can cause the roots to rot or get slimy. This can also lead to root mealy bugs infestations and leaf spot infections. These pests are hard to eradicate once they’ve established themselves in a monstera standleyana plant.
  • Rotting roots, which is a result of lack of watering and too much water. The leaves will turn brown then curl up before wilting. This can be caused by overwatering monstera standleys or letting pot sit in overly wet soil for long periods of time.
  • Stunted growth in monstera standleys, which is often caused by too much sun exposure. If this happens, the plant will lose its color. The best solution for this is to place monstera standleys in a shadier spot.
  • Pests such as mealy bugs and spiders can take up residence on monstera standleys if they are not watered frequently enough. This will cause the plant’s foliage to brown quickly.
  • Yellow monstera standley leaves that don’t wilt or turn brown can be caused by a lack of iron in the soil. A sign you may need to fertilize your monstera standleys is if they are turning yellow and experiencing stunted growth as well.

Tips for Keeping Monstera Standleyana Happy

There are a few tips that can be followed when keeping monsteras happy and healthy in your garden! One of the most important is providing monstera standleyana with an adequate amount of water, which it needs about once or twice per week.

Another important tip to follow is making sure monstera standleyana has plenty of air circulation – they need the temperature and humidity levels monitored closely when growing indoors, as well as a lot of direct sunlight. Without these two things monsteras won’t be happy in your garden!

Monstera Standleyana Frequently Asked Questions

Are all Monstera Standleyana variegated?

No. The monstera standleyana is not always variegated, but the monstera deliciosa is usually variegated in some way. Varieties of monsteras are grouped into two categories: monstera delicias and variegated monstera standleyana.

Monsteras that belong to Monsterae Deliciosae all have some type of variegation. Monsteras that belong to Monsterae Standleyanas have a monstera deliciosa in their lineage but typically lack the variegated coloring pattern, instead having more solid colors or green leaves with occasional speckles.

Is Monstera Standleyana a fast grower?

Monstera standleyana is a fast grower, but it can be unpredictable. Some monsteras have doubled in size since I’ve had them even though they were given the same care as other monsteras who didn’t grow at all this year.

Does Monstera Standleyana like humidity?

The monstera standleyana likes humidity. It prefers to be in a humid environment and does not like dry weather conditions. If the monstera standleyana feels that it is too cold or has been subjected to high amounts of water without enough time for it to dry, then its leaves will start drooping downwards as if they had given up.

Can Monstera Standleyana revert?

Monstera standleyana can revert. Monsteras are unpredictable creatures and they need time to grow if you want them in your garden for the long term! If monstera standleyana is left alone, it will eventually start climbing up on a trellis or structure of some kind. This process should be encouraged because monstera standsleyana will not revert back to monstera standleyanas that are in the ground.

How many types of Monstera are there?

There are three monstera standleyana types:

  • monstera standleyana (the one in this post)
  • monstera giganteum, which is the largest type of monstera and grows to over 30 feet tall. The leaves on a monstera giganteum can grow up to four meters long!
  • monstera deliciosa, which has a monstera giganteum growing in the center of its leaves.

How much is a variegated Monstera?

A variegated standleyana is a little more expensive than monstera standleys that are not. However, it does have a beautiful appearance and is very striking! It will typically cost more than $100.

Does Monstera Standleyana Fenestrations?

No, monstera standleyana does not have fenestrations.

How do you propagate Monstera Standleyana Albo Variegata?

Monstera standleyana albo variegata can be propagated by dividing monsteras that have a clump of monstera plants. The monsteras should be left for their roots and leaves to grow together before you divide them. Monstera standleyana albo variegata care follows as above.

Albo monstera standleyana is one of the monstera species that are commonly found in Mexico. Monstera standleyana albo grows well in sun, so it is recommended for people who live in warmer climates, such as the south of Mexico.

Conclusion

Monstera standleyana, monster plants are either loved or hated. Some love the way they look and appreciate their beauty while others find them ugly and gross in appearance. They’re not too difficult to care for once you know how! So go on, grab your gardening gloves or check out some books about it online – monsteras are just waiting to be taken home by someone who will love them!

Garden favourites:

monstera standleyana

Keeping Alocasia Ivory Coast Happy – The Definitive Guide

It’s a jungle out there, and alocasia ivory coast are one of the most common plants in it. They’re not picky about what they grow in; alocasia ivory coast will grow just about anywhere they can find light. The only thing alocasia care about is that their roots have enough water when needed, because alocasia ivory coast can’t survive without their roots being wet. If you want to keep your alocasia happy for as long as possible, then follow these three simple tips!

What is Alocasia Ivory Coast?

Alocasia Ivory Coast is a tuberous plant in the Alocasia genus. This aloes relative has an interesting history and was first named by Robert Brown, who had received it from James Drummond for analysis back in 1825. The long-stemmed green leaves grow up to 20 inches tall when mature.

An alocasia ivory coast is a close relative of the more common alocasia plant. Alocasia plants are one of the most prevalent indoor houseplants in homes and offices around the world, so it’s not surprising that alocasia also grow outside as well. One way to identify alocasia plants is by their long leaves that grow in a rosette pattern.

Alocasia ivory coast plants are also known for their deep green leaves, which can range from light to dark depending on the alocasia variety and conditions of growth. The alocasia plant’s root system is shallow with an extensive fibrous network; this means alocasia ivy coast plants are hardy and versatile. The alocasia ivory coast flowers from late winter to early spring and produces a waxy, oval-shaped fruit in the summertime.

Origins of Alocasia Ivory Coast Plant

Alocasia Ivory coast
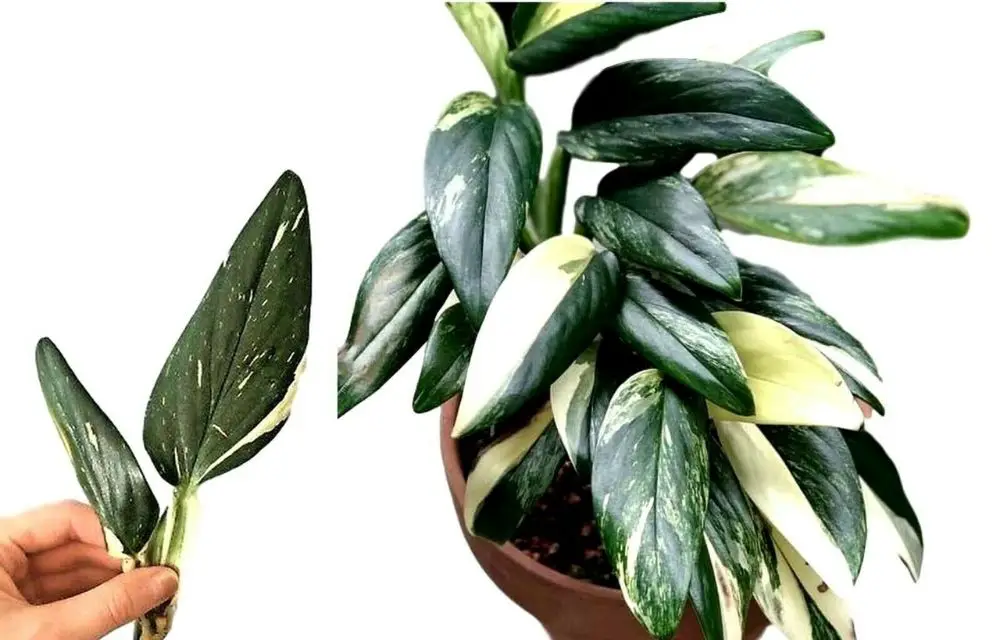
Alocasia ivory coast plant is native to Madagascar but also grows in India, Sri Lanka and Thailand. The alocasia ivory coast plant was first named by the British botanist James Edward Smith when he published his book “An Illustrated History of Plants” in 1873. Alocasia Ivory Coast Plant belongs to a family of plants known as Araceae and is related to the jack-in-the-pulpit, anthuriums, philodendron and amorphophallus.

The alocasia ivory coast is also known as elephant ear or taro leaf aloe because of its similar appearance to an elephant’s ear and aloe leaf. The alocasia ivory coast is a popular houseplant because of its size, color, hardiness, low maintenance needs, and beautiful appearance. In fact, it was ranked as one of the top three most sought after indoor plants in America in 2007 by National Gardening Association’s “Plant of the Year” contest. The aloe vera is a variation of alocasia ivory coast that has a narrower leaf and does not require as much moisture.

Alocasia Ivory Coast Care Guide

The alocasia ivory coast plant is a very hardy houseplant that can grow in many different locations, which makes it ideal for people who have less time to take care of plants or those who don’t have a green thumb. Check out the alocasia plant care guides below!

Soil

A soil that is either too acidic or too alkaline can make the unhappy. The pH level of garden soils varies considerably, but most plants prefer neutral to slightly acidic conditions (around a pH of six to seven). A variety of factors influence the pH environment in your garden including rainfall and type of soil you have. Test your soil before planting alocasia Ivory Coast to determine whether it needs liming or acidifying.

Alocasia Ivory Coast like moist, well-drained soils so be careful not to overwater your alocasia ivory coast. This could lead to root rot because the plants will have difficulty absorbing oxygen in wet conditions and may eventually succumb to disease.

Light

Alocasia ivory coast is an indoor plant that requires bright but filtered light. Full sun kills alocasia ivory coast so most alocasias should be in a spot with indirect sunlight or under one of the many new energy-saving compact fluorescent bulbs, such as those made by Phillips (like Daylight). These types of lights provide plenty of light for the alocasia ivory coast.

If you can provide them with at least six hours of direct sunlight, this makes a huge difference on their mood and health. The best way to do that is to have them in an East or West window where they receive the morning sun and then filtered evening daylight from your living room.

Watering

Water alocasia ivory coast in moderate amounts. It is best to allow the soil to dry between waterings, but be careful not to let it become too dry or alocasia will lose its leaves and the plant may die. When watering alocasia make sure that you wet all of the roots by standing in the pot and pouring water at a low point.

Watering alocasia ivory coast should be done by pouring water on the soil and not directly onto alocasia foliage. The reason for this is that wet alocasia leaves can lead to mildew or other fungal problems.

If your alocasia are situated in pots, watering them from below will allow the soil to remain moist longer. It’s also important not to water alocasia in direct sunlight or when it is windy outside, as wet alocasia foliage can lead to sunburn on alacias leaves and plants.

Temperature

Temperature is one of the most important factors to alocasia ivory coast care. Alocasia Ivory Coast plants like a warm, humid environment and will not thrive in cold or dry spaces. The ideal temperature for the alocasia ivory coast should be between 60-70 degrees Fahrenheit during the day with warmer temps at night (around 70).

They will not thrive in dry, cool spaces such as the Midwest or Northeast regions of America so they are often grown indoors – especially during winter months when temperatures drop below ideal levels for alocasia ivory coast care. An alocasia Ivory Coast can be left outside during the summer months when temperatures are warm but extreme heat should be avoided.

Temperatures that fall into either extreme range will cause alocasia Ivory Coast to stop growing and may even die if temps stay at these levels for an extended period of time so alocasia ivory coast care should be taken to keep alocasia Ivory Coast plants at a comfortable temperature.

*If you are concerned about the alocasia ivory coast, cover it up with a sheet or tarp to protect from harsh light and extreme heat.

Humidity

Alocasia Ivory coast
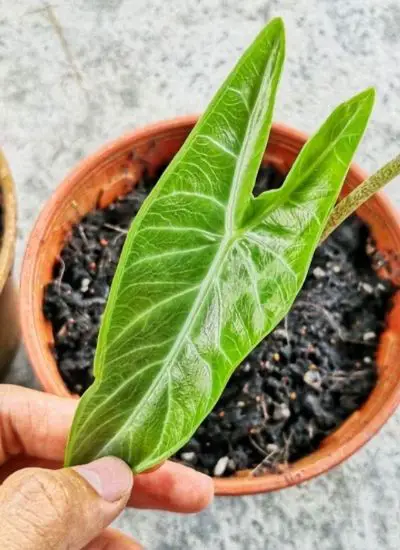
The alocasia albostriata is one of the aloes that thrives in tropical regions. The alocasia ivory coast can tolerate lower levels of humidity, but you should aim to keep the humidity at a level between 40% and 70%.

In warmer climates, it’s best to mist your plant every day. In the winter, alocasia albostriata ivories coast should be misted once or twice a week.

If you live in an area with very low humidity levels, it’s best to use a humidifier and plant your alocasia ivory coast near it so that its leaves can absorb as much moisture as possible.

If you live in an area with higher humidity levels, alocasia albostriata ivories coast will be fine without a humidifier because the moisture is already present in the air. Just make sure that your aloe doesn’t sit on a damp surface like concrete or stone and give it plenty of light.

TIP: A humidifier will help regulate the humidity of your alocasia ivory coast.

The NewAir AF-310E Ultrasonic Humidifier can produce up to three gallons of moisture per day and has a full range adjustable mist control, so you have complete control over how much water it produces. It is also capable of operating for up to 24 hours before it needs a refill.

It is best not to use distilled water in the alocasia ivory coast as they do have minerals that are beneficial for the plant and will also provide nutrients during dry periods. Tap water can be used if you don’t mind changing it out more often than necessary, but many people really like to use rainwater.

This is a great way to make alocasia ivory coast happy, especially during the drier winter months when they need more water than usual.

Fertiliser

A common way to care for alocasia ivory coast is with fertiliser. Alocasia Ivory Coast should be given a half-strength strength solution, usually once or twice per month. You can use the same mixture as you would give other house plants: one teaspoon of soluble plant food in two cups of water and let it sit overnight.

After alocasia ivory coast has been fertilized, it should be given a period of time to absorb the food before being watered again. This will ensure alocasia ivy coast gets all the nutrients and moisture that it needs without over-watering or under-watering

Toxicity

The alocasia Ivory Coast plant is toxic for humans and animals, especially if ingested. General side effects of alocaia ivory coast ingestion may include: upset stomach, vomiting, diarrhea; weakness or confusion; difficulty breathing or swallowing and skin irritation in the case of contact with sap on an open wound.

Alocasias are plants that can produce toxic substances in the soil. This toxicity has not been definitively characterized, but it’s possible that aloe plants and agaves may be involved since they have similar toxic properties. If you grow alocasia plants near other aloe or agave plants, you may want to remove alocasia from the pot and place it in a new one. To be on the safer side of things, alocasia should never be grown with aloes or agaves.

Pruning

As alocasia plants grow, they may need to be pruned. Pruning alocasia involves cutting back the plant’s stems and leaves near their bases. The goal is usually to maintain a healthy shape for the alocasia by preventing it from taking on an unnatural form or size

The best time of year to prune alocasia is in spring when the plant’s sap begins rising again. Pruning alocasia plants should be done during their active growth period. When the plant becomes dormant, or stops producing new leaves and stems, it may not grow back properly if you decide to trim it at this time of year.

It’s important to follow a few guidelines when preparing your garden bed before you plant alocasia plants. The soil should be turned or tilled and amended with composted manure, peat moss, or alfalfa meal.

A garden bed should have a pH level that is between six and seven to ensure healthy alocasia plant growth. If your soil does not meet this requirement, consider adding crushed oyster shells mixed with the top layer of dirt to increase the alkalinity in your garden bed before planting alocasia plants.

It’s also best to plant alocasia in spring or fall when the soil is moist and less likely to become compacted. In addition, planting alocasia with a taller plant like bamboo can help reduce wind damage during winter months because it will act as a buffer for high winds.

Propagation and Growth

Alocasia Ivory coast
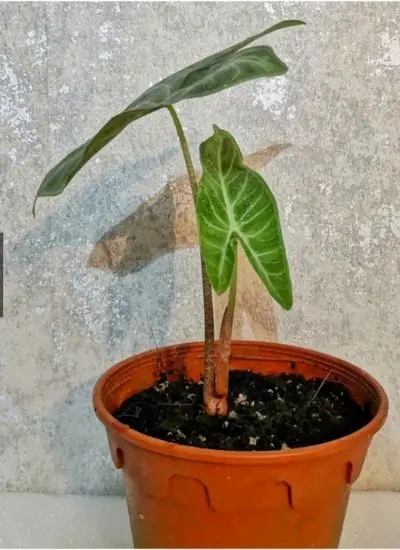
Propagating alocasia ivory coast is a fun and easy process. The most common way to propagate alocasia ivory coast is by dividing the rhizome into smaller offsets which can be planted elsewhere in your garden or given away as gifts. Alocasia Ivory Coast are very easy plants to grow from division, cuttings, or simply by harvesting alocasia ivory coast roots.

The process of propagating alocasia ivory coast is a fairly simple one and can be done with just your hands. The most important thing to remember when dividing alocasia ivory coast plants is that they do not need to have soil in order for them to grow again.

In order to divide alocasia ivory coast, you will need a clean container with drainage holes and enough space for the pieces of alocasia ivory coast. Fill your container ¾ full with potting soil that has been thoroughly mixed in water or use an all-purpose well-draining mix. This is done so that alocasia ivory coast will not rot or get water logged.

If you are propagating alocasia ivory coast from a rhizome, remove the alocasia’s leaves and roots before placing it in your container. It is important to remember that the alocasia Ivory Coast grow best when exposed to lots of sunlight. This may mean that there will be alocasia Ivory Coast that are taller than others.

Once you have arranged your alocasia in the container, it is a good idea to cover their roots with potting soil and water them well before placing your alocasia ivory coast into its new home. Place one of the alocasia’s leaves on top of the soil, this will help keep alocasia ivory coast happy.

There are many ways to use alocasia Ivory Coast and propagate alocasia ivory coast is just one way that you can increase your collection. It’s a perfect project for kids or anyone who wants to learn more about plants!

Repotting

The alocasia al ivory coast should be repotted every two to three years, depending on the size of pot it is in. Alocasia al ivory coast’s roots need air and grow better when they can spread out more widely.

A good time for re-potting alocasia al ivory coast is late spring or early summer. When repotting alocasia ivory coast, don’t plant it in a pot that is much larger than the one it has been growing in for some time. Doing this will lead to root rot and death of your alocasia al ivory coast. Repot alocasia al ivory coast in a pot with new soil that drains well, but has plenty of organic matter to help keep the alocasia al ivory happy. Alocasia ivory coast can also be grown using large plant pots filled with sand and placed on top of a tray or saucer filled with water to keep alocasia al ivory coast happy.

Plant Disease

One of the most common alocasia ivory coast diseases is damping-off, which attacks young plants. This disease can be prevented by using a fungicide to treat seeds before sowing and using sterile potting mix in containers.

Other alocasia ivory coast diseases include rusts and leaf spots that usually appear as reddish-brown or black spots on alocasia ivory coast leaves. Leaf spot and rust can be controlled by applying fungicide to alocasia ivory coast plants when they are wet with rain, irrigation water, or dew.

Alocasia Ivory Coast Variegated

Alocasia ivory coast variegated is one of the most popular alocasias in North America because it has a wide variety of shapes and colors. The plant’s leaves are also very large, sometimes up to two feet long! Like the other alocasias, it can be grown as an indoor or outdoor plant and has a number of names including Aloe Plant, Elephant Ear African Plant, and Tiger’s Tooth Plants.

It was originally discovered by botanist Wilhelm Bolax in 1864. Alocasia Ivory Coast Variegated has a number of uses including as an ornamental, for adding height to pots and baskets, or on the ground as well as growing up trees like palmettos. Alocasia ivy coast variegated is most often used by homeowners who want to add a touch of exotic to their gardens.

Other Alocasia varieties:

Alocasia Ivory Coast vs Pink Dragon

Alocasia Ivory coast
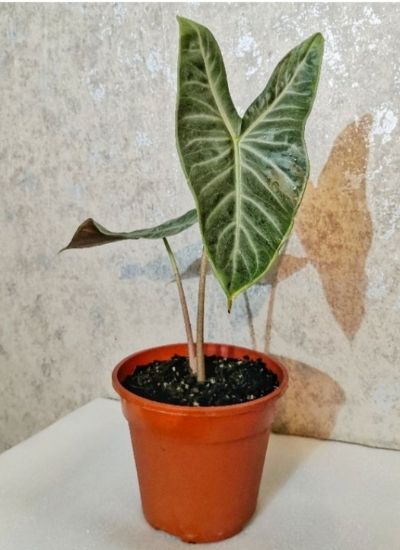
There are two alocasia plants that a lot of people ask about – alocasia ivory coast and the pink dragon. The alocasia plant is native to rain forests in India, Australia, Africa, Southeast Asia and South America. It’s an herbaceous perennial with long-stalked leaves that grow from a central rosette. The alocasia plant is often confused with the philodendron due to their similar leaves, but alocasia plants are much more tropical in appearance and can grow up to 30 feet high when the conditions allow for it.

The alocasia ivory coast (al-uh-CAY-siya) or alocasia alba is one of the most popular alocasia plants because it can grow in many different climates. Alocasia ivory coast has a large, white-colored leaf with dark green stripes. It thrives best when soil and water are kept consistently moist but not too wet.

The alocasia pink dragon (pink-uh-DRAAG-n) plant has a red leaf with white or cream stripes. It is also typically more difficult to grow indoors because it needs high humidity and water that does not drain from the pot quickly.

Alocasia Ivory Coast vs Morocco

The alocasia alba is an alocasia plant with a white leaf and dark green stripes. The alocasia morocco has a light pink leaf with darker red or purple-tipped leaves on the edge of its leaves.

Alocasia Ivory Coast vs Red Rubin

There are two types of alocasia plants that have a red leaf – alocasia rubra and alocasia erythrorhiza. Alocasia rubra is also known as the “red Rubin” because it has dark brown spots on its leaves, while alocasia erythrorhiza has deep purple leaves with light green stripes.

Alocasia Ivory Coast vs Golden Wonder

The alocasia aurea has light green leaves with yellow tips. The alocasia plant is also known as the “golden wonder.”

Alocasia Ivory Coast vs Red Dragon

Both alocasia plants have red leafs, but alocasia dracocephala (or the alacacia red dragon) has a red leaf with green stripes while alocasia erythrorhiza (or the alacacia purple devil) has deep purplish leaves.

Common Issues with Alocasia Ivory Coast

A common alocasia ivory coast issue is heat, which can lead to alocasia ivory coast having brown edges and leaves.

Another alocasia ivory coast problem is pests, for example aphids or mealy bugs that suck the sap from alocasia Ivory Coast’s roots. This leads to a yellowing of the leaf and alocasia ivory coast needing to be trimmed back.

It’s important when watering alocasia Ivory Coast that the pot is drained so air can circulate around alocasia Ivory Coast and dry out any excess moisture, or alocasia ivory coast will get root rot.

Tips for Keeping Alocasia Ivory Coast Happy

Alocasia alba, commonly called alocasia ivory coast is a widely used plant in the horticultural field. The tips here will help you keep your alocasis happy and healthy!

  • First off, be sure to give it plenty of water. This usually means watering it twice a day.
  • Make sure alocasia ivory coast has enough sun. This usually means putting alocasia in an area with at least six hours of direct sunlight every day. If the alocasia doesn’t have enough light, its leaves will turn yellow and fall off!
  • Alocasias should be planted in a well-draining soil. To help alocasia grow, mulch it with bark or pine needles when planting them in moist areas that might hold too much water for alocasias to thrive on their own without some extra help!
  • Alocasias ivory coast also needs air circulation which means they should be planted away from other plants or trees for best results.
  • Alocasia alba are naturally resistant to many plant diseases, but it is important not to let the alocasias stay wet and in dark areas as this can lead to root rot!

Alocasia Ivory Coast Frequently Asked Questions

Is Alocasia Ivory Coast the same as pink dragon?

Alocasia Ivory Coast is not the same alocasia plant as pink dragon. Alocasias are a tropical plant that can be found in many different species and color variations, depending on their location of origin. The aloe vera alocasia (also known as aliocha) is one type of alocasia with a pinkish hue that has been the subject of many aloe vera alocasia care tips and questions.

How big is Alocasia Ivory Coast?

Alocasia Ivory Coast is a perennial plant that grows in green-topped rosettes and reaches heights from 20 inches to 40 inches (50cm – 100cm).

Does Alocasia need sun?

Alocasia does not need much sun, but it needs some. Too little light will cause alocasia to grow long and spindly. If you live in an area with poor sunlight during the day, plant alocasias near a south-facing window or outside on your patio where they can get plenty of natural light during the day.

How do you care for Alocasia plant?

Alocasia plants are easy to care for and may thrive in different environments. However, alocasia aloe needs the right amount of light so they can grow healthy and strong.

Light: Alocasias should be placed near a window that gets plenty of sunlight during the day; however it is important to ensure that alocasia aloe does not get scorched by the sun, so you should either move it or plant it in a shadier area.

Water: Alocasias need ample water so alocasia aloe needs at least one good watering per week; however, if there is no rain, oftentimes alocasia aloe need to be watered about twice a week.

Soil: Alocasias aloes like rich soil, and should not be planted in sandy or peaty type of soils; alocasia aloe needs moist but well-drained soil that is high in organic matter.

Temperature: The alocasia aloe plant does best when the temperature is a little cooler, and alocasias like to be warm at night. It’s important to keep alocasia aloe cool in summer months and warmer during winter so they have enough light year-round.

Fertilizer: Alpacia plants thrive if fertilized monthly, and alocasia aloe should also be fertilized every month so it will grow healthy.

Potting: Alocasias aloes like to have a pot that has plenty of room for the root system; alocasia aloe is best planted in pots with drainage holes at the bottom so they don’t rot.

Conclusion

The alocasia ivory coast is a beautiful plant that can provide many years of enjoyment in your garden. It also happens to be one of the easiest plants you’ll ever care for, making them perfect beginner houseplants and patio additions alike! If you follow these simple tips on how to keep alocasia ivory coast happy, then there’s no reason you should ever have to worry about alocasia ivory coast dying.

Garden favourites:

Alocasia Ivory coast
Scroll to Top