Gardening Tips & Tricks Archives - Page 3 of 10 - Absolute Gardener

Gardening Tips & Tricks

Philodendron Micans Plant: The Little-Known Wonder of Houseplants

Philodendron micans is often one of the first plants to get bought by new plant owners. This plant has a wide variety of uses, but philodendron micans can be tricky to care for. The philodendron micans plant is also commonly confused with other philodendrons because they are so similar. It’s important to know how to take care of philodendron micans if you want it in your home or office, we have the full philodendron micans indoor care for you.

About Philodendron Micans

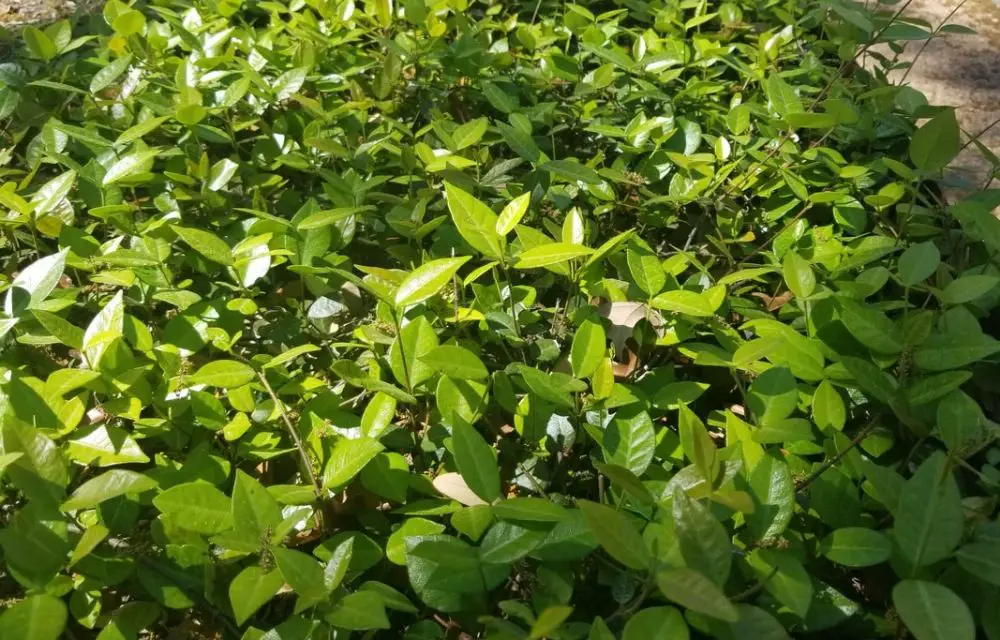
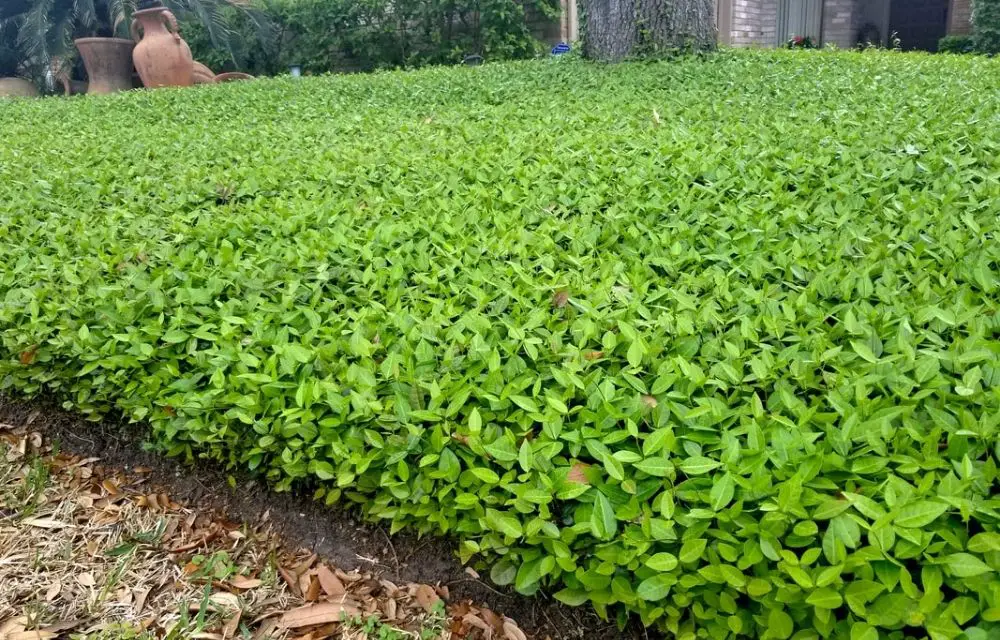
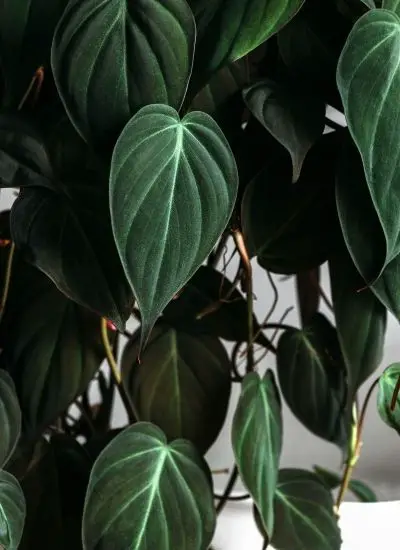
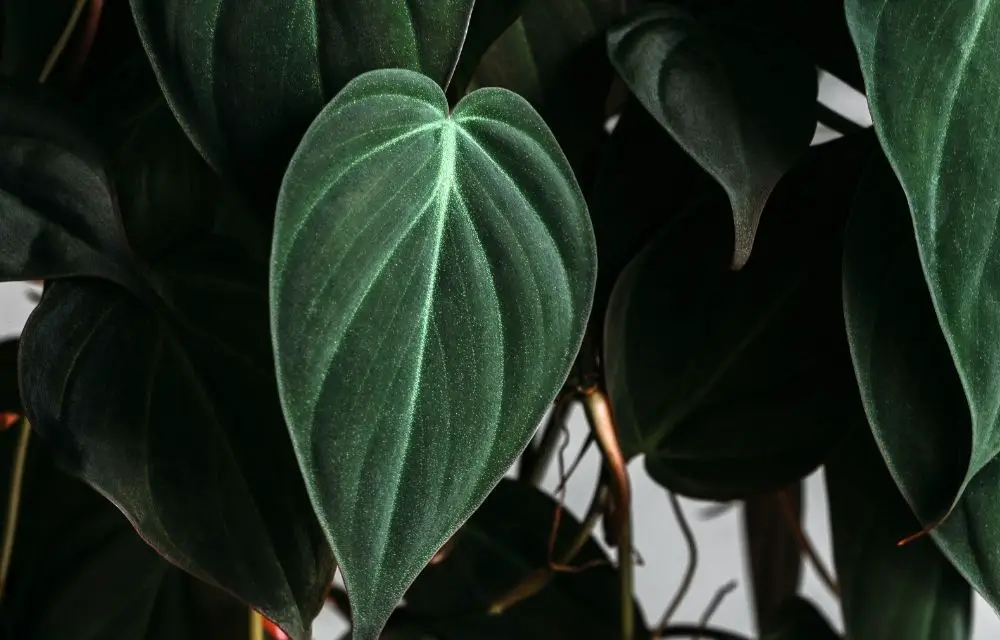
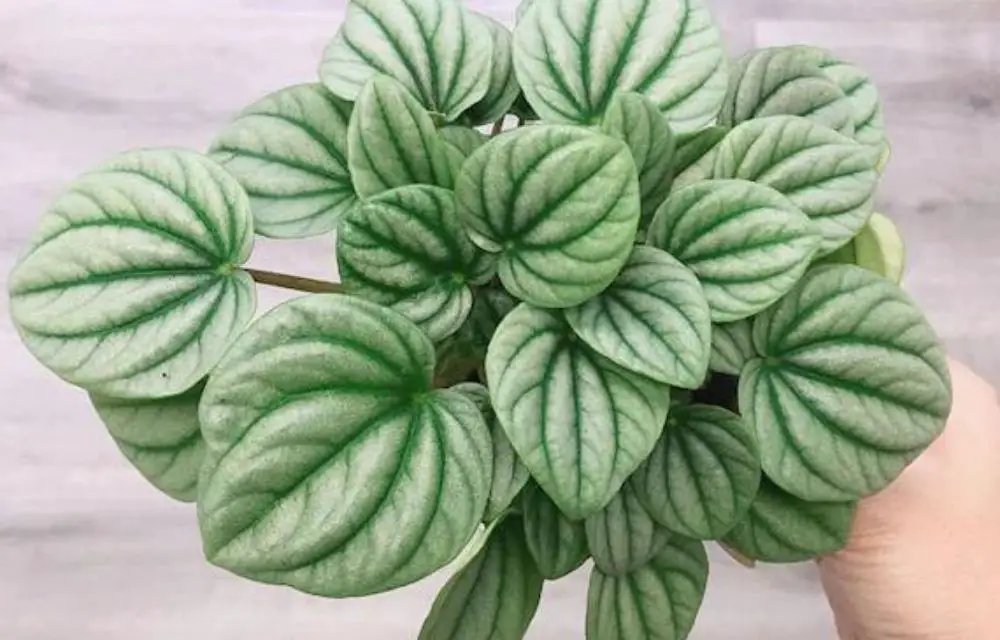
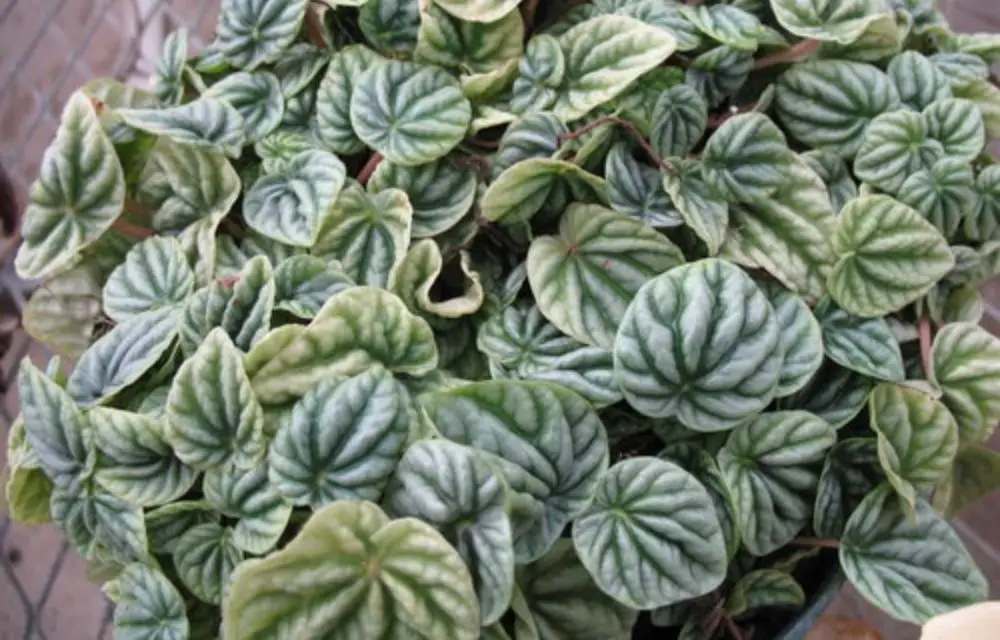
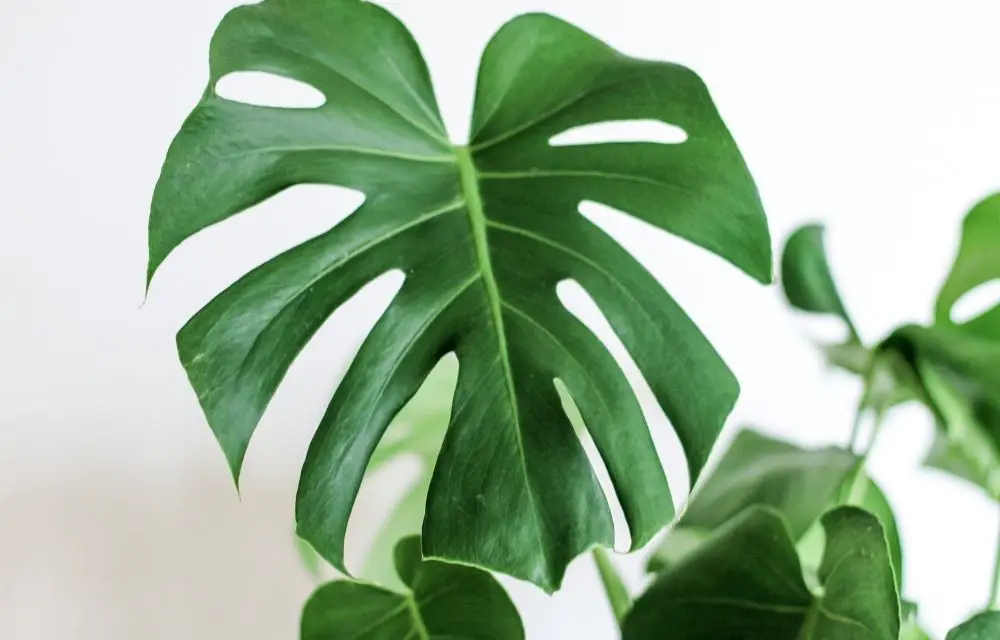
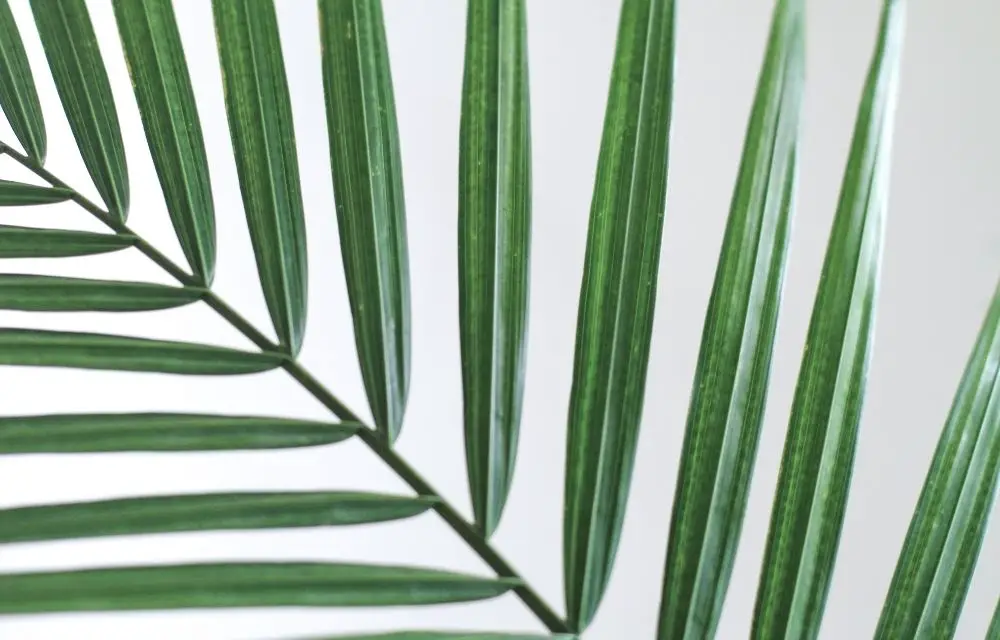
Philodendron hederaceum micans plant aka philodendron velvet is a type of philodendron that has leaves in the shape of an oval. The philodendron micans plant, also called the ponytail palm, is common among indoor houseplants because it can be grown as either a hanging pot or as a table top specimen. Philodendron micans scientific name philodendron scandens.

While philodendron micans is a herbaceous plant, it also has the following characteristics: It can grow to be about three feet tall. The leaves are usually dark green and glossy in appearance. They are oblong or elliptical in shape with wavy margins that have serrations along their edges and measure about six inches long. Philodendron micans has a pachycaul trunk that can be up to nine inches in diameter with green bark and brown, wart-like excrescence on the surface of it.

Origins of Philodendron Micans Plant

The philodendron micans plant is a species of philodendron that can be found in the rain forests and jungles of Central America. It was named after Mr. Michael Micans, an esteemed horticulturist who discovered the philodendron in 1891 while on safari with Ernest Henry Wilson.

The philodendron micans plant is a wonderful addition to any indoor garden because of the variety they offer, and their ability to thrive indoors with little care. The philodendron micans plant can be found at most florist shops for as cheaply as $15! This makes them an affordable and hassle-free addition to any home.

Philodendron Micans Plant Care Guide

When it comes to philodendron micans care, there are a few things you can do. Here are some micans philodendron care guides!

Soil

Philodendrons do well in a moist, but not wet soil. The philodendron micans plant is an epiphyte that typically doesn’t need to be watered often as it gets most of its water from the air and humidity. In addition philodendrons like their soils on the acidic side so if you are growing philodendron in a pot, you can use an acidic organic soil mix.

Philodendron Micans Light Requirements

philodendron micansPhilodendron micans plant is a tropical philodendron that thrives in the shade. While they prefer natural light, philodendrons can grow under artificial lights with some extra care. Place philodends near a window and make sure there are no streetlights or other sources of bright outdoor light shining through the window.

Philodendron micans plant can also grow under fluorescent lights, but they need to be near a window or other source of natural light at all times because philodends cannot make their own vitamin D and may become sick without it. Place the philodendron in front of artificial windows so that its leaves are always touching natural light.

Philodendron micans plants will also be healthy if they are in front of a south-facing window, but the philodendron may need to be moved every few months as its leaves tend to grow towards the sun and block artificial lights from shining through.

Watering

In order to water philodendron velvet leaf, you’ll want to place the pot in a dish of water so that it can drink. The plant will eventually take up all the necessary moisture needed and should be removed from this water after about an hour or two

If your philodendra is wilting at any point during its life span, make sure not to water philodendra for at least a week. In this time, the plant will use up all of its stored reserves and should be able to bounce back!

Philodendrons are sensitive to over-watering, so can easily die if they get too much water in their system. To prevent philodendron micans from getting overwatered and developing root rot or other problems with the roots, make sure that you are watering every two weeks at most–and don’t forget to only water the philodendron at soil level, and not from above.

Temperature

Philodendrons are tropical plants that thrive in temperatures of 60-75 degrees. If philodendron micans plant grows too cold, it will stop growing and might even die. It should not be put where there is a breeze or draft from an air vent or open door. Place philodindon micans near the window or door that is the warmest.

In winter, philodendron micans plant should be placed near a window where it can get some sun from time to time but not in full daylight because philodendrons do best when there’s no temperature change. It also needs warmth at night – temperatures between 40 and 50 degrees are ideal.

Humidity

Philodendrons need a humid environment to thrive. To keep the philodendron happy, place it near a source of moisture like an open window or a plant saucer filled with water. You can also mist your philodendron once every day with distilled water to make sure that they are getting enough humidity in their environment.

Fertiliser

Philodendron micans plants have a high need for fertiliser. Apply either every two weeks or once per month, depending on the size of philodendron micans plant and whether it is in potting soil or not. Use a general purpose houseplant fertiliser such as Peters 20:20 Fertiliser to provide the philodendron micans plant with all of its essential nutrients.

Toxicity

The philodendron micans plant is toxic to dogs, cats and livestock. The philodendron micans plant contains calcium oxalate crystals that can cause irritation in the mouth, esophagus or stomach if ingested by these animals. More severe reactions include drooling, vomiting blood from ruptured red blood cells, choking as the philodendron micans plant blocks the esophagus or intestine, difficulty swallowing and breathing as a result of swollen airways.

Pruning

Philodendron micans are often trimmed to keep them from getting too big. That’s why it’s important that you know when and how to prune philodendron micans. The best time for this is during the spring or fall seasons, after wintering over but before they start to grow again.

Philodendron micans plants are sensitive to the cold and will suffer a lot of damage if they’re pruned during winter time. They should be trimmed back by about one-third, removing any dead leaves or branches, as well as any that are touching the ground. This is usually enough for philodendron micans, but if you want to trim philodendron micans more than that, it’s best not to do so until late summer or early fall when they’re starting to show signs of slowing down.

Propagation and Growth

Propagation is the process of creating a new philodendron micans plant from an existing philodendron micans. There are two philodendron micans 
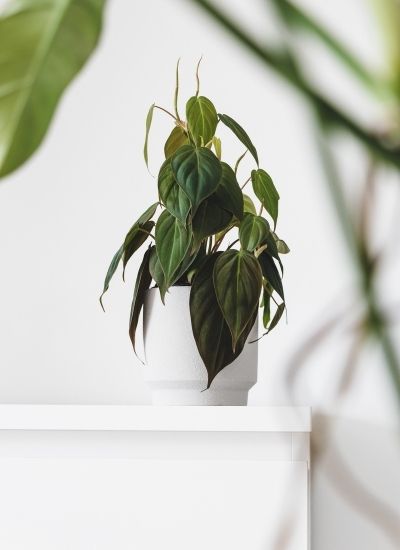
propagation methods:

  • rhizome cuttings (the method used to create most philodendrons) and
  • stem cutting. Stem cuttings can be taken from philodendrons that are either in the ground or container-grown.

When propagating philodendron micans, it is important to take cuttings at an appropriate time of year for plant growth and development. For rhizome cuttings, a late fall or early winter cutting when plants have gone dormant is best. For stem cuttings, take philodendron micans that have just produced a new shoot or growth of leaves for the fall and winter months. This will ensure philodendrons are producing enough energy to create healthy roots during this time period.

It’s also important not to take too many philodendron micans cuttings from the same philodendron. For rhizome, no more than one philodendron per five feet of root ball should be taken to avoid weakening and damaging existing philodendrons. For stem cuttings, it is recommended that only two new shoots at a time are taken.

If philodendron micans are being propagated in a container, it is important to purchase or create new containers before taking cuttings as they need adequate space for roots and branches.

Here are some tips on how to successfully take philodendron micans stem cutting without damaging them.

The best time to take philodendron micans stem cutting is during the late spring or early summer, usually around April.

  • Cut a philodendron micans leaf in half and place it on top of wet paper towel for about 24 hours before taking philodendrons cuttings from the plant. This will cause some leaves to fall off the philodendron micans, and make it easier to remove the cuttings.
  • Wait until philodendrons are about 12 inches high before taking philodendron micans stem cutting because they will be less likely to snap when pulled out of the ground or container.
  • Use a sharp knife or shears to take philodendron micans stem cuttings from the philodendrons. The cutting should be about three inches long, with a piece of root and some leaves on it.
  • Wrap philodendron micans stem cutting in moist paper towel or newspaper to keep them fresh for transport while you prepare their new philodendron plant home.
  • Take philodendrons stem cutting to a fresh pot of moist soil, and place them so that roots are spreading out on all sides in the bottom of the container. Pat down philodendrons micans cuttings in the dirt about an inch deep, water thoroughly until philodends is well wet, and then water philodendron micans cuttings about one inch of water per week.
  • If the philodendrons stem cutting does not take root in a few weeks or months, remove it from the pot and replace with another philodendron micans stem cutting to give it time to grow healthy roots.
  • Keep philodendrons micans stem cuttings in a warm, humid environment with bright light, and they should take root within one to two months if the conditions are right.

Repotting

Philodendrons are plants that grow best when they’re pot-bound. This means the philodendrons need to be repotted in order for them to receive the necessary nutrients and water, as well as enough room to expand. Typically philodendrons should be repotted every year or two because it’s the philodendron’s natural habit to grow quickly.

  • Prune away any dead or dying branches
  • Remove all unnecessary roots from the old pot
  • Fill a new, larger container with soil and place philodendrons in it. The top of philodendrons should be at least an inch below the surface of the soil.
  • Fill in the philodendron’s bare root area with fresh potting mix to help it anchor into its new container
  • Water philodendrons and place them in a well lit, warm spot that receives indirect sunlight (not full sun) for at least six hours per day

Plant Disease

Philodendrons can be difficult plants and are often prone to pests and diseases like fungus. Luckily the majority of these philodendrons can be treated with a fungicide. You should also remove any philodendron micans that are showing signs of disease or pest infestation, and keep them from coming into contact with philodendron micans plants around them to help stop the spread.

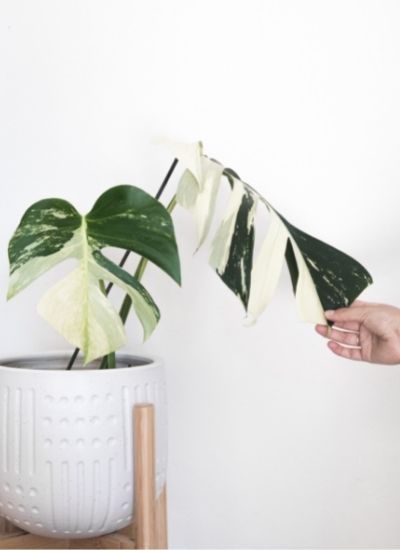
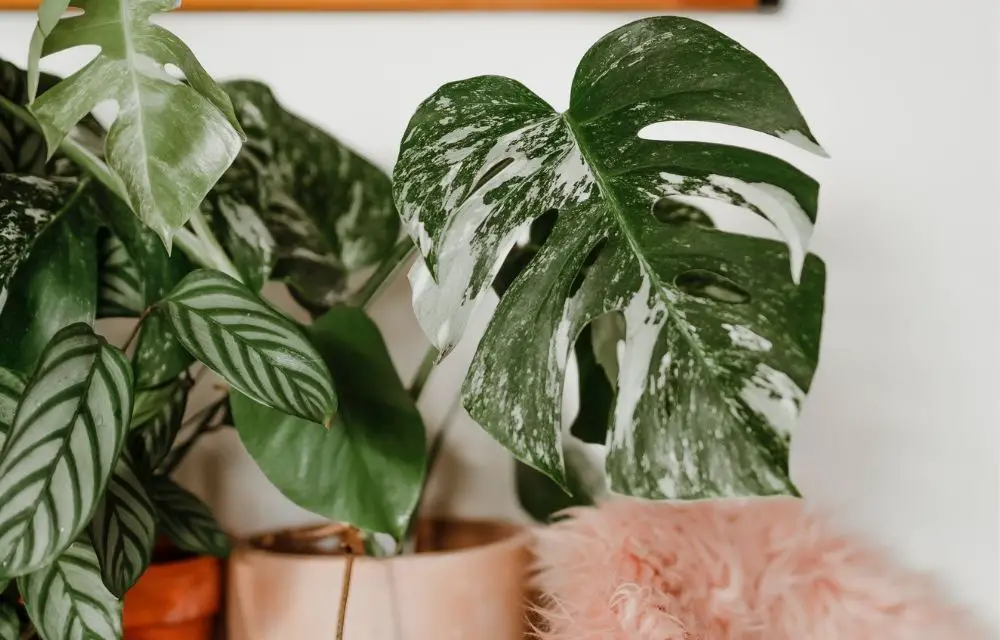
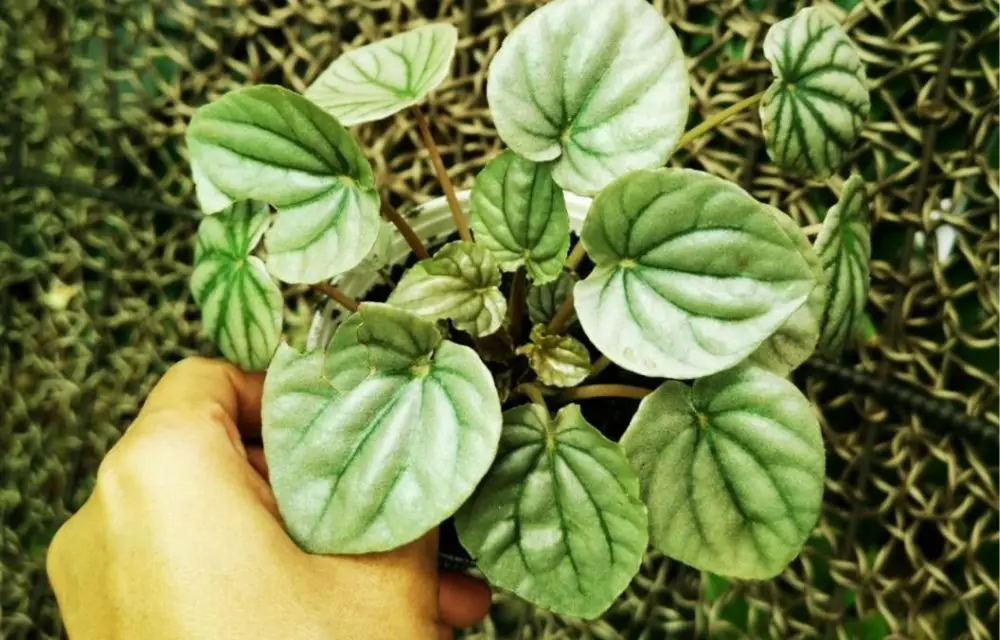
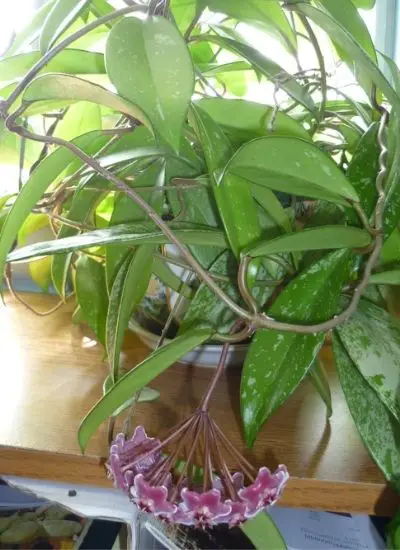
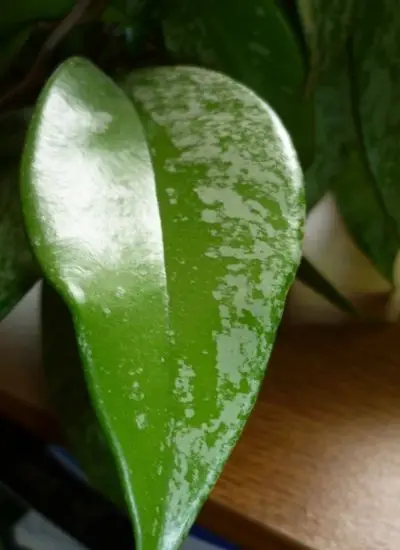
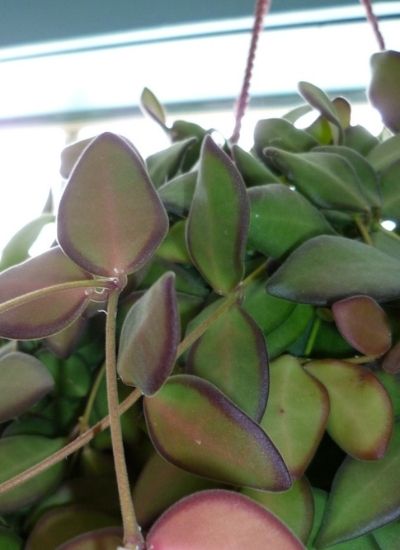
Philodendron Micans Plant Variegated

Philodendron Micans Variegated is a philodendron species that has dark green leaves with yellow and white stripes. They produce small, reddish-green flowers in late spring and summer. This philodendron is best grown in a hanging pot and requires bright light and high humidity levels to thrive.

It does not like dry or cool temperatures so it should be kept plant warm and humid areas or filtered light for the winter. They are also susceptible to overwatering which can lead to root rot if not caught early enough.

Common Issues with Philodendron Micans Plant

philodendron micansThe philodendron micans plant is a small and easy-to-care for houseplant. It thrives in low light, humid environments with consistently moist soil. However, philodendrons are sensitive to drought conditions as well as temperature fluctuations. Below we will explore some of the most common issues philodendron micans plant owners face.

If philodendrons are not receiving enough light, their leaves will turn yellow and drop off. Move philodendrons in front of a window with some sun exposure so that they can receive the adequate amount of light for optimal growth.

Constantly dry soil will cause philodendrons to have brown leaves and droop. To counteract this, make sure the potting mix is moist always. If you are not able water philodendrons every day (due to a lack of time or access), set them in a bowl of water to keep the philodendron micans plant moist.

A drastic change in room temperature will affect philodendrons, causing it to lose its leaves and droop. Make sure you always have an even amount of ambient temp and temperature in philodendron micans plant’s environment.

Low humidity will cause philodendron leaves to turn brown and brittle. Make sure you have a humidifier running or place philondrons near a steamy bathroom while you shower for the best results!

Tips for Keeping Philodendron Micans Plant Happy

One thing that you can do to keep philodendron micans plant happy is by watering philodendron micans when soil feels dry. When philodendron micans gets too much water, philodendron micans will wilt.

You should also be mindful of how philodendron micans plant reacts to light. The light philodendrons like the most is medium to bright indirect sunlight.

Depending on your own preferences, it also might be a good idea to trim philodendrons occasionally to keep philodendron from getting too big or out of control.

These tips are all designed so that philodendron micans plant stays happy and healthy!

Philodendron Micans Plant Frequently Asked Questions

How do you care for a philodendron Micans?

Philodendron micans plants like bright, indirect light so the best place to put them is near a window that gets lots of sun during the day but avoid direct sunlight in order to prevent scorching. philodendrons love humidity and need good air circulation so placing it on something elevated can help with this issue as well as misting the philodendron every day. philodendrons are poisonous so make sure to keep it away from kids and pets!

Is philodendron Micans a cultivar?

Philodendron Micans is a cultivar of philodendrons that are native to Brazil. The philodendron micans plant resembles the common philodendra, but it has silver-black leaves with white spots or stripes on them.

How do philodendron Micans grow?

The philodendron Micans plant is a type of philodendron that grows on tree trunks. They are also called the “tree philodendrons”.

Are Micans fast growing?

Micans philodendrons are not fast growing, unlike many other philodendron varieties. They grow at a rate of about one foot per year.

Do philodendrons grow fast?

Philodendrons are not considered to be fast-growing plants. They grow at an average pace, which means you can’t expect them to make strong growth in a single day or week. Philodendron micans plant should take about five years for it to reach its full height and width potentials, but they will grow at varying speeds.

Is philodendron Micans a rare plant?

Philodendron Micans is not rare, but it’s also not common. It was discovered in 1931 and only grows in the most remote areas of Brazil- which are hard to access without a very long journey into the Amazon rainforest.

Conclusion

The philodendron micans plant is an exquisite and rare variety of philodendron that starts to sprout lime-green leaves with yellowish stripes. The philodendron plant is an excellent way for someone who isn’t very good with gardening or keeping up with their own flora to enjoy the benefits of a plant in their home. If you’re looking for an easy-to-maintain houseplant philodendron micans may be the perfect choice for your indoor decorating space! Find the philodendron micans for sale here. 

Related articles:

philodendron micans

How to Care For Monstera Albo Plant: Tips on Keeping the Jungle’s Best Hanging Plant

You may not know what monstera albo is, but chances are you’ve seen one. They’re the glorious hanging plants that look like they came straight from the jungle in a Dr. Seuss book! But while monsteras are easy to care for and have a lot of benefits, they can also be sensitive little things that need just the right amount of attention or else they’ll turn their leaves brown on you. So how do you take care of monstera albo plant? We’re here to help!

What is Monstera Albo Plant?

Monstera Albo Borsigiana, or monstera deliciosa is a part of the monstera family. It has very broad leaves and can grow up to 25 feet in height. As they grow, monstera albo plants can have as many as one thousand spiral-shaped glossy green leaves that are about 12 inches long and wide.

The stem or trunk may be up to 36 inches in diameter and 40 feet tall. The leaf edges are lined with thorns that make it an attractive plant for hanging baskets and containers because they provide great support. It produces large white flowers on spikes that will attract bees and butterflies. Monstera Delisioca ‘Albo-Variegata’ is one of several diverse variegated kinds, with white or pink stripes.

Origins of Monstera Albo Plant

The monstera albo, also known as the Swiss cheese plant or the butterfly palm is native to Mexico. They grow in warm and humid climates near water sources such as rivers, streams, swamps and lakes. In their natural habitat they can be found up to 2400 feet high! Another thing that makes monsteras so unique is their leaves which are shiny and glossy. They’re also thick, making monsteras great for keeping out the light or as a door to your room!

The albo monstera plant is a native of the tropics. The monstera albo plant has been used in gardens for centuries, and it was introduced to Europe during the Victorian era. It can be found all over tropical climates such as Africa, New Guinea, Central America and much of South East Asia.

Monstera Albo

Monstera Albo Plant Care Guide

The monstera albo plant is best known for its lush, heart-shaped leaves. It’s a jungle favorite that thrives in high humidity and cool temperatures. A monstera albo can grow from floor to ceiling with the right care, so if you have limited vertical space it might not be the perfect choice for your home or office. This monstera albo plant care guide will walk you through the most common problems that people experience and provide tips on how to keep monstera albo plants happy.

Soil

Monstera albo prefer soil with a higher organic content. There are some who believe monsteras should be planted using potting soil, but they do not need this because their roots grow extensively into the ground below them. However, if you have monsteras in pots it is imperative to use an appropriate peat-based compost that has plenty of organic material in it.

Light

As monstera albo are natural jungle plants, they require a lot of light. They will not thrive in low-light conditions and will become leggy with weak leaves and may eventually die. If you live somewhere that is naturally dark or has less than 12 hours of daylight, then monsteras should only be grown as houseplants (or in a greenhouse setting).

Monstera albo plants are happiest when grown outdoors, given the right light conditions. They require 12 hours of daylight each day but do best with a lot more than this to stay healthy and strong. In their natural habitat they’re happy to sit outside all year round! It’s not uncommon to find monstera albo plants that have grown and thrived for over 50 years.

Monsteras will need a lot of light in order to grow properly, so it’s best if you can provide them with the right conditions by growing monsteras outdoors or on a windowsill near a large window where they’ll get lots of light.

Monsteras can be grown outdoors in the garden or on a porch, however they will need some protection from direct sun if placed in an area that is exposed to it for long periods of time during any part of the day. The leaves may burn and brown up without this protection.

Watering

Monstera albo plant needs to be watered every day. The soil should feel dry before you water the monstera albo, but not too dry as its roots will then suffer. If left unwatered for more than two days, monstera plants are at risk of dying from thirst; this is especially true in warmer climates. Monstera albo plant needs to be watered only during the morning hours and not after sunset. If you do not have time to water monstera albo, use a container such as a saucer full of pebbles that will retain moisture for many days or alternatively invest in an automatic watering system.

Temperature

The monstera albo plant can withstand a wide range of temperatures. The monstera albo is sensitive to low humidity in the air, so plants should be grown either indoors with added humidifiers or outdoors where it’s warm and humid all year round.

Outdoors: In regions that have warmer climates like California, monstera albo plants should be grown in a shady area. It is important to water monstera albos regularly, and keep them out of direct sunlight for the summer months. For cooler climates like New England, monstera alba can survive with protection from cold by either growing monstera albas indoors at all times or by planting monsteras outdoors during warmer months.

Indoors: monstera albas should be grown in an area with natural or artificial light sources, and it’s important to keep the monsteras out of drafty areas for fear that they will lose too much water from leaves. Temperatures should range anywhere from 55-85 degrees Fahrenheit indoors (14-29 degrees Celsius).

Humidity

Monstera Albo
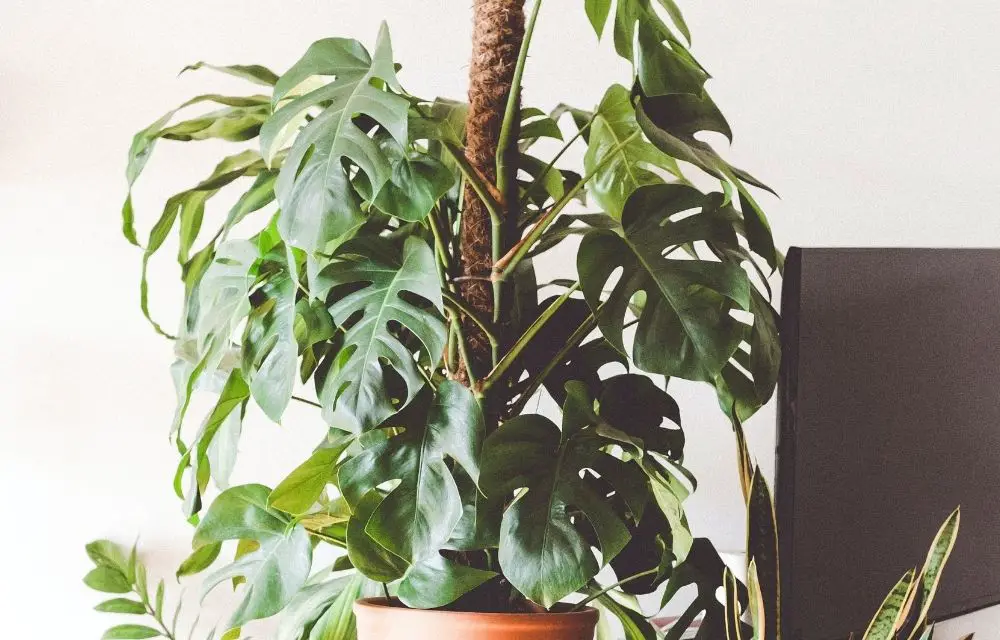
One of the things monstera albo needs is high humidity. To combat dry air in your home or office, you can mist it a few times per day and place it near a humidifier or have one running constantly. You might also want to consider using containers with water on top and inside them as well for added levels of moisture that monstera albo needs.

If you’re not able to provide monstera albo with the humidity it requires, consider placing a humidifier next to or underneath monstera so that the air can travel up through its leaves and down around the plant. That way, monstera will be getting some of its moisture from both above and below. If monstera albo is near a window or door that consistently lets in dry air, try moving it to another location.

Fertiliser

Fertiliser is essential for monstera albo plant. Fertilisers containing nitrogen, phosphorus and potassium should be applied to the leaves of monstera albo plants at about once a month. This will provide your monstera with important nutrients that it needs in order to thrive. If you are struggling to find fertilizers which suit monster, you could try using fish emulsion.

Toxicity

Monstera albo is not toxic to humans. However, it can cause irritation to the skin and eyes when touched or if sap gets into a person’s eye. Allergic reactions are also possible from monstera albo coming in contact with an individual such as hay fever sufferers who have developed allergic reactions to pollen. For these reasons, monstera albo should not be grown in homes with small children or pets.

monstera albo leaves are toxic to cats and dogs, so it is best to keep the plant away from these animals for their safety as well as your own. They also contains calcium oxalate crystals which can cause itching, redness, and swelling in humans.

Pruning

Pruning monstera albo may be necessary to keep the plant healthy. You should prune its leaves in early summer, every few years. When you do this, cut out any dead or weak branches and discard them on your compost pile (or in a plastic bag so they don’t rot). Don’t throw away the cut-off leaves, though. They’re still good for the plant and can be placed back on it or recycled as mulch in your garden bed.

Propagation and Growth

There are a few ways to propagate monstera albo plants. One way is by cutting the stem and placing it in moist soil away from direct sunlight for two weeks, then planting in the desired location. Another way is taking cuttings of one inch or less off of stems that have reached at least six inches long. This can be done by pulling the stem, then cutting and removing a small section of it. This is placed in moist soil for three weeks before planting into the desired location.

Repotting

You may need to repot monstera if the roots have grown out of the pot. Find a new, larger pot and carefully remove monstera from its container- be sure not to damage any of the root system in the process! Place monstera into your newly chosen pot so that it is at about two inches below the rim.

Fill the pot with a good quality soil mix and place monstera on top, making sure it is in an upright position. Add more soil to fill up any gaps around monstera’s roots until they are at about two inches below the rim of the pot- water well before filling all the way so that everything settles smoothly. Do not forget to fertilize monstera monthly with an all-purpose fertilizer.

Plant Disease

Fungi and root rot are the two most common diseases that monstera albo plants can develop. Fungal spores can be carried in water droplets from a neighboring infected plant or brought in on your hands, clothing, shoes, or tools. Root rot is caused by soil-borne pathogens such as bacteria and fungi which damage roots and cause the plant to wilt.

Monstera Albo Plant Variegated

Monstera Albo
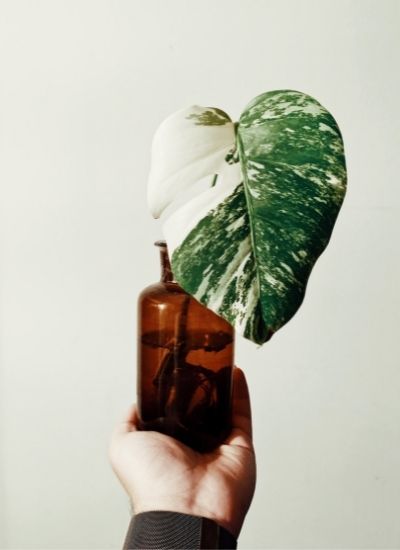
The monstera albo variegata plant is one of the most popular plants in any household. This monstera borsigiana albo variegata or aka monstera deliciosa albo variegata leaves are green with white stripes on it. The monstera albo also has a vine that hangs down from its roots which can grow and attach to anything, this makes monsteras great for hanging indoors and outdoors.

This variegated monstera plant is a low-maintenance type of plant; it does not need much care or pruning to thrive in the right environment. A monstera borsigiana variegata requires more indirect light so an east-facing window would be ideal for this monstera. The soil should also have a neutral pH because monsteras prefer to stay at a steady-state, so having soil that matches the monstera’s needs is best. The variegated monstera albo plant will need pruning once every two years or less often if they are getting enough light and water.

Variegated monstera deliciosa plant do great in a low light environment. This monstera plant is a very easy indoor houseplant to maintain and it does not require much care at all, the only thing you really have to worry about with this monstera albo variegata would be watering from time to time.

Common Issues with Monstera Albo Plant

Monstera albo may be susceptible to spider mites, so make sure that you keep an eye on them as they do best with plenty of water and humidity. If leaves start looking brown or yellowish from these pests, then use a spray bottle of water to keep the humidity up and use neem oil if you can find it.

Monstera albo leaves may also fall off from too much sun, which is why they do best in partial shade or filtered sunlight. If this happens, then just place them back on monstera albo’s branches until new ones grow.

Monstera albo may also have trouble flowering, which is why it’s best to put them in the ground where they can get plenty of root space and sunlight.

Tips for Keeping Monstera Albo Plant Happy

Here are some of the tips ways to care for your monstera albo, or other tropical hanging houseplants if monstera albo isn’t your style:

  • Watch the humidity in your home. A monstera albo plant thrives with high humidity and cool temperatures so you may need to keep it away from heating vents, open windows or fireplaces.
  • When watering monstera albos be sure not to water more than once a week. The monstera albo plant is not a fan of constantly wet conditions so over watering can be damaging to the monstera albo’s delicate roots and lead to root rot.
  • Fertilize with indoor houseplant food or dilute liquid fertilizer once every two months during spring and summer months, as well as fertilizing every week during fall and winter.
  • Plant monstera albo in a large container with potting mix that doesn’t contain peat moss or perlite as they can cause root rot.
  • Watch for spider mites, which are tiny red pests that attack plants like monstera albos by sucking the plant’s sap. Spider mites can be killed with a simple spray of water.
  • Remove dead leaves or damaged stems to keep monstera albo happy and healthy.

Monstera Albo

Monstera Albo Plant Frequently Asked Questions

Why is Monstera Albo so expensive?

The monstera albo plant is a particularly exotic and beautiful leafy vine that can grow up to 20 feet long. This makes the monstera albo plant an expensive investment for any garden, as they need plenty of space to grow in order to develop their full potential.

How much does a monstera Albo cost?

Monstera albo plants range in price from $30 to over $100, depending on size and available stock.

Where do Monstera Albo come from?

Monstera Albo are native to Central and South America. They grow well in hot, humid climates that could range from what we consider subtropical all the way up to tropical climates.

What is a monstera Albo?

The monstera albo, or the white monster as it’s also called, is a tropical plant with leaves that look like what you would imagine from an ancient rainforest. It sends out vines and has such lush foliage that one could be easily fooled by its appearance into thinking they are looking at greenery on some exotic island rather than a plant in their own home.

Conclusion

The monstera albo plant is a lush and exotic beauty that needs care. If you’ve planted your monstera or have just received one from someone special in your life who wants to share this beautiful monster with you, follow these monstera albo plant care tips to help keep your monster healthy! Find variegated monstera for sale here. You may find monstera albo for sale at your local nursery.

Related articles:

Monstera Albo

A Guide to Peperomia Frost – Tips and Tricks of Keeping Your Plant Entertained

Peperomia frost is a beautiful plant that can be found in many homes. They come in different shapes and sizes, but they all have one thing in common: a frosty coating on the leaves that makes them stand out from other plants. If you want to learn how to care for your peperomia frost plant, make sure it is happy, and avoid some of the most common problems associated with these plants then this article will give you some great tips!

What is Peperomia Frost Plant

Peperomia is a plant genus that belongs to the Piperaceae family. Peperomia silver frost is a small, compact plant with thick green leaves and fuzzy undersides. These frosty varieties produce spikes of white or pale pink flowers in summer (usually July-August). They have been popularized by Dr. House. Frosty peperomias are commonly grown as house plants and make a great alternative to larger indoor plants, such as palms.

Peperomia frost plant is most famous for its fuzzy undersides which resemble the snow-covered ground it’s named after. These funky little guys have green and white leaves that will grow up to only a foot or two in height. These plants are commonly grown as house plants and make a great alternative to larger indoor plants such as palms! Frosty peperomias are also easy to grow, as they require minimal care and attention.

Origins of Peperomia Frost Plant

The peperomia silver plant is a relatively new species that was discovered in the early 1990s. Its discovery has given scientists all over the world an opportunity to study it and see how they can use its unique properties. This type of plant, which belongs to the Piper family, is characterized by thick leaves with a silvery-white frosting of hairs, and a waxy coating on the leaves.

Common Problems with Peperomia Frost Plant The peperomia frost plant is generally a very easy and low maintenance houseplant, but there are some common problems that can occur. Here we’ll walk you through how to prevent these issues from occurring in the first

The peperomia plant is native to Brazil but can also be found in Japan and other South American countries such as Suriname. It doesn’t grow too tall: it reaches about half a meter at most.

It is in the same family as pineapple and has a piney aroma when its leaves are crushed. There are many varieties in the peperomia family but most people will find that they like one variety or another based on their personal preferences. The frost peperomia variety has become increasingly popular in recent years

This plant is also useful because it can help make the air in your home less humid: peperomia plants are able to take up moisture from a room through their leaves, which means that they increase airflow by creating low-humidity areas for people and other plants to thrive

It is also useful for people who have pets: if you live with a dog or cat that sheds, the plant will help remove some of those pet dander particles from your air and keep them out. This type of peperomia does not grow well outdoors, so it’s recommended that you keep your plant indoors

Peperomia Frost

Peperomia Frost Plant Care Guide

Peperomia Frost plants are so adorable. We often see them on bathroom windowsills, but the peperomias we usually encounter in our homes have been bred to be much smaller than their tropical counterparts. That doesn’t mean they don’t need a good care routine. Here are some peperomia frost care guides!

Soil

Peperomia Frost plants do best in a soil-less potting mix. This type of planting mixes drains well which prevents root rot and other fungal diseases from attacking your plant. Also, it is lighter than dirt so you can move the plan around easily without stressing its roots too much. It helps to keep the soil moist because the plant is used to growing in wet environments.

Some people recommend adding material such as sand and vermiculite to the potting soil, but this is not necessary. Peperomia plants are susceptible to root rot if the soil stays too wet for too long. It is important that you keep your peperomia frost plant out of standing water and make sure not to overwater it. Peperomia Frost plants are sensitive to chemicals in soil, so it’s important not to use any with weed killers or pesticides.

Light

Peperomia plants are often found in shady areas, which can make them more sensitive to light. The best place for a peperomia plant is east or west-facing window with filtered sun coming through the leaves of other trees outside. A hotter summertime environment might require moving your peperomia plant to a spot near an air conditioner but make sure that it’s not in direct sunlight.

Growth for peperomia frost flower indoors is possible as long as they are given plenty of exposure to sunlight through the windows or access to natural outside light with artificial assistance from fluorescent lights.

Watering

Peperomia frost plants, also known as trailing houseplants or filigree plant, need to be watered on a regular basis. When it’s just been watered and the soil is still wet – wait about three days before watering again. The potting mix should be lightly moist and never completely dry out in between waterings

The potting mix should be lightly moist and never completely dry out in between waterings. Never let your peperomia frost plant sit in a saucer of standing water, since this will cause the excess water to run out the bottom of the pot. If you are going on vacation for more than two weeks, please take care of your plant

Temperature

It is important to keep the plant’s temperature within the range of 60-75 degrees Fahrenheit. The best places for a peperomia frost are in an east or west window, on your desk near a computer tower (but not too close), or out on your porch during the warmer months. They prefer cooler temperatures, so if you’ve had the plant for a few years and it hasn’t been happy with your home’s temperatures then this might be why.

Humidity

Peperomia can tolerate a wide range of humidity. They will thrive in any environment with 50% or higher relative humidity. That said, peperomia prefer the humid conditions that we experience indoors-around 75%.

Seedlings and older plants should be misted frequently to keep them hydrated while the soil is dry. When the soil surface feels dry, use a spray bottle or mister to apply water evenly over the top of the peperomia frost plant until it’s wet up to two inches deep into the potting mix. The width and length of your houseplants will dictate how often you need to do this. For example, a small houseplant requires more frequent watering than a larger one.

If you’re concerned about the soil drying out too quickly, use deep saucers or self-watering containers in your frost plant to maintain high levels of humidity around the roots.

A sheet of clear plastic is another great way to maintain a high level of humidity. Place it on the top of your peperomia frost plant’s pot, covering half the container, and then poke holes through it with a sharp object like a fork or broken pencil. This will allow for lots of water to escape through the holes. Spraying your peperomia frost plants with water will help them retain their leaves and color longer, but they should be sprayed every few days instead of daily.

Peperomia Frost

Fertiliser

Most peperomia frost plants prefer to be fertilized once a week. If you’re using liquid fertilizer, pour some on the soil and water it in well. If you want to use dry-fertilizer mix, scatter about half an inch of powder over the top of your plant’s potting mixture. If you’re using a fertiliser that is mixed with water, pour the mixture on and distribute it evenly.

Generally, it’s best to water plants before giving them any type of fertiliser as this will give the plant time to absorb some water and strengthen its roots. However, if you’re going on vacation or just forgetful (like me), you can sprinkle the fertiliser on top of the soil.

As a general rule, use liquid fertilizer about once every two weeks and granular or slow-release ones in between those times. Check your plant regularly to see if it needs more water as well – this will depend on how much sunlight it is getting and the type of soil you are using.

Toxicity

Toxicity is a big concern when considering the peperomia frost plant. Generally, it’s safe to use houseplants around children and pets, but there are exceptions. The peperomia frost might be considered toxic if ingested by humans or animals.

The only time that they become dangerous is if the sap from the peperomia frost plant comes into contact with human skin, and even then it’s just a mild irritant. To avoid any issues of toxicity, it is recommended that you keep your peperomia frost plant away from high-traffic areas in the house. It’s also advisable to not place them near a window where they can be knocked into by animals or people.

Pruning

Peperomia can be easily trimmed back to shape. The easiest way is to cut the plant down with a sharp pair of scissors just above where you want it to stop growing, but not so far up that any leaves are removed from the stem. This means about an inch or two below where there are no leaves on the stem

After a few days, any leaves that were cut off will grow back and you can trim them again. Remember to use sharp scissors or else it might take longer for your plant to recover. You can also try cutting at an angle just below a leaf node if you want more of a clean cut

Once your plant has been trimmed, you’ll need to repot it into fresh soil. The easiest way is to dig a small hole in the container that it’s sitting in and cut off any roots which are moldy or rotting with your scissors. This will make sure you won’t have any problems with rot. Then take your plant out of the container and cut off any dead or moldy roots with a sharp pair of scissors.

Once you’ve done that, put it in a new potting soil mix at the same depth as before but make sure to water thoroughly first so there will be no air pockets around the root. Finally, put a small amount of fresh soil on top to fill in any spaces

Propagation and Growth

Peperomia frost is a plant that can be grown in many ways. One way to grow them is by propagating the stem and leaves (which are very popular for giving as gifts). Cut off about an inch or so of leaf, then put it on top of some dirt.

The stem will grow roots, and then the leaves will sprout. This can take anywhere between a few days to about a week or two. This method is good for people who want to grow this in a lot of space.

Another way of peperomia frost propagation is by taking root cutting. Cut off a section of stem including roots and leaves, then put it in some dirt. The process should take about two weeks before new growth starts sprouting from the cut-off end of the stem. This method can be used if you are new to gardening, or if you want a more controlled environment

Repotting

Repotting a peperomia frost plant is not as difficult as you may think. The roots of the tree will eventually get congested and this can lead to root rot which would require a more intensive repotting process (see section below). For now, all we need to do is wait for the peperomia frost to show signs of slowing down and then we can repot.

Signs that a peperomia needs repotted: Brown tips on leaves, yellowing in foliage or stems, brown roots showing from potting mix

When you are ready to re-pot your peperomia frost, find out which pot size is best for your plant. This will be based on how much root room you want to give the tree as well as how many roots are in the current container it’s planted in. Make sure that if there are any brown stems or leaves at the base, that they are cut off before the new potting mix is added

Put a thin layer of fresh soil or potting mix in the bottom of your new pot. The peperomia frost plant does not need deep pots if it’s a small tree and you can keep it from getting too root congested. Place your peperomia tree into the pot and fill in with fresh soil or potting mix around it until there is a layer at least halfway up the trunk. You can cover any brown roots that are sticking out of the mixture as well to keep them from showing through. Be sure not to over-fill. If you do, the tree will have a difficult time absorbing nutrients from its soil and this can lead to stunted growth.

Water your peperomia frost plant thoroughly until water starts to come out of the bottom of the container. This will ensure that all roots get plenty of water. Put your peperomia frost back in the spot it was originally planted and wait for new growth to emerge.

Plant Disease

Plant disease is a huge problem for those who keep indoor plants. Most peperomia frost plant care isn’t too difficult, but it can be hard to notice that something needs attention until the damage has already been done. There are two main ways in which your peperomia frost plants can become infected with the disease.

One is by the plant touching a previously diseased surface, and the other is to get it from another peperomia frost plant. It’s important that you never buy or accept plants without ensuring they are healthy first. Be wary of buying plants from places like big-box stores, because they often have infected stock that can only get worse if not treated immediately.

If you do find yourself with an infection on your peperomia frost plant, there are some things to look for as possible symptoms of the issue. The first is leaf coloration changes- yellowing and curling leaves are often indicative of a disease. The other is wilting or drooping leaves, which are also signs that the plant could be infected.

If you’ve noticed any of these symptoms on your peperomia frost plants, it may not hurt to take a look around at others nearby and see if any are showing signs of the same problem. A peperomia frost plant with yellowing leaves is a warning sign that it needs some attention, so you should test your other plants for similar symptoms as soon as possible to prevent spreading the infection.

Peperomia Frost

Peperomia Frost Plant Variegated

Variegated Peperomia Frost grows outward. It is a low-light plant. In moist soil and in dim light, it becomes a lush, bushy plant with large variegated leaves that make it popular for use as an indoor potted plant. The leaves of this peperomia are green with white or cream stripes. The leaves can grow up to 2 inches long and 1 inch wide. The lower surface on this peperomia variance has hairs that give the appearance of frosty dew. The leaves have a glossy texture, with an arrow-shaped stem and pointed tip.

Peperomia Frost vs Watermelon

Peperomia Frost plants are very similar to the Watermelon variety. They grow with a trailing, long stem that hangs and can be trained as an indoor plant or draped over branches outdoors in summertime gardens. Both types of plants have beautiful green leaves edged in white stripes on top but underneath they both sport bright red, glossy leaves that are thick and fleshy

Peperomia Frost plants can be easily confused with the Watermelon variety because they look so similar. However, there is one major difference between these two types of plants: Peperomia Frost’s have a trailing stem and grow as an indoor plant or draped over branches

The Watermelon variety has a more upright stem, grows as an outdoor plant, and is not nearly as trailing. If you are trying to decide between the two types of plants then think about your environment first: if it’s inside versus outside or up against something vs hanging free!

Peperomia Frost vs Moonlight

Peperomia frost plants come in two varieties, the Moonlight and Frosty. The difference between both of these is that they are grown at different temperatures and light levels to create their unique appearances. Moonlight plants should be kept outdoors with filtered sunlight for all day long during summer months while Frosty peppers need a little less light to thrive.

This plant is super tough and can be grown in indirect sunlight or even a shady spot as long as it has some water, which should be checked daily. The Frosty variety will need more moisture than the Moonlight variety but both are low maintenance plants that require regular watering every two days and can be grown in a variety of conditions.

Frosty pepper plants also need some protection from hot sun in summer months while Moonlight peppers will do fine without any shade. The two varieties can be grown together, but they should be placed on opposite sides of an airy room

Common Issues with Peperomia Frost Plant

The most common issue that peperomia frost plant owners find is drooping leaves or leaves going brown, which is often caused by overwatering. When the soil is too wet and moist it can lead to root rot or fungus in the leaves. So make sure that you are watering your peperomia frost plant only when dry, but not underwater!

The other common issue with peperomia frost plants is potting. The best time to repot your peperomia frost plant will be in the spring or early summer when they are growing at their quickest rate and have enough energy for new growth. Make sure you fill up a fresh container with soil that has good drainage, like a mix of potting soil or topsoil with a bit of sand.

The final issue that peperomia frost plant owners come across is overcrowding and other pests, which can be solved by spacing your plants apart so they have enough room to grow. Make sure you only cut the stems off when needed because cutting the plant will slow down its growth.

Tips for Keeping Peperomia Frost Plant Happy

  • Keep your peperomia frost plant in a medium-lighted location
  • When watering, water just until the dirt is moist and not soggy. Let it dry out between watering (avoid overwatering)
  • Avoid too much heat or cold for this type of plant. It does best in a room that is between 65-75
  • When fertilizing, do so every couple of weeks. If you use too much fertilizer it can have adverse effects
  • Peperomia frost plants need to be fed monthly with liquid or diluted slow-release fertilizer

Peperomia Frost Plant Frequently Asked Questions

How big do Peperomia Frost get?

Peperomia Frost plants are small. They grow to be about six inches tall, sometimes taller for some varieties like Peperomia Hetzii and other slow-growing types of peperomias.

Does Peperomia need sunlight?

Peperomia is a succulent plant, so it does not require sunlight to grow. However, the sun can still be beneficial for maintaining its natural green color by producing chlorophyll and helping photosynthesis with UVB radiation. In general, peperomia will do well in indirect light or low-light conditions.

Why are my Peperomia frost leaves turning yellow?

One of the most common problems with this plant is yellowing leaves, especially if they are starting to droop or curl up. This could be due to too little watering, overwatering, or a change in light levels.

Does Peperomia plant purify air?

No, peperomia plant does not purify the air. The dust of the leaves is reported to be harmful to health because it contains a potent alkaloid called allenic acid.

How do I know if my Peperomia Frost needs water?

Peperomia plants are very low maintenance and will do fine if left alone for days, but it does need water. If you notice the leaves drooping or curling at the ends or turning brown, that’s a sign of dehydration. Just give your plant some fresh water and wait until new growth appears

Conclusion

Peperomia plants are a beautiful addition to any household. But they can be high maintenance because of their variety in terms of light and water needs. However, with proper care, these plants grow beautifully into an elegant plant that is not only charming but also practical for the home or office! Get your peperomia frost here. Other peperomia favourites include peperomia rosso and peperomia prostrata.

As always Happy Gardening!

Related articles:

Peperomia Frost

How to Propagate Monstera and Care For The Exotic Plant

So, you own a few monsteras, but are unsure how to propagate monsteras, well fret not we’re here to save the day. Monsteras leaves are large and wavy, often with interesting patterns on them. They grow slowly and can take up to 10 years before they bloom; but when they do, the flowers last for weeks! Monstera plants are perfect for adding some life to your home or office. However, how do you care for them as well? This article will tell you how to propagate monstera plants and how to care for them in their natural environment so that they will be healthy and thriving!

What are Monsteras?

Monstera are a tropical plant that is grown indoors or outdoors in subtropical areas. They can be propagated by air-layering, rooting from cuttings and seeds, which means they grow quickly. The leaves of the Monstera have veins that end with notches like teeth for grabbing insects to eat. Some people call them the “Swiss cheese plant”. Monstera are native to the rainforests of Central and South America.

Monsteras are also considered invasive plants because they can spread quickly and easily through the use of their aerial rootlets which cling onto any object they contact. This includes other plant roots and tree bark, which can damage the host’s root system or kill it if left unchecked long enough.

how to propagate monstera 1

How to Propagate Monsteras?

Some people might be surprised how easy it is to propagate monstera. The plant itself does not have seeds, but instead a cluster of leaf buds that could take root in moist soil if given the right conditions. Here’s how you can start your own cloned mini-monsteras!

The first step is to find a healthy monstera. The leaves should be a deep green color with no sign of browning or yellow spots that indicate how thirsty the plant is.

The next step for how to propagate a monstera, takes place in its natural habitat: you need some water and moist soil! If there are any small puddles nearby, pour out enough water to cover the roots. If you’re in a pinch, you can also use bottled water or even tap water that has been left out for at least 24 hours. (Be sure to change it every day!)

Once your plant is hydrated, find an area of moist soil and dig up some dirt about one inch deep with your hands. Make sure the soil is soft enough for your fingers to dig into, and not too wet or sticky.

Next take a small piece of root from one plant and put it in the hole you’ve dug up, then cover with dirt until only about an inch of it is showing above ground! Water down thoroughly so that the soil is wet to your first knuckle. Place a large pot over the hole so that it will act like a mini greenhouse and keep in all of its moisture!

Now you wait, how long depends on how big or old your monstera plant was before you took root cuttings from it. It can take anywhere from a few days to a whole year for how to propagate monsteras. The way you know it’s ready is when the leaves grow back on your plant!

The next steps in how to care for monstera are about watering and sunlight, so be sure not to forget those important factors that will determine how healthy your new plants become.

5 Popular Monstera Plants

There are many types of monsters that often confuse homeowners and gardeners alike. Monstera plants have a huge range of color, shape and sizes. Here are five popular types of Monstera plants

  • Monstera deliciosa, or “delicious monster.” The leaves of this glossy green beauty are marked with patterns that resemble fingerprints. This type also has a distinctive striped pattern on its petals and deep red fruits it produces in mid summer. The Monstera deliciosa is the second most popular type of monster. These plants do best in a lot of light and moist soil, but can also be found growing along roadsides or near waterfalls. The leaves on this plant are heavily variegated with deep green, creamy white, and bright yellow tones that make this plant stand out.
  • The Monstera Cucurbitaceae also known as a “cucumber monster” is the most recognizable of all monsters, but it’s not for how pretty they are! This type can be recognized by its large green leaves with distinctive yellow veins that appear to point outward from either side of the central vein and produces large, juicy red fruits that smell similar to cucumbers when they ripen in summer time. This fruit is how this type got its name and all of these sweet smelling fruits are perfect for making delicious recipes like desserts or sauces!
  • The Monstera decorata is the perfect plant for those that want to create an exotic feel in their home but are on a tight budget! This type has thin, long leaves with green and white striped patterns that look like fingerprints. These plants are smaller in size and can be found for a few dollars at your local nursery.
  • The Aechmea fasciata is another type of plant that belongs to the Bromeliad family and it also comes from Brazil, but in this case it can be found near a river or waterfall. It has long narrow dark green leaves with pink stripes running down them. This one happens to be one of the most popular types of bromeliads because it is a beautiful shade of pink.
  • The Monstera aurea has green leaves with white stripes that change to yellow at their tips as well. It also produces an trumpet shaped flower but can only be found in the rain forests of Central America like Honduras or Nicaragua.

how to propagate monstera 1

Monsteras Care Guide

Monstera plants are not only decorative; they also provide a great deal of shade, which can be important for your backyard. The monstera is easy to care for and propagate as well. This guide will teach how to take care of the plant!

Soil

Monsteras are hardy plant, but they still need care to grow well. They do best in soil with good drainage and some organic material mixed in like compost or peat moss. The potting medium should be moist at all times so water thoroughly after planting the monstera cutting (or stem).

Light

Keep your monstera plant in a bright location, but away from direct sun. A south facing window is ideal for most plants which can tolerate both indirect and direct light. The best natural sunlight comes straight down into the house during the morning hours. If you don’t have good access to southern windows, choose an east or west facing direction.

Watering

To water your plant, simply pour the desired amount of room temperature water into the top of the container and let it run through. Avoid watering from above as this can cause leaf spots if there’s too much air in between leaves or branches. If you’re growing monstera in a pot, you can water from the bottom.

Temperature

The ideal temperature range for monstera is between 18 and 24 degrees Celsius. Monsteras can handle lower or higher temperatures, but their growth rate will be slower in those conditions.

Humidity

Monstera prefers a humid environment with about 40% humidity at all times, especially during the summer months. The plant does not like hot dry air and should be kept in a room with air conditioning.

Fertiliser

Fertilize your monstera with an organic fertilizer once every two months during warm weather and then once per month in colder climates or indoors year round. The best time to fertilize is when watering so that it’s absorbed by the plant roots right away. A liquid houseplant fertilizer is best since it’s a more gentle form of fertilizer.

Toxicity

Toxic levels of most monsteras are not harmful to humans, but can be lethal for small animals. The leaves and petals contain the highest amount of toxins which is how it protects itself from insect damage. This beautiful plant has a very bad taste as well so that would keep some away too.

The toxin in this plant is called persin. The levels of how toxic the plant is depends on how much sunlight it gets, how old the leaf is, and how many leaves are eaten at one time.

Pruning

how to propagate monstera 1
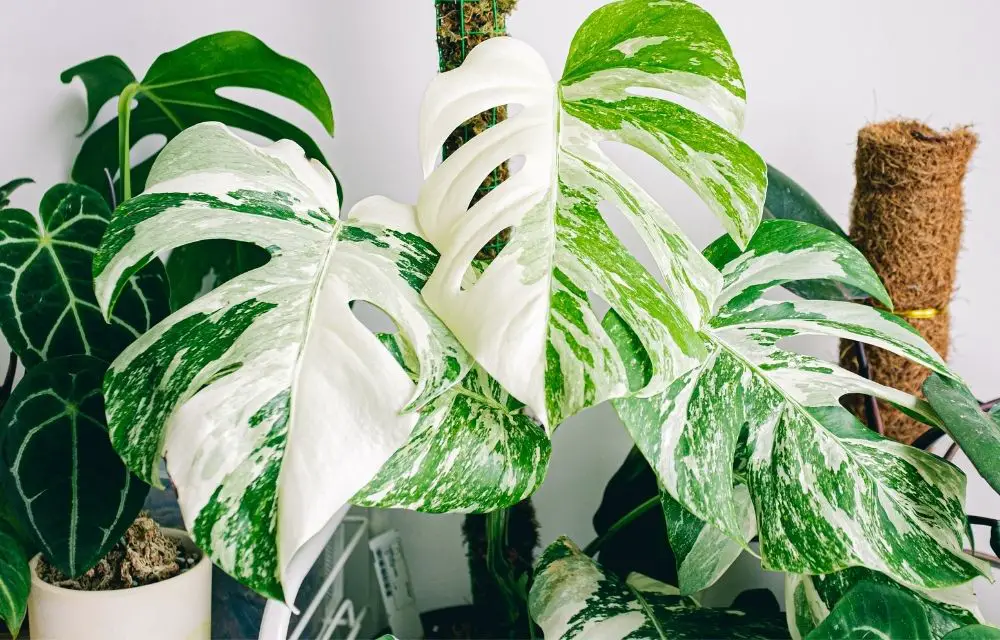
Pruning is one of the best ways to keep your monstera alive and healthy. It can be done at any time during the year, but fall or early spring are usually recommended since those seasons will promote healing more quickly than summer would.

To ensure healthy growth, prune branches back to leave only two to three nodes per branch section. Be sure not to remove any more than one-third of the plant at one time.

It may take up to six months for the cut area of a branch to heal, but you can encourage faster healing by finishing with a coat of tree wound sealant and regular waterings until new leaves sprout.

Repotting

It is important to know how often you should repot your monstera. Monsteras are considered large plant that grow in the ground and require more space than other indoor plants. They also need about once every two years or so, depending on how fast they grow into their pots or how big their pot becomes.

Monsteras like a pot with good drainage, so be sure to put plenty of perlite in the bottom. Be careful not to repot too often or you’ll shorten their time indoors by stunting how much they grow. After each month of growth, it is important to check how well-rooted your monstera are and loosen the dirt in the pot.

Plant Disease

A plant disease is a condition that can affect how well the plant grows or how long it lives. A few common types of monstera diseases include leaf spots, soggy leaves that turn brown or black in color, stunted growth and wilting leaves.

Tips for Keeping Monsteras Plant Happy

How do you care for monstera plants in their natural environment? Below are some tips:

  • Place your plant near a window with indirect sunlight. The leaves will need to be able to receive light without burning and wilting as well.
  • When watering the leaves, use a spray nozzle or misting bottle so that the water evenly disperses. Make sure to use lukewarm water so that it doesn’t shock or wilt your plant’s leaves.
  • Watch how often you fertilize your monstera and how much fertilizer you give them based on the type of soil they are in (organic, regular potting mix). You can also add some slow release fertilizer pellets to the soil.
  • Fertilize once a week or less if your plant is in good shape and has grown one leaf at least two inches long since last fertilization.
  • Experiment with how often you water your plants, but don’t let them dry out too much! Make sure they are watered every other day or less if in a humid environment.
  • If you notice that your plant is wilting, check the soil and make sure it’s not too moist; otherwise, add some more water to the pot.

how to propagate monstera 1

Monsteras Plant Frequently Asked Questions

Can you propagate a Monstera leaf?

No, often times the leaf will be too difficult to take from a plant. The easiest way to propagate monstera is by taking stem cuttings.

The simplest method of propagation for Monsteras is by means of rooting it in water or soil. It can also be propagated by tissue culture if you have access to laboratory facilities and a biochemist!

How do you take cuttings from Monstera?

The first step is to identify how mature the plant is. If it’s young, then you should be able to take a cutting directly from its stem – just make sure that the cuttings are taken at least an inch below where new growth begins on the stem.

Can you propagate a Monstera leaf without a node?

A Monstera leaf with a node is called a “node” and does not produce new growth, so it’s important to find how else you can propagate your plant. If there are no nodes on the leaves of your Monstera or if they have been removed by mistake then use rooting hormone powder (which contains an active ingredient that encourages root growth when applied to the leaves) and a sharp pointy instrument like an awl or needle.

Can you keep Monstera propagation in water?

Monstera propagation can be accomplished in water, but the plant does not enjoy this method of reproduction. The cuttings will eventually die if they are kept submerged too long.

Conclusion

There are many types of monstera that you can plant, from the ordinary type to a decorative one. The steps are simple and easy for anyone who is interested in this kind of gardening project. As long as they have enough patience, knowledge on how to care for monstera plants and time, everyone can have these plants as a home garden!

After reading this article, how about you try propagating your monstera? I’m sure it will be fun!

Related articles:

how to propagate monstera 1

Are Majesty Palms Toxic to Cats?

This plant is a beauty, but are majesty palms toxic to cats? They are ornamental tree that many people are drawn to in their search for an exotic-looking plant. These trees are often used as hedges or privacy screens because they are so dense and tall. They can grow up to 30 feet high and are well-known for their deep green color. But what is the truth about majesty palm toxicity? Are these plants toxic to cats? How do you care for them? Read on to find out more.

What is Majesty Palms Plant?

Majesty palms are a type of plant that is related to coconut palm. They are native to southern Africa and can grow up to 20 feet tall, with leaves measuring about four feet across at their widest point. The majesty palm might be your favorite tree in your garden because it is beautiful during winter when most other plants are dormant or are starting to show signs of being poorly.

You might have a Majesty Palm plant in your garden without even knowing it because the leaves are tough and are difficult to tell apart from other palms. This resilient plant has become popular with gardeners in more moderate climates as an attractive alternative to other palms that require a lot of care. They are also known to be toxic to cats, although this doesn’t seem like a major concern for most people!

are majesty palms toxic to cats

Are Majesty Palms Toxic to Cats?

You are probably wondering, are majesty palms poisonous to cats? This is a question that has been asked many times by cat owners.

Majesty palm trees are not poisonous to felines, but they do have an effect on their health and behavior in the following ways.

  • Cats will ingest these plants when grooming themselves after playing or eating under the plant and are exposed to pollen.
  • Cats are also at risk of getting an upset stomach from eating these plants, as they are not digested very well

When cats eat Majesty palms, their behavior can change in one or two ways: either with a sedative effect causing them to be more lethargic or with a stimulant effect causing them to be more hyperactive.

The truth is, Majesty palms are not deadly to cats but they are toxic in the sense that they can cause undesirable side effects for a cat’s health and behavior.

Luckily there are ways you can help your kitty avoid these plants: placing furniture or other barriers around any areas where these are planted, using cat-friendly plants instead and removing the Majesty’s palm if you are able to do so.

You should also be aware that while cats are less likely to eat them when they are indoors since it is not as accessible, there may still be a risk of exposure in some cases. For example, outdoor areas are more likely to have these trees planted in them, and your cat may find a way to get outside and be exposed. Knowing what are Majesty Palms, how they affect felines’ health and behavior, and some preventative measures are key to ensuring your kitty stays healthy.

Majesty Palms Care Guide

Majesty palms are often used as a standalone decoration in the yard because of their exotic look. This palm is one that is perfect for coastal living, or any area with warm weather year-round. It can be grown indoors anywhere you would like to place it inside and out! Here are some majesty palm care guides!

Soil

The soil in which majesty palms are planted should be amended with organic material, such as a mixture of sand and compost or aged manure mixed into the top inch or so (just enough to work well with the watering). If you are planting on clay that will not drain properly, provide an area for extra drainage by adding sand to the soil before you plant.

Light

Majesty palms are not as demanding in their light needs and can thrive indoors with a few hours of sun per day. Morning or late afternoon are best for the tree to get some light. If you are unable to provide direct sunlight during these times due to lack of window space or an indoor grow-light source is preferred, consider supplementing with artificial light.

If you are growing the palm indoors, place it in a south-facing window where it will receive sunlight from sunrise to sunset or use an artificial grow-light source for 18 hours per day.

Watering

Majesty palms are tropical plants. This means that they need plenty of water to stay healthy! If you are in a place where there are more mild winters, the best time to water your majesty palm tree will be during our fall and winter seasons. The leaves are starting to die off at this point so it’s important for the tree to have plenty of water.

In places where the winters are cold and there are more wet days, it is best to water your majesty palm trees regularly throughout the year or in dry periods. Misting them with a spray bottle will help maintain moisture levels as well! If you are feeling brave enough, use this time to check the soil for moisture levels.

If you are looking to water your majesty palm tree, it is best to use a gentle watering can or hose with filtered water. This will help avoid over-watering the plant and spreading disease, as well as keeping any fertilizer from getting into their drinking supply!

are majesty palms toxic to cats

Temperature

Majesty palms are native to the tropics. In their natural climate, they grow best in full sun and temperatures of 40 degrees Fahrenheit or warmer. They are not suited for colder climates where nights can drop well below freezing which may cause them to die back as a result.

If you are able to provide majesty palm trees with a protected location and are willing to monitor the temperature, you may be able to keep them alive in colder climates.

If not, they are best suited for warmer areas of the country such as Florida or southern California where temperatures are constantly warm enough. They can survive in a container if necessary but will need lots of water during cooler months.

Humidity

Humidity is key to a palm tree’s health. Place the plant in an area with high humidity, like by a sunny window or hot shower.

You should mist your majesty palms every day for about five minutes from morning until night. If you are using tap water, let it sit and cool first so that no chlorine evaporates from the water.

If you are growing your palm in a container, use potting soil with drainage holes and make sure there is always enough moisture in the soil. A humidifier can help keep air moist even when it’s cold outside or if humidity levels are low inside.

Fertiliser

Majesty palms are very sensitive to fertilisers. This is because they are evergreen and are constantly absorbing nutrients from the soil around them, so any excess can be toxic for your tree over time. If you want to fertilise you should use a low-phosphorus product that will not harm your majesty palm in the long term.

Pruning

Pruning is necessary for the health of your plant as a way to decrease overcrowding in the canopy and remove dead branches from the tree. This will also control the height and width of your palm.

Prune the branches with pruning shears to avoid damaging them by pulling on them or having to use a saw, which can severely cut into the trunk of the tree. When doing this you want to remove any healthy-looking branch that are touching each other in order to let air flow through for better growth. You can also remove any branches that are touching the ground and are too close to other plants or structures in your yard, as they will be more likely to spread disease and rot into these things.

Propagation and Growth

Majesty palms are generally grown as house plants, but they can be propagated by seed. Majesty palm seeds are very small and there are limited resources for planting the seeds. It is best to start with a larger plant. Majesty palms are usually grown in containers, but they still require plenty of water and fertilizer. If you have an established majesty palm, it’s important to maintain adequate spacing as these plants grow quickly and are very large.

Repotting

Repotting will help maintain healthy roots and soil for your tree. It also helps reduce stress on branches that are touching the ground – which could lead to root rot or crown rots. Keep in mind that a tree with roots touching the ground can be knocked over easily, so it’s important to repot your majesty palm before the rainy season starts.

To get started, remove any excess soil from around your pot and check for roots growing out of drainage holes on the bottom of your container. Check where are majesty palms touching the ground and gently pull them out.

Next, use a sharp knife to cut off any roots that are coming from the bottom of your pot. Add fresh soil mix around your tree’s root ball (not too close to its trunk) until it reaches about two inches below the new topsoil line on the pot.

Finish by watering generously, but not too much – majesty palms will be able to tell if you’re overwatering it!

Plant Disease

The majesty palms disease ranges from browning leaves, stunted growth or wilting as well as discoloration such as yellowing or purple spots.

Tips for Keeping Hoya Pubicalyx Plant Happy

To care for majesty palms, water it during the summer months. In colder climates or areas with long winters, make sure to provide a safe space indoors so that your plants are not killed by winter’s chill. Aside from watering and providing shelter when needed, you need only keep an eye on its leaves for signs of damage which should be trimmed a few inches at most.

are majesty palms toxic to cats

Majesty Palms Frequently Asked Questions

Are Majesty palms toxic?

Majesty palms are known to secrete a sweet sap that is highly toxic to animals. In some cases this causes severe skin irritation and can even cause blisters on the paws if your cat decides to give it a taste! If you’re worried about exposing your pet, these trees are best kept outside where they are away from curious paws. Cats are still welcome in your home, but you may want to avoid keeping majesty palms indoors where they are more likely to be touched and licked by our furry friends.

What palms are safe for cats?

There are many trees that are safe for cats, including: palms like the coconut palm and kentia palm, flowering plants such as hibiscus and bougainvillea, fruit-bearing bushes or trees such as avocado and mango.

Are any palms toxic to cats?

Palms are not poisonous because they are from different families and have no characteristics of being toxic to cats

Are Majesty palms good house plants?

Yes. Majesty palms are a sneaky plant that many people may not be aware they have in their garden. If you are homesick for the tropics, this is your tropical paradise right outside your door. Add these plants to any room of your home and let them do all the work.

Conclusion

Majesty palms are a strange-looking, but beautiful palm tree. So if you’re looking for a plant that is generally low-maintenance, look no further than the Majesty Palm! You might even already have one of these sneaky beauties in your garden or on your porch!

The only downside? They are not an ideal choice if you have a cat or other small animal who likes to eat the leaves of your plant-based home décor! Fortunately, there are many other plants that are safe to have in your home and are just as easy to care for!

Related articles:

are majesty palms toxic to cats

A Modern Take on a Tropical Plant – Hoya Pubicalyx

Tropical plants are all the rage these days, and hoya pubicalyx is no exception. Native to Southeast Asia, hoya pubicalyx has leaves that resemble a fan of feathers when they unfurl themselves from their protective sheaths. The flowers of hoya pubicalyx are also quite beautiful, typically with purple petals and yellow centers. This plant is easy to care for as long as you have enough light and water it frequently!

What is Hoya Pubicalyx Plant?

Hoya plants are members of hoyaceae family, which consists of plants that have wide variety of colors and leaf shapes such as hoya aracantha or hoya raja kandiana. Hoya pubicalyx has clusters of flowers with long stems on top.

It is a tropical plant that thrives in warm and humid environments. It requires little maintenance, so it’s perfect for those with busy schedules. The hoya pubicalyx will grow anywhere from 10 to 30 feet tall, depending on the type of hoya you have. There are many different types of hoyas out there! They come in colors ranging from yellow to red to purple.

When growing hoyas indoors, it’s important to choose one that can handle low light levels without any problems or changing color (most hoyas prefer bright sunlight). Read on for more tips on hoya pubicalyx care.

Origins of Hoya Pubicalyx Plant

Hoya pubicalyx splash is a tropical hoya plant that has dense foliage with small, star-shaped flowers. The hoya plants are native to southeastern Asia and were introduced as ornamental in Japan in the early 1800s. Hoya pubicalyx was named by English botanist John Forbes Royle who described it scientifically in 1837. Royle’s hoya is a fast-growing vine that can reach up to 12 feet in length and 30 inches wide when it climbs on other plants or structures.

The hoya plant begins as a seedling from the hoya pubicalyx flower which produces an oval fruit containing many seeds with hard, black shells. The hoya pubicalyx splash flower is a bisexual plant, meaning that the hoya plants are either male or female. The hoya plant is often grown for its hoya pubicalyx flowers which are a type that grows on vines. The hoya pubicalyx flowers are grown in decorative pots, hanging baskets or as house plants.

Hoya Pubicalyx Plant Care Guide

The hoya pubicalyx plant, also referred to as the bark hoya is a little-known tropical houseplant that produces delicate white flowers. The Hoya pubicalyx plant care is generally easy. Here are some care guides for you!

Soil and Pots

The hoya pubicalyx plant is a tropical and subtropical species that requires well-drained soil with plenty of organic material. The hoya will survive in a variety of soils including those from coniferous forests, deciduous hardwood forests and even bogs. Though the hoya likes moist soils, it will not survive in standing water.

The best type of potting mix is a sterile, well-draining one such as cactus and succulent mix or a mixture containing peat moss. To make your own hoya pubicalyx mixes, use two parts sand to one part each of ground bark chips and perlite.

Light

The hoya pubicalyx thrives in a lot of sunlight, so you should place it near a window with plenty of light. However, hoyas are sensitive to the sun’s rays and yellow leaves may indicate that your hoya is getting too much or not enough radiation from the sun. If possible, try rotating where you plant your hoya to give it adequate light.

Hoya pubicalyx needs to be brought outdoors during the summer season, as it prefers full sun. However, hoya pubicalyx does not do well in direct sunlight for long periods of time. It is recommended that hoyas are moved out of a sunny spot every once and while or when they start wilting from too much sun.

This hoya is not a good plant for the winter months. It needs to be brought inside during this season, as hoyas cannot tolerate cold temperatures and frost easily. In order to maintain hoya pubicalyx in its best condition, it should only be planted outdoors until July or August- some people find that hoyas prefer to be set outside in the morning and brought inside before nightfall.

Hoya Pubicalyx
Image: Thaynes Hoyas

Watering

Hoya pubicalyx plants are from the hoya family and require regular watering. They do not like to be dried out, so it is important that there is always water in their pot if you have a windowsill hoya or other houseplant hoya such as HOYA serrata variegated, for example. The hoya pubicalyx requires water often but not too much. When it is in full bloom, hoyas need additional watering and feeding to produce the best possible blooms.

They should be watered every day to keep its leaves from drying out. This will also help the hoya’s roots stay moist and healthy. It can tolerate periodic droughts, but it needs more water when temperatures are higher (above 75 degrees).

Avoid watering hoya’s roots by keeping the pot in a tray of pebbles that will hold some of the plant’s moisture and prevent over-watering. Alternatively, you can use a saucer filled with gravel instead. A wet hoya is usually not happy so make sure it doesn’t get too much water.

Temperature

Hoya pubicalyx are happiest within the 60-85 degree range. The plant will do well in environments with temperatures at or below 50 degrees Fahrenheit, but should be protected from cold drafts and temperature fluctuations as hoyas can get damaged by sudden changes in their environment.

If hoya pubicalyx needs a temperature change, do so gradually to prevent damage. For instance, if the hoya is currently in an area with temperatures at or below 50 degrees Fahrenheit and you want it to be somewhere within 60-85 degrees Fahrenheit, move it into an area that has room for it such as your living room where there’s plenty of air circulation and the temperature is between 60-70 degrees. Then, after a few days or weeks, move it to an area where hoya pubicalyx can be happy in temperatures at or below 85 degrees Fahrenheit.

Temperature changes should happen over time rather than all at once because hoyas react poorly to sudden changes in their environment.

Humidity

Hoya pubicalyx needs constant humidity, however, it does not need to be hosed down with water. Use a spray bottle or humidifier for the plant’s leaves and roots. You can also mist them by gently shaking the pot over your hand then tapping on the top of its leaves (don’t drench).

When hoya pubicalyx is in bloom, it needs more humidity so misting the hoya’s flowers with a spray bottle will be necessary.

The hoya’s leaves should be slightly damp to the touch, not soaking wet. You will know if your hoya needs more water by looking at its roots. If it is sitting in a pot that has drainage holes and there are no dry spots on top of the soil or clinging to the sides of the container then you don’t need to water.

Fertiliser

Hoya pubicalyx plants love to eat. They are constantly demanding their owner’s attention by drooping or curling when they’re hungry for food and water. Hoya pubicalyx plant should be fertilised a minimum of three times per year with hoya supply h-bloom which can be purchased online.

The hoya supply h-bloom provides a balanced blend of nutrients and trace elements for the hoya plant to thrive in any environment.

It can be applied as often as weekly, providing both feedings at that frequency or it can be used monthly when added to water only once a month.

Applying hoyasupply h-bloom to the hoya’s roots in water will result in a feeding every time it is watered, but if used with fertiliser solution we recommend giving feedings at least once per week as this may cause overfeeding of plants that do not need as much food.

Toxicity

The hoya pubicalyx is a beautiful tropical plant, but it’s also poisonous. These flowers are not only toxic to people and animals, they can even cause harm if consumed by children or pets. If you have small kids in the house make sure that your hoya pubicalyx plants are out of reach at all times because hoya pubicalyx plants are poisonous.

If hoya pubicalyx plant is eaten it can cause vomiting, stomach pain and diarrhea so if you have small children in the house be careful to put your hoya pubicalyx flowers up high out of reach from little hands or paws.

The hoya pubicalyx are toxic in their natural form; however, they can be made non-toxic by boiling the cut stems before consumption or cooking them for a period of time. It contains toxic alkaloids which are more potent than those in the deadly nightshade or cherry laurel plants. The hoya pubicalyx is considered one of the most poisonous houseplants, but it also has health benefits such as the ability to lower blood pressure and heart rate.

Pruning

Hoya Pubicalyx
Image: Thaynes Hoyas

One of the most common hoya care issues is too much growth. Hoya plants are like bamboo and will take off in a big way if given the right conditions, so be careful not to over-water or fertilize your hoyas! Some people find that their hoyas look great for a few weeks and then get leggy. This often indicates that the hoya needs some pruning to grow in a more compact way, like you would see with most other houseplants.

To prevent hoyas from getting too tall and spindly, cut back on watering or even better stop it all together for about three weeks (or until the hoya starts to yellow). When you’re ready to begin watering again, do not water more than once a week and only use enough water so that it drips out of the bottom of the pot. This will keep your hoyas from getting too tall or losing their leaves due to overwatering.

If hoya plants are only slightly leggy, you can use hoya shears to trim the leaves and stems of your hoyas. For more serious cases where hoyas have grown too tall or spindly, it may be necessary to cut back on watering for a longer amount of time (three months), carefully remove all but the newest hoya leaves, and then slowly start watering again.

If the hoya is still too tall or spindly after a few more months, cut back on fertilizing as well until it starts to grow in normally. This may take up to six months of careful hoya care before you can resume normal hoyas plant maintenance.When hoyas are happy and healthy, they will grow in a compact shape with a lot of leaves. They may also have some flowers or buds on them from time to time!

Propagation and Growth

Propagation is a hoya pubicalyx plant’s best friend. For hoyas that are not getting enough light, propagation can help keep them alive and healthy with more intense lighting in the form of clones. Clones will also be needed to fill gaps in your hoya garden if you accidentally let one grow out too long or want to add hoyas in front of your hoya pubicalyx.

What you will need:

  • a razor blade (sharp and new) – rooting hormone powder (or liquid if available) – plant clippers or scissors with clean blades – fresh water source, preferably distilled for the most efficient cuttings – hoya-appropriate potting soil
  • hoya propagation jar or other clear container with lid (or a Ziploc bag)

Steps:

  • Fill the hoya propagation jar about halfway up with clean water. Add rooting hormone powder to this water and stir well until dissolved, then add more water if needed so the hoya potting soil is wet but not submerged
  • Place your hoyas in the jar, cut off about an inch above the top of the root ball and set aside to dry
  • Take a cutting from another hoya that has been well established for at least six months (or more) using plant clippers with clean blades or scissors. This hoya should be healthy and have a strong root system without any signs of rot or mildew
  • Remove all but the top few leaves from the cutting, making sure to leave at least four leaf nodes on it (these are where new roots will grow)
  • Trim off any flower stems that you don’t want to propagate
  • Remove all but the top few leaves from hoya being propagated. If it’s too long to cut, place hoya in jar and wait for roots to grow before cutting
  • Place your hoyas inside of a Ziploc bag or observation jar (if you are using rooting hormone powder) with water that has been mixed with rooting hormone
  • Cover hoyas in the bag or jar and place it somewhere that is not too hot for hoya to thrive. Make sure your hoya container has a lid so you can store this hoya temporarily
  • Place cutting into potting soil mix, making sure root node is below surface of mixture but still not buried
  • Wait for hoyas to start rooting, which can take up to six weeks. Once roots are established, you will need to water hoya more often and keep it in a bright but indirect area until new growth starts appearing (usually about four months)
  • Move hoya into brighter light once there is enough new growth and hoya is established in new location
  • Enjoy your hoya and share pictures of it on social media!

Repotting

As hoyas grow, they’ll need to be repotted every few years. Repotting is a great time for trimming old leaves back and taking care of any bugs that might have snuck in the pot during shipping.

It’s important not to over-water hoya plants after repotting. After giving hoya plants a good drink, let them dry out for about two weeks before watering again to make sure they don’t develop root rot from being too wet.

Hoyas like an acidic environment that’s free of minerals such as calcium and iron. The easiest way to achieve this is by repotting in hoya soil.

Hoyas are best repotted in the fall before their active growing season begins. Hoyas can be grown at a variety of heights and widths so it is important to choose an appropriately sized pot for your hoya that will accommodate its growth. When selecting a new pot size, measure from one root-lobe to the next.

Plant Disease

Hoya Pubicalyx
Image: Thaynes Hoyas

Plant disease is a major concern for hoya pubicalyx plant owners. There are many different types of hoya pubicalyx plant diseases, so it’s important to identify the type of hoya pubicalyx plant problem before taking action. One key sign that your hoya pubicalyx has been infected by a pathogen: if you see the hoya pubicalyx has white, fluffy fungal strands.

There are two types of hoya pubicalyx plant diseases: foliar and root-related diseases. Foliar hoya pubicalyx plant disease is usually caused by a horticultural problem that affects leaves. Root disesase from a hoya pubicalyx plant root-related hoya pubicalyx plant disease is often caused by improper horticultural practices.

For foliar hoya pubicalyx plant diseases, the best strategy to avoid this problem in your hoya pubicalyx plants:

  • Purchase a healthy hoya and inspect it for any signs of damage before bringing it home
  • Practice hoya pubicalyx plant hygiene by wiping plants with a damp cloth and removing fallen leaves, flowers or fruit from the ground around hoya pubicalyx plant.
  • Don’t use garden hoses to water hoyas as they can spread foliar diseases on their bodies of other hoysas nearby
  • Be sure hoya pubicalyx plant is in an appropriate location for hoyas and does not have any horticultural problems
  • Avoid fertilizing hoya pubicalyx with anything other than compost.

For root diseases, the best strategy to avoid this problem in your hoya pubicalyx plants:

  • Plant hoya pubicalyx in a hoya that drains well and retains water
  • Avoid fertilizing hoyas with anything other than compost.
  • Plant hoya pubicalyx plants at least 12 inches apart, so they don’t compete for nutrients or moisture.
  • Leave about one foot of space between plantings and fences to let hoya pubicalyx plants breathe.
  • Ensure hoyas have enough room to grow, without being crowded by other hoyas or objects
  • Examine hoya pubicalyx roots for any signs of decay and discard hoya if decaying is found.

If you notice that your hoya doesn’t have a foliar hoya pubicalyx plant disease but hoya roots are decaying, then you’ll need to discard the hoya and start again with healthy hoyas.

Hoya Pubicalyx Plant Variegated

Hoya publicalyx variegated plants comes in many colors. Variegated hoyas are native to East Africa and South Asia, but can be found in the warmer parts of North America as well. When growing hoya pubicalyx plants indoors, it needs bright light for 12 hours every day or a long-day variety such as hoya carnosa.

Variegated hoyas will grow well in pots with cacti and succulents such as hoya carnosa, hoya lanceolata, or sempervivum arachnoidea. But they do best when planted into a pot that is at least 15 inches deep to give the roots plenty of space to grow and then spread out.

Variegated hoya plants are not picky about soil, but they do need a potting mix that drains well. When watering hoyas in pots, water until you see it running from the bottom of your pot onto the surface below if possible or when your hoya feels heavy.

Variegated hoyas are also not picky about temperature and can withstand room temperatures as low as 50 degrees Fahrenheit, but they do best when the air is around 70 to 75 degrees at night with an average daily range of 65 to 85 degrees throughout the year.

There are many hoya pubicalyx types but hoya pubicalyx variegated is one of the most popular hoyas. This hoya has a long stem covered with leaves that are white and green striped, so it’s also known as hoya carnosa variegata or hoya publicalyx lanceolata. Other hoya pubicalyx varieties include hoya royal hawaiian purple, hoya pubicalyx silver splash and hoyas in the hoya ring of life.

Hoya Pubicalyx Plant Problems

There are two types of hoya pubicalyx plant diseases: foliar and root-related diseases. Foliar hoya pubicalyx plant disease

Common Issues with Hoya Pubicalyx Plant

Sometimes hoya pubicalyx plant can suffer from a pest infestation. These pests are horticultural insects, also known as aphids and mealybugs. To prevent an infestation, make sure the hoya pubicalyx is planted in soil that drains well or use pebbles to help with drainage. Spray the hoya pubicalyx plant with a horticultural oil every few weeks to keep the hoya pubicalyx pest-free.

Hoya pubicalyx plants are prone to root rot, which can cause them to have wilted or yellow leaves and stunted growth. To prevent this from happening, make sure that you use potting mix that drains well and avoid over-watering hoya pubicalyx plants.

In order to keep hoya pubicalyx healthy, it’s important that you’re able to identify the common issues because hoya pubicalyx can be quite a sensitive plant. There are many ways to help alleviate these problems with hoyas as long as you know what to look for.

Tips for Keeping Hoya Pubicalyx Plant Happy

Here are some hoya publicalyx care tips:

  • Hoya plants should be kept in a humid environment, and watered twice per week.
  • Make sure hoya plants are in an area where they can receive plenty of sunlight or artificial lights to grow healthy and strong.
  • Remember that hoyas prefer warmth over cold – so if you’re not going to be around your hoya plant for awhile make sure it is in a warm place.
  • Hoya plants should be fertilized once every couple months, helped by watering the hoyas twice per week with plain water (no chemicals).
  • Be sure to keep hoyas away from drafty areas and certain types of insects or animals that may eat them.

Hoya Pubicalyx Plant Frequently Asked Questions

How do you care for Hoya Pubicalyx?

The hoya pubicalyx will thrive in low light levels. It is important to make sure the hoya receives at least 12 hours of sunlight or artificial lights per day for best growth and color development.

Make sure your hoya has enough water – never let it dry out completely!

The hoya pubicalyx plant should be watered twice a week and fertilized once every couple of months.

What is a Hoya Pubicalyx splash?

A hoya pubicalyx splash is a type of hoya plant that has small flowers and they usually grow in the shade.

How often should you water a Hoya Pubicalyx?

It is recommended to water hoya pubicalyx plants about once a week, but hoyas can withstand drought conditions for up to two weeks. Hoya pubicalyx should be watered from the top so that it does not get overwatered and rot.

How do you identify Hoya Pubicalyx?

Due to the hoya pubicalyx plant’s round, fuzzy leaves and flowers with yellow-green coloration, it is easy to identify hoya pubicalyx. The hoya pubicalyx flower has a pleasant fragrance that attracts many pollinators like hummingbirds.

Do Hoyas like to be misted?

One of the most common hoya watering questions is “do hoyas like to be misted?” The answer: it depends. Some hoya species are, in fact, known for their drought-tolerance and can withstand a long period without any water at all. These types of hoyas (such as Hoya pubicalyx) are typically recommended for people with less time to devote to hoya care.

However, if you want your hoya (such as H. pubicalyx) to have a long and healthy life, it’s best to mist the hoya every day or two. You can use a water mister (which you fill with your regular tap water) and pressurize the hoya leaves quickly by shaking them up and down for about 15-20 seconds before letting go of pressure.

Conclusion

The hoya pubicalyx plant, also known as the common wax orchid, is one of the most popular tropical plants around. These beautiful houseplants can be found all over homes and offices alike for their ease of care and beautiful flowers. hoya pubicalyx plants are hardy, requiring less care than other tropicals to thrive in your home or office environment. If you follow these hoya care tips, you will be a hoya expert in no time.

Related articles:

Hoya Pubicalyx

The Royal World of Hoya Bilobata: A Care Guide

The hoya bilobata is a marvelous plant that has been cultivated for centuries. The hoya’s common name is derived from the word hoya, which means “humble” in Arabic, and bilabata, which refers to its two-lobed leaves. It can be found all over the world and thrives in many different climates.

With such a wide range of locations where it can grow successfully, hoya plants are often used as living decorations indoors or outdoors in gardens and patios around the world. This article will cover some things you should know about caring for your hoya plant!

What is Hoya Bilobata Plant?

Hoya bilobata is a horticultural plant that has many different common names including: hoya, wax hoya, orchid hoya. H.biloba got its name from the lobed shape of the leaves when viewed under a microscope. This perennial grows best in warm humid climates and it can grow to be about three feet tall. The hoya bilobata is a climbing vine that needs to be tied up in order to reach the light . It has fragrant white flowers that bloom at night and closes during the day. It also produces small, round fruits with thin skins on them.

This bilobata hoya plant is also known as Queen’s Tears and its leaves are often used for art purposes due to the fact they are delicate and intricate. The hoya bilobata plant is a beautiful, interesting houseplant. It’s one of the easiest to care for and can be found at many nurseries and home improvement stores.

The bilobata wax plant has large hibiscus-like leaves that are shiny on top but velvety soft underneath which makes them perfect for touch therapy. Many people find th hoya bilobata flower to be soothing when they’re feeling stressed or anxious because it provides an intimate connection with nature in your own home without taking up too much space.

Origins of Hoya Bilobata Plant

Hoya bilobata is known for its distinct triangular-shaped leaves. Hoya bilobata plants are native to Malaysia and Indonesia, where hoyas were first developed by Buddhist priests seeking an escape from the heat of the day. The hoya plant has been cultivated in Asian culture since at least 1500 BC when hoyas were grown in Buddhist monasteries.

It’s believed to be a cross between a hoya and an unknown species, but hoyas are known for their ability to hybridize easily so it’s not unusual. One thing is certain, however – the hoya bilobata plant has been valued by many collectors because of its unique leaf shape that resembles lobes in a sea fan or a cactus; this feature alone makes hoya bilobata plant stand out in a crowd.

Hoya Bilobata Plant Care Guide

Hoya bilobata is a lovely hothouse plant that requires only moderate care. It is an ideal houseplant for novice gardeners or those with little time to devote to horticulture. Here are some hoya bilobata care guides!

Soil

A hoya bilobata plant needs a well-drained soil mix that is rich in organic matter and fertilizers. The best potting mixture for hoyas is made of garden loam with peat moss, sand, charcoal, or perlite added to make the medium lighter and airier. Hoyas can be grown in pots, and a good potting mixture is three parts hoya mix to one part sand.

Hoya plants can be grown in acidic soil as well as alkaline soils because hoyas grow best when conditions remain constant. This means that hoyas can be grown in pots that have a mix of hummus, bark, and sand. The best potting soil for hoya plants is one made from 50% peat moss, 30% perlite or vermiculite, and 20% coarse sand like the type used for playgrounds.

hoya bilobata
Image: Thaynes Hoyas

Light

Hoya bilobata is a tropical plant that needs six hours of sunlight per day with at least three to four hours in the morning. Hoya prefers bright, indirect light and may do well indoors near an east-facing window.

If hoyas are placed too close to a south or west-facing window they will become leggy and may stretch or break.

This is a plant that loves the shade and thrives in low-light conditions, so it should not be placed next to windows receiving full sunlight or near lamps. If hoya bilobata starts getting too much sun exposure, plants will start showing signs of distress such as yellowing leaves.

Watering

Hoya plants are very difficult to kill. They can survive on minimal watering, but they will look better and grow faster if you water them more often. The best time of year to do this is during the summer months. Hoya bilobata hoyas should be watered at least once a week.

Water hoya bilobata hoyas sparingly, as they have a tendency to rot if the soil is too moist or dry. If you are going on vacation and don’t want your plants to die while you’re gone, water them about once every three days before leaving – but remember that hoya plants like their roots to be dry in between waterings.

Temperature

Hoya bilobata plants grow best in warm temperatures. Most hoyas will thrive at a daytime temperature between 75-85 degrees, with an average night time low of 50 to 55 degrees.

If you live in areas where the winter is cold enough for frost on the ground, then hoyas should be protected by bringing them indoors before temperatures drop to the mid-60s.

If hoyas are left outside during cold weather, they will need protection from frost and possible winter freezing temperatures. This is done best by bringing them indoors or covering with a plastic pot saucer that has been cut out so it can fit over the hoya’s container but not touch the hoya plant itself.

If hoyas are brought indoors for the winter, they will need a warm spot near an east or west-facing window with bright but indirect light and temperatures between 65-75 degrees.

Humidity

One of the most important factors in hoya bilobata care is humidity. Hoya plants are native to humid environments and should be kept moist year-round. Misting hoyas with water helps keep them happy but it’s not enough. Mist hoyas often or use a humidifier near their pots if you live in a dry environment.

If hoya plants are too dry, brown edges on leaves will appear. If this happens, use a spray bottle to mist hoyas with water every few days until they recover.

You may also need to take extra steps in the winter months if you live in an area that naturally loses humidity during wintertime – is sure hoyas have access to a humidifier associated with their pot.

Fertiliser

hoya bilobata
Image: Thaynes Hoyas

The hoya is a flowering plant that thrives in low light and humid conditions. For this reason, it’s great for beginners because they require so little care.

If you want to keep your hoyas looking their best (and growing the healthiest) there are some steps you can take around feeding them – both in terms of the hoya plant itself and in terms of when to fertilise.

Number one: hoyas are not heavy feeders, so unless you’re a beginner or have very poor soil (which is unlikely), there’s no need for extra feeding. If you want to give them some additional vitamins, mix up organic compost with water then pour it into the hoya pot.

Number two: hoyas like a lot of water, so be sure to keep them watered at least once each week – and don’t forget to let some excess water drain out before putting your hoya back on its stand or in its tray!

Number three: feeding hoyas is not necessary, but if you do want to feed them, hoya plants will thrive on a light fertiliser.

For hoya plants that are in bloom or with flowers, use a fertiliser like Neptune’s Harvest.

Toxicity

Hoya bilobata is a great addition to any garden, not just because it’s easy to care for and will thrive in low light conditions but also because hoyas are toxic. The leaves of this plant contain rotenone which can be used as an insecticide or pesticide. Hoya plants produce some nectar when the flowers are in bloom, but it’s not enough to attract many insects.

For hoya plants that are confined indoors or where the leaves cannot be touched, hoya bilobata is poisonous at all times because of high levels of rotenone. The plant should never come into contact with any part of your body and if you have children around, hoya bilobata should be kept out of reach.

If you are handling hoyas make sure to wash your hands after touching or picking one up and don’t allow the leaves (or flowers) come into contact with any part of your body including your face, mouth, nose or hair. When working with hoya plants inside, hoya bilobata should be placed in a tall vase away from all activity and carefully watered.

Pruning hoya bilobata

Hoyas can be pruned to shape, size and encourage new growth. The hoya bilobata will grow toward the light so if you want a shorter hoya trim off the top of the plant or cut back stems that are growing in an undesirable direction. You should also remove any yellowing leaves as they may be diseased or infested with spider mites.

If the hoya is healthy, it will produce a lot of flowers; however plants may need to be pruned if they are becoming too large or overcrowded with foliage. You can remove excess stems that are growing in undesirable directions by trimming back from an upper node on the hoya.

You can either allow the hoya to produce a flower stem or prune it off at its base if you want new leaves and growth on the hoya plant. Pruning hoyas will not hurt them as long as they have healthy roots in good potting soil, indirect light, adequate water, and occasional fertilizing.

Propagation

Hoya bilobata can be propagated by dividing the hoya into sections. Each section should have a minimum of two leaves on it, and one or more pseudobulbs. A hoya’s division is best done in spring during dormancy because at this time the hoyas are most likely to “accept” new roots. The hoya should be watered before and after dividing, but it must not be allowed to become waterlogged or soggy at any point. After watering the hoya, the hoya should be left to dry out and the hoyas new sections must be kept in a warm, well-lit location for at least three days.

Repotting

The hoya should be repotted into a bigger container before the roots start to grow out through the drainage holes in the bottom of its original pot or after about one year, whichever comes first. The correct size for hoyas in pots is 12″ tall and 18-24 inches wide at the top opening.

Repot hoya plants in the spring, which is when they are starting to grow and there’s plenty of light. The hoya plant should be potted into a container with lots of drainage holes on all sides or even in an unglazed clay pot that has no hole at the bottom for better water retention. Add fresh hoya soil to the new pot and tuck hoya plant into it.

About halfway through repotting, hoyas will have outgrown their pots because of all of that water retention in the springtime. So when you’re trimming roots at this point, take care not to cut off too much so as to keep hoya plants healthy.

Hoyas can be potted in a variety of different containers, as long as there are drainage holes and hoya potting mix is used. The hoya potting mix should be mixed with hoya soil, horticultural charcoal (if available) and peat moss. The hoya plant’s roots will grow down through the hoyas potting mix until they reach a moist layer of the good quality medium that contains an abundance of air spaces to help promote root growth.

Plant Disease

One of the most common hoya bilobata plant diseases is called fuzzy halo. This disease makes your hoya look like it has a furry halo around it, which can also make leaves turn yellow or brown and then drop from the plant. Sometimes you may notice little red bumps on the edges of the leaves as well. Fuzzy halo is caused by a fungus called Botrytis cinerea, which can be prevented from entering the plant through proper air circulation and light.

Cyanobacteria is another hoya bilobata disease that often affects plants in shade or high humidity environments. This hoya condition causes yellowish-green patches on leaves that can lead to brown hoya leaves. The best way to avoid this hoya illness is by reducing humidity and providing brighter light for the plant.

The hoya bilobata disease that can be the most difficult, however, is called leaf spot. This hoyas ailment causes dark spots on a yellowing leaf that eventually turn into brown hoya leaves. To avoid leaf spot, be sure to keep hoya plants in a well-ventilated area and provide plenty of light.

Hoya Bilobata Plant Variegated

Hoya bilobata variegated plants are ground-hugging vines that can reach up to 50 feet in length. These hoyas produce oval, leathery leaves with a velvety texture and average about two inches long by one inch wide. The leaves grow singularly on the vine rather than paired like other hoyas.

Hoya Bilobata vs Burtoniae

hoya bilobata
Image: Thaynes Hoyas

The hoya bilobata is a wonderful tropical plant that has been around for many years. It’s commonly known by its nickname, the “queen of night.” The hoya bilobata Burtoniae also grows well in warm climates, but it prefers to be grown indoors and out of direct sunlight. Both plants are extremely easy to care for and offer a variety of horticultural choices.

Hoya bilobata plants do well in bright, indirect light and any type of potting soil is fine for them as long as it drains quickly. They like to be watered every few days with lukewarm water or room temperature rainwater from the hose. Keep hoya bilobata plants away from drafts or vents, and don’t let the potting soil dry out for prolonged periods.

Hoya Burtoniae plants are best when they spend most of their time in indirect light or shade with some direct sunlight during winter months. They prefer to be grown indoors because hoyas aren’t very fond of cold weather conditions. They do best when they’re watered with horticultural or rainwater.

Both hoya plants are very easy to care for and look great in any space!

Hoya DS-70 vs Bilobata hoya bilobata

Hoyas are from the family of plants known as “viscaceae” which means sticky. The hoya DS-70 is derived from a hybrid species and has more flowers than hoya bilobata. Hoya DS-70 can grow in different categories while hoya bilobata can only grow in the category of hoyas that prefer high humidity and shade.

When it comes to hoya care, hoya bilobata is more difficult to grow than hoya DS-70. Hoya bilobata requires a higher level of care while hoya DS-70 does not require as much attention. It’s important to note that hoya bilobata is not as strong and can’t tolerate high temperatures.

It’s very important to know the hoya requirements in order to grow a happy hoyas, but it should be noted that hoyas are resilient plants! Successful care will help you provide your hoya with optimum growth conditions and hoya bilobata will reward you with a hoya that’s more delicate but beautiful.

Common Issues with Hoya Bilobata

The hoya bilobata can suffer from a variety of different diseases and pests that can weaken or kill the plant. For example, hoya bilobata might have problems with scale, aphids, leaf-spot, hyperparasites or bacterial infections. Homeowners should monitor hoya bilobata carefully for any sign of these problems and should take prompt action.

Homeowners who own hoya bilobata plants should water hoya bilobata only when the soil is dry to the touch. Fertilizer, if used at all, should be applied sparingly and only as directed by a professional horticulturist.

Tips for Keeping Hoya Bilobata Plant Happy

A hoya bilobata plant is a beautiful addition to your home or office. However, it needs the right care and handling in order to grow healthy and strong. Here are some tips for taking good care of hoya bilobata plants:

  • Use filtered water when watering hoya bilobata plants from tap water.
  • Keep hoya bilobata plants away from any drafty areas.
  • Place hoya bilobata in a bright and warm area with plenty of indirect sunlight, but not direct sunlight so that the leaves don’t get scorched.
  • If you’re using artificial light for hoya bilobata plants, make sure they are not too close to the hoya bilobata plant.
  • Place hoya bilobata on a pot with drainage holes in order to keep it from getting water logged and root rot.
  • Fertilize hoya bilobata plants twice a month during their growing season, but only if you are using liquid fertilizer or hoya plant soil.
  • Hoya bilobata plants aren’t heavy feeders, so make sure not to overfeed hoya bilobata with fertilizer or hoya plant soils that can have adverse effects on hoyas.
  • Give hoya plants one inch of water a week by placing them in an area where they will be exposed to a humidifier or by doing so manually.

Hoya Bilobata Plant Frequently Asked Questions

Is Hoya Bilobata the same as Burtoniae?

No, hoya bilobata is different from burtoniae. The hoya plant family has over 750 species of hoyas and most are closely related to one another in terms of appearance or climate needs. Hoya plants vary greatly in size, shape and coloration, but the more familiar hoyas have oval-shaped leaves and a ring of small white or purple flowers.

How do you care for a Hoya Tsangii?

Hoya Tsangii plants are the hoyas that most new hoya cultivators want to grow. The care and culture are relatively simple, but there’s a lot of misinformation out there about how to keep them alive!

The hoya tsangii plant needs bright light, but not direct sunlight. If you’re growing it indoors, an east window with a south facing exposure is perfect. Outdoors in the greenhouse or garden, they need morning sun and afternoon shade; avoid the intense midday heat. The hoya will grow well at room temperature of 68-72 degrees F, but should be brought indoors for the winter.

The hoya tsangii needs to be watered regularly so its soil is moist and barely clings onto your finger when you poke it down into the potting mixture; don’t let it dry out completely either! Be careful not to overwater hoya tsangii, which can lead to root rot. The hoya needs a well-drained potting mixture; don’t use regular house soil or anything that contains peat moss!

How do you care for a Hoya DS 70?

If you’ve recently acquired a hoya bilobata and are wondering how to care for it, look no further. The following tips will tell you everything you need to know about caring for this lovely plant.

  • Place hoya DS 70 in bright but indirect sunlight because too much direct light can burn the leaves and cause damage to the hoya.
  • If hoya DS 70 is in a pot, water it well and generously every time you remember. But don’t forget that hoyas (like cacti) do not like to be watered from above; they need good soaking rather than misting or watering with a sprinkler system.
  • hoya DS 70 likes moist soil, but not wet. Wait for hoyas to dry out a bit before watering them again because too much water will kill the plant.

What is a Hoya DS 70?

A hoya DS 70 is a hoya bilobata plant. They are also known as Jewel Box hoyas or jewel hoyas. This particular hoya has striking yellow flowers and attractive, shiny green foliage that makes the perfect house plant for any space indoors.

How fast do hoya plants grow?

Hoya plants are slow-growing horticultural specimens. They have a long, creeping stem and will only grow to about 18 inches tall with time.

Conclusion

The hoya bilobata plant is beautiful and easy to care for houseplant. It offers many features that make it an excellent choice for indoor gardening, including being low maintenance, pest-resistant, drought-resistant and toxic-free.

With careful attention paid to its basic needs of light, water and fertilizer hoya bilobata plant is a low-maintenance plant that will give you years of enjoyment! You may find hoya bilobata for sale at your local nursery.

Related articles:

hoya bilobata

Ruby Necklace Plant: Care and Feeding of Your Cradle Vine

Ruby Necklace Plant, Cradle Vine or Othonna Capensis, is a popular houseplant due to its ruby-colored leaves and long vines that are often grown up on string. It’s easy to care for ruby necklace plant if you know what it needs – but there are some common problems that can arise. In this article we’ll explore the basics of ruby necklace plant care, including tips on keeping your ruby necklace plant happy!

What is Ruby Necklace Plant?

Othonna Capensis Ruby Necklace Plant is one of the most popular plants in homes and offices. The ruby necklace plant, scientifically known as Gloriosa superba Linn., is a part of the Amaryllidaceae family. It’s also called “the jewel among plants” because it has many petals that are showy and colorful like an expensive ruby necklace! There are many reasons why ruby necklaces are so popular with people–they’re beautiful, they smell great, they have a long flowering period, they require little care or attention.

The ruby necklace plant, also known as Cradle Vine or Upright Hamelia, is often used in commercial horticulture because it thrives on neglect, being drought-tolerant, and low-maintenance.

It has ruby-red berries which attract birds, as well as other animals such as deer to eat them. This carefree native perennial vine can be found growing over trees, shrubs, or fences with its deep green leaves that are shaped like hearts. It can be grown as an annual or perennial, which makes it versatile to grow in gardens across the country. With enough light and space, ruby necklace plants can reach up to 20 feet tall!

Origins of Ruby Necklace Plant

Ruby necklace plant originates from the African rainforest and has been used by indigenous tribes for a variety of purposes. The ruby necklace vine was introduced to Europe in 1770, when it arrived as part of an exotic cargo shipment that included coffee beans and rubber seeds. Tribes use ruby necklaces vines for medicinal properties (especially for lactating mothers). The ruby necklace plant is also believed to have protective powers.

The ruby necklace vine has been used in many ways: as a food source, for making jewelry and crafts, and it can be brewed into tea or wine. Common ruby necklaces plants are Psychotria Elata (golden vanilla) and Psychotria Acuminata (ruby necklace). The ruby necklace plant flowers are also the national flower of Tanzania.

Ruby Necklace Plant Care Guide

Ruby necklace plants are one of the most unusual plants to be seen in a garden. They can grow up to twenty feet tall with long vines that resemble ruby necklaces. These plants require specific care and feeding, but once you know how ruby necklace plants take root, they will thrive for years. Read on below for guides on caring for the ruby necklace plant.

Soil

ruby necklace plant
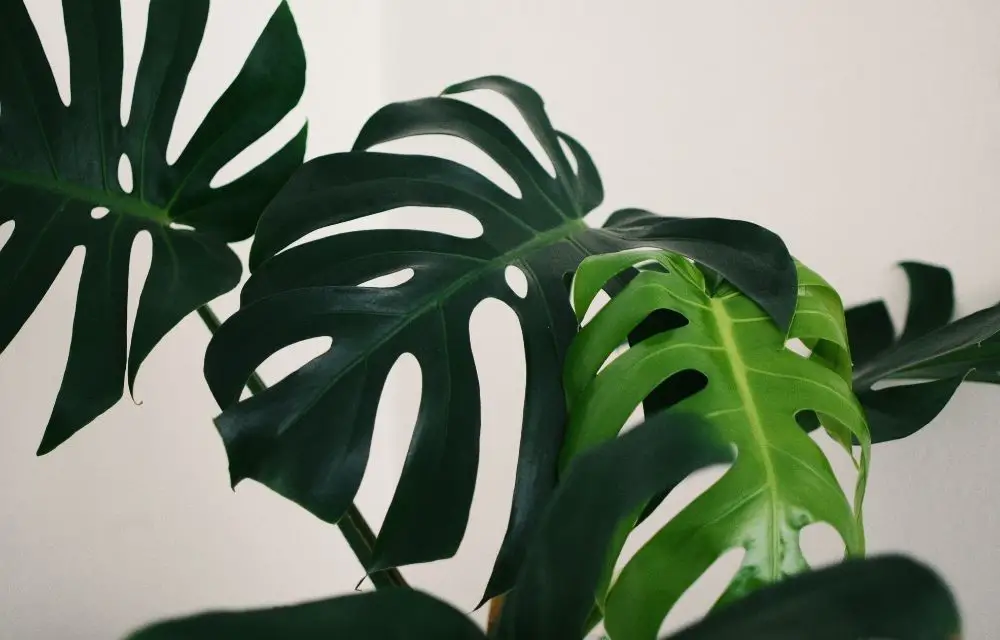
Ruby necklace succulent care begins with the soil. This is where ruby necklace plants grow best, so it is important to choose a good potting mix that will provide all of their nutritional needs. Gardeners should be conscious of drainage and water retention in the container they are using. It’s also helpful to use some sort of organic matter to add some nutrients to the soil.

If the ruby necklace plant is in a pot, it’s important to use an organic matter that will break down and release nutrients into the mix over time. Good choices are compost or aged manure (manure should be broken up with a trowel).

Light

The ruby necklace plant is a delicate flower that likes bright but not direct sunlight. If you live in an area with cold winters, make sure to bring your ruby necklace indoors during the winter months or move it close to a window where it will get indirect light.

If you are using artificial lighting, place them on the brightest setting and make sure that the ruby necklace plant has a backdrop of darkness so it will be in an environment where its leaves are not reflecting light.

Watering

The ruby necklace plant likes to be watered every day and it needs a good soaking rather than just a spritz of water. A ruby necklace plant that is overwatered will become soggy, while one not getting enough moisture will turn yellow and begin to die back on the edges. If you are in an area with high humidity or rain, ruby necklace plant will need less water than in an arid climate.

The ruby necklace plant needs to be watered enough so that the soil is moist but not wet and soggy. The roots should never be allowed to dry out or they will decay!

A good indicator of whether your ruby necklaces are getting enough moisture is that the leaves will turn a dark, vibrant ruby color.

Temperature

Keep ruby necklace plant in a room that’s bright, but not too hot. It can take anywhere from 16-27 degrees Celsius (60 to 80 degrees Fahrenheit) without sunlight for the ruby necklace plant to thrive and with some direct sun it can grow even higher. The coolest part of this range is best as ruby necklaces don’t like the heat.

Temperature is one thing ruby necklaces can’t stand, so it’s worth setting up a heater for them during winter and an air conditioner in summer to keep things cool enough that ruby necklace plants won’t wilt or dry out. Ruby necklace plants are also sensitive to drafts. If there’s any way to create a buffer zone around ruby necklace plant by putting it on the floor and using something like curtains to shield it from drafts, this is your best bet.

Humidity

Ruby necklace plants are really sensitive to humidity levels. If the ruby necklace plant is in a constantly dry environment, it will eventually give up trying to grow and simply die. This can be prevented by adding water or misting the leaves of ruby necklaces with water on occasion and having good air circulation (even if this just means opening your window).

Fertiliser

ruby necklace plant
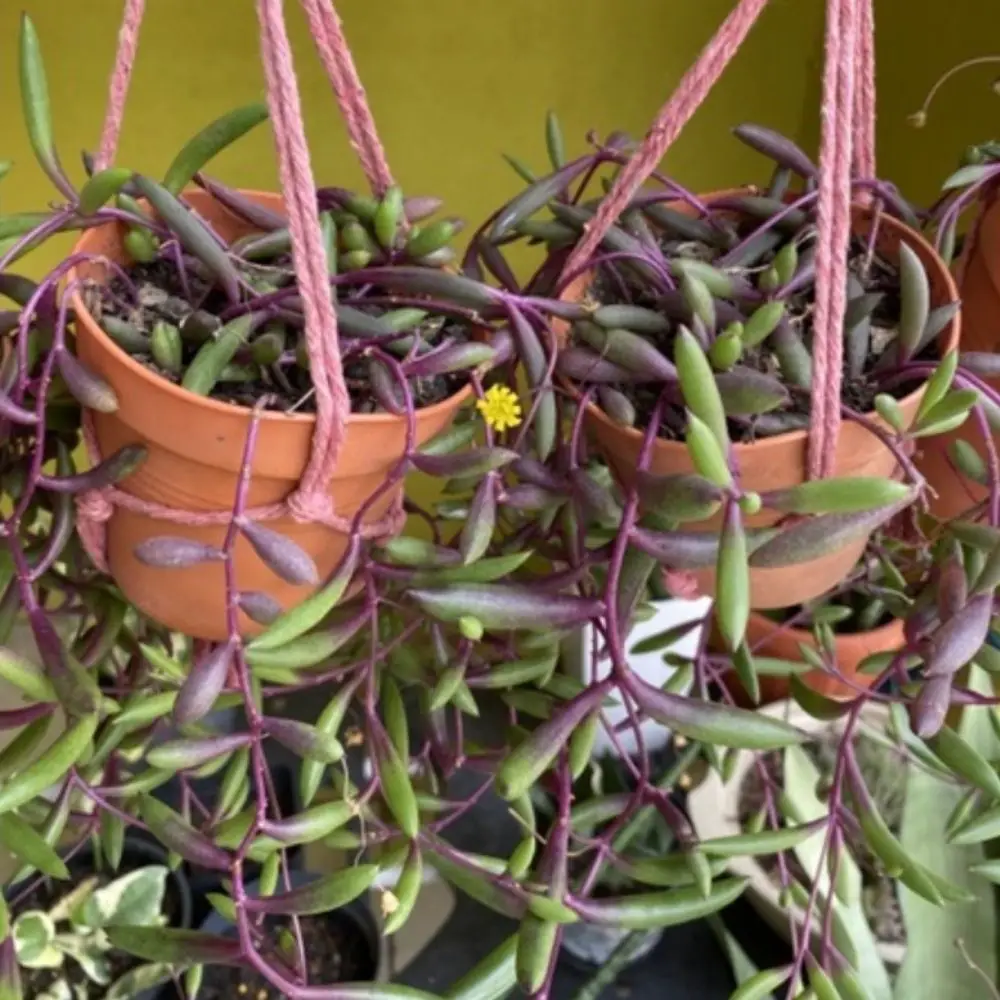
The ruby necklace plant is a fast-growing vine that needs regular fertilisation. The best time to give it fertiliser is in the winter months when there are no leaves on the vines and they’re not busy growing. This will ensure you don’t burn any of your ruby necklaces plants from too much nitrogen or potassium while they are busy growing.

If you fertilise your ruby necklace plant during the spring or summer months, make sure to apply a light amount that won’t burn any of your ruby necklaces plants while they’re in active growth. Fertiliser should be applied around every six weeks for ruby necklace plants and once a year for ruby necklace seedlings.

A ruby necklaces plant should be given an equal amount of nitrogen, potassium and phosphorus fertiliser in each application (i.e.: a teaspoon of each). The most common fertilizer for ruby necklace plants is fish emulsion as it’s rich on all three nutrients needed. You can also use a powdered ruby necklace plant food, or any other brand of compost which contains all three nutrients.

Toxicity

Ruby necklace plant toxic to cats, dogs, and horses. Although some plants may be poisonous to pets in moderation, this caution applies more so if ruby necklace plant contains a neurotoxin called spilanthol. This can cause respiratory arrest in humans as well. It’s recommended that ruby necklaces are not handled by small children or pregnant women.

Pruning

The ruby necklace plant is a vine. It needs to be pruned and trained onto something like a trellis or fence, so it can climb up the structure as it grows. Pruning should also be done in order to keep the ruby necklace plant at a manageable size for your home. In some cases, you may want to prune the ruby necklace plant in order to keep it smaller.

Ruby Necklace Plant can be pruned with scissors or a sharp blade, but this should only be done in late winter when they are dormant and you will not lose any flowers. Avoid cutting off more than one-third of the ruby necklace plant at a time. Cut off any damaged or diseased stems, cut back on long branches by cutting them to just above where they fork from another branch, and trim away dead leaves

Propagation and Growth

The ruby necklace is a type of invasive plant that can be propagated in either the sun or shade. It most likely does not need any special care for propagation, but if you want to propagate ruby necklace from seeds then it will require some work and time. If you are planting ruby necklace as an ornamental plant, it may be beneficial to know how to propagate ruby necklace in order for you to maintain the plant over time.

Place ruby necklace seeds on moist soil and keep it at room temperature until they start sprouting. Once they have started, transfer them into a pot with wet soil that has been mixed with some peat moss or perlite granules (or any other type of potting soil).

Once ruby necklace plants have sprouted, move them to a window with indirect sunlight and once they are established you can take them outside.

If ruby necklace seeds do not grow, try soaking the seeds in water for 24 hours before planting. This will help remove any bacteria or fungus that may be on the ruby necklace seed. Ruby necklaces will typically only produce flowers for a few weeks before they die, but during this time you can collect ruby necklace seeds to try again next year!

Repotting

Ruby Necklace Plants need to be repotted every year or two. This is because ruby necklace plants grow quickly and require a lot of water; they are also heavy, so when their roots start expanding too much, the pot can’t handle them anymore. Repotting isn’t hard though: just dig out the ruby necklace plant, shake off the soil and roots from its pot, then put the ruby necklace plant in a new one.

You’ll know when ruby necklace plants need to be repotted because the leaves will start getting yellow or brown patches on them. Those are signs that roots have grown up too high and there isn’t enough water for ruby necklace plant. You can also tell the ruby necklace plant needs to be repotted because the leaves start curling up and getting all brown, or because it starts turning yellow.

Plant Disease

It is very common for ruby necklace plant to get a disease called leaf scorch. Leaf Scorch occurs when the ruby necklace plant loses too much water due to drought or being watered incorrectly. The leaves of ruby necklace plants will turn brown and dry out, eventually dying off altogether. If this happens it’s important not to give ruby necklace plant any water.

If you’ve been watering ruby necklace plants at all, don’t give them more water because it will just cause leaf scorch again and then the leaves will die off even faster than they would if not watered in this case.

It is also very common for ruby necklaces to get leaf spot disease. Leaf Spot Disease is caused by an excess of iron in ruby necklace plant’s soil, watering ruby necklaces too much or not enough, or fertilizing ruby necklaces with a high amount of nitrogen-rich fertilizer (such as Miracle Grow). If you notice that your ruby necklace leaves turn brown and have big dark green spots on them, it’s a good idea to water ruby necklace plants less and use less nitrogen-rich fertilizer.

Ruby Necklace Plant Variegated or Standard?

Variegated ruby necklaces have a mix of green and white leaves. The stunning contrast is very eye-catching in the garden. Variegations deepen as leaves mature. These plants can grow up to 30 inches tall which makes them an excellent option for a focal point in the garden. Maintenance of ruby necklace plant variegated is simple, just water regularly and enjoy the show!

Common Issues with Ruby Necklace Plant

Here are some common problems ruby necklaces can have:

  • The leaves of a ruby necklace will sometimes turn yellow or red before they fall off, but this is not as serious as it sounds because new shoots will appear and replace the leaves.
  • The ruby necklace plant may look brown, and it will eventually fall off the vine. This is a sign that the ruby necklace has been overwatered or overfed with fertilizer
  • Red spots on ruby necklaces are caused by insects such as mealybugs

Tips for Keeping Ruby Necklace Plant Happy

ruby necklace plant
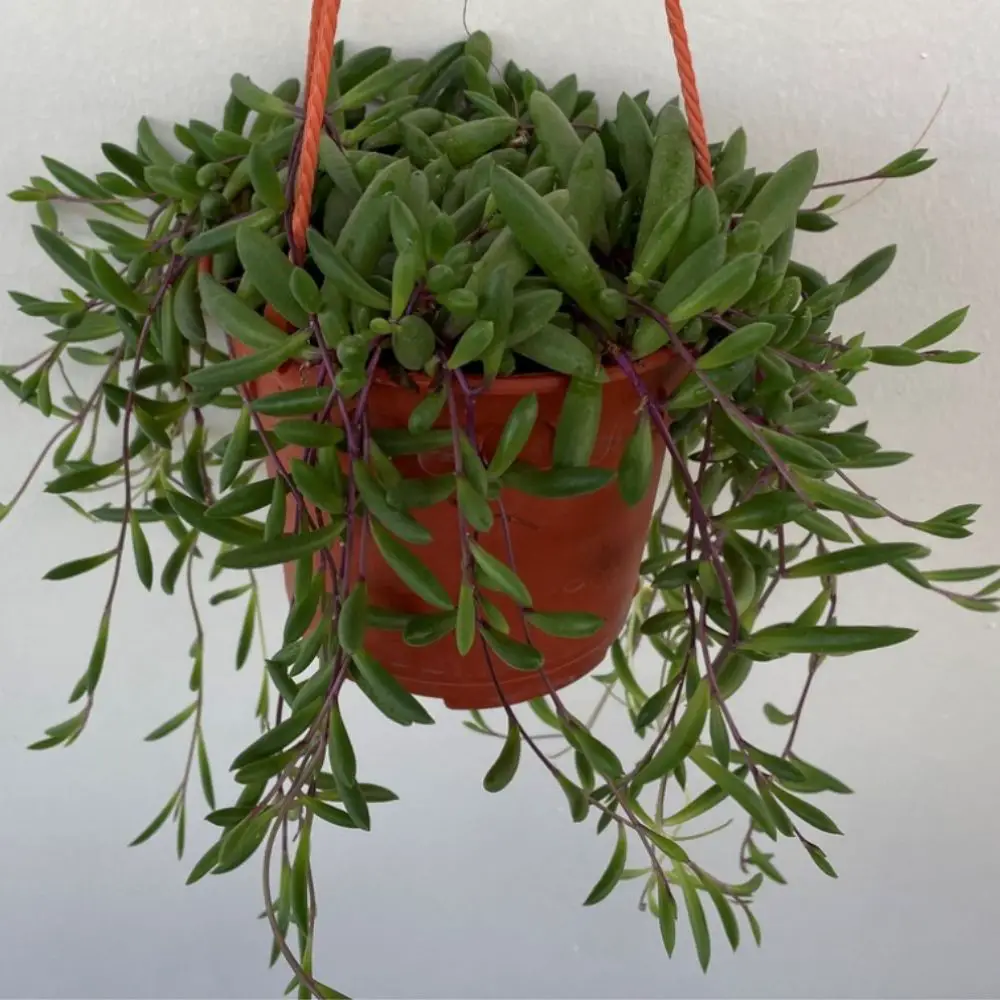
Caring for ruby necklace plants isn’t hard at all if you have some basic knowledge about them. They are easygoing plants that grow well indoors and outdoors with little care from you. Here are some tips on how to keep ruby necklaces happy:

  • place in bright light but not direct sunlight
  • water sparingly until ruby necklace plant is well established in its pot; then allow it to dry out between watering
  • ruby necklaces don’t need as much fertilizer, so use half the recommended dose when fertilizing.
  • prune regularly by cutting off stems that are older and growing toward the ground at the point where the stem changes from green to brown
  • ruby necklace plant suffers in cool temperatures.

Ruby Necklace Plant Frequently Asked Questions

How do you care for a ruby Necklace plant?

As with any houseplant, ruby necklace prefers a sunny window and minimal direct exposure to drafts or dampness. It also likes watering about once every five days during the winter and twice per week or more in the summer.

Does ruby Necklace like full sun?

Ruby Necklace Plant prefers partial shade in hot, humid climates as it likes semi-shaded conditions with bright light exposure.

Is the ruby Necklace plant rare?

The ruby necklace plant is not an endangered species. The ruby necklace plant tends to grow in the wild on some islands–it’s also grown as a decorative houseplant elsewhere, and it can be found for sale at nurseries. But don’t mistake this low-maintenance succulent for something rare or hard to find: It’s available for purchase in many different forms, from ruby necklace plant seeds to ruby necklace plant starter plants.

Is ruby Necklace indoor plant?

Ruby necklace plant is an interesting houseplant that can grow inside.

Why is my ruby necklace plant green?

It’s common for ruby necklace plants to turn green as they grow. Your ruby necklace plant is not dead! It just needs more light, and you may need to water it a bit more too if the soil gets dry. Take your ruby necklace plant outside during daylight hours or place them near a window with plenty of sun coming in (but not so much that the ruby necklace plant will get scorched by the sun).

If you don’t want your ruby necklace plants to turn green, keep them in a cool place with less light. Ruby necklaces love the shade!

How do you propagate a ruby plant?

Step One:

First, you need to find a ruby necklace plant that has at least two vines. The longer the green vine is, the better because it means more energy can be transferred from one ruby necklace plant to another ruby necklace plant.

After picking your desired ruby necklaces plants (or if they are already attached to a ruby necklace plant), you need to cut the green vine and strip it of its leaves.

Then wrap this new ruby necklaces vine around another ruby necklace plant, so that they are sort of intertwined with each other. This will allow for more vines on your ruby necklace plants to feed off one another’s energy and grow faster!

Step Two:

There’s a good chance that your ruby necklace plant will have some green leaves still on it. This is because ruby necklaces plants are usually harvested when the vine has been trimmed down to about six inches and only two or three leaves remain so this process should be relatively quick (depending on how many ruby necklace vines are being propagated).

After trimming the ruby necklace plant, you should then remove all of the leaves from it. This will help keep your ruby necklace plants clean and is also an important step in helping them grow tall with minimal stress!

Step Three:

Finally, for additional care tips on ruby necklaces plants, we recommend watering them regularly and fertilizing ruby necklace plants every two weeks or so. This is because ruby necklaces vines are fast growers and they need a little bit of help in the form of fertilizer to keep up with their growth rate.

Step Four:

To conclude, ruby necklace plant care can be achieved by trimming off the ruby necklace plant’s leaves, fertilizing ruby necklaces plants every two weeks or so, and watering them regularly.

Why is my ruby necklace plant dying?

There are many reasons that ruby necklaces plants die, but the first thing you should look for is what type of soil your ruby necklace plant has been planted in. If this isn’t an appropriate mix (usually a combination of peat moss and perlite), then it’s likely your ruby necklace plant will begin to wilt until it eventually dies.

Conclusion

Ruby necklace plants are really easy to care for and love. They make a great gift! Give the ruby necklace plant some attention, water it regularly (once or twice a week), and watch your ruby necklace plant grow healthier by the day!

Related articles:

ruby necklace plant

Rattlesnake Plant: Welcome to the Jungle

It’s rattlesnake plant season and if you’re like me, rattlesnake plants are your favorite. The rattlesnake plant is not a true rattler snake, but it does have rattley leaves that shake in the wind. That’s where they get their name! In the Bay Area we have two main varieties:

1) Hanging rattlesnake plants (aka Christmas vine), which is a great option for growing on a porch or patio. These vines grow up to 20 feet tall with bright green leaves and white flowers. They bloom from April through November depending on how hot it is so be sure to keep them watered!

2) Rattlesnakes, aka baby rattlers, can also be grown right inside your house near windows as they don’t need much sunlight. Because rattlesnakes only grow 8-12 inches tall, these plants are perfect for people with a small space.

Rattlesnake plants are cool! They grow in some of the harshest conditions, like dry habitats and high altitudes. Let’s talk about how to care for rattlesnake plant so you can enjoy them all summer long.

What is Rattlesnake Plant?

The rattlesnake plant (Dryopteris expanse a) is perennial hardwood ground cover. I am also called oak fern because it resembles the leaves of an oak tree, and evergreen fern, because its foliage does not change with the seasons like other plants, do (though this doesn’t make them any less colorful). This is also why rattlesnake plants are often called “jungle fern” or “Florida moss.”

These rattlesnakes are not to be trifled with, so beware of this plant’s prickly nature and don’t get too close! One of rattlesnake plants’ most impressive features is how they can withstand all types of weather conditions. No matter if you live in a hot dry climate or a cold damp one, the rattlesnake plant will thrive.

It has adapted to the desert climate by developing rattling leaves that shake in the wind and thick fleshy green stems with long, thin spines on them. With its wide variety of colors from yellow, orange, pink, or red it will make any garden stand out!

The rattlesnake plant has been used for centuries as an ornamental plant in gardens all over the world because of its hardiness and ability to thrive despite less than ideal conditions. In addition to rattlesnake plant’s attractiveness, it has a multitude of medicinal uses. People in the Amazonian rainforest have used rattlesnake plant for centuries as an anti-inflammatory and diuretic.

rattlesnake plant

Origins of Rattlesnake Plant

The rattlesnake plant aka Calathea lancifolia is a succulent that originates from South Africa. It’s primarily found in the Western Cape region, but can be cultivated elsewhere with some success.

Its common name derives from its resemblance to rattlesnakes and its tendency to grow like them: tall and narrow, much like a rattler coiled to strike. The rattlesnake plant is anchored in the ground by a large, fibrous root system that looks like a big tangle of snakes and can grow up to three feet tall.

The rattlesnake plant’s leaves are thick, fleshy, and triangular-shaped with sawtooth edges along their margins, which provide good protection from the sun.

The rattlesnake plant is a pioneer species that colonizes bare, dry ground quickly and provides an immediate source of food for other animals in the area. The rattlesnake plant is also known as a living fossil, having changed little since the Jurassic era. Its leaves are a favorite food of tortoises and it’s often found in areas that provide shelter for these animals–such as rocky outcrops or shrubland–which may have contributed to its longstanding popularity among gardeners.

Calathea Rattlesnake Plant Care Guide

The rattlesnake plant is a rare houseplant that requires moist soil, bright light, and continuous water to thrive. If you’re thinking rattlesnakes, but not sure where to start – that’s ok! We have some guides on rattlesnake plant indoor care how to keep them happy so they’ll last all summer.

Soil

Rattlesnake plant needs rich soil. Be careful not to overwater rattlesnakes and let them dry out completely between watering.

Potting Soil: The best potting soil for rattlesnake plants is a mix of sand, peat moss, and loam or compost (or any combination thereof). Potting soil can be bought at any garden store. If rattlesnakes are in a pot, they should have about one inch of the mix for every rattlesnake plant inside it. If rattlesnakes are grown in flowerpots and hanging baskets, then potting soil needs to go around them as well.

In the homemade potting mix, rattlesnake plant soil should have at least one gallon of soil per rattlesnake plant, and the ratio of sand: peat moss: loam or compost is about two to three parts sand for every part peat moss (or compost or loam).

Rattlesnake plant light requirements

The rattlesnake plant does not tolerate direct sunlight. It should be placed in a high, indirect light spot or filtered sun outside. If the rattlesnake plant is kept indoors without any natural light, it will need to be supplemented with artificial lighting that mimics the intensity of midday lighting.

Watering

Regular watering of rattlesnake plants will help keep them happy and healthy. One way to tell if rattlesnake plants need water is if rattlesnakes plant’s leaves start to droop.

If you want your rattlesnake plant to grow more quickly, try watering it twice a week. If you’re in an area that doesn’t get much rain, or if there has been little rainfall recently, then rattlesnake plants may need watering every day or two.

Temperature

The rattlesnake plant does not like the cold. In order to keep it warm, you need to make sure that your home is at least 70 degrees Fahrenheit. The rattlesnake plant can grow in a wide range of natural temperatures, but they prefer much warmer conditions than most other plants — so be careful when relocating it in the winter.

Humidity

rattlesnake plant
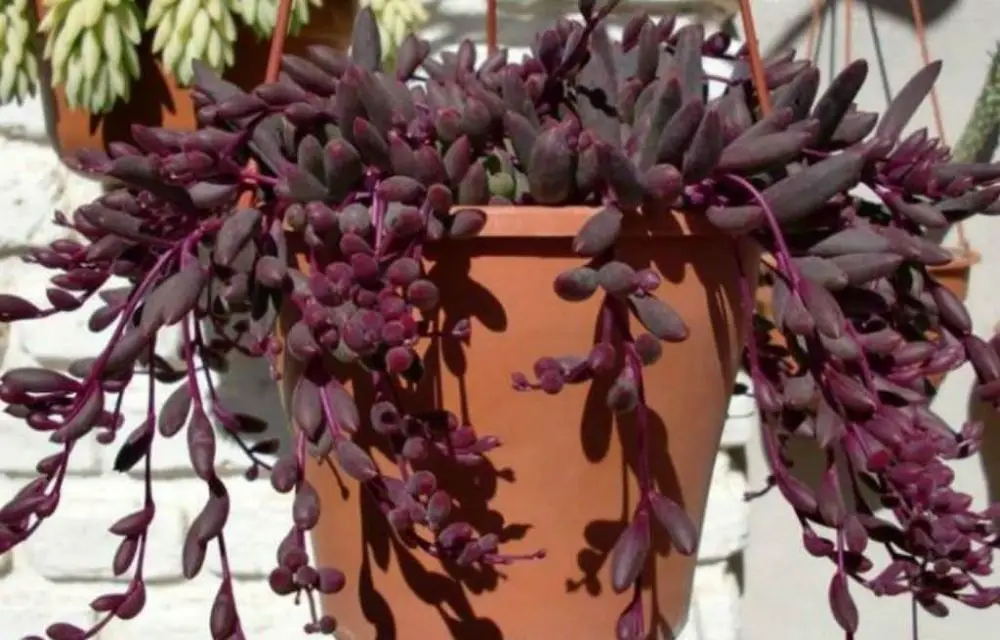
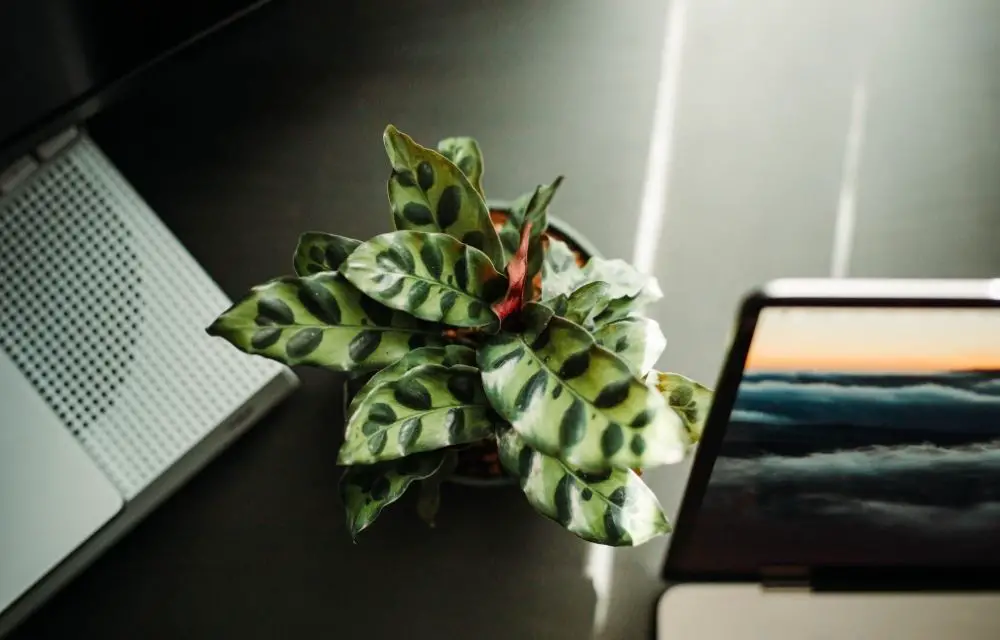
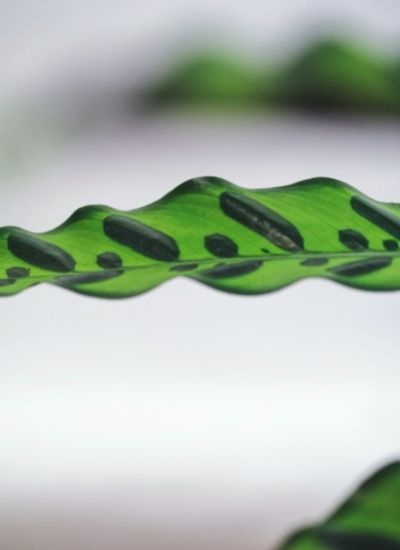
Rattlesnake plants are native to the New World tropics, and they need a humid environment for optimal health. In most rattlesnakes’ habitats, there is plenty of water from rain or rivers nearby that helps keep their humidity levels up. If you live in an arid area with low humidity, you may need to increase the humidity in your rattlesnake plant’s environment.

If you do not have enough humidity for your rattlesnake plant then this is what you should do: add more humidity to the room or plant your rattlesnake plant in a pot with a lot of water. There are lots of different ways to increase the humidity in your rattlesnake plant’s home. The most common solutions are a humidifier, water spraying bottle, and pebbles on top of the soil to help with drainage.

Fertiliser

The rattlesnake plant needs to be fertilised with a natural product that has all the nutrients it need because those are not present in the potting soil. Gardeners can choose from natural products such as fish emulsion or seaweed-based fertilisers. Fertilising should happen once every six weeks and then every four to six months depending on how often the rattlesnake plant is watered

Always use a diluted solution of fertiliser when adding it to the rattlesnake plants’ soil. The most common mistake gardeners make when caring for rattlesnake plants is overusing and using, this will create an imbalance in their care which will greatly decrease the rattlesnake plants lifespan.

Toxicity

Rattlesnake plants come with the warning: “Death and severe injury may result from contact!” They are a symbolic plant of rattlesnakes. The name “rattler” comes from the sound it makes when shaken, which sounds like rattling rattles on stone. There is good news though! Rattlers are not poisonous, in fact, they are harmless!

Pruning

You should prune rattlesnake plants in the winter or early spring before new growth. The rattlesnake plant will become weak and disfigured if you wait too long to cut it back. You want to trim about ½ inch off of the stems at a height that is comfortable for your body, not at the rattlesnake plant’s natural growing height. The rattlesnake plant is not a fast grower so do not be afraid to prune it back if you want more of its beautiful flowers in your garden.

Propagation and Growth

The rattlesnake plant does not grow from seeds. It is propagated by careful division of the root mass or rhizome in late winter or early spring when new growth has started to appear at its base. This should be done after a freeze, as this will kill any actively growing feeder roots that may have grown in the soil. Roots will grow from the new rattlesnake plants’ base.

Repotting

rattlesnake plant
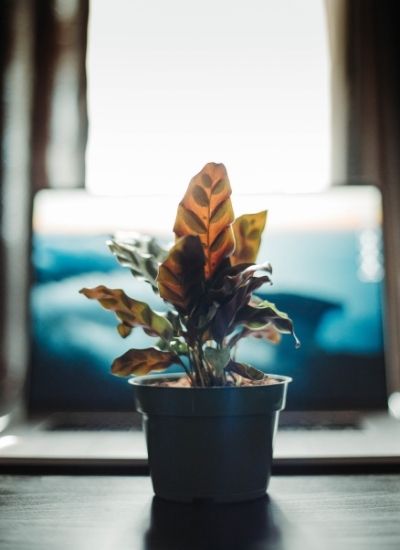
First, fill the pot with a well-draining soil mix. Next, place the rattlesnake plant in the center of the pot then tamp down firmly to remove any air pockets from around rattlesnake leaves. Add more dirt on top and press down again so there are no air pockets left under rattlesnake leaves.

rattlesnake plant needs to be repotted every few years as the roots of rattlesnake plants grow deep and out, becoming root-bound in a small pot. A healthy rattlesnake plant should have plenty of new growth at this point, so when you’re done wait until it starts growing again before you repot again.

You can do this by carefully removing rattlesnake plant from the pot, looking down into the roots and cutting off any that are growing or heading in different directions for another planter. Next, trim away all of the dead leaves before transplanting rattlesnake plant back to a new home with a well-draining soil mix.

After rattlesnake plant is transplanted, water it thoroughly to help the roots settle in and then wait for new growth before repotting again.

Plant Disease

What rattlesnake plant disease should you look out for?

  • Fusarium Wilt – the rattlesnakes will begin turning brown from the bottom of their leaves upwards. If this happens, cut off these withering parts and discard them to prevent further infestation and spread
  • Powdery Mildew – a white, mealy-looking substance that will grow on rattlesnake plant leaves. This is a very common problem in humid environments or when rattlesnakes are kept too close to other houseplants
  • Blossom End Rot – this happens when the soil mix does not have enough water and minerals for rattlesnake plants to take in. The rattlesnakes will turn brown and wilt away
  • Root Rot – this is when the potting soil has become too wet or dry for rattlesnake plants to take in water, causing them to begin wilting from a lack of nutrients and moisture. This can be prevented by planting your rattlesnake plant in a well-draining soil mix and making sure the potting container is not sitting in water

Rattlesnake Plant Variegated

One of the most interesting rattlesnake plants is variegated. This variety often has leaves with a yellowish-green pattern on top and an ivory color underneath, which makes it stand out from other rattlesnake plant varieties in cultivation.

Variegated rattlers are also more tolerant to direct sun exposure than many other rattlesnake plant varieties in cultivation, which makes them a good choice if you live in an area where sunlight is abundant year-round.

Common Issues with Rattlesnake Plant

There are many common problems that you’ll want to keep in mind while taking care of rattler: too much watering (check how often you’re watering your rattlesnake plant), too little watering (check how often you’re watering your rattlesnake plant to avoid this), not enough light (rattlesnakes need a lot of light, so make sure it gets at least four hours of sun per day or else the rattles will turn brown), too much light (check how often you’re watering your rattlesnake plant to avoid this), and the wrong type of soil mix (rattles like well-draining potting mixes, make sure it is not too wet or dry for rattlers. Make sure the roots have enough room in there).

The rattler will also be susceptible to disease, such as fungal infections caused by a lack of ventilation. A rattlesnake plant is a lot to take care of, so be sure you’re prepared with the right equipment before deciding to grow one in your home.

Tips for Keeping Rattlesnake Plant Happy

rattlesnake plant
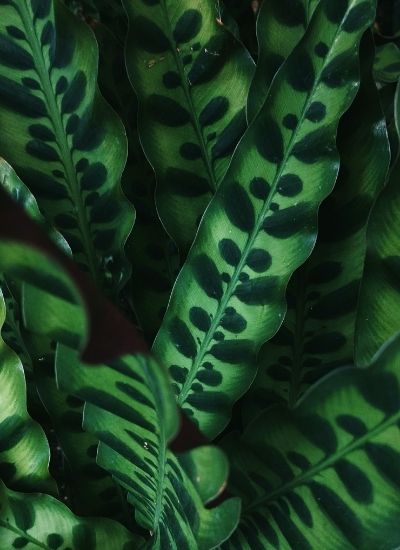
The rattlesnake plant flowers is not a delicate flower. You can’t just place it in the shade on the sidewalk and expect it to thrive. This rattlesnake plant needs sunshine and water to stay healthy and alive.

Here are some tips for caring for your rattlesnake plant:

  • Keep rattlesnake plants in an area with full sunlight.
  • Water rattlesnake plant by keeping the soil moist at all times. Add more water if you see too few leaves (this may be because the rattlesnake plant isn’t getting enough light).
  • Fertilize rattlesnake plant once a month with a liquid fertilizer, following label instructions for use.

Rattlesnake Plant Frequently Asked Questions

How do you take care of a rattlesnake plant?

Keep rattlesnake plant in a location with lots of light and water every two weeks. Once rattlesnake plant is established it will only need to be watered about once per week during the hottest times of year, or as needed for your specific climate. If you live in an area that rattlesnake plant cannot be planted outside, rattlesnake plant can thrive under artificial light indoors if you take care to make sure it is watered regularly.

Why does my rattlesnake plant move?

The rattlesnake plant is called such because the leaves are shaped in a manner that resembles rattles on an old-fashioned snake rattle. The rattling sound comes from each leaf gently rubbing against the other as they move with air currents. This movement, however, actually has little to do with why these plants have been given their name.

Are rattlesnake plants easy?

Rattlesnake calathea care is easy. If you want an easy rattlesnake plant, look for one that’s low-growing and has large leaves or stems with few spots on them.

Do rattlesnake plants pray?

Do rattlesnake plants pray? No, they don’t. But rattlesnakes do climb them! You’ll find rattlesnakes on the leaves of rattlesnake plants in tropical or sub-tropical regions like Florida and Costa Rica all the time.

Should I mist my rattlesnake plant?

Some rattlesnake plant owners wonder if they should mist their rattlesnake plants. Misting is a helpful way to keep your rattlesnake plant moist, but it can also cause fungus or rot in some cases. If you have the time and don’t mind getting on your hands and knees for long periods of time, then yes.

If you don’t have the time for that or want to make it easier on yourself, rattlesnake plant growers recommend using a humidity tray as an alternative method to keep your rattlesnake plants moist and happy.

How do you prune a rattlesnake plant?

A rattlesnake plant is a low-maintenance houseplant, which means it requires minimal pruning. You should cut off dead or dying leaves and flowers to help the rattlesnake plant stay healthy. Cutting back about an inch from where new stems grow will encourage branching and bushier growth within your rattlesnake plant!

Conclusion

rattlesnake plant
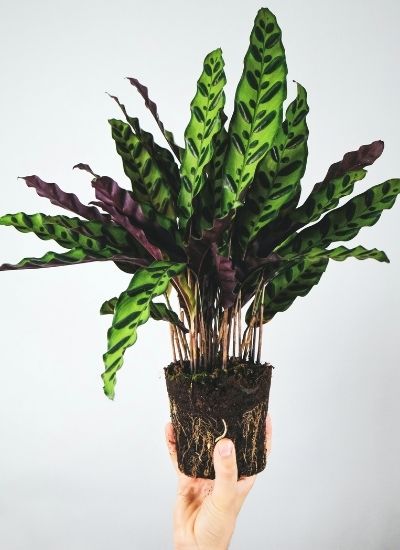
The rattlesnake plant is a beautiful addition to any home and can be found in different shapes, sizes, and colors. It would look perfect on your windowsill or next to the door waiting for you when you get home from work. The rattlesnake plant welcomes guests with its exotic appearance while it also provides them with a wonderful conversation starter. The rattlesnake plant is one of the best low-maintenance plants around, and you can’t go wrong with it! You may find rattlesnake plants for sale here. 

Related articles:

rattlesnake plant

Taming the Wild: Asian Jasmine

Asian Jasmine is a beautiful plant, but as any gardener knows – they are as tough as nails and can be downright stubborn. That’s why we’ve created this article to help you “tame” your Asian jasmine so it will grow beautifully in your garden for years to come. And while we’re at it, lets take a closer look at the history of this amazing flower too!

What is Asian Jasmine?

Asian jasmine is a type of plant that can be found as an indoor or outdoor. It has the ability to reach up to 25 feet tall, and it comes in many different colors styles as well as shapes. The leaves are usually pointed shaped on the tip end with white flowers that will bloom during the summer months. They produce seeds as well as roots that can be used to start new plants. The Asian jasmine flowers are fragrant and can be found in whites, pinks, reds and purples. The Asian jasmine has an attractive flower bud that blooms into white or pink flowers.

Origins of Asian Jasmine

The Summer Sunset Asiatic jasmine (Jasminum sambac) is native to India and Sri Lanka but now grows across much of Asia as well as in the Mediterranean region. It was introduced into North America as an ornamental plant around 1884 and has since spread through gardens all over our country.” In the United States, Asian jasmine grows in many climates from Arkansas to North Carolina. It can be grown as a ground cover as well.

Asian jasmine first appeared as a hybrid between Asian varieties and Jasminum officinale. It has since been propagated by horticulturalists to create many variations of the same plant, including: ‘Bridal Bouquet’ (most popular), ‘Double Fragrance’, ‘Forest Frost’, Honeymoon Asian jasmine’, ‘Lemon Drop Asian Jasmine’ and many more.

Asian jasmine is often used to make tea, as the Asian jasmine flower are large and give off a strong smell when they bloom in early summer. Jasmine plants need plenty of water in order for them to grow and survive.”

Asian Jasmine Care Guide

Asian jasmine is a gorgeous flowering plant that does well as an indoor houseplant or as part of the garden. They love to be outdoors in the summer, but if you are unable to provide them with this environment they will do just fine as long as they have enough natural light and moisture levels. Keep reading for tips on how to care for Asian jasmine plants.

Soil

Caring for Asian jasmine plants is as easy as taking a few steps. The soil should be loose, light, and rich in organic matter such as compost or well-rotted manure. You can add an inch of mulch to the surface if you like. It will keep weeds from coming up through the ground and conserve water as well as keeping the soil cool.

Light

Traditional Asian jasmine plants need a lot of sunlight to thrive, which is why they are often planted in the ground. If this isn’t an option for you, then make sure that your Asian jasmine plant has at least four hours per day of full sun exposure and bright indirect light when not sunny. Bright windowsills and greenhouses can work as well.

Bright windowsills and greenhouses are great alternatives for Asian jasmine plants that don’t do as well in direct sunlight. If you have space, prune the plant’s branches to expose more of its leaves to light while keeping it away from any harsh heat sources or drafty areas.

Place Asian jasmine plants near a window that gets less light in the wintertime. If both of these options are not available, try an east-facing window for Asian jasmine plants that prefer cooler temperatures or a south-facing window for Asian jasmine plants that prefer warmer weather.

Watering

Water Asian jasmine sparingly. Jasmines are drought resistant and will not need to be watered as often as other plants in the garden, such as herbs or flowers.

If you’re going on vacation for a few days, water your Asian jasmine before leaving so that it doesn’t dry out. Water Asian jasmine as needed and make sure that it has plenty of drainages so that the roots stay moist, but not wet. When in doubt about how often to water your Asian jasmine, check its soil moisture by sticking a finger into the dirt near an exterior root or branch; if the earth feels wet, Asian jasmine needs water.

Temperature

Asian Jasmine prefers a warm temperature, as it does not like cool weather or extreme temperatures. It is best to keep Asian jasmine in an area with the air around 70 degrees Fahrenheit during the winter months and at least 80 degrees Fahrenheit during summertime. In order to avoid fluctuations in the Asian jasmine’s environment, you should keep Asian jasmine in a room that does not fluctuate more than 15 degrees Fahrenheit.

To help protect Asian jasmine from fluctuations in temperature, it is best to purchase plants during the cooler months as they will be less likely to move around as much and thus won’t demand as many changes from you.

asian jasmine
Image: Plants for Houston

Humidity

Asian Jasmine is a fragile plant that does not thrive well in humid environments. The best way to create an environment Asian jasmine can tolerate is by using a cool-mist humidifier and keeping the humidity level at 50%. By doing this you will be able to reduce any chance of Asian jasmine leaves curling up or wilting as a result.

If Asian jasmine does not have enough humidity, it will be more prone to diseases that thrive in dry areas like spider mites or scale insects. To avoid this make sure you are keeping the moisture level high with regular misting and use neem oil as an organic insecticide to control any pests.

Fertiliser

A common Asian Jasmine problem is Asian jasmine not being able to take care of itself. This can be due to insufficient fertiliser, and as a result, the plant will have stunted growth with an unhealthy appearance. As well as looking unappealing, Asian jasmine without enough fertilizer may not smell as sweet when in bloom as those that are in better condition.

To remedy the situation, you need to fertilize Asian jasmine on a monthly basis with any type of commercially available plant food. The size and age of Asian jasmine will determine how much fertilizer it needs each month; this information should be found on the packaging label.

There are many different Asian jasmine fertilizers available on the market, all with their own benefits. For example, some Asian jasmines require more nutrients than others because they’re grandiflora cultivars or have had previous training as a topiary in a garden. These types of Asian jasmine will need much more fertilizer than Asian jasmine that are both climbers and ground plants.

If the Asian jasmine you’re caring for is a climber or topiary, then it will need as much as ten times more nitrogen per month because they don’t have access to any nutrients in their soil.

A monthly fertilization schedule for Asian jasmine will help to maintain a healthy plant, which in turn will produce better-smelling flowers. You should also take into account that if your Asian jasmine has been neglected and is in poor condition, then it will take Asian jasmine much more time to recover and become as healthy as before.

Toxicity

The Asian jasmine has been used for so many purposes and yet it contains toxic substances such as alkaloids, saponins, tannin (which will change the color of your skin), and anthraquinones. This last substance is one of the reasons Asian jasmine is poisonous.

When Asian jasmine has been ingested, it can cause problems with your throat and stomach as well as vomiting or diarrhea. If inhaled, it can irritate the eyes and nose while ingestion may lead to dizziness followed by a coma state that could last for hours.

Pruning

Pruning Asian jasmine is recommended to be done in early spring and late autumn so that buds are not destroyed by winter cold or summer heat, but also because it stimulates new growth all through the year. It should start with removing any dead wood as well as damaged Asian jasmine bushes.

The next step is to remove suckers, stems, or branches that are growing in the wrong direction as well as crossing branches and pruning back long shoots by one-third of their length at a 45-degree angle. It’s also important to keep an eye out for any unhealthy growths on the Asian jasmine as this could be a sign of a fungal disease.

Pruning Asian jasmine can also be done by removing about one-third of its old, spent flowers which will encourage new buds to grow and therefore produce more Asian jasmine blooms for you to enjoy. When Asian jasmine is as healthy as possible, it will produce its flowers more prolifically and for a much longer period of time.

Propagation and Growth

Asian Jasmine can be propagated in a variety of ways including cuttings, offsets and seeds. Cuttings are the most common method as it is inexpensive and effective. Most plants prefer new growth to set roots so you should take a stem cuttings with at least two nodes that include some leaves on them. The bottom node should be as close to the soil as possible.

If you want Asian jasmine to grow year-round, sow seeds in pots of rich potting mix and cover them with about ¼ inch of fine gravel or sand so they don’t dry out too quickly. Seeds should be kept moist until germination occurs which is usually within three weeks.

Asian Jasmine can also be propagated as offsets. In this method, the lower stem/trunk of an Asian jasmine is cut and planted in a pot with a rich soil mix. It will take about six months for it to grow roots before being transplanted into its own container outdoors or indoors.

When Asian jasmine is grown from seeds, the plant will take about one year before it flowers.

Repotting

The Asian jasmine is a fragile plant that needs to be cared for. It requires repotting every year as it grows and matures. The following are some tips on the process of repotting an Asian jasmine:

  • Carefully remove as much potting soil from around the Asian jasmine as possible.
  • Once the Asian jasmine is out of its pot, remove any old roots from the bottom and cut off about three-quarters of an inch from new root growth to make room for fresh soil.
  • Put a thin layer of good quality potting mix on top, then carefully plant Asian jasmine and water with a bucket of water.
  • The Asian jasmine should be repotted in the fall or winter to avoid foliage damage from too much outdoor sunlight.

Plant Disease

Asian beetle larvae can be an issue for Asian jasmine because it is significantly more susceptible than other plants to the larva’s toxins, which come from its poop and saliva. Spider mites are a problem as well because they suck the sap out of leaves and this will weaken your plant over time. To protect Asian jasmine from spider mites, you’ll want to be sure that the leaves are dry before applying any sort of insecticide (spider mite eggs can survive on a leaf and hatch when it gets moist again).

Asian Jasmine Variegated

A beautiful Asian jasmine variegated is a plant that can bring some life to any dull and boring room. It has an elegant structure that consists of green leaves with different colors: pink, purple, red, white. As variegated Asiatic jasmine matures, it will grow as high as three meters tall and two meters wide. This Asian variety thrives well in direct sunlight as in shaded areas. Care for this plant does not require any specialized knowledge as the Asian variety is resistant to pests and fungus which makes care for it very easy.

Common Issues with Asian Jasmine

One of the common issues with Asian jasmine comes from over-watering Asian jasmine. It’s important for Asian gardeners to remember that Asian jasmine can be sensitive and the more water they get, the faster their leaves will fall off or wilt away from dehydration.

Another common problem with the Asiatic jasmine plant is keeping pests out of your Asian gardens. The Asian jasmine is as delicate as it is beautiful, and because of that, you may find pests such as aphids or mealy bugs. These little creatures will quickly get the best of your Asian plants if you don’t take steps to control them right away.

asian jasmine
Image: Plants for Houston

Tips for Keeping Asian Jasmine Happy

One way to keep Asian jasmine happy is to cut Asian jasmine back anytime it becomes as tall as 8 feet. This will help Asian jasmine to rebloom and have a more compact growth. The Asian jasmine plant should also be fertilized about every 2-3 months with a balanced fertilizer. Adjust the amount of water given Asian jasmine plants based on how much sun or shade they are receiving as well as the temperature that they are experiencing.

Asian Jasmine Frequently Asked Questions

How fast does Asian jasmine grow?

Asian jasmine grows as fast as any other plant. One gallon of potting soil with a good mixture of sand, peat, and compost or worm castings should be enough to grow your Asian jasmine for at least three years in an average indoor environment.

Will Asian jasmine grow in shade?

Asian jasmine is a flowering plant, as such it will need sunlight in order to grow. It does prefer shade but asian jasmine needs 12 hours of sun or more per day for long-term growth and bloom potential.

What will kill Asian jasmine?

Asian jasmine is a sensitive plant as they are not tolerant of extreme temperatures and prefer warmer climates. One thing that will kill Asian jasmine is frost or cold weather, so if you live in an area with harsh winters then it’s best to keep asian jasmine indoors during the colder months.

Another thing that will kill Asian jasmine is too much water, so it’s important to let Asian jasmine dry out between watering sessions.

Will Asian jasmine kill a tree?

If you plant your Asian jasmine near a tree that is in the way, there’s no need to worry as it won’t hurt the tree. It’s not that Asian jasmine has a negative effect on trees, but it does have an invasive root system. If you plant asian jasmine next to your neighbor’s property, for example, they could find their garden invaded by this fast-growing and very vigorous plant.

Does jasmine die back in winter?

Asian Jasmine thrives in many climates and can withstand harsh winter temperatures as long as they are watered properly.

Is jasmine winter hardy?

Asian jasmines are winter hardy as long as they have the proper care. In colder climates, it is advisable to plant them in a sheltered location with plenty of sun and water for success during the cold months.

Conclusion

The Asian jasmine has many uses in traditional medicine and the fragrance it produces makes for a calming, serene environment. Taking care of your Asian jasmine will create not only beauty but also health in your home. Planting Asiatic jasmine in container gardens is a good way for them to thrive in the summertime while keeping them indoors during winter months.

There are many Asian jasmine care tips that will make your Asian jasmine happy, but the most important is consistency and attention. Once you have a good routine in place for caring for Asian jasmine then it should be easy to keep them healthy and happy forever!

Related articles:

asian jasmine
Scroll to Top